background image

VQT1A24

For USA assistance, please call: 1-800-211-PANA(7262) or, contact us via the web at: http://www.panasonic.com/contactinfo

For Canadian assistance, please call: 1-800-561-5505 or visit us at www.panasonic.ca

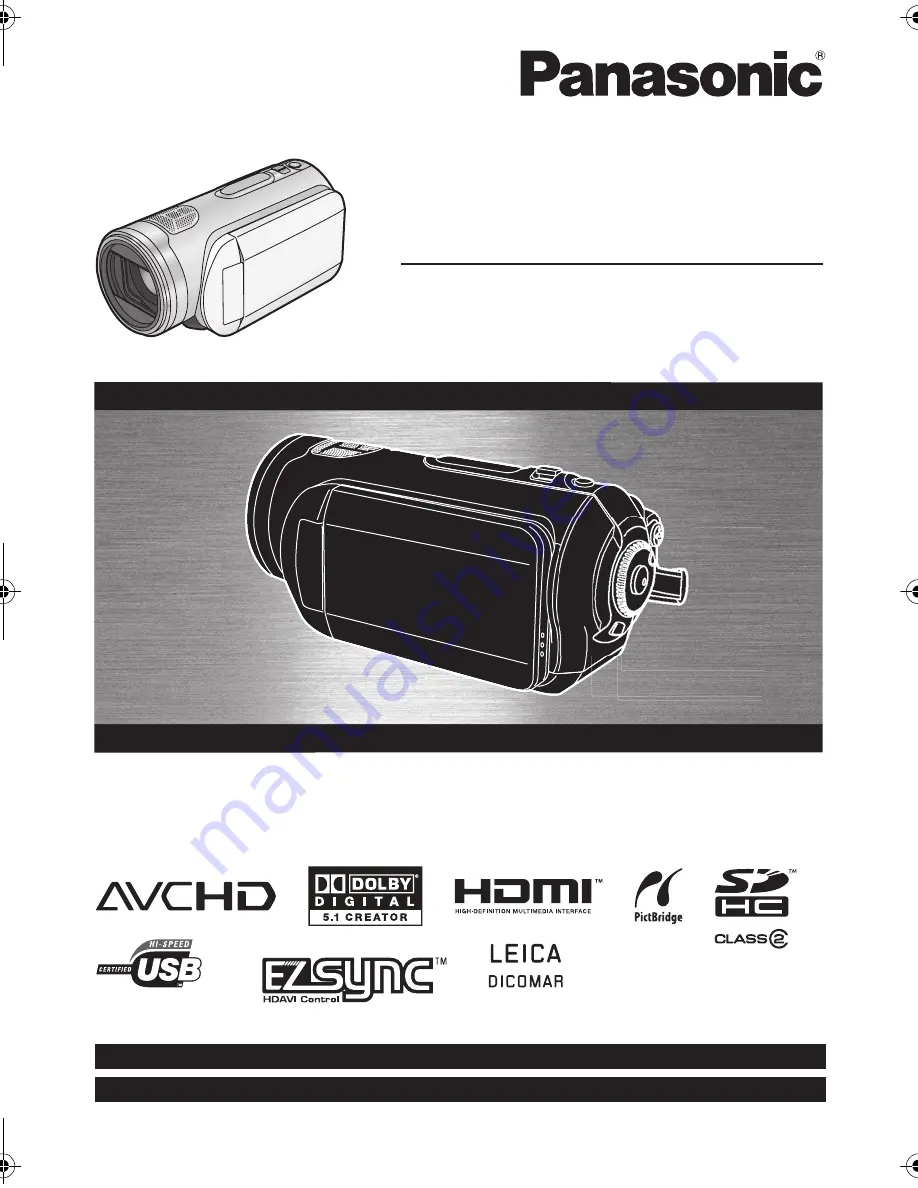
High Definition Video Camera

Operating Instructions

Model No. 

HDC-SD1PP

Before connecting, operating or adjusting this product, please read the instructions completely.
Spanish Quick Use Guide is included.
Guía para rápida consulta en español está incluida.

VQT1A24_ENG_PP.book  1 ページ  2007年1月21日 日曜日 午後1時17分

Summary of Contents for HDC-SD1

Page 1: ...anadian assistance please call 1 800 561 5505 or visit us at www panasonic ca High Definition Video Camera Operating Instructions Model No HDC SD1PP Before connecting operating or adjusting this product please read the instructions completely Spanish Quick Use Guide is included Guía para rápida consulta en español está incluida ...

Page 2: ...ACE ENSURE THE UNIT IS WELL VENTILATED TO PREVENT RISK OF ELECTRIC SHOCK OR FIRE HAZARD DUE TO OVERHEATING ENSURE THAT CURTAINS AND ANY OTHER MATERIALS DO NOT OBSTRUCT THE VENTILATION VENTS The socket outlet shall be installed near the equipment and easily accessible The mains plug of the power supply cord shall remain readily operable To completely disconnect this apparatus from the AC Mains disc...

Page 3: ...e separation between the equipment and receiver Connect the equipment into an outlet on a circuit different from that to which the receiver is connected Consult the dealer or an experienced radio TV technician for help FCC Caution To assure continued compliance follow the attached installation instructions and use only shielded interface cables with ferrite core when connecting to computer or peri...

Page 4: ...he batteries above the following temperatures or incinerate Button type battery 60 oC 140 oF Battery pack 60 oC 140 oF AC adaptor This AC adaptor operates on AC between 110 V and 240 V But In the U S A and Canada the AC adaptor must be connected to a 120V AC power supply only When connecting to an AC supply outside of the U S A or Canada use a plug adaptor to suit the AC outlet configuration When ...

Page 5: ...rounding prong The wide blade or the third prong are provided for your safety If the provided plug does not fit into your outlet consult an electrician for replacement of the obsolete outlet 10 Protect the power cord from being walked on or pinched particularly at plugs convenience receptacles and the point where they exit from the apparatus 11 Only use attachments accessories specified by the man...

Page 6: ...he internal parts of your camera AVOID SUDDEN CHANGES IN TEMPERATURE If the unit is suddenly moved from a cold place to a warm place moisture may form on the SD card and inside the unit DO NOT LEAVE YOUR CAMERA OR THE POWER SUPPLY TURNED ON WHEN NOT IN USE STORAGE OF YOUR CAMERA Store and handle your camera in a manner that will not subject it to unnecessary movement avoid shaking and striking You...

Page 7: ...hita Electric Industrial Co Ltd LEICA is a registered trademark of Leica microsystems IR GmbH and DICOMAR is a registered trademark of Leica Camera AG Microsoft Windows and DirectX are either registered trademarks or trademarks of the Microsoft Corporation in the United States and or other countries Microsoft product screen shot s reprinted with permission from Microsoft Corporation IBM and PC AT ...

Page 8: ...rding motion pictures 45 Recording modes recordable time available for the motion picture 47 Recording still pictures JPEG 48 Picture Quality Approximate Number of Recordable Pictures on an SD Card 51 Various recording functions 52 Zoom in out function 52 Recording yourself 53 Backlight compensation function 54 Fade in fade out function 54 MagicPix function 55 Soft skin mode 56 Tele macro function...

Page 9: ...of the software applications 98 Software application uninstallation 98 Connection and recognition 99 Connection and recognition procedures 99 About the computer display 100 To disconnect USB cable safely 101 Verifying the unit is correctly recognized by the computer 101 Using HD Writer Ver1 0E for SD1 102 If using Macintosh 104 Others Menus and Indications 105 Menu list 105 Menus related to ADVANC...

Page 10: ...licks paying attention to the direction of the battery B Push the center of the battery until it locks 3 Close the battery cover ª Removing the battery 1 Open the battery cover 2 Remove the battery Move A in the direction of the arrow to unlock it and then remove the battery 3 Close the battery cover ª How to turn on the power While pressing the lock release button set the mode dial to or Rotate t...

Page 11: ...4 Securely close the card slot cover ª Recording motion pictures 1 Rotate the mode dial to select 2 Open the LCD monitor 3 Press the recording start stop button to start recording 4 Press the recording start stop button again to pause recording ª Recording still pictures JPEG 1 Rotate the mode dial to select 2 Open the LCD monitor 3 Press the PHOTO SHOT button halfway in order to adjust focusing F...

Page 12: ...k Stops the playback and shows the thumbnails ª Still picture JPEG playback 1 Rotate the mode dial to select 2 Press the cursor button up and then right to select the still picture playback tab A Still picture playback tab 3 Select the file to be played back B Previous page C Next page D File number display E Folder file name 4 Press the cursor button 5 Move the cursor button to operate 1 Slide sh...

Page 13: ...corded based on the MPEG 4 AVC H 264 codec for compressing images and audio is recorded in Dolby Digital About the SDHC Memory Card supplied with this unit and the compatibility of the recorded motion pictures About the SDHC Memory Card Be careful about the following It is not compatible with devices other than those that support SDHC If you use the SDHC Memory Card in another device use a device ...

Page 14: ... B HDMI cable optional If you connect this unit to a TV that does not support high definition the images will be standard quality ª When connecting to a TV that does not have a HDMI terminal Connecting with the component cable and the AV cable Connecting with the AV cable The pictures cannot be played in high definition They will be played back in standard quality Watching high definition images B...

Page 15: ...e power on this unit also turns off Automatic input switching If you connect with a HDMI cable and then turn on the power on this unit the input channel on the TV automatically switches to this unit s screen If the TV s power is in standby status it will turn on automatically if Set has been selected for the TV s Power on link setting Depending on HDMI terminal of the TV the input channel may not ...

Page 16: ...em Internal microphones The 5 mounted internal microphones give better directivity Far away sounds can be recorded more clearly with the zoom microphone function l 53 A AV amplifier with HDMI terminal B HDMI cable optional Refer to the operating instructions of the TV AV amplifier speakers etc for details on how to connect If you record with an external microphone the recording is in stereo 2 chan...

Page 17: ...opied to the hard disk of the computer For details on how to use the software application read the PDF operating instructions ª The SD Media Storage USA only The SD Media Storage VW PT2 optional is convenient if you are on the move It is an extremely compact lightweight and easy to carry HDD hard disk If you insert an SD card with recorded motion pictures and still pictures in the SD Media Storage...

Page 18: ...re using this unit SDHC memory card 4 GB Battery pack VW VBG130 AC adaptor VW AD21PP AC cable K2CA2CA00029 DC cable K2GJYYC00001 Remote control N2QAEC000023 Button type battery CR2025 AV cable K2KZ9CB00002 Component cable K2KZ9DB00004 USB cable K2KZ4CB00011 CD ROM ...

Page 19: ...icator l 32 7 Mode dial l 32 8 LCD monitor open latch l 24 9 Menu button MENU l 39 10 Battery cable cover l 22 11 Cursor button l 35 12 Recording start stop button l 45 13 Cooling fan inlet 14 Delete button l 74 76 ª About the cooling fan The cooling fan rotates to prevent the internal temperature rising Take care not to cover the inlet and outlet when using this unit 1 2 3 4 5 11 13 14 12 6 7 8 9...

Page 20: ...T1A24 15 Internal microphones 5 1 channel support 16 Zoom lever W T In recording mode l 52 Volume lever sVOLr In playback mode l 70 17 Photoshot button l 48 18 Tripod receptacle l 23 19 Battery cover l 29 15 16 17 18 19 ...

Page 21: ... can be used as an external microphone When the unit is connected with the AC adaptor sometimes noise may be heard depending on the microphone type In this case please switch to the battery for the power supply and the noise will stop 28 DC input terminal DC IN 9 3V l 31 29 Card slot cover l 34 30 Card slot l 34 Due to limitations in LCD production technology there may be some tiny bright or dark ...

Page 22: ...l 1 Open the battery cover Push A while sliding it 2 Open the battery cable cover 3 Attach the battery pack holder kit Read the operating instructions of the battery pack holder kit for details on how to use it 4 Close the battery cover The cable of the battery pack holder kit can pass through the hole Keep the battery cable cover closed when using this unit normally Battery cable cover 31 32 33 3...

Page 23: ...to remove it In order to attach it place into slot B and then rotate it clockwise C The tripod receptacle is a hole used to mount a tripod for the unit Use of Panasonic s VW CT45 optional standard tripod is recommended For details on mounting the tripod refer to the operating instructions for the tripod You cannot use a tripod with a fixed tripod pin A Camera base B Screw for mounting the unit C T...

Page 24: ...itor is forcibly opened or rotated Check that the terminal cover is closed before closing the LCD monitor Using the remote control 1 Photoshot button 2 On screen display button EXT DISPLAY l 80 3 Date time button DATE TIME l 41 4 Playback operation buttons l 68 69 70 5 Delete button 6 Direction buttons 3 4 2 1 l 40 7 Recording start stop button START STOP 8 Zoom volume buttons ZOOM VOL 9 Menu butt...

Page 25: ...trol usable range The distance between the remote control and the unit s remote control sensor A Within approx 5 m 16 feet Angle Approx 10o up and 15o down left and right The remote control is intended for indoor operation Outdoors or under strong light the unit may not operate properly even within the usable ranges CAUTION Danger of explosion if battery is incorrectly replaced Replace only with t...

Page 26: ... and SDHC Memory Cards formatted in FAT32 system If you wish to use Memory Cards that are 4 GB SDHC Memory Cards only can be used Card type SD Memory Card SDHC Memory Card Capacity 8 MB 16 MB 32 MB 64 MB 128 MB 256 MB 512 MB 1 GB 2 GB 4 GB Motionpicture recording Cannot be used Cannot be guaranteed in operation Refer to About SD cards that you can use for motion picture recording Still picture rec...

Page 27: ...ed Class Rating Class 2 This indicates a Class 2 rating in the high speed standards SD Speed Class stipulated by the SD Card Association for high speed writing between SD compatible products and SD Memory cards If you use a Class 2 card compatible with the SD Speed Class in an SD compatible product you can obtain stable recording by using an SD card conformed with Class 2 or more ª Handling precau...

Page 28: ...ry on the battery mount by aligning the mark and then securely plug it in The output plug of the AC cable is not completely connected to the AC adaptor jack As shown in A there is a gap ª Charging lamp Lights up Charging Goes off Charging completed Flashing Make sure that the terminals of the battery or the AC adaptor are not exposed to dirt foreign objects or dust then reconnect them properly Dis...

Page 29: ...ove A in the direction of the arrow to unlock it and then remove the battery 3 Close the battery cover Be sure to set the mode dial to OFF and check that the status indicator is off before removing the battery The battery cover opens up to 180o Inserting the battery A B Removing the battery CAUTION Danger of explosion if battery is incorrectly replaced Replace only with the same or equivalent type...

Page 30: ... in the table are approximations 2 h 20 min indicates 2 hours 20 minutes When you charge a battery that has not been used for long time the charging time will become longer ª Recordable time The times shown in the table below are for when the temperature is 25 oC 77 oF and the humidity is 60 These times are approximations The actual recordable time refers to the recordable time on a card when repe...

Page 31: ...g period of time where the temperature is low or high or if the battery was repeatedly charged The times of remaining battery capacity indication will vary depending on the status of use These times are approximations When turning the mode dial to switch modes the time indication will turn off in order to recalculate the remaining battery capacity time When using batteries made by other companies ...

Page 32: ...t time a message asking you to set the date and time will appear Select YES and set the date and time l 41 Set the mode dial to OFF The status indicator goes off and the power turns off The lens cover closes when the mode dial is set to OFF Do not forcefully rotate the mode dial How to turn on the power PC B A How to turn off the power Recording mode l 45 48 Use this to record motion pictures and ...

Page 33: ...r is still being consumed even when the LCD monitor is closed This unit will resume recording pause mode about 1 7 seconds after the LCD monitor is reopened When in quick start standby mode about 70 of the power used in recording pause mode is being consumed so the recording time will be reduced This is only activated in the following case When the mode dial is set to and an SD card is inserted 1 ...

Page 34: ...rent from the scene last recorded When the MagicPix function is used however the white balance of the scene last recorded is retained When this unit is quick started the zoom magnification becomes 1k and the picture size may differ from what it was before quick start standby mode If POWER SAVE l 107 is set to 5 MINUTES and the unit automatically goes into quick start standby mode close the LCD mon...

Page 35: ...n the access lamp is lit then the SD card or the recorded data may be damaged or this unit may malfunction Opening the card slot cover and removing the SD card Operating the mode dial Removing the battery or disconnecting the AC adaptor How to use the cursor button This unit has a cursor button A for selecting functions performing operations etc so it is easy to operate this unit with one hand B O...

Page 36: ...n up left or right to select an item Rotate the mode dial to select 1 Move the cursor button up down left or right to select the scene to be played back and press the cursor button The selected scene is played back on the full screen The operation icon is automatically displayed on the screen 2 Move the cursor button up down left or right to operate The operation icon appears or disappears each ti...

Page 37: ...nd MANUAL l 44 About the operation icons displayed in each mode Icon Direction Function Page 1 3 3 Backlight compensation 54 2 Fade 54 1 Help mode 39 2 3 3 MagicPix 55 2 Soft skin mode 56 1 Tele macro 56 3 3 Ø 3 Self timer 57 ß 2 Flash 57 1 Red eye reduction 58 In manual mode MANUAL 4 4 3 White balance 65 2 Iris or gain value 66 1 Shutter speed 66 In manual focus mode FOCUS 5 5 21 Manual focus adj...

Page 38: ...and show thumbnails 68 6 2 Rewind during playback 68 2 Reverse slow frame playback during pause 69 5 1 Fast forward during playback 68 1 Forward slow frame playback during pause 69 Icon Direction Function Page 1 3 Slide show start pause 73 4 Stop playback and show thumbnails 73 E 2 Playback previous picture during pause 73 D 1 Playback next picture during pause 73 ...

Page 39: ...ursor button is moved down To exit the help mode Press the MENU button or select END When the help mode is used functions cannot be set When the help mode is used motion pictures and still pictures cannot be recorded Using the menu screen Refer to Menu list l 105 for information about the menus 1 While stopped press the MENU button The menu displayed differs depending on the position of the mode d...

Page 40: ...e the cursor button left To exit the menu screen Press the MENU button The menu screen does not appear during recording or playing You cannot start other operations while the menu screen appears The menu screen transition is the same as when the buttons on the main unit are used 1 Press the MENU button 2 Select a menu item Use the direction buttons 3 4 2 1 and ENTER button in place of the cursor b...

Page 41: ... then select SETUP DATE TIME desired display style and press the cursor button You can also show or change the date and time display by repeatedly pressing the DATE TIME button on the remote control Changing the display style Press the MENU button then select SETUP DATE FORMAT desired display style and press the cursor button The date and time function are driven by a built in lithium battery Make...

Page 42: ...he MENU button to exit the menu screen BRIGHTNESS Brightness of the LCD monitor COLOR Color level of the LCD monitor These settings will not affect the images actually recorded ª In order to increase the brightness of the entire LCD monitor Press the POWER LCD button The indication appears on the LCD monitor Press the POWER LCD button if the surroundings are bright and the LCD monitor is difficult...

Page 43: ...oth hands 2 Put your hand through the grip belt Place your fingers on the rubber grip A and grasp the unit firmly 3 Do not cover inlet B or outlet C of the cooling fan with your hand as it will prevent heat release If heat builds up inside the unit it could be damaged 4 Do not cover the microphones D or the sensors E with your hands 5 Keep your arms near your body 6 Slightly open your legs When yo...

Page 44: ...ording and walk with the unit tilted upside down while recording continues If the unit continues to be tilted upside down from the normal horizontal position while recording motion pictures it is automatically put into recording pause Turning the AGS function on off Rotate the mode dial to select Press the MENU button then select VIDEO AGS ON or OFF and press the cursor button This function s defa...

Page 45: ...ng is in progress the recording will not stop even if the LCD monitor is closed To end the recording Press the recording start stop button again to pause recording and are red during recording Do not move this unit until is green The images recorded between pressing the recording start stop button to start recording and pressing it again to pause recording become one scene When about 5 minutes hav...

Page 46: ...pictures do not remove the battery or disconnect the AC adaptor Also do not remove the SD card while the card access lamp is lit If you do either of the above the scene recovery message is displayed and the recovery operation will begin when the SD card is next inserted or the power is turned back on l 112 ª When recording stops suddenly during motion picture recording When using an SD card other ...

Page 47: ...s recorded with the Dolby Digital 5 1 Creator when recording with the built in microphone Recordable time using the battery l 30 8 MB and 16 MB SD cards cannot be used for motion picture recording If the write protection switch on the SD card is set to LOCK it cannot be used for recording l 27 If an SD card is recorded on or erased many times it may no longer be possible to record motion pictures ...

Page 48: ...en focusing is unsuccessful B Focus area 4 Press the PHOTO SHOT button fully to take the picture In order to take better still pictures the screen will brighten when recording To record still pictures clearly When zooming in on the subject with a magnification of 4k or higher it is difficult to reduce the slight shaking from holding this unit by hand We recommend decreasing the zoom magnification ...

Page 49: ...tes the status of the auto focus The focus indication does not appear in manual focus mode Focus on a subject manually when it is not easily focused automatically You can record still pictures on the card even if the focus indication does not appear but pictures may be recorded without being focused The focus indication does not appear or has difficulty displaying in the following cases When the z...

Page 50: ...o take the picture This function is not activated if the PHOTO SHOT button is pressed halfway The screen indications that appear only when the PHOTO SHOT button is pressed halfway will be displayed l 49 However the remaining number of still pictures will not be displayed The picture quality is different from normal still picture recording because priority is given to the motion picture recording W...

Page 51: ...s recorded Still pictures are recorded in normal picture quality ª Picture quality and number of recordable pictures The number of recordable pictures depends on whether and are used together and on the subject being recorded The numbers shown in the table are approximations Picture quality Approximate Number of Recordable Pictures on an SD Card Picture size 1920t1080 Picture quality 8 MB 4 6 16 M...

Page 52: ...function The zoom speed varies depending on the range over which the zoom lever is moved The zoom speed does not vary when operating with the remote control If the zoom lever is pushed to the end you can zoom from 1k up to 12k in as fast as approx 1 8 seconds When the zoom speed is high the subject may not be focused easily If the zoom magnification exceeds 12k then the digital zoom function will ...

Page 53: ...hen recording music recitals or other events where you wish to record quality sound and keep a realistic sensation even when zooming in we recommend that you turn the zoom microphone function off You can record yourself while viewing the LCD monitor Rotate the mode dial to select Rotate the LCD monitor towards the lens side The image is horizontally flipped as if you see a mirror image However the...

Page 54: ...ff the power or operate the mode dial the backlight compensation function is canceled Fade in The image and audio gradually appear Fade out The image and audio gradually disappear Rotate the mode dial to select 1 Press the cursor button Then move the cursor button down to display the icon shown in the illustration 2 Move the cursor button left to select 3 Press the recording start stop button Star...

Page 55: ...t to a tripod and you can record images free from vibration Recorded scene is seen as if frames were missed Rotate the mode dial to select 1 Press the cursor button Then move the cursor button down to display the icon shown in the illustration 2 Move the cursor button up to select To cancel the MagicPix function Select again The focus indication does not appear even if the PHOTO SHOT button is pre...

Page 56: ...ocusing only on the subject and blurring the background the image can be impressive The unit can focus on the subject at a distance of approx 60 cm 24q Rotate the mode dial to select 1 Press the cursor button Then move the cursor button down to display the icon shown in the illustration 2 Move the cursor button right to select If the magnification is 12k or less then it is automatically set to 12k...

Page 57: ...s canceled The self timer is canceled if the power is turned off or the mode dial is operated The self timer standby mode is canceled when you press the recording start stop button to start motion picture recording Even if you press the recording start stop button while the self timer is counting down motion picture recording is not possible Depending on the time taken to bring the subject into fo...

Page 58: ...es Pictures will appear dark or reddish when they are recorded by using the flash at distances greater than 2 5 m 8 2 feet Using the flash fixes the shutter speed of 1 750 or faster to 1 500 The picture may become out of focus in dark places If so adjust the focus manually The picture may appear dark if the flash is lit in front of a white background Set the flash to FLASH OFF where using a flash ...

Page 59: ...ion may not work effectively When the digital zoom is used When the unit is shaken greatly When you record a moving subject while tracking it You can check if the image is level while recording or playing back motion pictures and still pictures The function can also be used to estimate the balance of the composition Rotate the mode dial to select or rotate the mode dial to and then select the moti...

Page 60: ...e surround effect is automatically restored when then the wind weakens The wind noise reduction function does not work with an external microphone When recording the input level from the built in microphones and the external microphone terminal can be adjusted Rotate the mode dial to select 1 Press the MENU button then select VIDEO MIC LEVEL SETrAGC or SET and press the cursor button AGC Auto Gain...

Page 61: ...reen To return to automatic setting Press the MENU button then select VIDEO MIC LEVEL AUTO and press the cursor button Adjust the gain value so that the last 2 bars of the microphone input level on the center of the screen are not red Otherwise the sound is distorted Select a lower setting for gain value or set MIC LEVEL to AUTO The front left and front right gain values only work when input is fr...

Page 62: ... OFF and press the cursor button The zebra pattern does not appear on the images actually recorded This unit displays a 7 color bar which is useful for adjusting the picture quality of the TV or the external monitor Rotate the mode dial to select Press the MENU button then select ADVANCED COLOR BAR ON and press the cursor button To cancel the color bar Press the MENU button then select ADVANCED CO...

Page 63: ...r slow motion playback or playback pause of recorded pictures this mode helps diminish camera shake During normal playback the image movement may not look smooth Avoid recording under fluorescent light mercury light or sodium light because the color and brightness of the playback image may change If you record a subject illuminated with strong light or a highly reflective subject vertical lines of...

Page 64: ... into focus The center of the screen is not enlarged when MF ASSIST is OFF To restore to the automatic adjustment Press the AUTO MANUAL FOCUS switch down again to the FOCUS position You can also restore the auto focusing by setting the AUTO MANUAL FOCUS switch to AUTO The subject may not be in focus when zoomed in if focusing with a wide angle First zoom in on the subject and then focus on it The ...

Page 65: ...r mode Outdoors under a clear sky Manual adjustment mode Mercury vapor lamps sodium lamps some fluorescent lights Lights used for wedding receptions at hotels stage spotlights in theatres Sunrise sunset etc To restore to the automatic adjustment Set the white balance mode to You can also restore the automatic adjustment by setting the AUTO MANUAL FOCUS switch to AUTO 1 Select fill the screen with ...

Page 66: ...anual white balance previously adjusted is stored Whenever recording conditions change re set the white balance for correct adjustment When setting both the white balance and the iris gain set the white balance first Shutter Speed Adjust it when recording fast moving subjects Aperture Adjust it when the screen is too bright or too dark Rotate the mode dial to select 1 Set the AUTO MANUAL FOCUS swi...

Page 67: ...automatically depending on how much the sensitivity lowers and the noise on the screen may increase When recording still pictures we recommend setting the shutter speed to 1 500 or less for even more beautiful pictures You may see vertical lines of light in the playback image of a brightly shining subject or highly reflective subject but this is not a malfunction During normal playback image movem...

Page 68: ...ecorded the next or previous page can be displayed by moving the cursor button left and right or moving the cursor button down selecting by moving the cursor button left and right and then pressing the center of the cursor button The scene number display switches to the page number when the motion picture playback tab or is selected 4 Press the cursor button The selected scene is played back on th...

Page 69: ...itor is closed The date time displayed may be different from the recording date time and it may take time to display the thumbnail display when playing back motion pictures not recorded on this unit The remaining time for playback indication will be reset to 0h00m00s each scene Press the or 9 button on the remote control during playback 1 Move the cursor button up during playback to pause the play...

Page 70: ...ll be shown in intervals of 0 5 seconds ª Operating with the remote control 1 Press the button 2 Press the E or D button Adjust the speaker volume during playback Move the volume lever to change the volume level Towards r increases the volume Towards s decreases the volume The further the indicator moves to the right the higher the volume level becomes When the adjustment is completed the volume s...

Page 71: ...ing back all the scenes returns if the power is turned off or the mode dial is operated Even if scenes are recorded on the same day they are grouped separately in the following cases When the number of scenes exceeds 99 When the card is repaired Playback of the first scene starts after playback of the last scene finishes Press the MENU button then select PLAY SETUP REPEAT PLAY ON and press the cur...

Page 72: ...sume position is cleared if you turn off the power or operate the mode dial The RESUME PLAY setting is kept Still picture JPEG playback Play back the still pictures recorded on the card 1 Rotate the mode dial to select The lens cover closes 2 Press the cursor button up and then right to select the still picture playback tab A Still picture playback tab The still pictures recorded on the SD card ar...

Page 73: ...apan Electronics and Information Technology Industries Association The file format supported by this unit is JPEG Not all JPEG formatted files will be played back If a non standard file is played back the folder file name may not be displayed This unit may degrade or not play back data recorded or created on other products and other products may degrade or not play back data recorded on this unit ...

Page 74: ...CT and press the cursor button When ALL SCENES is selected the following scenes except the protected scenes will be deleted Proceed to step 5 When PLAY MODE is set to VIEW ALL All the scenes on the SD card When PLAY MODE is set to BY DATE All the scenes selected by date 3 Only when SELECT is selected in step 2 Select the scene to be deleted then press the cursor button The selected scene is encirc...

Page 75: ...tery with sufficient battery power or use the AC adaptor If you delete scenes recorded on other products with this unit all the data related to the scenes may be deleted Scenes can be protected so that they are not deleted by mistake Even if you protect some scenes on an SD card formatting the SD card will delete them Rotate the mode dial to select and then select the motion picture playback tab 1...

Page 76: ... select ALL SCENES or SELECT and press the cursor button When ALL SCENES is selected all files on the SD card except the protected files will be erased Proceed to step 5 3 Only when SELECT is selected in step 2 Select the file to be deleted then press the cursor button The selected file is encircled by a red frame When the cursor button is pressed again the selected file will be canceled Up to 50 ...

Page 77: ...th sufficient battery power or use the AC adaptor If files conforming to DCF standard are deleted all the data related to the files will be deleted Files recorded on an SD card can be protected so that they are not deleted by mistake Even if you protect some files on an SD card formatting the SD card will delete them Rotate the mode dial to select and then select the still picture playback tab 1 P...

Page 78: ... the setting set the number of prints to 0 You can also select multiple files in succession To complete the settings Press the MENU button To cancel all DPOF settings Press the MENU button then select PLAY SETUP DPOF SET CANCEL ALL and press the cursor button When the confirmation message appears select YES then press the cursor button ª What is DPOF DPOF stands for Digital Print Order Format This...

Page 79: ...e cursor button When formatting is complete press the MENU button to exit the message screen Use this unit to format SD cards If an SD card is formatted on other products such as a computer the time spent for recording may become longer and you may not be able to use the SD card Depending on the type of SD card being used it may take time to format During formatting do not turn this unit off When ...

Page 80: ...unit will not change ª To watch images with a 16 9 aspect ratio on a regular TV 4 3 When playing back motion pictures or still pictures recorded on this unit with a 16 9 aspect ratio on a TV with a 4 3 aspect ratio the images on the screen may be squeezed horizontally In this case change the menu setting to play back the pictures in the original aspect ratio Depending on the TV setting the picture...

Page 81: ...cted terminal Check the input setting input switch and the audio input setting on the TV For more information please read the operating instructions for the TV Check HDMI RESOLUTION l 82 1 Connecting with a HDMI cable optional What is HDMI HDMI is the next generation interface for digital devices When this unit is connected to a HDMI compatible device the image and audio can be output with a digit...

Page 82: ...scan method which scans 1080 scan lines to display a high definition image The 1080 available scan lines are divided in half and scanned on the screen alternatively every 1 60th of a second The number of available scan lines is more than double the 480 scan lines used to display standard images until now so the images have clearer detail and a lot of presence 480p This is a progressive scan method...

Page 83: ... more information about how to connect them etc A HDMI cable optional Use a HDMI cable optional with the logo shown above B Center speaker C Front speaker D Surround speaker E Subwoofer F AV amplifier optional If you connect this unit to a Panasonic AV amplifier and Panasonic TV that are compatible with EZ SyncTM HDAVI ControlTM linked operations become possible l 87 Audio recorded from an externa...

Page 84: ...y differ depending on the connected TV 4 Start playback on this unit The image and audio are output on the TV ª About the setting when connecting the component terminals When this unit is connected to a TV with the component cable the output setting on this unit can be changed Set it to match the terminal on the TV that you connect to Press the MENU button then select SETUP COMPONENT OUT desired i...

Page 85: ...Check the TV s input setting input switch For more information please read the operating instructions for the TV If the images are not displayed correctly on a wide screen TV adjust the aspect setting on the TV Refer to the operating instructions of the TV for details If the pictures are displayed squeezed horizontally on a regular TV 4 3 change the setting on this unit l 80 ...

Page 86: ...go Check the connected terminal Check the TV s input setting input switch For more information please read the operating instructions for the TV When a HDMI cable is connected at the same time priority is given to the output from the HDMI cable When the component cable is connected at the same time priority is given to the component cable for image output If the images are not displayed correctly ...

Page 87: ...t setting is ON You can use the remote control for the TV to control playback on this unit If you use the remote control for the TV to turn off the power the power on this unit also turns off When recording motion pictures formatting deleting recovering or connecting the unit to a computer with a USB cable the power will not turn off If you connect with a HDMI cable and then turn on the power on t...

Page 88: ...2 To cancel EZ SyncTM HDAVI ControlTM Press the MENU button then select SETUP EZ Sync OFF and press the cursor button If you are unsure whether or not the TV and AV amplifier you are using are compatible with EZ Sync read the operating instructions for the devices Available linked operations between this unit and a Panasonic TV is different depending on the types of Panasonic TVs even if they are ...

Page 89: ...nel set will differ depending on the terminal to which the unit is connected 4 Start playback on this unit Then start recording on the connected device See the operating instructions of the video device for details To stop dubbing 1 Stop recording on the connected device 2 Then stop playback on this unit If the date and time display and function indication are unnecessary cancel them before dubbin...

Page 90: ... settings on this unit Do not use any other USB connection cables except the supplied one Operation is not guaranteed with any other USB cables 2 Select a file to be printed then press the cursor button The number of pictures set is displayed 3 Move the cursor button up or down to select the desired number of prints then press the cursor button You can set up to 9 prints To cancel the setting set ...

Page 91: ... kept and the screen returns to step 3 Avoid the following operations during printing These operations disable proper printing Disconnecting the USB cable Removing the SD card Switching the mode dial Turning off the power Check the settings for the paper size print quality etc on the printer The edges of still pictures recorded on this unit with a 16 9 aspect ratio may be cut at printing When usin...

Page 92: ...r connecting this unit to the computer We cannot guarantee operation of this unit if you use software other than that supplied to read write motion picture data to this unit What you can do with a computer Data type Can do Software used Motion picture Copy to PC HD Writer Ver1 0E for SD1 Write data to media Copy between media Easy editing Still picture Playing back on a computer Standard Windows p...

Page 93: ...between media You can copy motion picture data from an SD card to a disc or from a disc to an SD card Easy editing You can easily edit split merge delete etc motion picture data that was copied to the hard disk of the computer Format disc Depending on the type of disc that you use formatting is necessary Discs are formatted using the UDF 2 5 file system that supports the AVCHD ª DirectX Microsoft ...

Page 94: ...Decompiling or Disassembly Licensee may not reverse engineer decompile or disassemble the Software except to the extent either of them is permitted under law or regulation of the country where Licensee resides Matsushita or its distributors or dealers will not be responsible for any defects in the Software or damage to Licensee caused by Licensee s reverse engineering decompiling or disassembly of...

Page 95: ...t be guaranteed on all DVD drives Operating environment Personal computer IBM PC AT compatible personal computer OS Microsoft Windows 2000 Professional Service Pack 4 Microsoft Windows XP Home Edition Service Pack 2 Microsoft Windows XP Professional Service Pack 2 CPU Intel Pentium III 1 0 GHz or higher Intel Pentium 4 HyperThread 3 0 GHz or higher when a Preview function is used including compati...

Page 96: ...et the display resolution to 1024k768 16 bits color or higher Select start Settings Control Panel Appearance and Themes Display and select Settings tab and then adjust Screen resolution and Color quality ª Operating environment for the card reader function mass storage The USB equipment operates with the driver installed as standard in the OS Personal computer IBM PC AT compatible personal compute...

Page 97: ...cel the installation at any point e g by pressing Cancel Microsoft DirectX 9 0c must be installed in order to operate the HD Writer Ver1 0E for SD1 l 93 If you install the software on a computer that is not compatible with DirectX 9 0c the computer may not work properly If you are unsure whether or not your computer is compatible contact the maker of your computer 3 Click Next 4 Read carefully thr...

Page 98: ...low to uninstall any software applications that you no longer require 1 Select start Settings Control Panel Add or Remove Programs Applications 2 Select HD Writer Ver1 0E for SD1 then click Change Remove Change or Remove or Add Remove Proceed with the uninstallation by following the on screen instructions After uninstalling the software be sure to reboot the computer The computer must be rebooted ...

Page 99: ... to the computer 2 Insert an SD card with recorded images in this unit and then set the mode dial to to turn on the power 3 Connect this unit and a computer A USB cable supplied This unit is automatically recognized by the computer Insert the plugs as far as they will go The unit and computer will not operate properly if the plugs are not inserted fully Do not use any other USB connection cables e...

Page 100: ... as an external drive so that still pictures on the card can be copied to the computer with Explorer or other programs 1 Set the mode dial on the unit to and connect the unit to the computer Removable Disk is displayed in My Computer 2 Double click the folder that contains the files on the removable disk DCIM 100CDPFP 3 Drag and drop the files onto the destination folder on the computer hard disk ...

Page 101: ...en established Consult the manufacturer or follow the steps in your computer s operating instructions to establish a mode in which all the functions can be used then proceed with operation 1 Select start Settings Control Panel Performance and Maintenance System 2 Click the Hardware tab then click Device Manager 3 Verify the following items are displayed ª If the driver has been recognized properly...

Page 102: ...e battery and connect the AC adaptor If you do not insert the battery and connect the AC adaptor operation will not be possible after connecting this unit to the computer 2 Insert an SD card with recorded images in this unit and then set the mode dial to to turn on the power 3 Connect this unit and a computer A USB cable supplied Insert the plugs as far as they will go The unit and computer will n...

Page 103: ... button 2 Click on the top right and select the folder with the image data you want to copy to the SD card 3 Select Start writing to copy the images from the hard disk of the computer to the SD card A confirmation message appears Click Yes and copying starts Refer to the operating instructions of the software PDF file for details on how to use it Do not insert a disc created with HD Writer Ver1 0E...

Page 104: ... USB equipment operates with the driver installed as standard in the OS Supplied CD ROM is available for Windows only ª Copying still pictures on PC 1 Connect this unit to the personal computer via the supplied USB cable 2 Double click NO_NAME or Untitled displayed on the desktop Files are stored in 100CDPFP folder etc in the DCIM folder 3 Using a drag and drop operation move the pictures you want...

Page 105: ...C LEVEL l 60 AGS l 44 ª PICTURE PICT QUALITY l 51 FLASH LEVEL l 58 SHTR EFFECT l 50 ª ADVANCED REC LAMP l 107 ZEBRA l 62 COLOR BAR l 62 MF ASSIST l 64 ª SETUP FORMAT CARD l 79 DISPLAY l 107 DATE TIME l 41 DATE FORMAT l 41 POWER SAVE l 107 QUICK START l 33 BEEP SOUND l 107 LCD SET l 42 COMPONENT OUT l 84 HDMI RESOLUTION l 82 EZ Sync l 87 TV ASPECT l 80 INITIAL SET l 107 DEMO MODE l 107 ª LANGUAGE l...

Page 106: ... l 41 POWER SAVE l 107 BEEP SOUND l 107 LCD SET l 42 COMPONENT OUT l 84 HDMI RESOLUTION l 82 EZ Sync l 87 TV ASPECT l 80 ª LANGUAGE l 42 Playback menus still picture playback ª PLAY SETUP SCENE PROTECT l 77 DPOF SET l 78 ª SETUP FORMAT CARD l 79 DISPLAY l 107 DATE TIME l 41 DATE FORMAT l 41 POWER SAVE l 107 BEEP SOUND l 107 LCD SET l 42 COMPONENT OUT l 84 HDMI RESOLUTION l 82 EZ Sync l 87 TV ASPEC...

Page 107: ...u start recording When you turn on the power When this unit is recognized by the computer or the printer etc 2 Beeps When you pause recording When you turn off the power 2 Beeps 4 times When an error occurs e g recording not starting Check the sentence displayed on the screen l 110 ª INITIAL SET When there is a menu that cannot be selected due another function or mode being activated set to YES fo...

Page 108: ...30min 30min 0h00m00s 1 100 OPEN 0dB MNL AWB HN MF DEC 15 2007 3 30PM MEGA R30min 30min 0h00m00s 1 100 OPEN 100 0dB MNL AWB HN MF 2 1M AUTO MNL Fade White Fade Black MagicPix function Zoom microphone Wind noise reduction Microphone level Zebra display Motion picture recording mode 5 Sports mode Portrait mode Low light mode Spotlight mode Surf snow mode Auto white balance Indoor mode recording under...

Page 109: ...number display PictBridge When a printer compatible with PictBridge is connected 1 DPOF already set to more than 1 Protected still pictures 15 15 15 Number of recording pixels for still pictures 1920k1080 The picture size is not displayed for still pictures recorded with other products that have different picture sizes from the sizes shown above Accessing the card When connected to a computer Time...

Page 110: ...ecessary scenes files or insert a new SD card l 34 74 76 CANNOT RECORD THE NUMBER OF SCENES HAS EXCEEDED THE MAXIMUM LIMIT The maximum number of recordable scenes on 1 SD card has been reached so recording is not possible Delete unnecessary scenes or insert a new SD card l 34 74 76 CANNOT RECORD DATE CAPACITY IS FULL The number of scenes grouped together on a date has reached the maximum number so...

Page 111: ...ording mode DISCONNECT USB CABLE You are attempting to switch the mode dial from PC Connection mode to another mode with the USB cable connected PLEASE CONNECT AC ADAPTOR AND BATTERY You are attempting to connect to a computer in PC Connection mode when the AC adaptor is not connected or the battery is not inserted RECONNECT USB CABLE Disconnect the USB cable then connect the AC adaptor with the b...

Page 112: ...SFULLY When the remaining capacity of the battery is low PLEASE CONNECT AC ADAPTOR OR CHANGE BATTERY Use a sufficiently charged battery or the AC adaptor Depending on the condition of the data it may not be possible to completely repair the data If the recovery fails you will no longer be able to playback the scenes recorded before the power went off When data recorded on another device is recover...

Page 113: ...ancel Tele macro Set and cancel Help mode Shutter effect While recording motion pictures Flash While recording motion pictures When the MagicPix function is used Zoom When the PHOTO SHOT button is pressed halfway Zoom microphone An external microphone is used Wind noise reduction Scene mode When setting the AUTO MANUAL FOCUS switch to AUTO When the MagicPix function is used MF assist function When...

Page 114: ...shing or the message LOW BATTERY is displayed the battery has run down Charge the battery l 28 A clicking sound is heard when the unit is shaken This is the sound of the lens moving and is not a defect This sound will no longer be heard when the unit s power is turned on Battery runs down quickly Is the battery fully charged Charge it with the AC adaptor l 28 Are you using the battery in an extrem...

Page 115: ... DEMO MODE OFF and press the cursor button A function indication such as the remaining time indication or the elapsed time indication is not shown If you set SETUP DISPLAY OFF indications other than warnings and date indications disappear Recording does not start although power is supplied to this unit and the SD card is correctly inserted Has the SD card s write protect switch been set to LOCK No...

Page 116: ...when motion pictures recorded on this unit are played back on another device The internal microphones of this unit record sound with Dolby Digital 5 1 Creator When the sound is played back on another device if stereo 2 channel speakers on TV are used the sound may be played back from one side of the speakers When the TV has surround sound effect function we recommend using it Refer to the operatin...

Page 117: ...card may be damaged Please consult a dealer Use an SD card from 8 MB to 4 GB with this unit If the SD card is inserted in this unit it is not recognized Is the SD card formatted on a computer inserted Use this unit to format SD cards Please be aware that if an SD card is formatted then all the data recorded on the card will be erased l 79 If the SD card is inserted in another device it is not reco...

Page 118: ...lt A This will restart the unit If you do not press the RESET button the power to this unit is turned off automatically about 1 minute later Even after you press the RESET button the indication may still appear repeatedly If so this unit needs repair Detach the power connected and consult the dealer who you purchased this unit from Do not attempt to repair the unit by yourself 1 A ...

Page 119: ...eck points Even if connected by the USB cable this unit is not recognized by the computer Have you set this unit to the correct mode This unit is not recognized in recording playback mode Set it to PC connection mode Is the battery inserted and the AC adaptor connected Insert the battery and connect the AC adapter when connecting this unit on the computer Select another USB terminal on the compute...

Page 120: ...d the cables Do not spray insecticides or volatile chemicals onto the unit If the unit is sprayed with such chemicals its body may be marred and the surface finish may peel off Do not leave rubber or plastic products in contact with the unit for a long time When you use the unit in a sandy or dusty place such as a beach do not let sand or fine dust get into the body and terminals of the unit Also ...

Page 121: ...to last for 3 to 4 times the period during you want to record pictures in In cold places such as a ski resort the period during which you can record pictures is shortened When you travel do not forget to bring an AC adaptor so that you can recharge the batteries at your destination If you drop the battery accidentally check to see if the terminals are damaged Attaching a battery with damaged termi...

Page 122: ...y card adaptor in this unit Do not leave the adaptor in this unit while inserting or removing miniSD Cards This may cause the unit to malfunction When the LCD monitor gets dirty wipe it with a dry soft cloth In a place with drastic temperature changes condensation may form on the LCD monitor Wipe it with soft dry cloth When the unit has become very cold for example due to storage in a cold area it...

Page 123: ...unit for about an hour in the room so the temperature of the unit is close to the ambient temperature of the room then use it What to do with the lens is fogged up Remove the battery or AC adaptor and leave the unit for about 1 hour When the unit becomes close to the ambient temperature the fog disappears naturally Explanation of terms Automatic white balance White balance adjustment recognizes th...

Page 124: ...stant and close up objects at the same time Since the unit focuses on whatever is at the center of the screen it is difficult to bring the background into focus when close up objects are placed in focus When recording people with distant mountains in the background you cannot focus on both the subject which is close up and the objects which are in the distance Recording a subject behind dirty or d...

Page 125: ...520 Kk3 Still picture 520 Kk3 Lens Auto Iris F1 8 to F2 8 Focal length 4 0 mm to 48 0 mm Macro Full range AF Filter diameter 43 mm Zoom 12k optical zoom 30k 700k digital zoom Monitor 3z wide LCD monitor approx 251 K pixels Microphone 5 1 channel surround microphone with a zoom function Speaker 1 round speaker 20 mm White balance adjustment Auto tracking white balance system Standard illumination 1...

Page 126: ...W k64 9 mm H k137 mm D 2 9 q W k2 6 q H k5 4 q D excluding projecting parts Mass Approx 430 g Approx 0 95 lbs without supplied battery and an SD card Mass in operation Approx 490 g Approx 1 08 lbs with supplied battery and an SD card Operating temperature 0 C to 40 C 32 F to 104 F 0 C to 30 C 32 F to 86 F when connected to the computer Operating humidity 10 to 80 Battery operation time See page 30...

Page 127: ...ng SDHC Memory Card 4 GB FAT32 system corresponding Compression JPEG Design rule for Camera File system based on Exif 2 2 standard DPOF corresponding Picture size 1920k1080 Power source Power consumption DC output AC 110 V to 240 V 50 60 Hz 19 W DC 9 3 V 1 2 A Unit operation DC 8 4 V 0 75 A Battery charging Dimensions 92 mm W k33 mm H k61 mm D 3 6 q W k1 3 q H k2 4 q D Mass Approx 115 g Approx 0 2...

Page 128: ...ccessory No Figure Description VW AD21PP K AC adaptor with AC Cable and DC Cables VW VBG130 1320 mAh Rechargeable Lithium Ion Battery Pack RP SDR01GU1A RP SDR512U1A Class 2 1 GB SD Memory Card Class 2 512 MB SD Memory Card RP SDM04GU1K RP SDM02GU1A Class 4 4 GB SDHC Memory Card Class 4 2 GB SD Memory Card RP SDV04GU1K RP SDV02GU1A RP SDV01GU1A Class 6 4 GB SDHC Memory Card Class 6 2 GB SD Memory C...

Page 129: ...E 20421 84th Avenue South Kent WA 98032 Ship To Mr Mrs Ms First Last Street Address City State Zip Phone Day Night 4 Shipping information UPS delivery requires complete street address Please photocopy this form when placing an order 3 Method of payment check one Check of Money Order enclosed NO C O D SHIPMENTS VISA MasterCard Make Check or Money Order Payable to PANASONIC ACCESSORIES Please do not...

Page 130: ...duct needs service Please include your proof of purchase Failure to do so will delay your repair To further speed your repair please provide an explanation of what is wrong with the unit and any symptom it is exhibiting Mail this completed form and your Proof of Purchase along with your unit to Panasonic Camera and Digital Service Center 1590 Touhy Ave Elk Grove Village IL 60007 ...

Page 131: ... s or non expanded standard 4 3 pictures on wide screen TV s or onscreen data in a stationary and fixed location The warranty ALSO DOES NOT COVER damages which occurred in shipment or failures which are caused by products not supplied by the warrantor or failures which result from accidents misuse abuse neglect bug infestation mishandling misapplication alteration faulty installation set up adjust...

Page 132: ...strial Park Carolina Puerto Rico 00985 Phone 787 750 4300 Fax 787 768 2910 For hearing or speech impaired TTY users TTY 1 866 605 1277 Purchase Parts Accessories and Instruction Books online for all Panasonic Products by visiting our Web Site at http www pstc panasonic com or send your request by E mail to npcparts us panasonic com You may also contact us directly at 1 800 332 5368 Phone 1 800 237...

Page 133: ... purchase receipt or other proof of date of original purchase is required before warranty service is performed THIS EXPRESS LIMITED WARRANTY IS IN LIEU OF ALL OTHER WARRANTIES EXPRESS OR IMPLIED INCLUDING ANY IMPLIED WARRANTIES OF MERCHANTABILITY AND FITNESS FOR A PARTICULAR PURPOSE IN NO EVENT WILL PANASONIC CANADA INC BE LIABLE FOR ANY SPECIAL INDIRECT OR CONSEQUENTIAL DAMAGES In certain instanc...

Page 134: ...87 ª F Fade 54 Flash 57 Focus 48 64 Format Card 79 Frame by frame playback 70 ª G Gain 66 Grip belt 23 Guide line function 59 ª H HDMI terminal 81 Help mode 39 High definition 13 ª I Image stabilizer 59 Initial setting 107 Iris 66 ª L Language 42 LCD monitor 24 42 122 Lens hood 23 Limited Warranty Canada 133 Limited Warranty USA 131 ª M MagicPix function 55 Manual focus 64 Menu 39 Menu list 105 MF...

Page 135: ...e playback 72 ª S Scene mode 63 SD Memory Card 26 SD Speed Class 27 SDHC Memory Card 26 Self recording 53 Self timer recording 57 Shutter effect 50 Shutter speed 66 Simultaneous recording 50 Skip playback 69 Slide show 73 Slow motion playback 69 Soft skin mode 56 Still picture JPEG playback 72 Still picture JPEG recording 48 Still picture compatibility 73 ª T Tele macro 56 Tripod receptacle 23 TV ...

Page 136: ...ientras lo desliza 2 Inserte la batería hasta escuchar un clic prestando atención al sentido de la batería B Empuje la batería hasta que queda bloqueada 3 Cierre la tapa de la batería ª Extracción de la batería 1 Abra la tapa de la batería 2 Extraiga la batería Deslice A en la dirección de la flecha para desbloquearlo y luego extraiga la batería 3 Cierre la tapa de la batería ª Cómo encender la un...

Page 137: ...e la tapa de la ranura de la tarjeta de forma segura ª Grabación de películas 1 Gire el selector de modo para seleccionar 2 Abra la pantalla LCD 3 Pulse el botón de inicio parada de grabación para iniciar la grabación 4 Vuelva a pulsar el botón de inicio parada de grabación para hacer una pausa en la grabación ª Grabación de fotografías JPEG 1 Gire el selector de modo para seleccionar 2 Abra la pa...

Page 138: ...r las miniaturas ª Reproducción de fotografías JPEG 1 Gire el selector de modo para seleccionar 2 Pulse el cursor hacia arriba y luego hacia la derecha para seleccionar la ficha reproducción de fotografías A Ficha de reproducción de fotografías 3 Select the file to be played back B Página anterior C Página siguiente D Indicación de número de archivo E Nombre carpeta archivo 4 Pulse el cursor 5 Mue...

Page 139: ...139 VQT1A24 ...

Page 140: ...ctronics Company Division of Panasonic Corporation of North America One Panasonic Way Secaucus NJ 07094 Panasonic Puerto Rico Inc Ave 65 de Infantería Km 9 5 San Gabriel Industrial Park Carolina Puerto Rico 00985 Panasonic Canada Inc 5770 Ambler Drive Mississauga Ontario L4W 2T3 P C ...

Reviews: