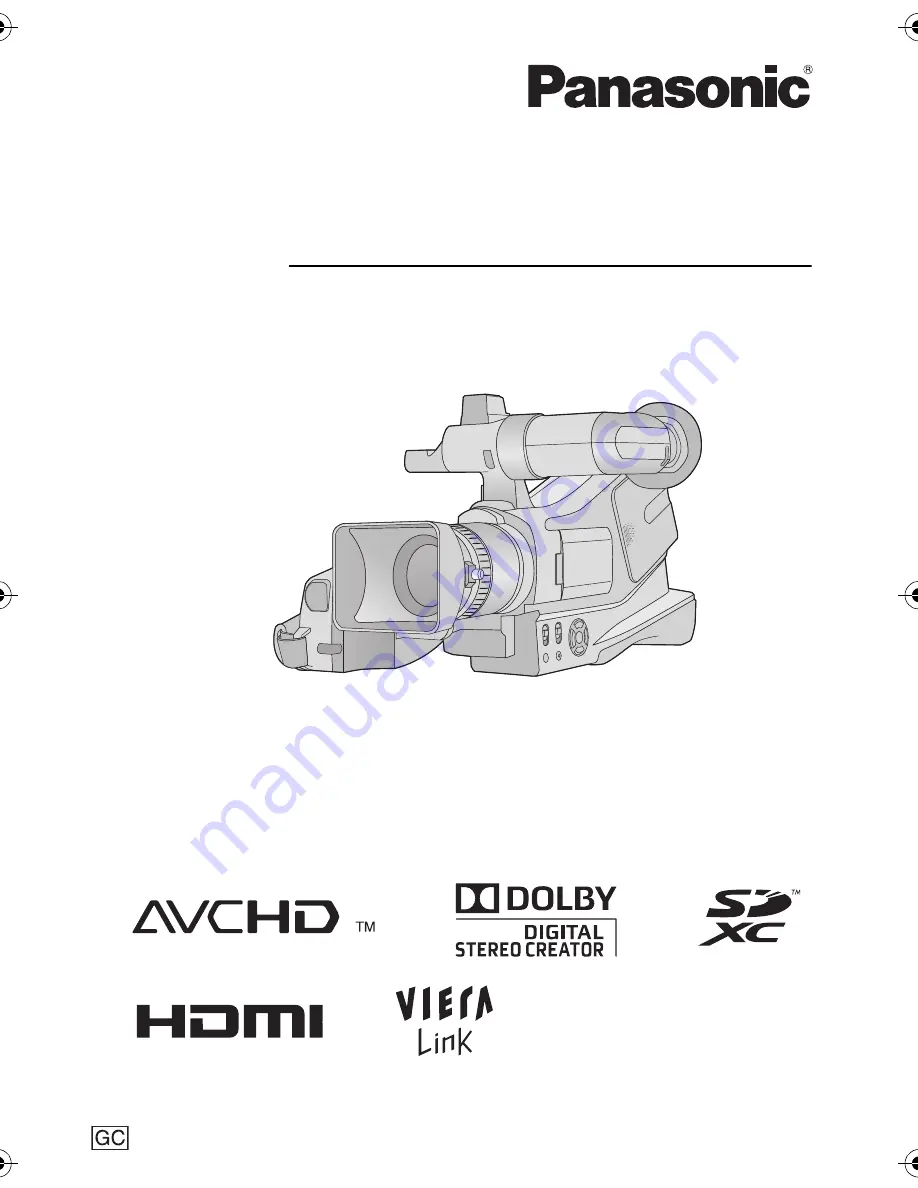
Operating Instructions
High Definition Video Camera
Model No.
HDC-MDH1
Before use, please read these instructions completely.
VQT2Z66
until
2010/8/30
HDC-MDH1GC-VQT2Z66_mst.book 1 ページ 2010年8月4日 水曜日 午前9時29分
Страница 1: ...Operating Instructions High Definition Video Camera Model No HDC MDH1 Before use please read these instructions completely VQT2Z66 ...
Страница 2: ...DE REFER SERVICING TO QUALIFIED SERVICE PERSONNEL CAUTION DO NOT INSTALL OR PLACE THIS UNIT IN A BOOKCASE BUILT IN CABINET OR IN ANOTHER CONFINED SPACE ENSURE THE UNIT IS WELL VENTILATED TO PREVENT RISK OF ELECTRIC SHOCK OR FIRE HAZARD DUE TO OVERHEATING ENSURE THAT CURTAINS AND ANY OTHER MATERIALS DO NOT OBSTRUCT THE VENTILATION VENTS DO NOT OBSTRUCT THE UNIT S VENTILATION OPENINGS WITH NEWSPAPER...
Страница 3: ...tely disconnect this apparatus from the AC Mains disconnect the power supply cord plug from AC receptacle Warning Risk of fire explosion and burns Do not disassemble heat above 60 oC or incinerate Product Location High Definition Video Camera Bottom AC adaptor Bottom How to replace the fuse The location of the fuse differ according to the type of AC mains plug figures A and B Confirm the AC mains ...
Страница 4: ...ard Specifications Refer to page 19 for more details on SD cards For the purposes of these operating instructions SD Memory Card SDHC Memory Card and SDXC Memory Card are referred to as the SD card Functions that can be used for motion picture recording motion picture playback are indicated by in these operating instructions Functions that can be used for still picture recording including the stil...
Страница 5: ... to use the touch screen 23 Viewfinder adjustment 24 Recording showing the contents to a partner 24 6 Setting date and time 25 Basic Recording Playback 1 Before recording 26 2 Recording motion pictures 28 3 Recording still pictures 30 Recording still pictures in motion picture recording mode 31 4 Intelligent auto mode 32 5 Motion picture Still picture playback 34 Setup 1 Using the menu screen 37 2...
Страница 6: ...I cable 79 Connecting with the component cable 79 2 Playback using VIERA Link HDAVI Control 80 Copy Dubbing With this unit other products 1 Dubbing images onto other video devices 83 With a PC Before using 1 What you can do with a PC 84 End User License Agreement 86 2 Operating environment 87 Setup 1 Installation 90 2 Connecting to a PC 92 About the PC display 94 Using with a PC 1 Starting HD Writ...
Страница 7: ...SK0698 AC cable A K2CT39A00002 B K2CQ29A00002 A Hong Kong Special Administrative Region of China and Saudi Arabia B Areas Other than Hong Kong Special Administrative Region of China and Saudi Arabia DC cable K2GJYDC00004 AV cable K2KA6CA00001 Component cable K1HY10YY0005 or K1HY10YY0009 USB cable K1HY04YY0032 Stylus pen VGQ0C14 Lens cap VKF3305 Shoulder strap VFC3877 External stereo microphone VW ...
Страница 8: ... This button functions in the same manner as the menu button 8 Mode switch l 22 9 Intelligent auto Manual Manual focus switch iA MANUAL FOCUS l 32 61 64 10 Cursor button 11 Power LCD button POWER LCD l 46 12 Menu button MENU l 37 POWER LCD MENU MANUAL FOCUS 11 9 10 2 4 8 12 1 5 7 3 6 Due to limitations in LCD production technology there may be some tiny bright or dark spots on the LCD monitor scre...
Страница 9: ...e to take clearer pictures 18 Lens hood attachment knob When you remove the lens hood first of all loosen the lens hood attachment knob When you attach the lens hood back unite the mark A and fasten the lens hood attachment knob If you use the filter kit optional or the conversion lens optional remove the lens hood l 119 19 Eyepiece corrector knob l 24 20 Tripod receptacle 15 16 18 17 13 14 20 20 ...
Страница 10: ...ay damage the user s ears 27 Photoshot button l 30 28 Zoom lever W T In motion picture recording mode or still picture recording mode l 43 Thumbnail display switch Volume lever sVOLr In playback mode l 36 29 Component connector COMPONENT l 76 Use the component cable only the supplied cable 30 Video output connector VIDEO OUT l 76 83 Use the AV cable only the supplied cable 31 Audio output connecto...
Страница 11: ...ways use the supplied AC adaptor or a genuine Panasonic AC adaptor VW AD21E EB K optional 37 Status indicator l 21 38 Power switch l 21 39 Recording start stop button l 28 40 Grip belt Adjust the length of the grip belt so that it fits your hand 1 2 Flip the belt 3 Adjust the length 4 5 Replace the belt DC IN OFF ON 34 35 32 33 36 37 38 39 40 ...
Страница 12: ...he tip of the shoulder strap run it through the shoulder strap length adjuster and pull it Pull it out more than 2 cm 1 from the shoulder strap length adjuster so that it cannot slip off About the external stereo microphone External stereo microphone Supplied external stereo microphone can be switched to record sound in either stereo or monaural 1 Wind Shield Microphone condenser 2 Off On mode sel...
Страница 13: ...ophone for one month or longer Keep the AAA battery out of reach of children to prevent swallowing Attaching the external stereo microphone to the unit 1 Attach the microphone to the accessory shoe 1 Loosen the shoe lock 2 Attach the microphone 3 Firmily tighten the shoe lock 2 Connect the stereo mini plug cord to the external microphone terminal You can adjust the microphone angle within the rang...
Страница 14: ...wind is so strong that even the wind shield is not adequate to keep down the noise set the WIND CUT OFF ON switch to ON to further reduce the wind noise OFF The microphone should usually be used with this position ON Set the WIND CUT OFF ON switch to this position to reduce wind noise or bass noise Although you can change the setting of the WIND CUT OFF ON switch while recording the sound of the s...
Страница 15: ...C cable from the AC adaptor 1 Connect the AC cable to the AC adaptor and the AC outlet 2 Insert the battery into the AC adaptor by aligning the arrows It has been found that counterfeit battery packs which look very similar to the genuine product are made available to purchase in some markets Some of these battery packs are not adequately protected with internal protection to meet the requirements...
Страница 16: ...wn in the figure and slide it until it clicks and locks Inserting removing the battery Removing the battery Be sure to set the power switch to OFF and the status indicator goes off Then remove the battery while supporting the unit to prevent it dropping While pushing the PUSH button slide the battery in the direction indicated by the arrow CAUTION Danger of explosion if battery is incorrectly repl...
Страница 17: ... 40 min HA HG HX HE 4 h 50 min 3 h SA SX 5 h 5 min 3 h 10 min VW VBG130 optional 7 2 V 1250 mAh 2 h 35 min HA 2 h 30 min 1 h 30 min HG HX HE 1 h 35 min SA SX 2 h 40 min 1 h 40 min VW VBG6 optional 7 2 V 5400 mAh 9 h 25 min HA HG 11 h 55 min 7 h 20 min HX HE 12 h 7 h 25 min SA SX 12 h 35 min 7 h 50 min Battery capacity indication The display changes as the battery capacity reduces If there is less ...
Страница 18: ... it is designed only for this unit Also do not use the AC cable from other equipment with this unit 1 Connect the AC cable to the AC adaptor and the AC outlet 2 Connect the DC cable to the AC adaptor 3 Connect the DC cable to the DC input terminal DC IN When removing the AC adaptor be sure to set the power switch to OFF and the status indicator goes off Then remove the AC adaptor Connecting to the...
Страница 19: ...ased on SD Memory Card Specifications When the write protect switch A on SD card is locked no recording deletion or editing will be possible on the card Keep the Memory Card out of reach of children to prevent swallowing This unit an SDXC compatible device is compatible with SD Memory Cards SDHC Memory Cards and SDXC Memory Cards When using an SDHC memory card SDXC memory card with other equipment...
Страница 20: ...e unit to vibrations or shock Performing the above while the lamp is on may result in damage to data SD card or this unit Do not expose the terminals of the SD card to water garbage or dust Do not place SD cards in the following areas jIn direct sunlight jIn very dusty or humid areas jNear a heater jLocations susceptible to significant difference in temperature condensation can occur jWhere static...
Страница 21: ... switch Set the power switch to ON to turn on the unit The status indicator lights To turn off the unit Set the power switch to OFF and the status indicator goes off Turning the unit on and off with the power switch OFF ON Rotate the power switch if changing from OFF to ON Align with A Status indicator B ...
Страница 22: ...eparation Setup 4 Selecting a mode Change the mode to recording or playback Operate the mode switch to change the mode to or Motion picture recording mode l 28 Still picture recording mode l 30 Playback mode l 34 65 ...
Страница 23: ...ng the cursor buttons Touch Touch and release the touch screen to select icon or picture Touch the centre of the icon Touching the touch screen will not operate while you are touching another part of the touch screen Drag Move your finger while pressing on the touch screen Can be used during direct playback About the operation icons To operate the following icons using the cursor buttons select th...
Страница 24: ...e field of view It adjusts the field of view to show the images on the viewfinder clearly Adjust the focus by sliding the eyepiece corrector knob Close the LCD monitor to turn on the viewfinder Change the mode to or Rotate the LCD monitor towards the lens side LCD monitor and viewfinder are turned on during the face to face recording when the LCD monitor is rotated towards the lens side Record by ...
Страница 25: ...ct ENTER and press the button in the centre The clock function starts at 00 seconds A message prompting for World time setting may be displayed Perform the World time setting l 38 Select EXIT then press the button in the centre or press the MENU button to complete the setting The date and time function is driven by a built in lithium battery When this unit is purchased the clock is set If the time...
Страница 26: ...you Place the unit on your right shoulder and hold it firmly with both hands Hold the eyecup of the viewfinder as close as possible to your right eye Take a firm stance with the legs slightly apart For stable images it is recommended to use a tripod optional whenever possible Low angle recording Adjust the angle of the LCD monitor according to the position in which the unit is held If the unit is ...
Страница 27: ...al surface Basic motion picture recording The unit should normally be held steady when recording If you move the unit when recording do so slowly maintaining a constant speed The zoom operation is useful for recording subjects you cannot get close to but overuse of zoom in and zoom out can make the resulting motion picture less enjoyable to watch ...
Страница 28: ...pause recording Still pictures can be recorded while recording the motion picture l 31 The images recorded between pressing the recording start stop button to start recording and pressing it again to pause recording become one scene Maximum number of recordable scenes Approx 3900 Maximum number of different dates Approx 200 l 69 When either of them reaches to the maximum limit more scenes cannot b...
Страница 29: ...ating instructions There are some cases where the recorded motion pictures cannot be played back even if the device supports AVCHD In such cases play the recorded motion picture with this unit instead 0h00m00s 0h00m00s 0h00m00s R 1h20m R 1h20m R 1h20m HA A Recording mode B Approximate remaining recordable time When the remaining time is less than 1 minute R 0h00m flashes red C Recording time elaps...
Страница 30: ... optical image stabilizer will be displayed when the button is pressed It is recommended using a tripod when recording still pictures in dark places because the shutter speed becomes slow The screen will become darker when the button is pressed if the shutter speed is 1 25 or slower To print a picture print using a PC or a printer A Focus indication The white lamp flashes Focusing The green lamp l...
Страница 31: ...s area the subject may not be focused If so move the contrasting object out of the focus area Focus area is not displayed in the following conditions jWhen the Extra optical zoom is used You can record still pictures even in motion picture recording mode Change the mode to Press the button press to the bottom to take the picture It is possible to record still pictures while recording motion pictur...
Страница 32: ...uto manual manual focus switch Slide this switch to change intelligent auto mode manual mode manual focus mode Please refer to page 61 about manual mode page 64 about manual focus mode MANUAL FOCUS Mode Scene Effect Scenery Recording outdoors The whole landscape will be recorded vividly without whiting out the background sky which may be very bright 1 Spotlight Under a spotlight Very bright object...
Страница 33: ...fective range of automatic white balance adjustment on this unit 2 Blue sky 3 Cloudy sky rain 4 Sunlight 5 White fluorescent lamp 6 Halogen light bulb 7 Incandescent light bulb 8 Sunrise or sunset 9 Candlelight If the automatic white balance is not functioning normally adjust the white balance manually l 62 Auto focus The unit focuses automatically Auto focus does not work correctly in the followi...
Страница 34: ...ion l 23 1 Change the mode to 2 Select the play mode select icon A using the cursor button then press the button in the centre 3 Select VIDEO or PICTURE and press the button in the centre 4 Select the scene or the still picture to be played back and press the button in the centre Next previous page can be displayed by using ...
Страница 35: ...e playback Still picture playback 1 Playback Pause 6 Rewind playback 5 Fast forward playback Stops the playback and shows the thumbnails 1 Displays the direct playback bar l 66 1 Slide show playback of the still pictures in numerical order start pause 2 Plays back the previous picture 1 Plays back the next picture Stops the playback and shows the thumbnails F 0h00m00s 0h00m00s 0h00m00s A Operation...
Страница 36: ...only during normal playback If pause play is continued for 5 minutes the screen returns to the thumbnails The elapsed time for playback indication will be reset to 0h00m00s each scene T W T W T W T W Motion picture compatibility This unit is based on the AVCHD format The video signal that can be played back on this unit is 1920k1080 50i 1920k1080 25p 1440k1080 50i or 720k576 50i This unit may degr...
Страница 37: ...can be displayed by using 4 Select the desired item then press the button in the centre to enter the setting 5 Select EXIT then press the button in the centre or press the MENU button to exit the menu setting About guide display After selecting and press the button in the centre selecting the submenus and items and press the button in the centre will cause function descriptions and settings confir...
Страница 38: ...message appears Select ENTER and press the button in the centre then proceed to step 3 2 Only when setting your home region Select HOME and press the button in the centre Select ENTER and press the button in the centre 3 Only when setting your home region Select your home region using the cursor button right or left then select ENTER and press the button in the centre Select SUMMER TIME SET and pr...
Страница 39: ...ME SET and press the button in the centre again to return to the normal time setting Close the setting by pressing the MENU button appears and the time of the travel destination is indicated To return the display to the home setting Set the home region using step 1 to 3 and close the setting by selecting EXIT then press the button in the centre or pressing the MENU button If you cannot find your t...
Страница 40: ...ing the cursor button and press the button in the centre 2 Select the desired setting item and press the button in the centre BRIGHTNESS Brightness of the LCD monitor COLOUR Colour level of the LCD monitor 3 Adjust settings using the cursor button right or left 4 Select ENTER and press the button in the centre Select EXIT and press the button in the centre or press the MENU button to exit the menu...
Страница 41: ...he amount of space left on the SD card can be checked Only when the mode is at the Select EXIT and press the button in the centre or press the MENU button to close the indication The SD card requires some space to store information and manage system files so the actual usable space is slightly less than the indicated value The usable space is generally calculated as 1 GB 1 000 000 000 bytes The ca...
Страница 42: ... Touch CALIBRATION Touch ENTER 3 Touch the _ that appears on the screen with the supplied stylus pen Touch _ in sequence up left down left down right up right centre 4 Touch ENTER Calibration cannot be performed when the LCD monitor is turned 180o You can select the language on the screen display and the menu screen CALIBRATION LANGUAGE English 中文 ภาษาไทย fgUnh ΔϴΑήόϟ ΔϴΑήόϟ γέΎϓ ...
Страница 43: ...zoom effect If you take your finger off the zoom lever during zoom operation the operation sound may be recorded When returning the zoom lever to the original position move it quietly When the zoom magnification is 20k the subjects are focused at about 1 2 m or more When the zoom magnification is 1k this unit can focus on a subject approx 4 cm away from the lens The zoom speed does not vary when o...
Страница 44: ...further improve image stabilization for recording while walking or holding the unit and recording a distant subject with zoom This function s default setting is ON When HYBRID O I S is ON is displayed When OFF is displayed Still picture recording mode OFF Cancel the setting MODE1 The function works all the time MODE2 The function works when the button is pressed We recommend you are recording your...
Страница 45: ...itch the image stabilizer to ON is displayed while you are touching icon Optical image stabilizer lock is released when you remove your finger from the icon Operation icon will disappear when no function is performed for a specific period of time if DISPLAY is set to OFF Touch the screen to display it again Setting to display not display the O I S LOCK icon Stabilization may not be possible under ...
Страница 46: ...he LCD monitor is set to automatically The recordable time will become shorter when you use this unit with the LCD monitor lit up Power LCD button Each time the POWER LCD button is pressed the indication changes by one setting in the following order No display Normal Makes less bright Automatic adjustment Makes even brighter Makes brighter It is not displayed in the manual mode or in the playback ...
Страница 47: ...not displayed in still picture recording mode 2 It is not displayed in the intelligent auto mode 3 It is not displayed in motion picture recording mode 4 It is displayed only when a headphone is connected to the headphone output terminal If you turn off the unit or change the mode to PRE REC backlight compensation colour night view and tele macro functions are cancelled If you turn off the unit th...
Страница 48: ... clear This allows recording of the pictures and sound to start approximately 3 seconds before the recording start stop button is pressed appears on the screen Aim the unit at the subject beforehand There is no beep sound PRE REC is cancelled in the following cases jIf you change the mode jIf you remove the SD card jIf you press the MENU button jIf you turn the unit off jIf you start recording jAf...
Страница 49: ... may not be recorded clearly In this case cancel soft skin mode or zoom in on the face close up to record A more impressive image can be obtained by focusing on the object only in close up and shading off the background The unit can focus on the subject at a distance of approx 50 cm If the magnification is 20k or less then it is automatically set to 20k The tele macro function is cancelled when th...
Страница 50: ... this is not a malfunction Using a tripod is recommended In darker areas auto focus may focus a bit slower This is normal Adjust the volume of the headphone using the cursor button right or left while recording Press the cursor button down to complete the setting It is possible to adjust the volume of the headphone by using Increase the volume Decrease the volume while recording When the LCD monit...
Страница 51: ...cient the sports mode does not function The display flashes Portrait jColour and screen brightness may change under indoor lighting SCENE MODE RECORD SETUP SCENE MODE desired setting OFF Cancel the setting 5Sports To make fast moving scenes less shaky with slow playback and pause of playback Portrait To make people stand out against the background Spotlight Improved quality when subject is brightl...
Страница 52: ...corded Change the mode to 1920k1080 720k576 A Image quality prioritised B Recording time prioritised Recordable time using the battery l 17 This function s default setting is HA mode Please refer to page 112 about approximate recordable time When the unit is moved a lot or moved quickly or when a fast moving subject is recorded particularly when recording in HE SX mode mosaic type noise may appear...
Страница 53: ...igent auto mode When motion pictures recorded while this function is turned ON are played back with a TV not compatible with x v Colour colours may not be reproduced properly To play back images recorded in the digital cinema colour with vivid colours of wider colour ranges a device compatible with x v Colour is required When these images are played back with devices other than ones compatible wit...
Страница 54: ...ct depending on the recording conditions If wind sound cannot be reduced with the wind noise canceller function alone set BASS SETTING to LOWCUT l 56 Directivity of the microphone is interlocked with the zoom operation Sounds near the front of the unit are recorded more clearly if you zoom in close up and surrounding sounds are recorded more realistically if you zoom out wide angle Change the mode...
Страница 55: ... value are not red Otherwise the sound is distorted Select a lower setting for microphone input level 3 Select ENTER using the cursor button and press the button in the centre to determine the microphone input level then select EXIT and press the button in the centre Microphone input level meter is displayed on the screen When changing to intelligent auto mode the setting is fixed to AUTO and cann...
Страница 56: ...ture recording mode Set the iA MANUAL FOCUS switch to manual mode l 61 1 Select the menu 2 Select the desired setting items using the cursor button and press the button in the centre 3 Adjust settings using the cursor button right or left 4 Select ENTER and press the button in the centre Select EXIT and press the button in the centre or press the MENU button to complete the settings appears on the...
Страница 57: ...y frame in It makes the adjustment of the brightness of the object easier by checking the luminance level of the object when recording same object in different surroundings Adjust the brightness using IRIS l 63 Change the mode to or Set the iA MANUAL FOCUS switch to manual mode l 61 Luminance level is displayed between 0 and 99 It will be displayed as 99 when it is over 99 Luminance is displayed w...
Страница 58: ...ribution in the graph Adjust the brightness using IRIS l 63 Change the mode to or Set the iA MANUAL FOCUS switch to manual mode l 61 Histogram is displayed while adjusting IRIS even if DISPLAY is set to OFF HISTOGRAM RECORD SETUP HISTOGRAM desired setting OFF Cancel the setting ANYTIME Constantly display ON ADJUST Display only when IRIS is adjusted l 63 A Normal B Dark C Bright Example of the disp...
Страница 59: ...o page 113 about the number of recordable pictures When the picture size is 2 9M 0 3M 2 8M or 640k480 black bands may appear on the left and right of the screen The edges of still pictures recorded on this unit with a 16 9 aspect ratio may be cut at printing Check the printer or photo studio before printing PICTURE SIZE PICTURE PICTURE SIZE desired setting 4 3 Aspect ratio of 4 3 television 3 2 As...
Страница 60: ...e the mode to No shutter sound is emitted in motion picture recording mode QUALITY PICTURE QUALITY desired setting Still pictures with a high picture quality are recorded Priority is given to the number of still pictures recorded Still pictures are recorded in normal picture quality SHTR SOUND PICTURE SHTR SOUND OFF MENU MENU ...
Страница 61: ...e Set the iA MANUAL FOCUS switch to manual mode appears on the screen Perform the setting by selecting the desired item to be set with the cursor button and press the button in the centre Select 1 and press the button in the centre to change the page Select and press the button in the centre to display not display the manual icon MNL MANUAL FOCUS White balance l 62 Manual shutter speed l 63 Iris a...
Страница 62: ...te If the display continues flashing the white balance cannot be set In this case use other white balance modes If you turn on the unit with the lens cap attached the auto white balance will not be performed correctly Always remove the lens cap before turning on the unit When the display flashes the manual white balance previously adjusted is stored Whenever recording conditions change re set the ...
Страница 63: ...he shutter speed and then set the iris gain value Manual shutter speed adjustment When the shutter speed is set lower than 1 12 in the still picture recording mode it is recommended using a tripod Also white balance cannot be set The shutter speed will be set to 1 25 when the unit is turned on again You may see a band of light around the object that is shining very bright or having very high refle...
Страница 64: ... appears on the screen A Rotate the focus ring to adjust the focus 1 When MF assist function is used Select the menu 2 Adjust the focus by rotating the focus ring B Part displayed in blue The in focus area is displayed in blue The normal screen returns approximately 2 seconds after you finish bringing the subject into focus When MF ASSIST is OFF the blue area is not displayed To restore auto focus...
Страница 65: ...ck During Pause With the playback paused select and continue pressing the button in the centre is for slow rewind playback Playback is slow while pressing the button in the centre Normal playback is restored when you select and press the button in the centre When slow motion pictures are played back in reverse they will be shown continuously at approximately 2 3rd the speed of normal playback inte...
Страница 66: ...y will be different from the normal still picture Playback operation Playback display Operating steps Direct playback During Playback 1 Open the LCD monitor 2 Touch 1 to display the direct playback bar A 3 Touch or drag the direct playback bar l 23 This operation can be performed only by touch operation The playback pauses temporarily and skips to the touched or dragged position Playback will star...
Страница 67: ... 6 SECONDS 12 SECONDS MINUTES 3 When MINUTES is selected Set the time using the cursor button up or down It can be set up to a maximum of 60 minutes Select ENTER and press the button in the centre 4 Select the thumbnail to be played back and press the button in the centre Next previous thumbnail can be displayed by using Playback of the first scene starts after playback of the last scene finishes ...
Страница 68: ... was stopped If playback of a motion picture is stopped appears on the thumbnail view of the stopped scene The memorised resume position is cleared if you turn off the unit or change the mode The setting of RESUME PLAY does not change Resuming the previous playback VIDEO SETUP RESUME PLAY ON MENU ...
Страница 69: ...ill pictures returns if the unit is turned off or the mode is changed Even if scenes are recorded on the same day they are grouped separately in the following cases 1 2 is added after the recording date displayed on the screen jWhen the number of scenes exceeds 99 jWhen switching between scenes recorded using HA HG HX or HE and scenes recorded using SA or SX in playback mode jWhen the media is rep...
Страница 70: ...ntre When SLIDES INTERVAL is selected Select the interval of playback for the slide show and press the button in the centre Changing the playback settings and playing back the slide show DATE SETUP Select the date to be played back SLIDES INTERVAL Selects the interval between still pictures at playback MUSIC SELECT Select the music to be played on playback SHORT Approx 1 second NORMAL Approx 5 sec...
Страница 71: ...o Select START then press the button in the centre and start the audio testing Select the other music option and press the button in the centre to change the music to be tested When you select STOP and press the button in the centre the music playback stops 4 Select START and press the button in the centre 5 Select the playback operation l 34 When the playback is finished or stopped the screen to ...
Страница 72: ...lect the scene still picture to be deleted and press the button in the centre When the button in the centre is pressed the scene still picture is selected and appears on the thumbnail Select the scene still picture again and press the button in the centre to cancel the operation Up to 99 scenes can be selected to be deleted 3 When SELECT is selected in step 1 Select Delete then press the button in...
Страница 73: ...h cannot be played back the thumbnails are displayed as cannot be deleted In case of ALL SCENES the deletion may take time if there are many scenes or still pictures If you delete scenes recorded on other products or still pictures conforming to DCF standard with this unit all the data related to the scenes still pictures may be deleted When still pictures recorded on an SD card by other products ...
Страница 74: ...nd press the button in the centre to continue dividing the same scene To continue dividing other scenes select NO and press the button in the centre and repeat steps 2 3 4 Press the MENU button to complete dividing 5 Delete the unnecessary scene l 72 To delete all the divided points The scenes that were deleted after division cannot be recovered You cannot divide a scene if the number of scenes of...
Страница 75: ... 2 Select the scene still picture to be protected and press the button in the centre When the button in the centre is pressed the scene still picture is selected and appears on the thumbnail Select the scene still picture again and press the button in the centre to cancel the operation Press the MENU button to complete the settings Protecting scenes still pictures VIDEO SETUP or PHOTO SETUP SCENE ...
Страница 76: ...is the interface for digital devices If you connect this unit to a HDMI compatible high definition TV and then play back the recorded high definition images you can enjoy them in high resolution with high quality sound Confirm the terminals on your TV and use a cable compatible with the terminals Image quality may vary with the connected terminals 1 High quality 2 HDMI terminal 3 Component termina...
Страница 77: ...able Select the Video 2 channel with an AV cable The name of the channel may differ depending on the connected TV Check the input setting input switch and the audio input setting on the TV For more information please read the operating instructions for the TV VIDEO OUT AUDIO L R OUT COMPONENT VIDEO OUT AUDIO L R OUT COMPONENT A HDMI cable optional Be sure to connect to the HDMI terminal B Componen...
Страница 78: ... information displayed This setting is only available in recording mode If the HDMI cable component cable and AV cable are connected at the same time output will be prioritised in order of the HDMI cable component cable and AV cable Cables Reference items A HDMI cable optional Connecting with a HDMI cable l 79 Playback using VIERA Link HDAVI Control l 80 B Component cable supplied Connecting with ...
Страница 79: ... TV for a few seconds in the following cases jWhen switching between scenes recorded using HA HG HX or HE and scenes recorded using SA or SX in playback mode Component output setting can be changed Connecting with a HDMI cable SETUP HDMI RESOLUTION AUTO 1080i 576p Connecting with the component cable SETUP COMPONENT OUT desired setting 576i When connecting to the component terminal on the TV compat...
Страница 80: ...nk This function allows you to use your remote control for the Panasonic TV for easy operations when this unit has been connected to a VIERA Link compatible device using a HDMI cable optional for automatic linked operations Not all operations are possible VIERA Link is a unique Panasonic function built on a HDMI control function using the standard HDMI CEC Consumer Electronics Control specificatio...
Страница 81: ... TV screen with the remote control for the TV A Operation icons B Display operation icons C Cancel operation icons D Display Cancel operation icons The following operations are available by pressing the colour buttons on the remote control jGreen Switching the number of scenes still pictures in thumbnail display 9 thumbnails 20 thumbnails 9 thumbnails Zoom in on still picture jYellow Deleting scen...
Страница 82: ...ending on the HDMI terminal on the TV the input channel may not switch automatically In this case use the remote control for the TV to switch the input channel If you are unsure whether or not the TV and AV amplifier you are using are compatible with VIERA Link read the operating instructions for the devices Available linked operations between this unit and a Panasonic TV is different depending on...
Страница 83: ...and time display and function indication are not wanted cancel them before dubbing l 39 78 Change the video input on the video device and TV that this unit is connected to The channel set will differ depending on the terminal to which the unit is connected See the operating instructions of the video device for details Insert the plugs as far as they will go Do not use any other AV cables except th...
Страница 84: ...efinition picture quality or conventional standard picture quality MPEG2 format Select the function you wish to use and follow the on screen instructions for easy copying Available function Data type Software required Copying data to a PC Motion picture and still picture CD ROM supplied HD Writer AE 2 5S Copying in BD AVCHD format Copying in DVD Video format Converted to conventional standard qual...
Страница 85: ...ion Data type Software required Playing back on a PC Still picture HD Writer AE 2 5S or Standard Windows picture viewer or a commercially available picture viewer Copying still pictures to a PC l 94 Windows Explorer Refer to page 96 if using a Mac Important Notice When using an SDXC Memory Card check the following support site http panasonic net avc sdcard information SDXC html Do not insert a dis...
Страница 86: ...se Engineering Decompiling or Disassembly Licensee may not reverse engineer decompile or disassemble the Software except to the extent either of them is permitted under law or regulation of the country where Licensee resides Panasonic or its distributors will not be responsible for any defects in the Software or damage to Licensee caused by Licensee s reverse engineering decompiling or disassembly...
Страница 87: ...2 Service Pack 3 Microsoft Windows XP 32 bit Professional Service Pack 2 Service Pack 3 Microsoft Windows Vista 32 bit Home Basic Service Pack 1 Service Pack 2 Microsoft Windows Vista 32 bit Home Premium Service Pack 1 Service Pack 2 Microsoft Windows Vista 32 bit Business Service Pack 1 Service Pack 2 Microsoft Windows Vista 32 bit Ultimate Service Pack 1 Service Pack 2 Microsoft Windows 7 32 bit...
Страница 88: ...ment of the PC used Refer to the operating environment and notes Operation during the playback may become slow if the CPU or memory is not fulfilling the requirements of the operating environment Always use the most current driver for the video card Always make sure there is enough capacity on the HDD in the PC It may become inoperable or the operation may stop suddenly if the capacity gets low Di...
Страница 89: ...Vista 32 bit Ultimate Service Pack 1 Service Pack 2 Microsoft Windows Vista 32 bit Enterprise Service Pack 1 Service Pack 2 Microsoft Windows 7 32 bit Starter Microsoft Windows 7 32 bit 64 bit Home Basic Microsoft Windows 7 32 bit 64 bit Home Premium Microsoft Windows 7 32 bit 64 bit Professional Microsoft Windows 7 32 bit 64 bit Ultimate CPU Windows Vista Windows 7 1 0 GHz or higher Windows XP In...
Страница 90: ...OM into the PC The following screen is displayed automatically Click Run setup exe Continue When using Windows 7 or if the following screen is not displayed automatically select Start Computer or double click on Computer on the desktop and then double click PANASONIC 2 Click Next 3 Read the End User License Agreement then place a check beside I accept the terms of the license agreement if you agre...
Страница 91: ... HD Writer AE 2 5S Follow the steps below to uninstall any software applications that you no longer require 1 Select Start Control Panel Uninstall a Program 2 Select HD Writer AE 2 5S then click Uninstall Proceed with the uninstallation by following the on screen instructions After uninstalling the software be sure to reboot the PC The PC must be rebooted for the application to work ...
Страница 92: ...ta into the unit 2 Turn on the unit This function is available in all modes 3 Connect this unit to a PC The USB function selection screen will appear 4 Touch PC on the screen of this unit The Smart wizard screen is automatically displayed when HD Writer AE 2 5S is installed This unit is automatically recognised as an external drive of the PC l 94 When you select an option other than PC reconnect t...
Страница 93: ...orming reading writing between a PC and an SD card be aware that some SD card slots built into PCs and some SD card readers are not compatible with the SDHC memory card or SDXC memory card When using an SDXC Memory Card check the following support site http panasonic net avc sdcard information SDXC html To disconnect USB cable safely 1 Double click the icon in task tray displayed on the PC Dependi...
Страница 94: ...orer or other programmes 1 Double click the folder that contains the still pictures DCIM 100CDPFQ etc 2 Drag and drop the still pictures onto the destination folder on the PC s HDD Do not delete the SD card s folders Doing so may make the SD card unusable in this unit When data not supported by this unit has been recorded on a PC it will not be recognised by this unit Always use this unit to forma...
Страница 95: ...ame equally authorized or with the user name for a standard user account If you log on with a user name for a guest user account the software cannot be used On the PC Select Start All Programs Panasonic HD Writer AE 2 5S HD Writer AE For details on how to use the software applications read the PDF operating instructions of the software You will need Adobe Acrobat Reader 5 0 or later or Adobe Reade...
Страница 96: ...his unit is automatically recognised as an external drive of the Mac When you select an option other than PC reconnect the USB cable When using the battery the LCD monitor turns off after about 5 seconds Touch the screen to turn the LCD monitor on 3 Double click CAM_SD displayed on the desktop Files are stored in 100CDPFQ or 101CDPFR folder etc in the DCIM folder 4 Using a drag and drop operation ...
Страница 97: ...0m A HA1920 15 11 2010 12 34 F PRE REC 6dB 1 100 OPEN 0dB MNL MEGA MF R 3000 1h30m A F 99 99 99 2 9M SA SA SX SX White Card recording possible status Green Recognising the card Red Recording Green Recording pause PRE REC l 48 Manual mode l 61 Intelligent auto mode l 32 Operation icon is displayed not displayed l 47 MF Manual focus l 64 White balance l 62 1 100 Shutter speed l 63 OPEN F2 0 Iris val...
Страница 98: ...isplayed for still pictures recorded with other products that have different picture sizes from the sizes shown above R3000 Remaining number of still pictures l 31 White Still picture recording icon Red Recording still picture MEGA OIS l 30 2 9M 0 3M 2 8M 2 1M 0 2M MEGA 1 5 6 7 8 D E 1 2 Display during playback l 34 65 Operation icon is displayed not displayed l 34 0h00m00s Playback time l 34 No 1...
Страница 99: ...off and on again after waiting a while If recovery fails repeatedly format a media on the unit Please be aware that if a media is formatted then all the data recorded on the media will be erased If the thumbnail information is recovered displaying the thumbnails may become slower CHECK CARD This card is not compatible or it cannot be recognised by the unit If this message appears even though motio...
Страница 100: ...nd of the lens moving and is not a defect This sound will no longer be heard when the unit is turned on and change the mode to or Remaining battery indication is not displayed properly The remaining battery capacity indication is an approximation If the remaining battery capacity indication is not displayed correctly fully charge the battery discharge it and then charge it again This unit cannot b...
Страница 101: ...mode use the manual focus mode to adjust the focus l 33 64 Colour balance of images is strange when recording in a place such as a gymnasium In a place with multiple light sources such as a gymnasium or a hall set the white balance setting to Indoor mode 2 If you cannot record clearly with the Indoor mode 2 set it to Manual adjustment mode l 62 Any scenes still pictures cannot be played back Any s...
Страница 102: ...ory Card SDHC Memory Card SDXC Memory Card that you inserted Refer to the operating instructions of the device for details Colour or brightness of the image changes or you may see horizontal bars in the image The LCD monitor flickers indoors Colour or brightness of the image may change or you may see horizontal bars in the image when the object is recorded under fluorescent light mercury light or ...
Страница 103: ...wer connected and consult the dealer who you purchased this unit from Do not attempt to repair the unit by yourself VIERA Link does not work Setting on this unit Connect with a HDMI cable optional l 80 Press the MENU button then select SETUP VIERA Link ON using the cursor button l 80 Turn the unit off and then back on again Setting on other devices If the TV input does not switch automatically swi...
Страница 104: ...annot see the PDF operating instructions for HD Writer AE 2 5S You will need Adobe Acrobat Reader 5 0 or later or Adobe Reader 7 0 or later to read the PDF operating instructions for HD Writer AE 2 5S Cannot copy scenes on the SD card by connecting to other equipment with the USB cable Other equipment might have not recognised the SD card Unplug the USB cable once and reconnect it Problem Check po...
Страница 105: ...otion picture data that exceeds 4 GB may momentarily stop at every 4 GB of data when played back with another device It may not play back smoothly when the editing of scenes was done with the HD Writer AE 2 5S but it will play back smoothly if you set the seamless settings in the HD Writer AE 2 5S Refer to the operating instructions for the HD Writer AE 2 5S Principal reasons for not playing back ...
Страница 106: ... and cables If you use optional accessories use the cords and the cables supplied with them Do not extend the cords and the cables Do not spray insecticides or volatile chemicals onto the unit If the unit is sprayed with such chemicals its body may be marred and the surface finish may peel off Do not leave rubber or plastic products in contact with the unit for a long time When you use the unit in...
Страница 107: ...tion may be triggered making it impossible to use the unit Be sure to detach the battery after use If the battery is left attached a minute amount of current continues to flow even if the unit is off Keeping the unit in this state may result in over discharge of the battery This may result in you not being able to use the battery even after it is charged The battery should be stored in the vinyl b...
Страница 108: ...he battery may not be charged If the charging lamp keeps flashing make sure that the terminals of the battery or the AC adaptor are not exposed to dirt foreign objects or dust then reconnect them properly Disconnect the AC cable from the AC outlet when you remove dirt foreign objects or dust on the terminals of the battery or the AC adaptor If the charging lamp is still flashing the temperature of...
Страница 109: ...with strong force It may become hard to see or hard to recognise the touch when the LCD protection sheet is affixed In a place with drastic temperature changes condensation may form on the LCD monitor Wipe it with a soft cloth such as eye glass cleaner When the unit has become very cold for example due to storage in a cold area its LCD monitor will be slightly darker than usual immediately after t...
Страница 110: ...ar to outside When a cold room has been warmed up quickly When cool wind from an air conditioner is directly blown onto this unit After summer afternoon showers of rain When this unit is in a very humid place where the air is thick with steam e g a heated swimming pool Helpful hint If for example you have used this unit for recording on a ski slope and are taking it into a heated room place the un...
Страница 111: ...s reprinted with permission from Microsoft Corporation IBM and PC AT are registered trademarks of International Business Machines Corporation of the U S Intel Core Pentium and Celeron are the registered trademarks or trademarks of Intel Corporation in the United States and other countries AMD Athlon is a trademark of Advanced Micro Devices Inc iMovie and Mac are trademarks of Apple Inc registered ...
Страница 112: ...hours and the recording will automatically resume after a few seconds If a recording with a lot movements is recorded the recording time is reduced The recordable time may be reduced if recording of short scene is repeated Use time in the row of 4 GB in above table as a guideline for the time that can be copied onto one DVD disc 4 7 GB Recording mode HA HG HX HE SA SX Picture size 1920k1080 720k57...
Страница 113: ... total of the capacity for copyright protection and management and the capacity which can be used on the unit a PC etc Aspect ratio 4 3 Picture size 1952k1464 640k480 Picture quality SD card 512 MB 300 500 3600 6100 1 GB 600 1000 7400 12000 2 GB 1200 2000 15000 25000 4 GB 2500 4000 30000 50000 8 GB 5000 8000 60500 102000 16 GB 10000 16000 122000 205000 32 GB 20000 32000 246000 414000 48 GB 31000 4...
Страница 114: ...cture 35 8 mm to 716 mm 16 9 43 9 mm to 878 mm 4 3 Still picture 35 8 mm to 716 mm 4 3 3 2 16 9 Minimum focus distance Normal Approx 4 cm Wide Approx 1 2 m Tele Tele macro Approx 50 cm Tele Intelligent auto Macro Approx 1 cm Wide Approx 50 cm Tele Zoom i Zoom OFF 20k 23k i Zoom 50k 1200k Digital Zoom Using image sensor effective area Image Stabilizer Function Optical HYBRID O I S active mode O I S...
Страница 115: ...audio output level Line 316 mV 600 h 2 ch Headphone output 77 mV 32 h Stereo mini jack HDMI connector audio output level Dolby Digital Linear PCM MIC input j70 dBV Mic sensitivity j50 dB equivalent 0 dB 1 V Pa 1 kHz Stereo mini jack USB Card reader writer function No copyright protection support Hi Speed USB USB 2 0 USB terminal Type Mini B Dimensions 216 mm W k224 mm H k432 mm D excluding project...
Страница 116: ...o page 19 for details on SD cards usable in this unit Compression MPEG 4 AVC H 264 Recording mode and transfer rate HA Approx 17 Mbps VBR HG Approx 13 Mbps VBR HX Approx 9 Mbps VBR HE Approx 5 Mbps VBR SA Approx 9 Mbps VBR SX Approx 4 5 Mbps VBR Refer to page 112 for the recordable time Picture size HA HG HX HE 1920k1080 50i SA SX 720k576 50i Audio compression Dolby Digital 2ch ...
Страница 117: ...emory Card exFAT system compliant Refer to page 19 for details on SD cards usable in this unit Compression JPEG Design rule for Camera File system based on Exif 2 2 standard Picture size Picture aspect 4 3 1952k1464 640k480 Picture aspect 3 2 2064k1376 Picture aspect 16 9 1920k1080 Refer to page 113 for the number of recordable pictures ...
Страница 118: ...or Information for your safety Dimensions 92 mm W k33 mm H k61 mm D Mass Approx 115 g Power source Power consumption DC output AC 110 V to 240 V 50 60 Hz 19 W DC 9 3 V 1 2 A Unit operation DC 8 4 V 0 65 A Battery charging ...
Страница 119: ...s not possible to attach it to the front of the lens hood l 9 AC adaptor VW AD21E EB K 1 Battery pack lithium VW VBG130 Battery pack lithium VW VBG260 Battery pack lithium VW VBG6 HDMI cable RP CDHG15 RP CDHG30 RP CDHG50 Wide conversion lens VW W4607H Filter kit VW LF46NE 2 Video DC light VW LDC103E Light bulb for video DC light VZ LL10E Stereo microphone VW VMS2E 1 The supplied DC cables cannot b...
Страница 120: ...Panasonic Corporation Web site http panasonic net Panasonic Corporation 2010 VQT2Z66 F0810KK0 7200 E ...