background image

Before connecting, operating or adjusting this product, please read these instructions completely. Please keep this manual
for future reference.

English

TQBC0840

®

TH-42PHD7UY
TH-50PHD7UY

High Definition Plasma Display

Model No.

TH-37PWD7UY
TH-42PWD7UY

Operating Instructions

Progressive Wide Plasma Display

Model No.

PLASMA DISPLAY

R - S

TAN

DBY

G   P

OWER

 ON

INPU

T

MEN

U

+

ENTER

VOL 

POW

ER     

/

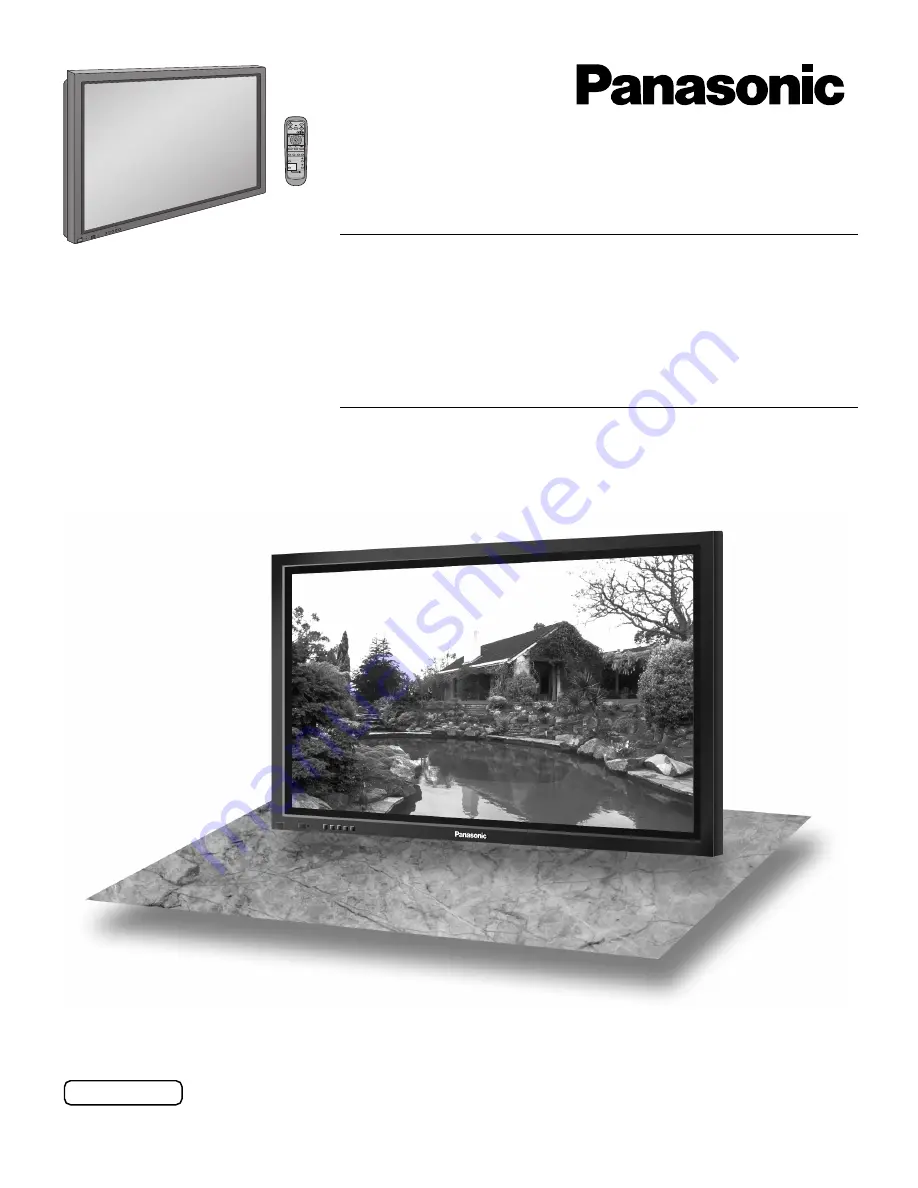
The illustration shown is an image.

Summary of Contents for H-37PWD7UY

Page 1: ...keep this manual for future reference English TQBC0840 TH 42PHD7UY TH 50PHD7UY High Definition Plasma Display Model No TH 37PWD7UY TH 42PWD7UY Operating Instructions Progressive Wide Plasma Display Model No PLASMA DISPLAY R STANDB Y G POWER ON INPUT MENU ENTER VOL POWER The illustration shown is an image ...

Page 2: ...DO NOT OPEN WARNING 1 To prevent electric shock do not remove cover No user serviceable parts inside Refer servicing to qualified service personnel 2 Do not remove the grounding pin on the power plug This apparatus is equipped with a three pin grounding type power plug This plug will only fit a grounding type power outlet This is a safety feature If you are unable to insert the plug into the outle...

Page 3: ...ent of the obsolete outlet 10 Protect the power cord from being walked on or pinched particularly at plugs convenience receptacles and the point where they exit from the apparatus 11 Only use attachments accessories specified by the manufacturer 12 Use only with the cart stand tripod bracket or table specified by the manufacturer or sold with the apparatus When a cart is used use caution when movi...

Page 4: ...Basic Controls 14 On Screen Menu Displays 16 Initial selections 18 Selecting the input signal 18 Selecting the On Screen Menu Language 18 ASPECT Controls 19 Adjusting PICTURE POSITION SIZE 20 MULTI PIP 21 PICTURE Adjustments 22 ADVANCED SETTINGS 23 SOUND Adjustment 24 MUTE 24 Digital Zoom 25 PRESENT TIME SETUP SET UP TIMER 26 PRESENT TIME SETUP 26 SET UP TIMER 27 SCREENSAVER For preventing after i...

Page 5: ...e Attach the ferrite core The ferrite cores provided as a supplied accessory must be used when connecting this Plasma Display to video equipment see page 10 11 FCC STATEMENT FCC CAUTION To assure continued compliance and possible undesirable interference the provided ferrite cores must be used when connecting this plasma display to video equipment and maintain at least 40 cm of spacing from other ...

Page 6: ...eat may be generated which could cause fire If the plug is damaged or the wall socket plate is loose they should not be used Do not handle the power cord plug with wet hands Doing so may cause electric shocks Do not do anything that might damage the power cable When disconnecting the power cable hold the plug not the cable Do not make any modifications place heavy objects on place near hot objects...

Page 7: ... a qualified technician to carry out set up When using the Plasma Display Do not bring your hands face or objects close to the ventilation holes of the Plasma Display Top of the Plasma Display is usually very hot due to the high temperature of exhaust air being released through the ventilation holes Burns or personal injuries can happen if any body parts are brought too close Placing any object ne...

Page 8: ...eries when replacing the old set 2 Do not combine a used battery with a new one 3 Do not mix battery types example Zinc Carbon with Alkaline 4 Do not attempt to charge short circuit disassemble heat or burn used batteries 5 Battery replacement is necessary when the remote control acts sporadically or stops operating the Plasma Display 3 Replace the cover and slide in reverse until the lock snaps P...

Page 9: ...ck as shown in the figure While ensuring there is sufficient slack in cables to minimize stress especially in the power cord firmly bind all cables with the supplied fixing band From SERIAL Terminal on Computer see page 11 From EXTERNAL monitor terminal on Computer see page 10 AC cord connection see page 13 Optional Terminal Board Insert Slot covered COMPONENT RGB IN and Audio IN Terminals see pag...

Page 10: ... in the illustration is for example purposes only Additional equipment and cables shown are not supplied with this set Do not set the horizontal and vertical scanning frequencies for PC signals which are above or below the specified frequency range Component Input is possible with the pin 1 2 3 of the D sub 15P Connector AUDIO PC IN COMPUTER Conversion adapter if necessary RGB D sub 15p Stereo plu...

Page 11: ...us 9600 bps None 8 bits 1 bit Communication parameters RS 232C Conversion cable D sub 9 pin female 2 3 5 4 6 7 8 1 9 Details R X D T X D GND Non use Shorted NC Command PON POF AVL AMT IMS DAM Control details Power ON Power OFF Volume 00 63 Audio MUTE OFF Audio MUTE ON Input select toggle Slot1 input Slot2 input Slot3 input PC input Screen mode select toggle NORMAL 4 3 ZOOM FULL JUST Panasonic AUTO...

Page 12: ...es Change the COMPONENT RGB IN SELECT setting in the SET UP menu to COMPONENT see page 34 Additional equipment cables and adapter plugs shown are not supplied with this set Notes Change the COMPONENT RGB IN SELECT setting in the SET UP menu to RGB see page 34 Additional equipment cables and adapter plugs shown are not supplied with this set S VIDEO VCR CAMCORDER VCR MONITOR RCA BNC adapter plug Ex...

Page 13: ...e Plasma Display to turn the set on Power On Power Indicator Green Example The screen below is displayed for a while after the Plasma Display is turned on setting condition is an example Connecting the AC cord plug to the Plasma Display Fix the AC cord plug securely to the Plasma Display with the clamper see page 9 Press the button on the remote control to turn the Plasma Display off Power Indicat...

Page 14: ...When the menu screen is displayed press to move the cursor up press to move the cursor down see page 16 MENU Screen ON OFF Each time the MENU button is pressed the menu screen will switch see page 16 Normal Viewing PICTURE SET UP SOUND PICTURE POS SIZE Status button 1 Input label 2 Aspect mode see page 19 3 Off timer The off timer indicator is displayed only when the off timer has been set Press t...

Page 15: ...ction Press to select INPUT1 INPUT2 INPUT3 and PC IN input SLOTS sequentially see page 18 Sound mute On Off see page 24 Volume Adjustment Press the Volume Up or Down button to increase or decrease the sound volume level ACTION button Press to make selections ASPECT button Press to adjust the aspect see page 19 SOUND button see page 24 SET UP button see page 16 POSITION buttons R button see page 16...

Page 16: ...NCED SETTINGS NORMAL NORMALIZE OFF 0 0 0 SOUND NORMAL NORMALIZE STANDARD OFF TREBLE AUDIO MENU BALANCE BASS SURROUND NORMAL NORMALIZE PICTURE POS SIZE V POS H POS V SIZE H SIZE NORMAL NORMALIZE PICTURE POS SIZE V POS H POS V SIZE H SIZE CLOCK PHASE During VIDEO S VIDEO COMPONENT and DVI input signal To PICTURE POS SIZE adjust menu see page 20 During RGB PC input signal To PICTURE adjust menu see p...

Page 17: ...VIDEO NR OFF INTERVAL SCREENSAVER START FUNCTION MODE WOBBLING PEAK LIMIT WHITE BAR SCROLL 6 15 12 30 OFF OFF SIDE BAR ADJUST BRIGHT PRESENT TIME OF DAY 00 00 SAVER DURATION SHOW DURATION SCREENSAVER START FUNCTION MODE WOBBLING PEAK LIMIT FINISH TIME START TIME WHITE BAR SCROLL TIME OF DAY 6 15 12 30 OFF OFF SIDE BAR ADJUST BRIGHT PRESENT TIME OF DAY 00 00 2 2 A1 LOCATION MULTI DISPLAY SETUP ARRA...

Page 18: ...ing the optional Terminal Boards PC IN INPUT1 INPUT2 INPUT3 PC IN INPUT1 INPUT2 Press to select the input signal to be played back from the equipment which has been connected to the Plasma Display Input signals will change as follows TH 37PWD7UY TH 42PWD7UY TH 42PHD7UY TH 50PHD7UY R STANDBY G POWER ON INPUT MENU ENTER VOL MENU ENTER INPUT VOL SURROUND VOL N R PICTURE SOUND SET UP INPUT MULTI PIP S...

Page 19: ...D VOL N R PICTURE SOUND SET UP ASPECT PICTURE POS SIZE MULTI PIP SWAP SELECT MOVE ZOOM ASPECT INPUT MENU ENTER VOL NORMAL 3 4 NORMAL will display a 4 3 picture at its standard 4 3 size NORMAL ZOOM mode magnifies the central section of the picture ZOOM 4 3 16 9 ZOOM JUST mode will display a 4 3 picture at its maximum size but with aspect correction applied to the center of the screen so that elonga...

Page 20: ...t up or down This picture position movement cannot be controlled by the PICTURE POS SIZE function If adjusting the PICTURE V POS V SIZE in Panasonic AUTO with FULL mode the adjustment is not memorized When exiting the mode the screen will return to a former adjustment While the PICTURE POS SIZE display is active if either the N button on the remote control is pressed at any time or the ACTION butt...

Page 21: ...re are processed by different circuits resulting in a slight difference in the clarity of the pictures There may also be a difference in the picture quality of the sub picture depending on the type of signals displayed on the main picture and depending on the 2 picture display mode Due to the small dimensions of the sub pictures used for the picture in picture and picture out picture displays thes...

Page 22: ...display the PICTURE menu Select to adjust each item Press to select the menu to adjust Select the desired level by looking at the picture behind the menu PICTURE ADVANCED SETTINGS ON Enables fine picture adjustment at a professional level see next page ADVANCED SETTINGS OFF Displays images with settings of the PICTURE menu Press to select ON Press to enter Advanced Settings 0 0 0 0 0 0 2 2 W B LOW...

Page 23: ...t the white balance of the bright sections using the W B HIGH R and W B HIGH B settings 2 Adjust the white balance of the dark sections using the W B LOW R and W B LOW B settings 3 Repeat steps 1 and 2 to adjust Steps 1 and 2 affect each other s settings so repeat each step in turn to make the adjustment The adjustment values are memorized separately for each input mode INPUT1 INPUT2 INPUT3 and PC...

Page 24: ...esired level by listening to the sound SOUND AUTO STANDARD Emits the original sound Automatically controls proper volume level Useful when answering the phone or receiving unexpected visitors Press this button to mute the sound Press again to reactivate sound Sound is also reactivated when power is turned off or volume level is changed PLASMA DISPLAY N R INPUT VOL PICTURE SOUND SET UP ASPECT PICTU...

Page 25: ...m capability is functional for the following component signals 525 480 60i 60p 625 575 50i 50p 1125 1080 60i 50i 24p 25p 30p 24sF 750 720 60p 50p 1250 1080 50i The Digital Zoom capability is functional for the following composite signals NTSC PAL SECAM Select the magnification required for the enlarged display Each time this is pressed the magnification factor changes This is shown in the image be...

Page 26: ... SETUP Note Set cannot be selected unless PRESENT TIME OF DAY is set Press to set up PRESENT TIME OF DAY button Forward button Back Notes Pressing or button once changes PRESENT TIME OF DAY 1minute Pressing or button continuously changes PRESENT TIME OF DAY by 15 minutes Press to exit from PRESENT TIME SETUP 1 2 SET UP 1 2 PC OFF STANDBY SAVE OFF POWER MANAGEMENT OFF AUTO POWER OFF OFF OSD LANGUAG...

Page 27: ...T TIME OF DAY is set Display the SET UP TIMER SCREEN button Forward button Back Notes Pressing or button once changes POWER ON TIME POWER OFF TIME 1minute Pressing or button continuously changes POWER ON TIME POWER OFF TIME by 15 minutes 1 2 3 R 0 00 0 00 SET UP TIMER POWER OFF FUNCTION POWER OFF TIME POWER ON TIME POWER ON FUNCTION OFF OFF PRESENT TIME OF DAY 00 00 0 00 0 00 SET UP TIMER POWER OF...

Page 28: ...up and those times arrive OFF WHITE BAR SCROLL NEGATIVE ON Operates when START is selected and the ACTION button is pressed START setting When the MODE is set to ON press to select START Press to start SCREENSAVER The menu screen will disappear and the SCREENSAVER will be activated To stop the SCREENSAVER under ON press the R button 2 3 1 4 5 SET UP 2 2 SET UP SCREENSAVER MULTI DISPLAY SETUP SET U...

Page 29: ...g after images SCREENSAVER START FUNCTION MODE WOBBLING PEAK LIMIT FINISH TIME START TIME WHITE BAR SCROLL OFF 6 15 12 30 OFF OFF SIDE BAR ADJUST BRIGHT PRESENT TIME OF DAY 00 00 SCREENSAVER START FUNCTION MODE WOBBLING PEAK LIMIT WHITE BAR SCROLL 6 15 12 30 OFF OFF INTERVAL SIDE BAR ADJUST BRIGHT PRESENT TIME OF DAY 00 00 SAVER DURATION SHOW DURATION SCREENSAVER START FUNCTION MODE WOBBLING PEAK ...

Page 30: ... the previous page operation guide steps 1 and 2 side bars 4 3 Screen Display after images Press to exit from SCREENSAVER Notes To reduce the occurrence of after images set the SIDE BAR ADJUST to BRIGHT The side bar may flash alternate black white depending on the picture being shown on the screen Using Cinema mode will reduce such flashing A B Picture out Picture Picture and Picture Non picture a...

Page 31: ...b terminal Press to exit from SET UP Press to select INPUT LABEL Press to change the INPUT LABEL Customizing the Input labels This function can change the label of the Input signal to be displayed Notes While selecting a Input signal through Optional Terminal Board connected to Slot 1 to Slot 3 the Input label will depend on each Optional Terminal Board INPUT LABELS for Slot 1 to Slot 3 and miniD ...

Page 32: ...splay the SET UP menu Press to display the MULTI DISPLAY SETUP menu Press to select the MULTI DISPLAY SETUP Press to select the MULTI DISPLAY SETUP Press to select ON or OFF How to setup MULTI DISPLAY group of 16 4 4 group of 4 2 2 group of 9 3 3 1 2 3 SET UP 2 2 SET UP SCREENSAVER MULTI DISPLAY SETUP SET UP TIMER PRESENT TIME SETUP 2 2 A1 LOCATION MULTI DISPLAY SETUP ARRANGEMENT OFF MULTI DISPLAY...

Page 33: ...llowing component signals 525 480 60i 60p 625 575 50i 50p 1125 1080 60i 50i 24p 25p 30p 24sF 750 720 60p 50p 1250 1080 50i The multi display capability is functional for the following composite signals NTSC PAL SECAM The MultiDisplay function does not display certain input signals from the terminals of the installed option boards listed below Digital RGB input signals from the DVI terminal of RGB ...

Page 34: ...ess to set ON OFF Press to exit from adjust mode Note When ON this setting only affects NTSC input signals Note Selection may not be possible depending on which optional board is installed 1 2 SET UP R 1 2 PC OFF STANDBY SAVE OFF POWER MANAGEMENT OFF AUTO POWER OFF OFF OSD LANGUAGE ENGLISH US COMPONENT RGB IN SELECT RGB INPUT LABEL SIGNAL POWER SAVE SET UP 1 2 PC OFF STANDBY SAVE OFF POWER MANAGEM...

Page 35: ...ch as movie pictures which are recorded at 24 frames per second If the picture is not stable turn the setting to OFF Note When ON this setting only affects the following signal input NTSC PAL signal input during VIDEO S VIDEO input signal 525i 480i 625i 575i 1125 1080 60i signal input during COMPONENT input signal 1 2 PC OFF STANDBY SAVE OFF POWER MANAGEMENT OFF AUTO POWER OFF OFF OSD LANGUAGE ENG...

Page 36: ...signal of Composite Sync input which is input from the HD connector Displays the H Horizontal V Vertical frequencies This display is valid only for RGB PC and DVI input signal Display range Horizontal 15 110 kHz Vertical 48 120 Hz H FREQ kHz V FREQ Hz SET UP for Input Signals Press to exit from adjust mode R 1 2 PC OFF STANDBY SAVE OFF POWER MANAGEMENT OFF AUTO POWER OFF OFF OSD LANGUAGE ENGLISH U...

Page 37: ...e Volume Up or Down button to select OSD LANGEAGE 3 Press and hold the ENTER button till the SHIPPING menu is displayed 4 Press the Volume Up or Down button to select YES 5 Press the ENTER button Note Press the R button to return to SET UP menu when SHIPPING menu is displayed SET UP 1 2 PC OFF STANDBY SAVE OFF POWER MANAGEMENT OFF AUTO POWER OFF OFF OSD LANGUAGE ENGLISH US COMPONENT RGB IN SELECT ...

Page 38: ... there is nothing wrong with the picture or sound this is the sound of the cabinet undergoing very slight contractions in response to changes in the room temperature There are no adverse effects on the performance or other aspects Adjust the position of the picture on the screen When using a video software program such as a cinema size program with a screen wider than one in the 16 9 mode blank ar...

Page 39: ...an be heard from the display unit Plasma Display panel Check The screen will darken slightly when photos still images of a computer or other pictures with minimal movements are shown for an extended period This is done to reduce after image on the screen and the shortening of the screen s service life It is normal and not indicative of malfunctioning The unit digitally processes the various signal...

Page 40: ...z 43 27 85 01 19 852 480 60 Hz 31 47 59 94 2 20 800 600 56 Hz 35 16 56 25 21 800 600 60 Hz 37 88 60 32 22 800 600 72 Hz 48 08 72 19 23 800 600 75 Hz 46 88 75 00 24 800 600 85 Hz 53 67 85 06 25 1 024 768 60 Hz 48 36 60 00 26 1 024 768 70 Hz 56 48 70 07 27 1 024 768 75 Hz 60 02 75 03 28 1 024 768 85 Hz 68 68 85 00 29 1 152 864 75 Hz 67 50 75 00 30 1 280 960 60 Hz 60 00 60 00 31 1 280 960 85 Hz 85 94...

Page 41: ...480 dots 32 F 104 F 0 C 40 C 20 80 NTSC PAL PAL60 SECAM Modified NTSC 525 480 60i 60p 625 575 50i 50p 750 720 60p 50p 1125 1080 60i 50i 24p 25p 30p 24sF SMPTE274M 1250 1080 50i VGA display VGA SVGA XGA SXGA UXGA compressed Horizontal scanning frequency 15 110 kHz Vertical scanning frequency 48 120 Hz VIDEO IN OUT BNC 1 0 Vp p 75 ohm or high impedance S VIDEO IN MINI DIN 4PIN Y 1 Vp p 75 ohm C 0 28...

Page 42: ... 575 50i 50p 750 720 60p 50p 1125 1080 60i 50i 24p 25p 30p 24sF SMPTE274M 1250 1080 50i XGA display VGA SVGA XGA SXGA UXGA compressed Horizontal scanning frequency 15 110 kHz Vertical scanning frequency 48 120 Hz VIDEO IN OUT BNC 1 0 Vp p 75 ohm or high impedance S VIDEO IN MINI DIN 4PIN Y 1 Vp p 75 ohm C 0 286 Vp p 75 ohm AUDIO IN RCA PIN JACK 2 0 5 Vrms high impedance Y G BNC 1 0 Vp p composite ...

Page 43: ......

Page 44: ...ZONE 3330 Cahuenga Blvd W Los Angeles CA 90068 323 436 3500 Dallas Region 6226 Abington Way Houston TX 77008 713 802 2726 No CA Northwest Region 5870 Stone Ridge 3 Pleasanton CA 925 416 5108 Government Marketing Department 52 West Gude Drive Rockville MD 20850 301 738 3840 Customer s Record The model number and serial number of this product can be found on its back cover You should note this seria...

Reviews: