background image

SQT1119

Operating Instructions

Thank you for purchasing this product.
Please read these instructions carefully before using this product, and save this manual for future use.

Model number suffix “EB” denotes UK model.

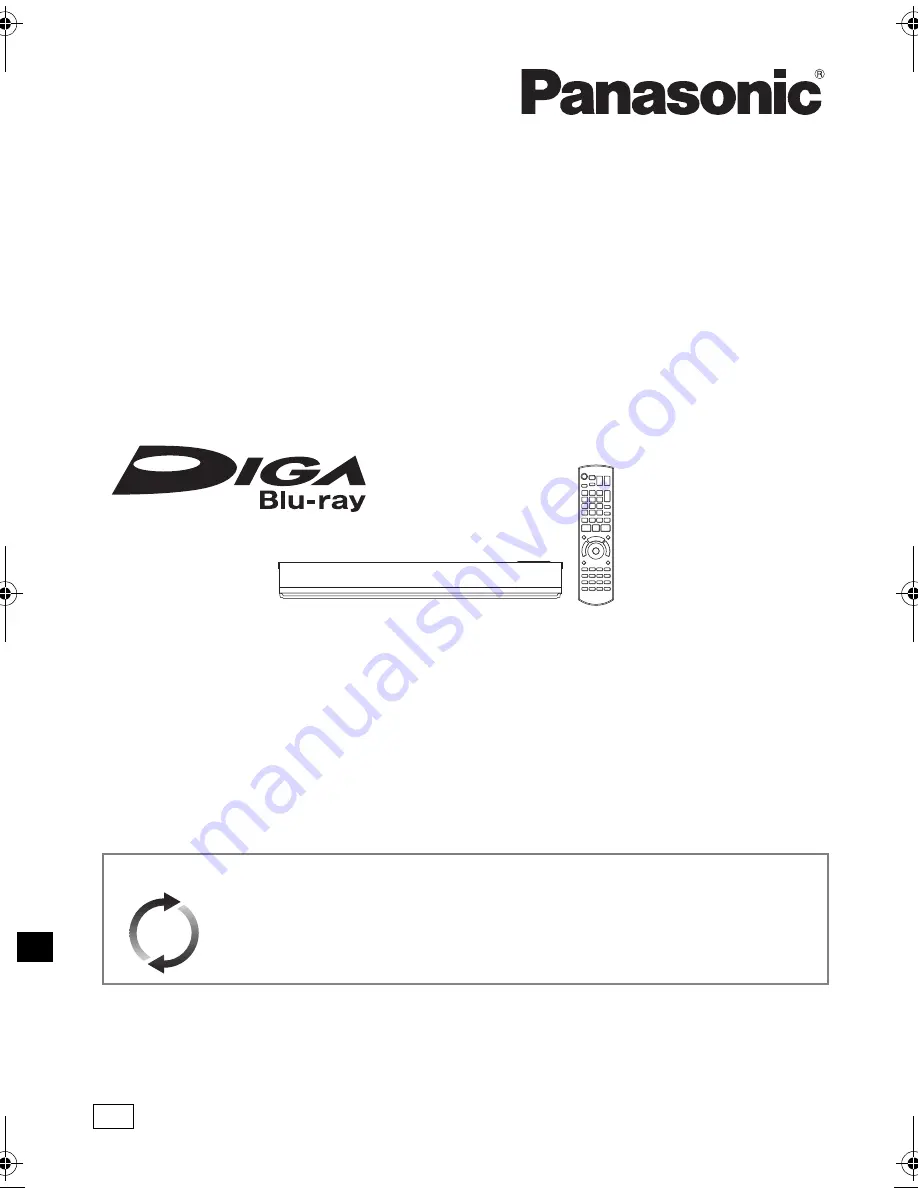
Blu-ray Disc™ Recorder

Model No. 

DMR-BWT850

Software (Firmware) Update

To support the latest features, it’s very important you install the latest updates to 
maintain proper operation of your unit.
For details, refer to “Software (Firmware) Update” (

>

81) or

http://panasonic.jp/support/global/cs/ (This site is in English only.)

until 
2015/09/26

EB

DMR-BWT850EB_eng.book  1 ページ  2015年9月11日 金曜日 午後5時40分

Summary of Contents for DMR-BWT850

Page 1: ... future use Model number suffix EB denotes UK model Blu ray Disc Recorder Model No DMR BWT850 Software Firmware Update To support the latest features it s very important you install the latest updates to maintain proper operation of your unit For details refer to Software Firmware Update 81 or http panasonic jp support global cs This site is in English only EB ...

Page 2: ...tall this unit so that the mains plug can be unplugged from the socket outlet immediately CAUTION This unit utilizes a laser Use of controls or adjustments or performance of procedures other than those specified herein may result in hazardous radiation exposure Placement Place this unit on an even surface To reduce the risk of fire electric shock or product damage Do not install or place this unit...

Page 3: ... according to the type of AC mains plug figures A and B Confirm the AC mains plug fitted and follow the instructions below Illustrations may differ from actual AC mains plug 1 Open the fuse cover with a screwdriver 2 Replace the fuse and close or attach the fuse cover Please check and identify the supplied accessories Product numbers are correct as of August 2015 These may be subject to change Do ...

Page 4: ...Operation during play 39 Editing video Deleting Editing titles 42 Copying video Copying titles 46 Photo and Music Playing photos 54 Editing photos 56 Copying photos 57 Playing music 58 Copying Deleting music 59 Network Smart Home Networking DLNA 60 TV Anywhere 64 Enjoying Network Service 64 With Other Equipment Copying the HD Video AVCHD 65 Registering the external HDD USB HDD 65 Convenient functi...

Page 5: ...Getting started Watching broadcasts Recording Playing back video Editing video Copying video Photo and Music Network With Other Equipment Convenient functions Troubleshooting Reference SQT1119 5 ...

Page 6: ...4 MPEG2 Xvid JPEG MPO 3D photo AAC ALAC DSD FLAC MP3 WAV WMA External hard disk drive USB HDD 9 USB_HDD Video 1 AVCHD AVCHD 3D 2 3 MKV MP4 MPEG2 Xvid JPEG MPO 3D photo AAC ALAC DSD FLAC MP3 WAV WMA BD Video BD V Video BD RE BD RE DL BD RE Video AVCHD AVCHD 3D JPEG MPO 3D photo BD R BD R DL BD R Video AVCHD AVCHD 3D 2 MKV Xvid DVD Video 4 DVD V Video DVD RAM RAM Video JPEG MPO 3D photo AVCHD 2 DVD ...

Page 7: ...AAC ALAC DSD FLAC MP3 WAV WMA RW RW Video AVCHD 2 Audio CD CD DA CD Music CD including CD R RW MKV Xvid JPEG MPO 3D photo AAC ALAC FLAC MP3 WAV WMA USB memory USB AVCHD AVCHD 3D 2 3 MKV MP4 MPEG2 Xvid JPEG MPO 3D photo AAC ALAC DSD FLAC MP3 WAV WMA SD Cards SD MP4 MPEG2 JPEG MPO 3D photo AVCHD AVCHD 3D 2 1 It cannot be recorded directly Only compatible with copying from the built in HDD 2 Recorded...

Page 8: ...th of folder trees to about five levels Bit rate up to 100 Mbps resolution up to 3840k2160 25p 30p 4096k2160 24p MP4 only The video file and subtitle text files are inside the same folder and the file names are the same except for the file extensions Some files may not be played back even if they have these extensions Information about contents Media Maximum titles HDD 3000 BD RE BD R 200 DVD RAM ...

Page 9: ...ce must be formatted in FAT12 FAT16 FAT32 or NTFS file system The USB device over 2 TB is not usable This unit supports USB 2 0 High Speed Although this unit can use USB 3 0 devices as USB 2 0 devices This unit does not recognise USB HDDs other than those in which the size of one sector is 512 bytes or 4096 bytes For details consult the dealer of your USB HDD This unit supports USB mass storage de...

Page 10: ...the HDD is possible Discs that cannot be played DVD RAM in a cartridge 2 6 and 5 2 GB DVD RAM 12 cm DVD Audio Super Video CD Super Audio CD Video CD Operation and sound quality of CDs that do not conform to CD DA specifications copy control CDs etc cannot be guaranteed If the SD card is formatted on other equipment the time necessary for recording may be longer or the card may not be able to be us...

Page 11: ...le to damage Therefore be careful of the following points while the unit is turned on especially during operation otherwise the HDD and the recorded content may be damaged Do not subject the unit to any vibration and shock Do not remove the AC mains lead from the household mains socket The HDD is a temporary storage device It is recommended to save the recorded content on a disc or to keep the ori...

Page 12: ... 31 Create chapter 40 Listen to Audio Description 23 40 A Skip the specified time 40 B TV operation buttons 17 C Channel select 22 Change pages in the Video Menu screen etc D Show the Freeview Play Catch Up Service screen 26 E Show NETFLIX screen 64 F Show the Network Service screen 64 G Exit the menu screen H Show the TV Guide screen 25 I Show the FUNCTION MENU screen 21 J Return to previous scre...

Page 13: ...nt of power 4 Disc tray 5 USB port 6 SD card slot When removing the SD card press on the centre of the card and pull it straight out Display Pull to flip down the front panel SD card USB memory Disc Display 1 Drive HDD BD or SD indicator 2 Disc indicator 3 Copying indicator 4 USB port indicator 5 SD card slot indicator 6 Remote control signal indicator 7 Timer recording indicator This indicator li...

Page 14: ...It is recommended that you use Panasonic s HDMI cable When outputting 1080p or 24p 4K signal please use HDMI cables 5 0 meters or less The HDMI compliant cable is supplied with this unit When the unit is not to be used for a long time To save power unplug it from the household mains socket This unit consumes a small amount of power even when the unit is in standby mode 92 Basic connections HDMI VH...

Page 15: ...fier receiver not compatible with 3D or 4K 3D programmes or 4K images can be played back when this unit is connected to a 3D or 4K compatible TV This connection only supports up to 5 1ch When using a TV or an amplifier receiver that does not display ARC on the HDMI terminal it is necessary to connect the TV and the amplifier receiver with a digital audio cable to enjoy the TV audio on the amplifie...

Page 16: ...ss LAN connection the network setting is needed 19 Easy Network Setting Use category 5 or above straight LAN cables STP when connecting to peripheral devices About wireless LAN connection 19 Easy Network Setting For up to date compatibility information on your Wireless router refer to http panasonic jp support global cs This site is in English only The unit is not compatible with public wireless L...

Page 17: ...ode Manufacturer Code AIWA 35 BENQ 58 59 BRANDT 10 15 CENTREX 66 CURTIS 05 DESMET 05 ELEMIS 05 FINLUX 61 Panasonic 01 02 03 04 AKAI 27 30 BEKO 05 71 72 73 74 BUSH 05 DAEWOO 64 65 DUAL 05 FERGUSON 10 34 FISHER 21 MITSUBISHI 05 19 20 47 METZ 05 28 79 MIVAR 24 NEC 36 NOKIA 25 26 27 60 61 OLEVIA 45 ORION 05 PHILCO 41 48 64 PHONOLA 05 PROVIEW 52 RADIOLA 05 NOBLEX 33 NORDMENDE 10 ONWA 30 39 70 PEONY 49 ...

Page 18: ...rtway Press BACK RETURN To restart setup 70 Auto Setup To display the Owner ID information on TV 1 While the unit is on press and hold OK the yellow button and the blue button on the remote control at the same time for more than 5 seconds 00 RET is displayed on the front panel display 2 Repeatedly press 1 right on the remote control until 01 OID is displayed on the front panel display 3 Press OK o...

Page 19: ...tupTM may have the mark Easy Network Setting OK RETURN Easy Network Setting Settings and tests for connection required for home network and the Internet will be conducted First please select a connection mode LAN cable connection Connect a LAN cable to the unit and select Wired Wireless LAN connection Select Wireless Current setting Wired Wired Wireless Search for wireless network The available wi...

Page 20: ...thorised access Refer to the operating instructions of the hub or router If you set Home Network function or TV Anywhere to On the setting for Quick Start is fixed to On Do not use this unit to connect to any wireless network for which you do not have usage rights During automatic searches in a wireless network environment wireless networks SSID for which you do not have usage rights may be displa...

Page 21: ...ic 58 Home Network Miracast 63 DLNA Client 61 Media Renderer 62 Wi Fi Direct 63 Setup Basic Settings 70 You can change the unit s settings of Tuning Sound Display Connection Network etc TV Anywhere 64 Wallpaper Personalize a background of the FUNCTION MENU To select from among Photo register photo in advance 55 BD Video Data Management 38 Media Disc SD Card USB device USB HDD Copy Video Copy Menu ...

Page 22: ...US again To hide the information screen Press EXIT To switch between the current programme and the next programme Press 2 1 To switch to another channel Press 3 4 then press OK When STTL appears in channel information left Press STTL Press again to hide subtitle When Multi Audio appears in channel information left 1 Press OPTION 2 Select Multi Audio in Digital TV Menu then press OK 3 Select the de...

Page 23: ...en adjust the volume with 2 1 Audio Description may not be available depending on the type of audio format When Dolby D Dolby D Dolby True HD DTS DTS HD MPEG or HE AAC is set to Bitstream the Audio Description may not work Set them to PCM 74 Digital Audio Output You can also set Audio Description active in the Setup menu 71 When TEXT appears in channel information 22 1 Press TEXT 2 Use 3 4 2 1 num...

Page 24: ...ary save stops in the following cases When switching to other channels or other screen When two programmes simultaneous recording is started When performing PAUSE LIVE TV or REWIND LIVE TV for more than 8 hours This may vary depending on the HDD free space These functions do not work in the following cases When the clock is not set When two programmes simultaneous recording is started While copyin...

Page 25: ...function These functions will be made available through a firmware update As of October 2015 For details please check the following website http panasonic jp support global cs This site is in English only A network connection and related access settings are required 16 19 Minimum broadband speed of 2 Mbps required for catch up and on demand services Freeview Play Side Bar 1 While watching a progra...

Page 26: ...mp Now OK Channel Back OK TV Guide Tue 22th Dec 2015 20 42 Monday 21th Sunday 20th 19th AD 1 XXXXXXXXXXX XXXXXXXXXXX XXXXXXXXXXX XX XX XX XXXX XXXX XXXX XXXXXXXXXXX 1 XXXXXXXXXX e g Freeview Play Catch Up 1 While watching a programme Press OK to display the Freeview Play Side Bar 2 Select the Catch Up then press OK You can directly access Freeview Play Catch Up by pressing e g 3 Select the item th...

Page 27: ...ecording Time This unit can record two programmes being broadcasted at the same time 1 Select the channel to record 2 Press REC MODE and select the conversion mode then press OK This unit will record the programmes in DR mode once and then automatically convert to the selected recording mode while this unit is in standby Recording mode 9 The conversion mode set here is used as an initial value for...

Page 28: ...ted with the same settings as at the start of recording Operation during Recording To check the recording programme e g While recording two programmes simultaneously To stop recording When recording two programmes Following screen appears 1 Select the programme then press OK 2 Select Yes then press OK To pause recording REC2 HDD REC1 OTR AUTO 5 Recording programme displayed on the TV Recording pro...

Page 29: ... 2 Select Edit Recording then press OK 3 Go to step 3 on page 31 Manually programming timer recording Some options cannot be changed when Guide Link is effective 30 32 Select the programme to cancel then press the REC Select Single Timer Recording or Series Timer Recording 30 then press OK You can enter up to 32 programmes within a month in advance Each daily or weekly programme is counted as one ...

Page 30: ...he on screen instructions Red Delete Green Record repeat programme Yellow Exit Overlapping is not resolved Timer programme overlaps with others Some part or all of programmes may not be recorded completely OK RETURN Overlapped Timer Recording Keep Change Please delete unnecessary programme to resolve OK RETURN Overlapped Timer Recording New Programme Confirm Delete Repeat THU 11 10 23 15 23 45 TWO...

Page 31: ...isappears Recommended cannot be selected if there is no recommended programme 1 Press PROG CHECK 2 Select New Timer Programme then press OK To confirm and edit the timer programme Refer to To confirm and edit a timer programme 33 Operation during Recording Refer to Operation during Recording 28 Recording recommended programme SAT 14 03 19 45 20 00 Recommendation List Manually programming timer rec...

Page 32: ...WED 07 01 Day Date Stop 8 00 9 00 Start Title Name DR OFF Mode OFF Conv Subtitles HDD RETURN OK Category DateorWeekly e g Timer recording from channel information 2 Display the channel information of a programme to record Switch the programme with 2 1 Switch the channel with 3 4 Notes on timer recording When the programme recorded in DR mode is converted the audio content and subtitle language wil...

Page 33: ...Press STATUS Channel Name Schedule Mode Space OK RETURN Page Up Page Down Turn Timer Off Total 3 32 Timer Recording 30 30 DR HDD TUE 06 01 2015 8 05 Delete Info Resolve overlap New Timer Programme MON 13 01 MON 13 01 10 00 11 50 11 00 11 45 11 30 1 00 8 00 10 45 MON 13 01 TUE 07 01 DR HG DR DR OK OK Guide Guide e g Screen icons F Red Timer recording standby is activated Grey Timer recording standb...

Page 34: ... screen right To play video files Select Video MP4 Xvid MKV then press OK The video list screen appears 36 4 Select the title then press OK Contents on HDD Recorded programmes can be played OK RETURN Video AVCHD Recorded Programmes Video MP4 Xvid MKV Photo Music Video Menu screen e g 1 Tab 35 2 Programme type 3 AVCHD tab e g Time Remaining 45h54m DR HDD Page Select Copy Grouped Titles Start Time P...

Page 35: ...e information Title restricted by Child Lock List 71 PIN is required to play Title has been recorded in Series timer recording Title has been recorded in Series timer recording and has not yet been played Titles cannot be copied to the disc in high definition quality mode DR HG HX HE HL HM any more Titles can be copied to the disc in high definition quality mode DR HG HX HE HL HM once Recording di...

Page 36: ...cted titles are bundled to form a group Release Grouping All the titles in the group are released Remove Selected titles are removed from the group Playback from Chapter View 1 Select the title then press OPTION 2 Select Chapter View then press OK e g HDD 3 Select the chapter then press OK Press OK to start playing from the selected chapter Selected chapter can be edited via OPTION Press RETURN to...

Page 37: ... While stopped Press FUNCTION MENU 2 Select Media then press OK 3 Select the media then press OK e g About screen icons 36 e g Showing Information Select the title then press STATUS For data files 9 only 1 Insert the media AVCHD If the menu screen is not displayed Press PLAY a1 3 1 2 When the Video Menu screen or menu screen etc appears Select the item or title then press OK Repeat this step if ne...

Page 38: ...Management in Setup then press OK 3 Select Delete BD Video data then press OK 4 Select Yes then press OK 5 Select Start then press OK 6 Press OK You can restrict Internet access when BD Live functions are used 72 BD Live When Pure Sound mode is set to On this unit cannot use BD Live functions 72 Video Menu AVCHD screen Video Menu AVCHD RETURN Date Day Time Title Name Rec time 0 30 41 Page 01 03 Pa...

Page 39: ... restart play The speed increases up to 5 steps Xvid MKV MP4 and MPEG2 Slow motion is not effective BD V AVCHD DVD R SD Forward direction SLOW SEARCH 5 only While paused press 2 2 or 1 1 Each press shows the next frame Press and hold to change in succession forward or backward Press PLAY a1 3 1 to restart play Xvid MKV MP4 and MPEG2 Frame by frame is not effective BD V AVCHD DVD R SD Forward direc...

Page 40: ...OK Select the desired audio with Multi Audio in the Basic Operation menu 68 HDD USB_HDD For recorded titles 9 BD RE BD R 1 Press STTL 2 Press OK 3 Select On or Off then press OK If you want to switch the subtitle language select it in the Basic Operation menu 68 BD V DVD V Xvid and MKV Display with Subtitle Settings in the Basic Operation menu 68 HDD USB_HDD For recorded titles 9 BD RE BD R 1 Pres...

Page 41: ...be enabled when Signal Format is set to 2D to 3D Manual 3D effects set manually below Graphic Display Level Adjust the 3D position for the playback menu or message screen etc Please refrain from viewing 3D images if you do not feel well or are experiencing visual fatigue In the event that you experience dizziness nausea or other discomfort while viewing 3D images discontinue use and rest your eyes...

Page 42: ...ailable for recording BD R DVD R R Available space does not increase even after the contents are deleted DVD RW RW Available recording space increases only when the last recorded title is deleted 1 On the Video Menu screen Select the title Multiple selection left 2 Press OPTION 1 Select Enter Title Name in Edit then press OK 2 Refer to Entering text 84 Deleting recorded titles Deleting during play...

Page 43: ...en press OK appears when setting the protection Partial deleting 1 Select Partial Delete in Edit then press OK 2 Press OK at the start point and end point to delete You can find the desired point by using play search etc 39 3 Select Continue then press OK Select Next then press OK to delete other sections Up to 20 sections can be set go to step 2 4 Select Delete then press OK 5 Press BACK RETURN C...

Page 44: ...will be recorded if they are included in the title and will not be recorded if they are not included Off Audio Description will not be recorded Timing Now Conversion begins immediately after step 4 Timer recording will not be performed during conversion During standby Conversion will be performed after the unit is switched to standby mode File Conversion Convert the selected title by changing its ...

Page 45: ...not perform the Resume play function 39 with the title HDD 2 Press DELETE 3 Select Yes then press OK All files in the folder will be deleted Editing chapters Edit Chapter Mark Select the point where you want to start a new chapter while viewing the title 1 Press the green button 2 Press OK at the point you want to divide Repeat this step 3 Press BACK RETURN to go to Chapter View screen To delete t...

Page 46: ...titles 9 only 2 The title in the source media will be deleted 3 The recording mode cannot be changed 1 Insert or connect the media 2 Press FUNCTION MENU 3 Select Recorded Programmes or Video AVCHD in Contents on HDD then press OK 4 Select the title Multiple selection Select the title then press the yellow button A check mark is displayed Repeat this step Press the yellow button again to cancel 5 P...

Page 47: ...e Not Viewed Copy Channel Date Title Name Titles All Page Up Page Down Movie 9 00 0h01m DR 1 2 90 Sport 04 10 04 10 29 10 29 10 Remaining space The order of copying Setting the copying options Automatic Standby after Copy On This unit is turned to standby mode when it is not operated for approximately 5 minutes after completing copy Subtitles Automatic Subtitles will be recorded if they are includ...

Page 48: ...pying titles with copying list HDD USB_HDD HDD BD RE BD R RAM DVD R DVD RW R RW USB_HDD BD RE BD R BD RE BD R RAM RW HDD 1 HDD USB_HDD 1 Press FUNCTION MENU 2 Select Copy Menu in Copy Video then press OK Except HDD USB_HDD 1 Insert a disc The menu screen appears 37 2 Select Copy then press OK 2 Set the copy direction 1 Select Copy Direction then press 1 right 2 Set Source and Destination 3 Press 2...

Page 49: ...er the titles are selected 50 Editing the copying list 4 Press OK 5 Press 2 Data size of each title Data size recorded to the copy destination RETURN Time Rec time Size 1360 MB 0 30 DR 9 00 Page Select Page Up Page Down HDD OK 001 003 Create List Grouped Titles 01 01 15 00 1 02 01 9 30 1 03 01 10 00 1 03 01 18 30 1 04 01 2 00 1 05 01 11 00 1 05 01 15 00 1 06 01 3 45 1 06 01 9 00 1 01 01 9 00 1 Dat...

Page 50: ... select titles Move Change the order of items on the copying list Select the title to move before step 2 Select the destination then press OK Copy 1 2 3 Cancel All Copy Direction Copy Mode Create List 4 Other Settings Start Copying HDD Disc HG Create copy list 2 Page 01 01 Size Destination Capacity No Size New item Total 2 Title 50 1 00 2 00 01 0 30 DR 25 0 30 DR 25 02 RETURN OK Screen icons Title...

Page 51: ...ed to The titles copied to the discs cannot be copied again Notes for copying High speed copy Original title s recording mode Media DR HG HX HE HL HM XP SP LP EP FR DVD RAM only It is impossible to copy at high speed in the following cases HDD BD RE BD R Copying radio programmes HDD DVD R DVD RW R RW Titles that contain many deleted segments HDD R RW Titles recorded in EP mode and FR recordings 5 ...

Page 52: ...ress 2 6 Select Yes then press OK When the Top Menu is displayed Select the title you want to start copying then press OK After the last title on the disc has finished playing the Top Menu is recorded until the set time is reached 01 02 01 Mouse 03 02 04 Cattle Copying Title Playing HDD BD RE BD R RAM DVD R DVD RW R RW 1 Play back the title to copy Multiple audio subtitle displayed during playback...

Page 53: ...nce etc 3D video may not be copied correctly 2 Press the blue button 3 Select Yes then press OK To stop copying Press and hold BACK RETURN for 3 seconds All files in the folder will be copied The names of folders files cannot be changed after they are copied to the HDD We recommend that you create a folder with an easily identifiable name on a PC or other device first and use the folder to perform...

Page 54: ...D To display or exit the Calendar screen Press PAUSE 1 For data files 9 only JPEG MPO 2 BD RE only 3 RAM DVD R R only 1 HDD 1 Press FUNCTION MENU 2 Select Photo in Contents on HDD then press OK Except HDD 1 Insert or connect the media The menu screen appears 37 2 Select View Photos then press OK 2 Select the folder then press OK 3 Select the photo then press OK Press 2 1 to display the previous or...

Page 55: ... not available during the 3D photo playback Information Information shooting date etc is shown Wallpaper A photo being played back is registered as wallpaper on the FUNCTION MENU screen 21 Slideshow settings Start Slideshow Interval Set up the time until the next photo is to display Transition Effect Effect for the next photo to display can be set Repeat Play Music Selection Select background musi...

Page 56: ...ple folders or photos Press the yellow button when selecting the folder or photo A check mark is displayed Repeat this step Press the yellow button again to cancel 1 2 Enter Folder Name Refer to Entering text 84 Combine Folders HDD Delete Folder Move Photos HDD Select Move to new folder or Move to another folder then press OK If Move to another folder is selected set a destination folder Delete Ph...

Page 57: ...d copying the photos HDD BD RE RAM SD BD RE RAM DVD R R CD HDD SD USB_HDD USB SD HDD BD RE RAM 1 On the Photo Menu screen To copy the folder Select the folder then press the blue button To copy the photo 1 Select the folder then press OK 2 Select the photos to copy then press the blue button To select multiple folders or photos Press the yellow button when selecting the folder or photo A check mar...

Page 58: ...t Play or Random in Basic Operation menu 68 Refer to Sound Effects in Sound Effect Settings Sound Settings menu 69 To play music continuously even if the Power off link works Refer to Playing music continuously even after turning off power to the TV 67 Playing music CD CD DA Playing music file on the media 2 Select Play Copy Music then press OK The music list screen appears 3 Select the item then ...

Page 59: ...on again to cancel While copying no other operations can be performed Timer recordings will not proceed All files in the folder will be copied Up to 1000 files can be copied at once HDD 1 On the music list screen Select the file or folder Multiple selection left 2 Press DELETE 3 Select Yes then press OK All files in the folder will be deleted Copying 1 On the music list screen Select the file or f...

Page 60: ...regarding the connection and operation of equipment connected via a network refer to their respective operating instructions DLNA function compatible software should be installed Preparation Perform Home Network settings 78 2 Select the item then press OK The DLNA compatible device that is to be connected to the unit should be connected to the same hub or broadband router as the unit The titles wi...

Page 61: ...quipment connected via the network is displayed This list can be updated by pressing the red button 4 Select the item then press OK Menu structure will be different depending on the equipment Select the contents by repeating the operation Convenient functions can be used by pressing OPTION depending on the contents Control Panel Control Panel is displayed once the playback starts Press OK if the C...

Page 62: ...press OK 3 Operate the Digital Media Controller compatible equipment To exit from Home Network Media Renderer screen Press BACK RETURN Playable contents Container Video codec Audio codec Example of file extension Recorded programmes XP SP LP EP FR 1 MPEG2 Dolby Digital Linear PCM mpg mpeg Recorded programmes DR HG HX HE HL HM 1 MPEG2 H 264 MPEG HE AAC Dolby Digital m2ts ts AVCHD 1 H 264 Dolby Digi...

Page 63: ...of your TV Compatible with AndroidTM device ver 4 2 and above and Miracast certified For information on whether the smartphone etc supports Miracast contact the manufacturer of the device 1 Press FUNCTION MENU 2 Select Miracast in Home Network then press OK 3 Operate the Miracast compatible equipment To exit from Miracast Press EXIT Using Smart Home Networking DLNA with Wi Fi Direct 5 When selecte...

Page 64: ...t Press EXIT Some features of websites or content of the service may not be available This unit does not support 4K streaming If using slow Internet connection the video may not be displayed correctly A high speed Internet service with a speed of at least 6 Mbps is recommended The services through Network Service are operated by their respective service providers and service may be discontinued ei...

Page 65: ...istered USB HDDs cannot be used with devices other than this unit Certain non confirmed USB HDDs cannot be used with this unit If a problem occurs with the USB HDD please contact the manufacturer of the device USB connection cable optional 1 Connect the video camera or insert the media Make the video camera ready for data transfer The menu screen appears 37 4 Select the title then press the yellow...

Page 66: ...DD Disc USB HDD then press OK 4 Select USB HDD Disconnection then press OK 5 Select Yes then press OK 6 Disconnect the USB HDD from this unit If the registering screen appears when connecting the USB HDD go to step 5 1 Press FUNCTION MENU 2 Select Basic Settings in Setup then press OK 3 Select Settings for USB HDD in HDD Disc USB HDD then press OK 4 Select USB HDD Registration then press OK 6 When...

Page 67: ...e power of the unit on and to play music continuously When the unit is directly connected to an amplifier receiver 1 While playing music Press OPTION 2 Select TV Power Off then press OK Sound may be discontinued for several seconds when the power to the TV is turned off You can operate this unit using the TV remote control Refer to the operating instructions of the TV about the buttons that you ca...

Page 68: ...e eng MPEG Subtitle Settings On Audio Channel LR Repeat Play Off Aspect Normal Menu Item Setting Basic Operation Soundtrack Show or change the soundtrack Multi Audio Switch in the case of multiple audio Audio Channel Change audio LR L R during playback Subtitle Settings Turn the subtitle on off and change the language depending on the media Subtitle Settings Subtitle Style Subtitle Position Subtit...

Page 69: ...ing when the content is distorted if Auto is selected Film Select this if the edges of the film content appear jagged or rough when Auto is selected However if the video content is distorted then select Auto Reset to Default Picture Settings Restores the default settings of the Picture Settings menu Sound Effect Settings DSD Decode Sampling Frequency Select the settings that suit your sound qualit...

Page 70: ...reen button Basic Settings OK RETURN Tuning HDD Disc USB HDD Picture Sound Display Connection Network Others To delete channels Select the channel in the Favourites column then press OK Yellow Delete all channels To change the name of the Favourites list 1 Press the red button in the Favourites column 2 Press 3 4 2 1 to select a character then press OK Repeat this step to enter other characters Re...

Page 71: ... to obtain the information automatically when a new DVB channel is added Child Lock You can restrict the viewing playback recording of channels unsuitable to children PIN is required to change 22 Child Lock List 1 Select the channel to lock 2 Press OK is displayed Press OK again to cancel Green Lock all channels Yellow Unlock all channels Player PIN Control You can restrict the viewing of Digital ...

Page 72: ... Child Lock List 71 Titles with icon in Video Menu etc PIN is required to change 22 Pure Sound mode You can enjoy movies or music in an environment more suitable for viewing by stopping the rotation of the HDD when playing back commercial BD Videos DVD Videos or music CDs If On is selected timer recording does not start while playing back BD Video DVD Video or music CD Settings for Recording REWIN...

Page 73: ...lt in HDD Format HDD Formatting deletes all contents on the built in HDD and they cannot be restored Check carefully before proceeding Settings for USB HDD USB HDD Registration Register the USB HDD 66 USB HDD Disconnection This function puts the USB HDD in a state in which it can be safely disconnected 66 USB HDD Management Press and hold OK for 3 seconds to show the following settings Delete all ...

Page 74: ...ion 44 Copying to a DVD R DVD RW R and RW Digital Audio Output PCM Down Conversion Select how to output audio with a sampling frequency of 96 kHz On Signals are converted to 48 kHz Choose when the connected equipment cannot process signals with a sampling frequency of 96 kHz Off Signals are output as 96 kHz The signals will be converted to 48 kHz regardless of the setting in the following cases Wh...

Page 75: ...ideo and cannot be played back correctly you may be able to play it by changing the setting 3D Playback Message Set to display or hide the 3D viewing warning screen TV Aspect Set to match the type of TV connected 16 9 When connected to a 16 9 widescreen TV 4 3 Side picture is trimmed for 16 9 picture The pictures may be shown in the letterbox style depending on the content Letterbox Black bands ap...

Page 76: ... Video Secondary Audio Off Dolby Atmos is a trademark of Dolby Laboratories Contents Type Flag If Automatic is selected the optimal method of playback depending on the TV e g cinema will automatically be selected only when the TV supports Contents Type Flag VIERA Link Select Off when you do not want to use VIERA Link Network Easy Network Setting Press OK to start Easy Network Setting 19 Network Se...

Page 77: ...ervice Depending on contents this function will not work Select Off when the audio is warped Notice Displays the terms of service for the cloud services You must agree to the terms of use for the Internet function and the privacy policy TV Anywhere Settings You must register to a service to use this function 64 TV Anywhere When you control this unit from a smartphone or a tablet away from home set...

Page 78: ...the name Refer to Entering text 84 Conversion Setting for DLNA On When playing back on DLNA Client compatible equipment this setting reduces the chance of break ups and freezing of an image by lowering the image quality When this is set to On switching the channel or starting playback will take longer Resolution Setting for DLNA When Conversion Setting for DLNA is set to On select the image qualit...

Page 79: ...8 Copying from media other than HDD with Video Menu Copying titles with copying list RF OUT Aerial Signal Set whether to output the broadcasting signal from RF OUT or not while in standby mode When Quick Start is not activated If On is selected the broadcasting signal is output from this unit Networked Standby This unit can be turn on using a wake up message sent from the network device in the hom...

Page 80: ... You can set change the PIN for parental control 1 Enter your 4 digit PIN with the number buttons 2 Enter the new 4 digit PIN with the number buttons Make a note of PIN in case you forget it e g 3 Press OK OK Remember the PIN PIN Entry 0 0 0 0 System Update Software Update in Standby When you set this unit to standby mode software firmware updates 81 are downloaded automatically at the time you ha...

Page 81: ...if the timer recording is scheduled to start the downloading will be performed at the next opportunity For the latest firmware update information please refer to the Panasonic support site below You can also download the latest software firmware from the following website http panasonic jp support global cs Compatible 4K content MP4 MOV 4K 24p 25p and 30p bit rate up to 100 Mbps resolution up to 3...

Page 82: ... OK 3 Press OK RAM To stop formatting Press BACK RETURN You can cancel formatting if it takes more than 2 minutes The disc must be reformatted if you do this Do not disconnect the AC mains lead while formatting This can cause the disc or the card unusable The contents are deleted when you format a disc or card even if you have set protection RAM Formatting normally takes a few minutes however it m...

Page 83: ... AC mains lead while finalising This can cause the disc unusable You cannot cancel finalising Finalising takes up to 15 minutes Up to 60 minutes in case of DVD R DL and R DL Depending on the disc it may take longer than displayed on the confirmation screen approximately four times longer You cannot finalise discs recorded on other manufacturer s equipment DVD R DVD RW R If you finalise discs recor...

Page 84: ... depends on the media HOLD function Entering text 1 Select a character then press OK Repeat this step to enter other characters Green Enter Alphanumeric characters Red Enter Symbols Yellow Enter Other Characters such as umlaut mark or accent grave PAUSE Delete a character PLAY a1 3 1 Shift the alphabetic characters on the screen to upper case lower case 2 Press STOP Finish Writing appears then the...

Page 85: ...Cambodian 7577 Catalan 6765 Chinese 9072 Corsican 6779 Croatian 7282 Czech 6783 Danish 6865 Dutch 7876 English 6978 Esperanto 6979 Estonian 6984 Faroese 7079 Fiji 7074 Finnish 7073 French 7082 Frisian 7089 Galician 7176 Georgian 7565 German 6869 Greek 6976 Greenlandic 7576 Guarani 7178 Gujarati 7185 Hausa 7265 Hebrew 7387 Hindi 7273 Hungarian 7285 Icelandic 7383 Indonesian 7378 Interlingua 7365 Ir...

Page 86: ...e unit s safety devices may have been activated Reset the unit as follows 1 Press Í I on the main unit to switch the unit to standby If the unit does not switch to standby press Í I on the main unit for about 3 seconds The unit is forcibly switched to standby Alternatively disconnect the AC mains lead wait one minute then reconnect it 2 Press Í I on the main unit to switch it on If the unit still ...

Page 87: ...by changing the following settings 3D Type of 3D Settings 75 Signal Format 41 3D settings during playback Check the settings of the connected TV When a non 3D compatible amplifier receiver is connected between this unit and a TV 3D video is not output 15 When HDMI Audio Output is set to Off 3D video may not be output correctly 76 No sound Distorted sound Check the connections 14 Check the settings...

Page 88: ...come unusable We cannot offer any guarantee regarding lost programmes An unusually loud sound is coming from the rotating disc If you want copy to perform more quietly select Normal Silent in Disc Speed for High Speed Copy 73 The time recorded on the disc and the available time shown do not add up DVD R R If you record or edit many times the remaining capacity is reduced and then recording or edit...

Page 89: ...witch the unit to standby mode and turn it on again Photos do not play back normally The images that were edited on the PC such as Progressive JPEG etc may not play back 8 This unit does not recognize the USB device correctly If inserted during playback the USB device may not be recognized by this unit Disconnect and reconnect the USB device If it still does not recognize the connection switch the...

Page 90: ...ipment depending on the equipment Following titles may not be played back A title with access restriction A title with incompatible format Playback via DLNA compatible equipment may not be performed when this unit is in the following conditions While playing back a BD Video While simultaneously performing High speed copy and recording While displaying the Basic Settings menu While executing functi...

Page 91: ...cording starts 81 When FINISH is displayed update of the software firmware has completed The media is not supported The software firmware is being updated You cannot operate the unit until the update is complete 81 The unit is hot The unit switches to standby for safety reasons Wait for about 30 minutes until the message disappears Install or place this unit with good ventilation When a disc is no...

Page 92: ... LAN Standard compliance IEEE802 11a b g n Frequency range 2 4 GHz 5 GHz band Security WPA WPA2 Encryption type TKIP AES Authentication type PSK WEP 64 bit 128 bit LASER specification Class 1 LASER Product Wave length 405 nm BDs 661 nm DVDs 783 nm CDs Laser power Depending on the content being recorded the recording time may become shorter than indicated DR mode This unit supports WPA and WPA2 enc...

Page 93: ...ours 24 hours HM 684 hours 17 hours 30 min 35 hours Recording Mode HDD BD RE BD R 1 TB Single Layer 25 GB Dual Layer 50 GB XP 215 hours 5 hours 15 min 10 hours 30 min SP 431 hours 10 hours 30 min 21 hours LP 862 hours 21 hours 42 hours EP 1724 hours 42 hours 84 hours Recording Mode DVD RAM DVD R DVD RW R RW 4 7 GB DVD R DL R DL 8 5 GB Single sided 4 7 GB Double sided 9 4 GB XP 1 hour 2 hours 1 hou...

Page 94: ...h rights in that content Panasonic has no authority to and does not grant you that permission and explicitly disclaims any right ability or intention to obtain such permission on your behalf It is your responsibility to ensure that your use of this or any other device complies with applicable copyright legislation in your country Please refer to that legislation for more information on the relevan...

Page 95: ...nts in accordance with your national legislation By disposing of them correctly you will help to save valuable resources and prevent any potential negative effects on human health and the environment For more information about collection and recycling please contact your local municipality Penalties may be applicable for incorrect disposal of this waste in accordance with national legislation Note...

Page 96: ... in a personal activity and or was obtained from a video provider licensed to provide AVC Video No license is granted or shall be implied for any other use Additional information may be obtained from MPEG LA L L C See http www mpegla com This product is licensed under the VC 1 patent portfolio license for the personal and non commercial use of a consumer to i encode video in compliance with the VC...

Page 97: ...layReady End User Notices Content owners use Microsoft PlayReady content access technology to protect their intellectual property including copyrighted content This device uses PlayReady technology to access PlayReady protected content and or WMDRM protected content If the device fails to properly enforce restrictions on content usage content owners may require Microsoft to revoke the device s abi...

Page 98: ...5 D Delete Music 59 Photo 56 Video 42 Delete BD Video data 38 Disc Finalise 83 Format 82 Media information 6 Protection 82 DVD Video 37 E Easy setting 17 Entering text 84 F Favourites 70 Finalise 83 Format Disc 82 HDD 73 SD Card 82 USB HDD 73 Freeview 30 Freeview Play Catch Up 26 FUNCTION MENU 21 H HDD Format 73 Media information 6 L Language code list 85 M Manual Tuning 71 Media Renderer 62 Menu ...

Page 99: ...nt 61 Media Renderer 62 Server 60 Software Firmware Update 81 T Timer recording 29 Top Menu 83 Create Top Menu 83 Troubleshooting guide 86 Messages 91 Tuning Channel List 70 Channel Sorting by Region 71 Child Lock 71 Manual Tuning 71 Signal condition 71 TV Anywhere 64 TV Guide Operation 25 Timer recording 29 TV System 75 U USB HDD Cancellation of all USB HDD Registrations 73 Disconnection 66 73 Fo...

Page 100: ...te service from Freeview it is important for Freeview customers to retune from time to time How do I re tune my Freeview Box The below instructions are a quick reference If you have any problems check your instruction manual or ask a friend or family member to show you how Alternatively go to your local electrical retailer contact your manufacturer or visit freeview co uk retune Re tuning only tak...

Reviews: