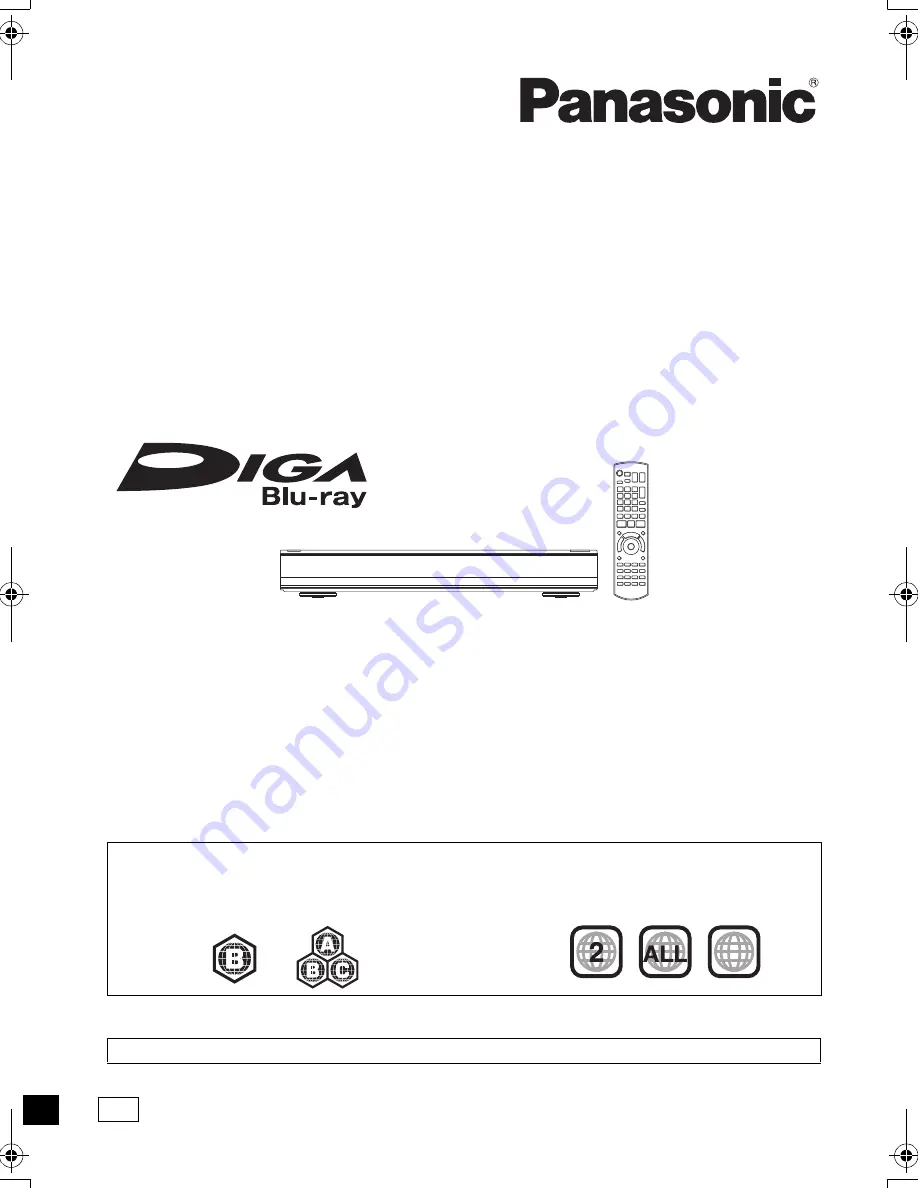
background image

VQT4G51

Operating Instructions

Thank you for purchasing this product.
For optimum performance and safety, please read these instructions carefully.
Please keep this manual for future reference.

• This Blu-ray Disc recorder is equipped with two CI/CI Plus slots. It can receive encrypted and 

free-to-air DVB-C services.

Blu-ray Disc™ Recorder

Model No. 

DMR-BCT820

DMR-BCT720
DMR-BCT721

Region management information
BD-Video:

This unit can play BD-Video discs 
supporting the region code 

“B”

.

DVD-Video:

This unit can play DVD-Video discs 
supporting the region number 

“2”

 or 

“ALL”

.

e.g.,

e.g.,

3

5

2

Web Site: http://www.panasonic-europe.com

until 
2012/09/05

EG

DMR-BCT820_720_721EG_eng.book  1 ページ  2012年8月1日 水曜日 午後5時18分

Summary of Contents for Diga DMR-BCT720

Page 1: ... recorder is equipped with two CI CI Plus slots It can receive encrypted and free to air DVB C services Blu ray Disc Recorder Model No DMR BCT820 DMR BCT720 DMR BCT721 Region management information BD Video This unit can play BD Video discs supporting the region code B DVD Video This unit can play DVD Video discs supporting the region number 2 or ALL e g e g 3 5 2 Web Site http www panasonic europ...

Page 2: ...ing to qualified service personnel Do not let metal objects fall inside this unit Do not place heavy items on this unit AC mains lead To reduce the risk of fire electric shock or product damage Ensure that the power supply voltage corresponds to the voltage printed on this unit Insert the mains plug fully into the socket outlet Do not pull bend or place heavy items on the lead Do not handle the pl...

Page 3: ...s Remote control N2QAYB000759 1 pc Batteries for remote control 2 pcs AC mains lead 1 pc RF coaxial cable 1 pc Indemnity concerning recorded content Panasonic does not accept any responsibility for damages directly or indirectly due to any type of problems that result in loss of recording or edited content data and does not guarantee any content if recording or editing does not work properly Likew...

Page 4: ...for BD Live discs 43 Operation during play 44 General operations 44 3D video playback 46 Editing video Deleting recorded titles 48 Editing recorded titles 49 Copying video Copying titles 54 Copying from media other than HDD with DIRECT NAVIGATOR 56 Copying titles with copying list 56 Notes for copying 59 Copying a finalised disc 60 Copying Title Playing 61 Copying HD Video AVCHD to the DVD R in Hi...

Page 5: ... aspect ratio of the screen 104 HOLD function 104 Troubleshooting Troubleshooting guide 105 General operation 105 Displays 106 TV screen and video 106 Sound 107 Recording timer recording and copying 108 Play 109 Edit 109 Photo 110 Music 110 USB 110 TV Guide 110 Broadcast 110 VIERA Link 111 Network 111 Reset 111 Messages on the unit s display 112 When you experience problems with Easy Network Setti...

Page 6: ...AVCHD 3D JPEG MPO 3D photo Music copied from music CD MP3 External HDD 1 2 3 80 USB_HDD Video BD Video BD V Video BD RE 1 BD RE Video AVCHD AVCHD 3D 4 JPEG MPO 3D photo BD R BD R Video AVCHD AVCHD 3D 4 DivX MKV DVD Video 5 DVD V Video DVD RAM 1 RAM Video JPEG MPO 3D photo AVCHD 4 DVD R DVD R DL DVD R Video AVCHD 4 DivX JPEG MKV MP3 MPO 3D photo DVD RW 1 DVD RW Video AVCHD 4 R R DL R Video AVCHD 4 ...

Page 7: ... be output only through the HDMI output terminal The producer of the disc can control how discs are played So you may not always be able to control play as described in these operating instructions Read the disc s instructions carefully With certain recording states and folder structures the play order may differ or playback may not be possible When this unit works as a DLNA client 75 following co...

Page 8: ...Recording can be done with reduced recording volume in HD quality Recording can be done with reduced recording volume in SD quality Quality Quality as the broadcast High definition 1 Standard definition Recordable media Multiple audio Record all multiple audio Record only one audio Subtitles Teletext Can be recorded Can be recorded only one subtitle or teletext 2 Surround audio Surround audio as t...

Page 9: ...o play on this unit DVD RW Recorded in DVD Video Recording DVD VR format This unit can play back and copy to HDD This unit does not support editing or recording It is possible to record and edit with DVD Video DVD V format by formatting discs with this unit Recording may not be possible to discs which were used for recording on other equipment Play on other players BD RE BD R When these discs cann...

Page 10: ...ondensation on the disc wipe with a damp cloth and then wipe dry Notes for the USB devices Notes for the SD cards Compatible SD card SD Memory Card from 8 MB to 2 GB FAT12 and FAT16 formats SDHC Memory Card from 4 GB to 32 GB FAT32 format SDXC Memory Card 48 GB 64 GB exFAT format Using miniSD card or microSD card Mini type and micro type cards can also be used but must be used with adaptor cards o...

Page 11: ...ains socket The HDD is a temporary storage device The HDD is not an everlasting storage device It is recommended to save the recorded content on a disc or to keep the original data or CDs that they were copied from If you notice a problem with the HDD such as repetitive strange sounds immediately save backup all content and request service If you continue using the HDD with a problem the unit or t...

Page 12: ...te unwanted recorded titles timer programmes photos or music 48 B TV operation buttons 21 C Channel select 27 Change pages in the DIRECT NAVIGATOR screen etc D Show the VIERA Connect screen 77 E Switching to the radio channel list 27 F Start up a video communication 77 G Exit the menu screen H Show the TV Guide screen 28 I Show the FUNCTION MENU screen 26 J Return to previous screen K Show subtitl...

Page 13: ...s unit receives incoming call etc of the video communication 77 4 Remote control signal sensor Angle Approx 20 up and down 30 left and right Distance Within approx 7 m in front of the unit 5 Open close disc tray 6 Disc tray 7 USB port 8 SD card slot When removing the SD card press on the centre of the card and pull it straight out 9 Stop Start play CI Common Interface slot 14 CI module eject butto...

Page 14: ... with the number buttons Notes for recording of an encrypted broadcast 33 You can insert one or two different CAMs with Smart Cards into this unit Be sure to insert the CI module horizontally into the slot Insert the CAM and the Smart Card with the correct direction When removing the CI module press the CI module eject button and pull it straight out For more details see the manual of the CAM and ...

Page 15: ...ed to the USB HDD or disc below Copying is prohibited CI Plus copy protection When the CI Plus compatible broadcast is recorded the title may be copy protected There are following types of the copy protection depending on the broadcast Copying not restricted Depending on the programme you can copy only to USB HDD BD RE BD R or DVD RAM CPRM compatible discs only The original title will be deleted O...

Page 16: ...d the appropriate operating instructions Basic connections AV1 VIDEO RGB S VIDEO AV2 EXT TV VIDEO S VIDEO HDMI VHF UHF RF IN This unit s rear panel Household mains socket AC 220 to 240 V 50 Hz Cooling fan AC mains lead supplied Connect only after all other connections are complete HDMI cable TV s rear panel RF coaxial cable supplied To CATV terminal CATV coaxial cable ...

Page 17: ...is unit you need to connect a 21 pin Scart cable 19 You cannot connect this unit to DVI devices that are incompatible with HDCP Depending on the device images may not display properly or at all when connecting with a DVI HDMI switching cable Audio cannot be output If you are connecting to a TV that is only compatible with 2 channel audio output audio with 3 channels or more will be down mixed and ...

Page 18: ...ot display ARC compatible on the HDMI terminal it is necessary to connect the TV and the amplifier receiver with a digital audio cable to enjoy the TV audio on the amplifier receiver Amplifier receiver connections HDMI terminal HDMI HDMI IN HDMI OUT HDMI cable Amplifier receiver TV HDMI cable ARC compatible ARC compatible 3D programmes can be played back when this unit is connected to a 3D compati...

Page 19: ...on Do not connect video signals through a video recorder Due to copy guard protection the picture may not be displayed properly DIGITAL AUDIO OUT terminal AUDIO OUT terminal AV1 VIDEO RGB S VIDEO AV2 EXT TV VIDEO S VIDEO OPTICAL IN Amplifier receiver Optical digital audio cable AV1 VIDEO RGB S VIDEO AV2 EXT TV VIDEO S VIDEO COAXIAL IN Amplifier receiver Coaxial cable AV1 VIDEO RGB S VIDEO AV2 EXT ...

Page 20: ...to http panasonic jp support global cs This site is in English only The unit is not compatible with public wireless LAN services Network connection LAN cable connection Broadband router etc Internet LAN ethernet cable Wireless LAN connection Precautions of Wireless LAN connection The following limits are in place regarding the usage of this unit You must be aware of these limits before using this ...

Page 21: ...AUDIO 10s 60s RECMODE INPUTSELECT REC TEXT STTL CHAPTER MANUALSKIP REWINDLIVETV INTERNET LASTVIEW F U N C T I O N M E N U TV operation buttons Brand Code Brand Code AIWA 35 BENQ 58 59 BRANDT 10 15 CENTREX 66 CURTIS 05 DESMET 05 ELEMIS 05 FINLUX 61 Panasonic 01 02 03 04 AKAI 27 30 BEKO 05 71 72 73 74 BUSH 05 DAEWOO 64 65 DUAL 05 FERGUSON 10 34 FISHER 21 MITSUBISHI 05 19 20 47 METZ 05 28 79 MIVAR 24...

Page 22: ...art at the initial power on 3 Follow the on screen instructions and make the following settings Language Country To change channel allocation restart Auto Setup in Setup menu and change channel number allocation selection 89 Frequency Auto The preset frequency will be automatically used Manual Enter the frequency specified by your cable provider with number buttons Network ID Auto The preset Netwo...

Page 23: ...nfirm that channels have been tuned correctly Refer to Using Channel List 27 If tuning is cancelled partway through it may not be possible to receive the channels Restart setup again On It will go into the Power Save in Standby mode On Timer Set the start and stop time and then press OK Power Save in Standby is activated when the set time comes Off It is possible to start quickly from standby mode...

Page 24: ...e network and the Internet will be conducted First please select a connection mode LAN cable connection Connect a LAN cable to the unit and select Wired Wireless LAN connection Select Wireless Current setting Wired Wired Wireless Connection method to wireless access point Search for wireless network 1 Select Search for wireless network then press OK 2 The available wireless networks will be displa...

Page 25: ...fer to the operating instructions of the hub or router Home Network function setting can be set only when you selected Off for Power Save in Standby in Easy Setting 23 step 7 Even if you set Home Network function to Off it is possible to set to On later 86 99 Do not use this unit to connect to any wireless network for which you do not have usage rights During automatic searches in a wireless netwo...

Page 26: ...ck Contents Video 39 Video AVCHD 43 Video MP4 42 Photo 62 Music 66 Top Menu 42 Menu 42 TV Guide 28 Timer Recording 36 Copy Copy Video 56 Copy Video AVCHD to DVD R 61 Network Home Network DLNA Client 75 Home Network Media Renderer 76 Network Service 77 View 27 View is displayed when this unit is connected with the TV that supports HDAVI Control 2 or later 82 Others Ext Link Standby 71 Playlists 42 ...

Page 27: ...ed If prompted to enter a PIN code enter the set PIN code with the number buttons Set according to the CI module 86 97 Common Interface You can select from the list of channel names 2 Select the channel then press OK To skip unwanted channels The channel is skipped next time you select the channel 1 While watching the broadcast to skip press DEL 2 Press OK You can select the skipped channel with t...

Page 28: ...ogramme Press STATUS Channel information appears 1 Current Category 2 Encrypted broadcast 3 Set timer 37 4 Subtitle 5 Teletext 6 Multiple audio Sub Channel 7 Data service Hybrid Broadcast Broadband TV 29 To show detailed information Press STATUS again To hide the information screen Press EXIT To switch between the current programme and the next programme Press 2 1 To switch to another channel Pres...

Page 29: ... show the data service Not all the data services are available depending on the broadcaster Some functions of the data service may be deactivated during recording When appears in channel information 28 2 Use 3 4 2 1 number buttons or colour buttons etc according to on screen instructions You can change the display mode 95 Teletext You can switch the screen mode Refer to Switching the aspect ratio ...

Page 30: ...or REWIND LIVE TV for more than 8 hours This may vary depending on the HDD free space These functions do not work in the following cases When the clock is not set When setting clock manually Copy protected title Copying is prohibited only 15 While recording two programmes simultaneously While copying While watching a programme being recorded When a radio programme is selected While watching an enc...

Page 31: ...Press REC Recording starts REC1 or REC2 will light on the unit s display HG HX HE HL HM XP SP LP EP Off DR Conversion Mode Setting OK RETURN HDD Remain DR m h High Definition Data Size Large Small Large Small Standard Definition 4 Select Automatic Stop then press OK One touch recording OTR Recording stops automatically when the programme ends You can also select Recording Time or Continuous record...

Page 32: ...ode will be deleted once the conversion is completed Conversion will take about the same time as the recorded duration When the HDD does not have enough remaining space conversion will not start Conversion is stopped when this unit is turned on Conversion will start from the beginning again once the unit is switched to standby mode The conversion will not start if the timer recording is scheduled ...

Page 33: ...ecord two programmes simultaneously Simultaneous rec and play 1 Press DIRECT NAVIGATOR If the DIRECT NAVIGATOR screen of photo or music is displayed press the red button then select VIDEO is displayed on the recording programme 2 Select the title then press OK Page Select OPTION Start Time Prog Type Rec Time Play RETURN PHOTO MUSIC Channel Date Title Name Delete Drama 9 00 0 10 DR 04 10 04 10 29 1...

Page 34: ...before decryption will be deleted once decryption is completed When the HDD does not have enough remaining space decryption will not start This function is stopped when this unit is turned on Decryption will start from the beginning again once the unit is turned off The decryption will not start if the timer recording is scheduled within the time required for the decryption When a decryption fails...

Page 35: ... timer recording work successfully 86 92 Timer Record Start Buffer Timer Record Stop Buffer 1 On the TV Guide screen Press the blue button 2 Select the item then press OK To return to the previous TV Guide list Select All DVB Channels in step 2 Category may not be assigned correctly depending on the programme information This operation will only record to built in HDD This unit can record two prog...

Page 36: ...amming timer recording 3 Select the items and change the items right Timer recording options 4 Press OK The timer programme is stored Channel Name Schedule Mode Space OK RETURN Page Up Page Down Turn Timer Off Total 0 32 Timer Recording 30 30 DR HDD SUN 01 01 2012 8 05 Delete New Timer Programme Info Channel Name Schedule Mode Space Timer Recording 30 30 DR HDD SUN 01 01 2012 8 05 New Timer Progra...

Page 37: ... of Preferred Language 90 Audio for HG HX HE HL HM Recording 95 When the programme recorded in DR mode is converted teletext will not be recorded Data service will not be recorded Only when recording broadcast in other than DR mode This unit will record in the DR mode once and then convert to the selected mode automatically during standby If the title has not been decrypted conversion will start a...

Page 38: ...1 10 00 11 50 11 00 11 45 11 30 1 00 8 00 10 45 SAT 07 01 SUN 01 01 DR HG DR DR OK OK e g Screen icons F Red Timer recording standby is activated Grey Timer recording standby is deactivated Currently recording programme A part or all of the programme will not be recorded since the programme is overlapping The HDD is full Copy protected programme It was not recorded The recording of the programme w...

Page 39: ...ion number 1 USB HDD Grouped Titles VIDEO Social Economic Sport AVCHD Movie Not Viewed DIRECT NAVIGATOR All USB HDD Playback Last Stopped Beginning Where do you want to start playback from OK RETURN DIRECT NAVIGATOR VIDEO screen Screen icons Currently recording programme Protected title Title was not recorded due to recording protection t Title cannot be played When data is damaged etc Title is co...

Page 40: ...ot display even with 3D programmes when a broadcast programme is recorded Recorded in 1080 50p contents Recorded in 1080 60p contents Title is restricted by Child Lock List or Parental Rating 90 Recording did not complete as the timer recording has started Tab Switching to the PHOTO or MUSIC screen Showing Information Switching the appearance 1 Press OPTION 2 Select Grouped Titles or All Titles th...

Page 41: ...se then press OK Remove Selected titles are removed from the group Select Remove then press OK Changing the group name Playback from Chapter View Regarding chapters You can divide a title into multiple chapters Each section between the division points Chapter Marks becomes a chapter Chapter Creation HDD This unit can create chapters automatically while recording broadcasting 92 If the title is rec...

Page 42: ...e menu screen is not displayed display it by performing the following operation 1 While stopped Press OPTION 2 Select Drive Select then press OK 3 Select the media then press OK e g Screen icons 1 Insert the media Depending on the type of the media play starts from the specified position or the screen appears AVCHD If the menu screen is not displayed Press PLAY a1 3 1 2 When the DIRECT NAVIGATOR s...

Page 43: ...ions and the operating method may vary with each disc please refer to the instructions on the disc You can restrict Internet access when BD Live functions are used 86 91 BD Live DIRECT NAVIGATOR screen Playback from Chapter View 1 Select the title then press OPTION 2 Select Chapter View then press OK 3 Select the chapter then press OK Regarding chapters Refer to Regarding chapters 41 DIRECT NAVIGA...

Page 44: ...s Press SLOW SEARCH 6 or SLOW SEARCH 5 Press PLAY a1 3 1 to restart play The speed increases up to 5 steps R RW Up to 3 steps DivX MKV MP4 and MPEG2 USB Audio is not heard during all levels search Press PAUSE Press PLAY a1 3 1 to restart play While paused press SLOW SEARCH 6 or SLOW SEARCH 5 Press PLAY a1 3 1 to restart play The speed increases up to 5 steps DivX MKV MP4 and MPEG2 USB Slow motion ...

Page 45: ...inute 3 Press OK Play skips the specified time BD V DVD V DivX MKV AVCHD MP4 and MPEG2 USB TIME SLIP is not effective BD V DVD V 1 Press OPTION 2 Select Playback Menu then press OK 3 Select Top Menu Pop up Menu or Menu then press OK Press SKIP or SKIP 9 HDD USB_HDD It will not skip the title But the titles in the grouped titles will be skipped 40 SKIP 9 is not effective for encrypted titles HDD US...

Page 46: ...ing the aspect ratio of the screen 104 Preparation Connect 3D compatible TV to this unit 16 Perform the necessary preparations for the TV Play back following the instructions displayed on the screen Perform the following settings as necessary 3D BD Video Playback It is also possible to play back 3D discs in 2D conventional video 86 91 3D Type If 3D video cannot be played back in 3D you may be able...

Page 47: ...tch to 2D video due to changes in resolution etc Check the 3D setting on the TV 3D video might not output the way it is set in HDMI Video Format 96 and 24p Output 96 It may display as Side by Side when playback of the 3D video is started 3D settings during playback Signal Format Original Keep original picture format Side by side 3D picture format comprising of left and right screens 2D to 3D Conve...

Page 48: ... the DIRECT NAVIGATOR screen Select the title 2 Press DEL 3 Select Delete then press OK Time Remaining 45 54 DR HDD Page Select Copy Grouped Titles VIDEO OPTION Start Time Prog Type Rec time Play RETURN PHOTO MUSIC Social Economic Sport AVCHD Movie Not Viewed DIRECT NAVIGATOR Channel Date Title Name Titles All Delete Page Up Page Down Movie 9 00 0 01 DR Start Time Prog Type Rec time Channel Date T...

Page 49: ...button again to cancel 1 Select Delete Title then press OK 2 Select Delete then press OK 1 Select Enter Title Name in Edit then press OK 2 Refer to Entering text 104 3 Select the item then press OK e g Edit has several functions Time Remaining 45 54 DR HDD Page Select Copy Grouped Titles VIDEO OPTION Start Time Prog Type Rec time Play RETURN PHOTO MUSIC Social Economic Sport AVCHD Movie Not Viewed...

Page 50: ...otection 1 Select Set up Protection or Cancel Protection in Edit then press OK 2 Select Yes then press OK appears when setting the protection Partial deleting 1 Select Partial Delete in Edit then press OK 2 Press OK at the start point and end point to delete You can find the desired point by using play search etc 44 3 Select Continue then press OK Select Next then press OK to delete other sections...

Page 51: ...s a thumbnail You can find the desired point by using play search etc 44 3 Select Finish then press OK Changing programme type of title Select the item for prog type change OK RETURN Sport Prog Type 1 No Prog Type Prog Type 2 Set Cancel No Prog Type Prog Type 3 Change Prog Type File Conversion 1 Select File Conversion in Edit then press OK e g 2 Set the conversion options then press OK Recording M...

Page 52: ...guage will be selected according to the following settings Multi Audio of Preferred Language 90 Subtitles of Preferred Language 90 Audio for HG HX HE HL HM Recording 95 When converted 3D information may not be retained In titles with the Auto Renewal Recording function 36 set a programme may be unintentionally converted while in During standby 3 Select the item then press OK Convert Delete The ori...

Page 53: ...he original title or not then press OK Yes The original title will be deleted to save HDD capacity after decryption No The original title remains after decryption 3 Select Start then press OK Decryption starts Decrypting appears during decryption When a title that is copy protected One generation copy is permitted is selected the original title will be deleted after decryption 15 When a decryption...

Page 54: ... 1 The title in the source media will be deleted 2 The recording mode cannot be changed About CI Plus restriction 15 1 Insert or connect the media 2 Press DRIVE SELECT to select HDD then press DIRECT NAVIGATOR If the DIRECT NAVIGATOR screen of photo or music is displayed press the red button then select VIDEO 3 Select the title then press the yellow button A check mark is displayed Repeat this ste...

Page 55: ...les that will be copied to the disc in normal speed Titles that cannot be copied HDD Page Select Copy Grouped Titles BD RE Remain Start Time Prog Type Rec time OK RETURN Social Economic Sport AVCHD Movie Not Viewed Copy Channel Date Title Name Titles All Page Up Page Down Movie 9 00 0 01 DR 1 2 90 OPTION Remaining space The order of copying Setting the copying options Automatic Standby after Copy ...

Page 56: ... Copy Mode Create List Start Copying HDD High Speed RETURN OK 2 Press OK to start copying BD DVD Copying titles with copying list HDD USB_HDD 1 2 HDD BD RE BD R RAM DVD R DVD RW R RW USB_HDD BD RE BD R BD RE BD R RAM RW HDD 1 HDD USB_HDD 1 Press FUNCTION MENU 2 Select Copy Video in Copy then press OK Except HDD USB_HDD 1 Insert a disc The menu screen appears 42 2 Select Copy then press OK 2 Set th...

Page 57: ...he order of the copying list If you want to specify the order edit the copying list after the titles are selected 58 Editing the copying list 4 Press OK 5 Press 2 Data size of each registered title Size Data size recorded to the copy destination RETURN Time Rec time Size 1360 MB 0 30 DR 9 00 Page Select OPTION Page Up Page Down HDD OK 001 003 Create List Grouped Titles 01 01 15 00 1 02 01 9 30 1 0...

Page 58: ...ed titles are deleted Select the title then press the yellow button before step 2 Repeat this step to select titles Select Yes then press OK Move Change the order of items on the copying list Select the title to move before step 2 Select the destination then press OK Copy 1 2 3 Cancel All Copy Direction Copy Mode Create List 4 Other Settings Start Copying HDD BD DVD HG Create copy list 2 Page 01 0...

Page 59: ...tles Protected titles HD Video AVCHD SD Video MPEG2 Notes for copying Notes for high speed copy Original title s recording mode Media DR HG HX HE HL HM XP SP LP EP FR DVD RAM only It is impossible to copy at high speed in the following cases HDD BD RE BD R Copying radio programmes HDD DVD R DVD RW R RW Copy including a title that was recorded to HDD with Rec for High Speed Copy set to Off 92 Title...

Page 60: ...l DVD Video on sale have been treated to prevent illegal copying and cannot be copied If play does not begin automatically press PLAY a1 3 1 to start Notes for copying to the DVD RAM Notes for copying 3D programmes About maintaining the chapter mark The position of the chapter might shift slightly Maximum number of chapters on the disc is limited BD RE BD R RAM DVD R DVD RW Approx 1000 R RW Approx...

Page 61: ...on Exceeding 18 Mbps 1080 50p or 1080 60p Without the AVCHD information video recorded with certain non Panasonic equipment video copied to the HDD after copying it to BD R or BD RE once etc 3D video will become 2D Copying Title Playing HDD BD RE BD R RAM DVD R DVD RW R RW 1 Play back the title to copy Multiple audio subtitle and Teletext displayed during playback will be copied Select the multipl...

Page 62: ...reen HDD Press PAUSE 3 Select the photo then press OK Press 2 1 to display the previous or next photo 1 2 HDD Page Select Slideshow Calendar PHOTO OPTION 03 01 2010 29 10 2010 25 02 2011 15 03 2011 0002 0002 Copy OK RETURN VIDEO MUSIC 8 12 18 4 DIRECT NAVIGATOR Date Event Name Photos All Album 1 Album 2 Album 3 Album 4 3D Page Up Page Down CH Tab DIRECT NAVIGATOR PHOTO screen Screen icons Tab Albu...

Page 63: ...FT e g The information of the rotated photos will not be stored depending on the media This function is not available during the 3D photo playback Information Information shooting date etc is shown Slideshow settings Start Slideshow You can start a slideshow Interval You can set up the time until the next photo is to display Transition Effect Effect for the next photo to display can be set Repeat ...

Page 64: ...how Calendar PHOTO OPTION 03 01 2010 29 10 2010 25 02 2011 15 03 2011 0002 0002 Copy OK RETURN VIDEO MUSIC 8 12 18 4 DIRECT NAVIGATOR Date Event Name Photos All Album 1 Album 2 Album 3 Album 4 3D Page Up Page Down CH Edit Add to Album HDD 1 Select the destination album then press OK 2 Press OK Combine Events HDD Select Yes then press OK Remove from Album HDD Select Yes then press OK Enter Album Na...

Page 65: ...D SD SD USB HDD BD RE RAM 1 On the DIRECT NAVIGATOR screen To copy the event Select the event then press the blue button To copy the photo 1 Select the event then press OK 2 Select the photos to copy then press the blue button To select multiple events or photos Press the yellow button when selecting the event or photo A check mark is displayed Repeat this step Press the yellow button again to can...

Page 66: ...er recordings will not proceed Music CD All tracks in the CD will be recorded MP3 All tracks in the folder will be recorded Tracks recorded to HDD in one operation will be regarded as one album DVD R only Music CD Insert the disc If connected to the network the unit starts accessing the Gracenote Database and searches for the information 20 24 If search results indicate that multiple informations ...

Page 67: ...um 2 Select the album then press OK 3 Select the track then press OK My Favourites Tracks registered in My Favourites Select the track then press OK Registering a track to the My Favourites Up to 99 tracks While the track list screen is displayed Select the track then press the green button DIRECT NAVIGATOR Music Menu MUSIC OK RETURN Please select to access music Artists Frequently Played Albums T...

Page 68: ...show Press RETURN How to create the photo album Refer to Add to Album 64 To play music continuously even if the Power off link works Refer to Playing music continuously even after turning off power to the TV 82 Operations during music play Stop Pause Search Skip Repeat Play Random Sound Effects Displaying photos Slideshow To change the photos to display 1 While slideshow playing Press OPTION 2 Sel...

Page 69: ...sts Select the playlist then press OK New playlist cannot be added Up to 999 tracks can be registered to each playlist 1 On the DIRECT NAVIGATOR screen Press OPTION e g 2 Select the item then press OK e g while selecting an Album Editing operations will change depending on the screen DIRECT NAVIGATOR Music Menu MUSIC OK RETURN Please select to access music Artists Frequently Played Albums Total Tr...

Page 70: ...e with DVD R DL and R DL Recording mode FR 1 Press DRIVE SELECT to select the recording drive 3 Press FUNCTION MENU 4 Select Flexible Recording via AV input in Others then press OK 5 Set the recording time 6 Start play on the other equipment 7 Select Start then press OK To stop recording partway Press STOP To show the remaining time Press STATUS Simultaneous operation is not possible while Flexibl...

Page 71: ...rogramme is in high definition During Ext Link Standby mode or recording you cannot select external input other than AV2 This function does not work when TV System is set to NTSC 96 This function does not work while recording two programmes simultaneously with timer recording The beginnings of recordings may not be recorded correctly in some cases Programmes are recorded as one title on this unit ...

Page 72: ...l be divided into titles every 99th scene and copied USB connection cable optional Copying HD Video AVCHD BD RE BD R RAM DVD R DVD RW R RW HDD SD USB video camera etc HDD BD RE BD R 1 Connect the video camera or insert the media The menu screen appears 42 Make the video camera ready for data transfer 4 Select the title then press the yellow button A check mark is displayed Repeat this step Press t...

Page 73: ...t Yes then press OK to start copying To stop copying Press and hold RETURN for 3 seconds Copying SD Video MPEG2 1 Connect the video camera or insert the media Make the video camera ready for data transfer The menu screen appears 42 2 Select Copy Video MPEG2 then press OK To change the copy destination and the titles to copy 56 Copying titles with copying list ...

Page 74: ...ilable for this function You cannot play back music from the playback equipment Client For details regarding the connection and operation of equipment connected via a network refer to their respective operating instructions DLNA function compatible software should be installed For more details refer to the Panasonic website left Preparation When DLNA Server Function is deactivated make the setting...

Page 75: ...lect Home Network DLNA Client in Network then press OK A list of equipment connected via the network is displayed This list can be updated by pressing the red button 4 Select the item then press OK Menu structure will be different depending on the equipment Select the contents by repeating the operation Convenient functions can be used by pressing OPTION depending on the contents Control Panel Con...

Page 76: ...ss OK 3 Operate the Digital Media Controller compatible equipment To exit from Home Network Media Renderer screen Press RETURN Depending on the contents and the connected equipment playback may not be possible Items displayed in grey on the display cannot be played back by this unit This unit can be played back via connected equipment only when controlled using Digital Media Controller Depending o...

Page 77: ... VIERA Connect are operated by their respective service providers and service may be discontinued either temporarily or permanently without notice Therefore Panasonic will make no warranty for the content or the continuity of the services All features of websites or content of the service may not be available Some contents may be inappropriate for some viewers Some contents of VIERA Connect may on...

Page 78: ...ress OK 3 Press OK RAM To stop formatting Press RETURN You can cancel formatting if it takes more than 2 minutes The disc must be reformatted if you do this The contents are deleted when you format a disc or card even if you have set protection RAM Formatting normally takes a few minutes however it may take up to a maximum of 70 minutes Do not disconnect the AC mains lead while formatting This can...

Page 79: ...fter formatting You cannot cancel finalising Finalising takes up to 15 minutes Up to 60 minutes in case of DVD R DL and R DL Do not disconnect the AC mains lead while finalising This can render the disc unusable Depending on the disc it may take longer than displayed on the confirmation screen approximately four times longer You cannot finalise discs recorded on other manufacturer s equipment DVD ...

Page 80: ...h optional USB HDD Only one USB HDD can be connected at the same time Do not connect additional HDDs using a USB hub For details about connection method refer to the instructions supplied with the USB HDD Please use the following procedure to disconnect Disconnecting without following this procedure may result in the loss of recorded content from the USB HDD or the internal HDD 1 Press FUNCTION ME...

Page 81: ...ion of all USB HDD Registrations 93 If you register a USB HDD all the content already recorded on the USB HDD will be deleted It is not possible to play back the content on the USB HDD whose registration has been cancelled You can check the registration number of the USB HDD on the DIRECT NAVIGATOR 39 Registering the USB HDD 5 Select Yes then press OK If you have already registered eight USB HDDs ...

Page 82: ...en you set the TV to standby mode this unit is also automatically set to standby mode Power off link function does not work when recording copying etc VIERA Link The following operations make it possible to keep the power of the unit on and to play music continuously When the unit is directly connected to an amplifier receiver 1 While playing music Press OPTION 2 Select TV Power Off then press OK ...

Page 83: ... manuals for other manufacturers equipment supporting VIERA Link function VIERA Link HDAVI Control based on the control functions provided by HDMI which is an industry standard known as HDMI CEC Consumer Electronics Control is a unique function that we have developed and added As such its operation with other manufacturers equipment that supports HDMI CEC cannot be guaranteed These functions may n...

Page 84: ...multiple audio Subtitle Language Select the subtitle language in the case of multiple languages Subtitle Style Select the subtitle style recorded on the disc Angle Change the number to select an angle Audio Channel Change audio LR L R during playback With some discs you may only be able to make changes using the menus on the disc Repeat Play Select the item which you want to repeat Random Select w...

Page 85: ...rrected to sharp and crisp picture quality when it is output as 1080i 1080p from the HDMI terminal Progressive Select the method of conversion for progressive output to suit the type of title being played Auto Automatically detects the film and video content and appropriately converts it Video Select this setting when the content is distorted if Auto is selected Film Select this if the edges of th...

Page 86: ...VB Tuning Favourites Edit 88 Channel List 89 Auto Setup 89 Manual Tuning 90 Update Channel List 90 Child Lock 90 Child Lock List 90 Parental Rating 90 Signal Condition 90 Preferred Language 90 New Channel Message 90 HDD Disc USB HDD Settings for Playback 91 3D BD Video Playback 91 Soundtrack 91 Subtitles 91 Menu 91 Play Video AVCHD on BD RE BD R 91 BD Live 91 BD Video Parental Control 91 DVD Video...

Page 87: ...A Link 97 AV1 Output 97 AV2 Settings 97 AV2 Input 97 Ext Link 97 Common Interface 97 Network Easy Network Setting 98 Network Settings 98 LAN Connection Mode 98 Wireless Settings 98 Connection Setting 98 Double Speed Mode Setting 2 4GHz 98 IP Address DNS Settings 98 Proxy Server Settings 98 Network Service Settings 98 Lock 98 Automatic Volume Control 98 Home Network Settings 99 Home Network functio...

Page 88: ...k then press OK Blue Select the Category To change the order of the channels list 1 Select the channel in the Favourites column to move then press the green button 2 Select the new position then press the green button Favourites Editor Select block Selectfavourites RETURN Add Select channel All DVB Channels Favourites1 Selectcategory 123 ABC Sorting 123 Page down Page up 1 2 3 5 7 8 6 4 To delete ...

Page 89: ...Page down Auto Setup You can restart the Auto Setup 22 1 Select Yes then press OK If the country selection screen appears Select the country then press OK 2 Select the channel number allocation then press OK 3 Select the items and change the items For details consult the cable provider Search Mode Free Channels Search for free channels only All Channels Search for all channels Scan Mode Quick Scan...

Page 90: ... Rating You can restrict the viewing and recording of channels unsuitable to children Set a ratings level to limit broadcast viewing and playback Follow the on screen instructions Signal Condition You can check the quality and strength of signals Press CH W X to select the channel Signal Quality Red bar Bad Yellow bar Poor Green bar Good When the signal is too strong red bar reduce the CATV signal...

Page 91: ... when you select Other 101 Language code list Play Video AVCHD on BD RE BD R When playing a disc which contains the following two video formats High Definition video AVCHD recorded by the Panasonic video camera etc High Definition quality video recorded on this unit select which video to play back On Play the High Definition video AVCHD Off Play the High Definition quality title BD Live You can re...

Page 92: ... LP EP or FR with the Rec for High Speed Copy set to Off In the following cases aspect is fixed to 4 3 DVD R DVD RW When the recording mode is set to EP or FR recordings 5 hours or longer mode When recording to a R R DL and RW Chapter Creation HDD Set the Chapter Creation method Even if Automatic is selected depending on the programme to be recorded the chapter may not be created correctly Rec for...

Page 93: ...ing Cancellation of all USB HDD Registrations This function cancels the registrations of all the USB HDDs registered on this unit Only do this if you are going to dispose of this unit Before operation perform USB HDD Disconnection left and remove the USB HDD It is not possible to play back the content from a USB HDD whose registration has been cancelled Picture Still Mode Select the type of pictur...

Page 94: ...or M2 when File Conversion 51 Copying to a DVD R DVD RW R and RW Rec for High Speed Copy is set to On 92 Digital Audio Output PCM Down Conversion Select how to output audio with a sampling frequency of 96 kHz On Signals are converted to 48 kHz Choose when the connected equipment cannot process signals with a sampling frequency of 96 kHz Off Signals are output as 96 kHz The signals will be converte...

Page 95: ...mation Select the time until the channel information screen 28 disappears automatically Unit s Display Changes the brightness of the unit s display If Automatic is selected the display turns dark during play and disappears when the unit is in standby mode While using this mode the standby power consumption can be reduced When Power Save in Standby is set to On or On Timer 99 this function is fixed...

Page 96: ...only select items compatible with the connected equipment If Automatic is selected the output resolution best suited to the connected TV 1080p 1080i 720p or 576p 480p is automatically selected To enjoy High Quality Video up converted to 1080p you need to connect the unit to 1080p compatible HDTV If this unit is connected to an HDTV through other equipment it must also be 1080p compatible 24p Outpu...

Page 97: ...nts Type Flag VIERA Link Select Off when you do not want to use HDAVI Control AV1 Output Set according to the terminal of the connected TV AV2 Settings AV2 Input Set according to the output from the external equipment Ext Link Set Ext Link 1 when a Set Top Box which transmits a control signal via the 21 pin Scart cable is connected This setting cannot be made when TV System is set to NTSC 96 Commo...

Page 98: ...ion settings and status are displayed Connection status Current status Network name SSID Wireless type 802 11n 2 4GHz 20MHz Authentication type Encryption type AES Connected Reception IP Address DNS Settings Check the connection of the network or set the IP address and DNS To set the IP address and DNS 1 Set IP Address Auto assignment and DNS IP Auto assignment to Off 2 Select the item then press ...

Page 99: ...t be enabled when Automatic is selected in Registration type for remote devices above The maximum number of equipment that can be registered is 16 Others Standby Settings Power Save in Standby On It will go into the Power Save in Standby mode On Timer Power Save in Standby is activated when the set time comes If the clock has not been set Power Save in Standby is activated at all hours Off It is p...

Page 100: ...mote controls with IR6 printed at the bottom when the remote control code of this unit is set to BD 4 BD 5 or BD 6 IR6 BLU RAY DISC RECORDER IR6 IR6 Clock If the time is not set correctly use the settings listed in the method below Automatic This unit usually obtains time and date information from digital broadcasts Time Zone When the time is not correct set Time Zone GMT 6 to 6 Manual Setting 1 S...

Page 101: ...77 Arabic 6582 Armenian 7289 Assamese 6583 Aymara 6589 Azerbaijani 6590 Bashkir 6665 Basque 6985 Bengali Bangla 6678 Bhutani 6890 Bihari 6672 Breton 6682 Bulgarian 6671 Burmese 7789 Byelorussian 6669 Cambodian 7577 Catalan 6765 Chinese 9072 Corsican 6779 Croatian 7282 Czech 6783 Danish 6865 Dutch 7876 English 6978 Esperanto 6979 Estonian 6984 Faroese 7079 Fiji 7074 Finnish 7073 French 7082 Frisian...

Page 102: ... it will automatically update the software firmware It may take up to a few hours until the update is completed depending on the network environment The timer recording always takes preference over the software firmware download if the timer recording is scheduled to start the downloading will be performed at the next opportunity For the latest firmware update information please refer to the Panas...

Page 103: ...iew playback or record cannot be performed while upgrading the CAM Any buttons on the remote control or the unit cannot be used while upgrading the CAM If the timer recording is started CAM software upgrade is cancelled to start recording For details refer to your CAM s operating instructions or consult your dealer CI Plus compatible CAM software firmware update 1 When notification is displayed on...

Page 104: ...rol Press and hold OK and RETURN simultaneously until X HOLD appears on the unit s display To cancel the HOLD function Press and hold OK and RETURN simultaneously until X HOLD disappears Entering text 1 Select a character then press OK Repeat this step to enter other characters Press the red button or green button to select character type and press OK To delete a character Select the character in ...

Page 105: ...h the unit on or to standby mode there may be an unexpected sound General operation The unit does not work Check the connections 16 One of the unit s safety devices may have been activated Reset the unit as follows 1 Press Í I on the main unit to switch the unit to standby If the unit does not switch to standby press Í I on the main unit for about 3 seconds The unit is forcibly switched to standby...

Page 106: ...This phenomenon may occur depending on the TV setting when Power Save in Standby is set to Off Depending on the TV this phenomenon may be prevented by reconnecting to a different HDMI input terminal Picture does not appear with the HD quality although HD setting was made The pictures are output with 576p 480p depending on the title The screen changes automatically If Screen Saver is set to On the ...

Page 107: ...ound Check the connections 16 Check the settings of the connected TV etc Press AUDIO to select the audio 29 46 To output audio from a device connected with an HDMI cable set HDMI Audio Output to On 86 96 Cannot change audio channel You cannot change the audio channel if Digital Audio Output is set to Bitstream 94 The images do not appear on the TV The picture is distorted during play or video will...

Page 108: ...ant copy to perform more quietly select Normal Silent in BD DVD Speed for High Speed Copy 86 92 The time recorded on the disc and the available time shown do not add up DVD R R If you record or edit many times the remaining capacity is reduced and then recording or editing may be disabled Available disc space display may be different from actual Encrypted titles cannot be decrypted Depending on th...

Page 109: ...BD Video Cannot play the disc on other players BD RE BD R When these discs cannot be played back on other Blu ray Disc players etc e g title recorded with HE AAC audio format convert the recording mode to play them back 51 File Conversion DVD R DVD RW R RW The disc must be finalised or have a Top Menu created 79 DVD R The disc created in AVCHD format can only be played back on AVCHD compatible equ...

Page 110: ... and reconnect the USB device If it still does not recognize the connection switch the unit to standby mode and turn it on again USB devices connected using a USB extension cable other than a dedicated one or a USB hub may not be recognized by this unit The TV Guide information is not displayed properly Set the clock correctly 86 100 Clock Some broadcast may not send programme information There wa...

Page 111: ...yed back A title with access restriction A title with copy protection Copying is prohibited 15 A title with audio only format A title with incompatible format An encrypted title Playback via DLNA compatible equipment may not be performed when this unit is in the following conditions While playing back a BD Video While simultaneously performing High speed copy and recording While displaying the Set...

Page 112: ...to this disc The disc may be damaged Use a new disc Displayed when the unit is started and is switched to standby mode There was a power failure or the AC plug was disconnected while the unit was on The unit is carrying out its recovery process Wait until the message disappears There are already 32 timer programmes Delete unnecessary timer programmes 38 The USB device is drawing too much power Rem...

Page 113: ...nit to standby mode Now press Í I on the main unit again to turn the unit on The HOLD function is activated 104 There is something unusual The service number displayed after H and F depends on the unit s condition Reset the unit as follows 1 Disconnect the plug from the household mains socket wait a few seconds then reconnect it 2 Press Í I to turn the power on The unit may be fixed Request servic...

Page 114: ...etting Fail 3 Connection to gateway Fail 1 LAN cable connection or Wireless setting Pass 2 IP address setting Pass 3 Connection to gateway Fail 1 LAN cable connection or Wireless setting Pass 2 IP address setting Home network available 3 Connection to gateway Fail Easy Network Setting Internet Connection Test Display Check the following Cannot find the server B019 Primary DNS and Secondary DNS set...

Page 115: ...pin 1 Vp p 75 S Video in AV2 21 pin 1 Vp p 75 Video out AV1 AV2 21 pin Video Out pin jack 1 Vp p 75 S Video out AV1 21 pin 1 Vp p 75 RGB out AV1 21 pin 0 7 Vp p 75 Audio Audio in AV1 AV2 21 pin Full scale 2 0 Vrms at 1 kHz Input impedance More than 10 k Audio out AV1 AV2 21 pin Audio Out L R pin jack Full scale 2 0 Vrms at 1 kHz Output impedance Less than 1 k Digital audio out optical 1 pc Output ...

Page 116: ...rom HDD to BD R in High Speed Copy Region code DVD 2 BD Region B Playable discs BD Video Blu ray 3D BD Live BD ROM Version 2 4 BD RE Ver 2 1 JPEG MPO BD RE DL Ver 2 1 JPEG MPO BD R Ver 1 3 LTH type Ver 1 3 DivX 1 MKV 1 BD R DL Ver 1 3 DivX 1 MKV 1 DVD RAM DVD Video Recording format AVCHD format JPEG MPO DVD R DVD Video format AVCHD format JPEG 2 MPO 2 MP3 2 DivX 2 3 MKV 2 3 DVD R DL DVD Video form...

Page 117: ...Between 34k34 and 8192k8192 pixels Sub sampling is 4 2 2 or 4 2 0 Files JPEG conforming DCF Design rule for Camera File system MPO conforming MPF Multi Picture Format Maximum numbers of folders and files This unit is not compatible with Motion JPEG or Progressive JPEG 1 Includes SDHC SDXC cards Includes miniSDTM cards need a miniSDTM adaptor Includes microSDTM microSDHCTM microSDXCTM cards need a ...

Page 118: ...CM Vorbis and FLAC can be decoded Maximum number of folders 300 folders including the root folder Maximum number of files 200 files MP4 Playable media SD Card USB device MPEG 4 AVC H 264 Up to High Profile Level 4 2 Video resolution Up to 1920k1080 MPEG 4 AAC LC Sampling rate 8 kHz to 48 kHz Number of audio channel 1 or 2 SD Video Standard Definition Playable media SD Card USB device Codec MPEG 2 ...

Page 119: ...f broadcasting High Definition HD quality estimated bit rate is 14 Mbps Standard Definition SD quality estimated bit rate is 5 Mbps Regarding recording time remaining Remaining time in the DR mode is calculated with a bit rate of 14 Mbps But the bit rate differs depending on the broadcast so the displayed remaining time might be different from the actual remaining time Recording Mode HDD BD RE BD ...

Page 120: ...rs 860 hours 42 hours 84 hours Recording Mode DVD RAM DVD R DVD RW R RW 4 7 GB DVD R DL R DL 8 5 GB Single sided 4 7 GB Double sided 9 4 GB XP 1 hour 2 hours 1 hour 1 hour 45 min SP 2 hours 4 hours 2 hours 3 hours 35 min LP 4 hours 8 hours 4 hours 7 hours 10 min EP 6 hours 6 hours 12 hours 6 hours 10 hours 45 min EP 8 hours 8 hours 16 hours 8 hours 14 hours 20 min Regarding recording time remainin...

Page 121: ...raunhofer IIS and Thomson This product is licensed under the AVC patent portfolio license and VC 1 patent portfolio license for the personal and non commercial use of a consumer to i encode video in compliance with the AVC Standard and VC 1 Standard AVC VC 1 Video and or ii decode AVC VC 1 Video that was encoded by a consumer engaged in a personal and non commercial activity and or was obtained fr...

Page 122: ...al non commercial use only You agree not to assign copy transfer or transmit the Gracenote Software or any Gracenote Data to any third party YOU AGREE NOT TO USE OR EXPLOIT GRACENOTE DATA THE GRACENOTE SOFTWARE OR GRACENOTE SERVERS EXCEPT AS EXPRESSLY PERMITTED HEREIN You agree that your non exclusive license to use the Gracenote Data the Gracenote Software and Gracenote Servers will terminate if ...

Page 123: ... without a license from Microsoft or an authorized Microsoft subsidiary b Content providers are using the digital rights management technology for Windows Media contained in this device WM DRM to protect the integrity of their content Secure Content so that their intellectual property including copyright in such content is not misappropriated This device uses WM DRM software to play Secure Content...

Page 124: ...HDD 93 Delete BD Video data 43 DIRECT NAVIGATOR Music 67 Photo 62 Video 39 Disc Delete all titles 78 Finalise 79 Format 78 Media information 6 9 Protection 78 DivX Playback 42 DVD Video Playback 42 DVD Video Parental Control 91 E Easy Network Setting 24 98 Easy setting 22 Edit Music 69 Edit Photo 64 Edit Video 49 Chapter 45 53 Delete 48 49 File Conversion 51 Protection 50 Entering text 104 F Favou...

Page 125: ...E TV 30 92 S SD Card Format 78 Media information 6 10 miniSD microSD 10 SD Video MPEG2 Copy 73 Setting Auto Setup 22 89 Easy Network Setting 24 98 Easy setting 22 Setup menu 86 Connection 96 Display 95 DVB Tuning 88 HDD Disc USB HDD 91 Network 98 Others 99 Picture 93 Sound 94 SkypeTM 77 Slideshow 62 68 Smart Card 14 Smart Home Networking DLNA Client 75 Media Renderer 76 Server 74 99 Software Firmw...

Page 126: ... Europe GmbH Panasonic Testing Centre Winsbergring 15 22525 Hamburg Germany This product is intended to be used in the following countries Austria Belgium Bulgaria Cyprus Czech Republic Denmark Finland France Germany Greece Hungary Ireland Italy Iceland Liechtenstein Luxembourg Malta Netherlands Norway Poland Portugal Romania Slovakia Slovenia Spain Sweden United Kingdom Switzerland This product i...

Page 127: ...that permission and explicitly disclaims any right ability or intention to obtain such permission on your behalf It is your responsibility to ensure that your use of this or any other device complies with applicable copyright legislation in your country Please refer to that legislation for more information on the relevant laws and regulations involved or contact the owner of the rights in the cont...

Page 128: ...ties may be applicable for incorrect disposal of this waste in accordance with national legislation For business users in the European Union If you wish to discard electrical and electronic equipment please contact your dealer or supplier for further information Information on Disposal in other Countries outside the European Union These symbols are only valid in the European Union If you wish to d...

Reviews: