background image

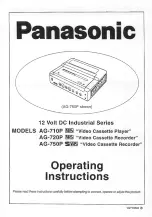
Please read these instructions carefully before attempting to connect,
operate, or adjust this product. Please save this manual.

Basic Operation

Initial Setup

TV Operation

Timer Operation

Advanced Operation

For Your Information

• Initial Setup and Connection Procedures are on pages 8 to 13.

As an 

E

NERGY 

S

TAR

®

 Partner, Matsushita Electric

Corporation of America has determined that this
product or product model meets the 

E

NERGY 

S

TAR

®

guidelines for energy efficiency.

Combination VCR

Operating Instructions

Models No.


AG-513E / AG-520E

Professional / Industrial Video

LSQT0606A

Summary of Contents for AG513E - COMBINATION VCR/TV

Page 1: ...on Advanced Operation For Your Information Initial Setup and Connection Procedures are on pages 8 to 13 As an ENERGY STAR Partner Matsushita Electric Corporation of America has determined that this product or product model meets the ENERGY STAR guidelines for energy efficiency Combination VCR Operating Instructions Models No AG 513E AG 520E Professional Industrial Video LSQT0606A ...

Page 2: ...ding of the lead in wire to an antenna discharge unit size of grounding conductors location of antenna discharge unit connection to grounding electrodes and requirements for the grounding electrode 2 KEEP ANTENNA CLEAR OF HIGH VOLTAGE POWER LINES OR CIRCUITS Locate an outside antenna system well away from power lines and electric light or power circuits so it will never touch these power sources s...

Page 3: ...ance with 15 119 of the FCC rules FCC WARNING Any unauthorized changes or modifications to this equipment would void the user s authority to operate This symbol warns the user that uninsulated voltage within the unit may have sufficient magnitude to cause electric shock Therefore it is dangerous to make any kind of contact with any inside part of this unit This symbol alerts the user that importan...

Page 4: ...ew batteries Do not mix alkaline with manganese batteries Record Playback Time Only use tapes with the mark in this unit SP Standard Play 2 Hours 40 Minutes 1 Hour 2 Hours 5 Hours 20 Minutes 2 Hours 4 Hours LP Long Play 3 Hours 6 Hours 8 Hours SLP Super Long Play Type of Video Cassette Tape Speed Setting T160 T120 T60 V IDEO HEADS MAY NEED CLEANING PLEASE I NSERT HEAD CLEANING CASSETTE OR REFER TO...

Page 5: ...ack a Tape 14 Record On a Tape 14 Copy Your Tapes Dubbing 15 Tape Operation 24 27 Special VCR Features 28 31 V Chip Control Feature 32 35 On Screen Displays OSD 36 Unit Information 37 Before Requesting Service 38 Index 39 TV Operation 16 Picture Adjustment 17 TV Timer Features 18 19 Closed Caption System 20 21 Timer Recording 22 23 Basic Operation Initial Setup TV Operation Timer Operation Advance...

Page 6: ... Location of Controls Remote Control Buttons EJECT button When EJECT is pressed the tape is ejected from Cassette Compartment If EJECT is pressed during recording the unit will not respond to the command ...

Page 7: ... 14 Built In Speaker Phones Jack Page 16 STOP EJECT ACTION CHANNEL UP DOWN TRACKING UP DOWN SELECT UP DOWN VOLUME UP DOWN Page 16 SET BACK SPACE Page 11 POWER Page 9 Audio Video In Jack Page 15 REWIND SEARCH ACTION Page 14 Page 12 Page 14 Page 11 Page 16 Page 37 Page 11 REC ON TIMER ON TIMER PROG TIMER PROG TIMER Front View of the unit and Indicators on the Front Panel Rear View of the unit VHF UH...

Page 8: ... 40 of the NEC that provides guidelines for proper grounding and in particular specifies that the cable ground shall be connected to the grounding system of the building as close to the point of cable entry as practical With a DSS Receiver You can record or view any channel including scrambled channels NOTE Channel selection must be made at the DSS Receiver You cannot view a channel other than the...

Page 9: ...T I ON SET CLOCK DST ON SELECT MONTH 1 If wrong language is set complete Reset all unit Memory Functions steps on page 37 If you use a cable box it must be left on To Make Corrections repeatedly press to move to error then correct 4 When Tuner OFF is selected your unit is automatically in LINE mode When Tuner ON is selected Channel selection Input selection Channel Add Delete etc is available 1 2 ...

Page 10: ...ed to the unit via Audio Video Jacks an RF coaxial cable must also be connected for auto clock set and channel auto set features If for any reason the time is changed manually automatic time correction will not occur If you use a cable box turn it on and select PBS channel in your time zone If Channel Auto Set is not performed CH AUTO SET PROCEEDING appears 2 Press CH to start Channel Auto Set CHA...

Page 11: ...Press to select the month 2 Press to set Likewise set date year time and DST Daylight Saving Time Press ACTION twice to end setup Clock starts To Make Corrections repeatedly press to move to error then correct c PLEASE SET CLOCK BY PRESSING ACTION KEY AUTO CLOCK SET I S I NCOMPLETE SET SELECT END ACT I ON SET CLOCK DST ON SELECT MONTH 1 Channel auto set selects normal TV or Cable channels dependin...

Page 12: ...nish For French Language MAIN MENU TV VCR EX I T CLOCK CH LANGUAGE SET ACT I ON SELECT Channels Clock Press ACTION to display MAIN MENU 3 Press to select EXIT then press ACTION to exit 1 Press to select CH MAIN MENU CLOCK CH SET ACT I ON SELECT VCR TV EX I T LANGUAGE ANTENN ENNA CABLE AUTO SET CHANNEL CAPT I ON WEAK S I GNAL D I SPLAY OFF SELECT SET END ACT I ON SET UP CHANNEL 2 Press ACTION MAIN ...

Page 13: ... I ON SET CLOCK AUTO CLOCK SET MANUAL T I ME ZONE ADJUST 1 SELECT SET END ACT I ON SET CLOCK Add or Delete a Channel TUNER ON only CHANNEL 08 ADDED To add channel Select channel with number keys and press ADD DLT CHANNEL 08 DELETED To delete channel Select channel with CH or number keys and press ADD DLT SET END ACT I ON SET CLOCK DST ON 3 6 2002 WED 12 00PM SE SELECT HOUR HOUR SELECT Example MANU...

Page 14: ...ator lights up on the unit Normal Rec 0 30 1 00 1 30 2 00 3 00 4 00 1Insert a tape with record tab The unit power comes on automatically Notes remove loose or peeling labels from tapes Forward Reverse scene search Press FF or REW Press again or PLAY to release Still Freeze picture Press PAUSE SLOW Press PLAY to release Slow Motion picture Hold down PAUSE SLOW in Still mode Press PLAY to release Fr...

Page 15: ... to start dubbing Press STOP to stop dubbing Selecting Input Mode TUNER ON only Method 1 Press INPUT on the unit Channel Number LINE Method 2 Press CH The display will change as follows 1 2 3 125 LINE CABLE 69 TV or AUDIO IN Recording Editing unit OUT IN IN FROM ANT OUT TO TV AUDIO VIDEO IN Playing Source VCR VIDEO AUDIO IN Perform operation of steps 4 and 5 on both units simultaneously Method 3 a...

Page 16: ...e Phones Jack Ready Checklist All connections are made Your unit is plugged in PHONES Jack POWER VOL VOL CH Model AG 520E unit shown 1 Press POWER on the remote or unit Use CH or number keys to select a channel 2 08 ABC 3 Press VOL or VOL to adjust volume 24 NIGHT NITE Mode Color and picture intensity levels are adjusted so the screen is easier on your eyes during night time use Press NITE to set ...

Page 17: ...level in the proper balance SHARPNESS Control Adjust picture sharpness 3 LOCK CAPT I ON I NPUT SELECT TUNER V I DEO ADJUST SELECT SET END ACT I ON SET UP TV 1 Press to select VIDEO ADJUST 2 Press to display screen 4 COLOR T INT BRIGHTNESS P ICTURE SHARPNESS NORMAL ADJUST SELECT END ACT I ON COLOR T INT BRIGHTNESS P ICTURE SHARPNESS NORMAL SET SELECT END ACT I ON 1 Press to select an adjustment ite...

Page 18: ...ress to select desired settings 2 Press to set the ON TIMER TIME or ON TIMER mode 4 ON T IMER SELECT ALARM 6 00AM CH08 SET SELECT END PROG ALARM ON CANCEL ADD DLT ABC Press to select ALARM ON or OFF When ON is selected an alarm will gradually increase in volume for one minute or until canceled by pressing any button including VOL To Make Corrections use and to move back and correct To Cancel ON TI...

Page 19: ... with sleep timer set displays remaining time Sleep Timer will not be performed during Play Lock mode Sleep Timer This unit can be set for auto power off SLEEP TIMER 30 SLEEP TIMER 60 SLEEP TIMER 90 SLEEP TIMER 00 Press SLEEP repeatedly until SLEEP TIMER 00 appears to cancel ...

Page 20: ...t mode See left CAPTION CAPT I ON MODE CAP C1 CC ON MUTE CAP C1 SET SELECT END ACT I ON Closed Caption Mode Selections Caption Mode CAP C1 or C2 A narration of selected TV programs is displayed Check TV program listings for CC Closed Caption broadcasts Caption Mode TEXT C1 or C2 The all of the screen will be blocked out When the TV station broadcasts information such as program listings it will ap...

Page 21: ...to display MAIN MENU 1 Press to select TV 2 Press ACTION to display SET UP TV screen 1 Press to select CAPTION 2 Press to display CAPTION screen 1 Press to select CAPTION MODE 2 Press repeatedly to select OFF 1 Press to select CC ON MUTE 2 Press repeatedly to select desired mode Each press of will change the display as shown left The caption may be broadcast over CAP C1 or C2 Press MUTE to mute th...

Page 22: ...mer Recording using ACTION key on the unit See page 11 SET SELECT END PROG SET PROGRAM ON TIMER ON TIMER T I MER PROGRAMMING Press PROG to display SET PROGRAM screen 1 Press to select TIMER PROGRAMMING 2 Press to display screen If a program is already in memory press and to select an unused program number Press to select and or to set the recording DATE 1 31 One time DAILY MON FRI WEEKLY SUN SAT S...

Page 23: ...mer Recording Recording is in progress Hold down STOP for a few seconds to cancel the Timer Recording Any future daily or weekly recordings will be performed as programmed Press ADD DLT Review Replace or Clear Program Contents Recording is not in progress 2 minutes before Timer recording is performed PLEASE PREPARE FOR TIMER REC appears and or the PROG TIMER Indicator flashes Be sure a cassette wi...

Page 24: ...rk may not be counted in the search 2 1 Press number keys to select the recording number To calculate number see below NOTE indicates start points of each recording 6 1 5 7 2 3 4 To calculate the Index Number Example 1 To go to rec 2 from rec 4 enter 3 and press REW 1 7 5 3 4 6 2 Example 2 To go to rec 6 from rec 2 enter 4 and press FF ENTER INDEX NUMBER 1 USING 1 9 KEYS FORWARD SEARCH FF REVERSE ...

Page 25: ...onds in BLANK area PLAYBACK DIRECTION Program 1 Program 2 or BLANK INDEX Program 2 BLANK INDEX BLANK Program 1 Program 2 BLANK Program 1 INDEX Press SEARCH button Press SEARCH button FF FF Press SEARCH button FF End Point 2 End Point Upon locating end point The unit searches slightly past end point reverse searches and plays the last few seconds of the program then stops Press SEARCH button If Pro...

Page 26: ...ns on Playback begins if tape has no record tab Auto Rewind Tape reaches its end Rewind Stop Playback Auto Eject Repeat Play is OFF Tape with no record tab reaches its end Rewind Stop Eject DETECTING TAPE POSITION is displayed only when a cassette is first inserted and it takes several seconds for correct tape position to appear Press TAPE POSITION or wait 5 seconds to return to normal screen Note...

Page 27: ... to 0 00 00 Press DISPLAY during playback to display the Counter Press CM ZERO repeatedly to select skip time in Playback mode Commercial Skip By pressing the CM ZERO button in Playback mode you can skip over 1 to 3 minutes of recorded tape in just a few seconds 1 Press CM ZERO in stop mode to start ZERO SEARCH BEGIN END 1 23 45 BEGIN END 0 00 00 No indication appears If a blank portion exists on ...

Page 28: ...A CABLE AUTO SET CHANNEL CAPT I ON WEAK S I GNAL D I SPLAY OFF SELECT SET END ACT I ON SET UP CHANNEL 4 1 Press to select PRESET CAPTION 2 Press to display screen To create your own captions go to Manual Caption on page 29 PRESET CAPT I ON MANUAL CAPT I ON CHANNEL CAPT I ON SELECT SET END ACT I ON To Make Corrections Press then to select channel number Press to change or ADD DLT to delete 5 PRESET...

Page 29: ... channels deleted from Channel Memory are not displayed You can set a total of ten channel captions with up to four characters each 4 1 Press to select and to enter your caption Characters change in the following order 1Do Preset Caption steps 1 3 page 28 Press repeatedly to move the cursor to CH NUMBER Repeat steps 3 and 4 as desired To Make Corrections Press then to select channel number Press t...

Page 30: ... which has blue back feature selecting ON will have no effect on the other equipment VCR Lock All operations are prohibited except Timer recording and tape eject Useful for families with small children VCR LOCK ACT IVATED VCR LOCK OFF 4 Press ACTION to display MAIN MENU 1 Press to select CH 2 Press ACTION to display SET UP CHANNEL screen Press ACTION twice to return to the normal screen 1 Press to...

Page 31: ...nformation is then displayed about 10 seconds after playback begins TUNER OFF REPEAT PLAY OFF TI MER PROGRAMMING TI ME STAMP ON SELECT SET END ACT I ON SET UP VCR 4Press ACTION twice to return to normal screen MAIN MENU TV VCR EX I T CLOCK CH LANGUAGE SET ACT I ON SELECT Press ACTION to display MAIN MENU 1 Press to select TIME STAMP 2 Press to set ON or OFF 1 Press to select VCR 2 Press ACTION to ...

Page 32: ...ree times to exit 5 Notes Step 2 not necessary when changing rating or secret code Take care that you are not observed entering the secret code To Make Corrections Press repeatedly to move the cursor Press number keys to make the correction Changing your secret code You will need your current code Do steps 1 4 In step 5 press ADD DLT to clear current code Repeat steps 4 and 5 to enter new code DO ...

Page 33: ...ocked See ratings chart right G PG PG 13 R NC 17 X V I EW NR PROGRAMS YES GENERAL AUD I ENCE SELECT SET END ACT I ON UNLOCKED 5Press ACTION to redisplay LOCK menu and continue with US TV PROGRAMS Ratings Setup next page Or press ACTION four times to exit G PG PG 13 R NC 17 X GENERAL AUDIENCE All ages admitted PARENTAL GUIDANCE Some material may not be suitable for children PARENTS CAUTIONED Some m...

Page 34: ...L D V S L D V S L UNLOCKED 4 1 Press to select and to set ratings to be blocked See ratings charts right 5Press ACTION four times to exit this mode TV Y TV Y7 TV G TV PG TV 14 TV MA FOR ALL CHILDREN Content specifically geared to young viewers ages 2 6 FOR AGE 7 AND OLDER May contain mild physical or comedic violence which may frighten children under 7 GENERAL AUDIENCE Contains little or no violen...

Page 35: ...a black background and sound is muted STOP 11 00AM ABC 0 12 34 SP RATING PG 13 If DISPLAY is pressed even when no V Chip data NO V CHIP DATA is displayed on screen To View a Blocked Program Movie Temporarily Deactivate V Chip Control Enter your secret code ACCESS CODE in the Blocking Message screen V Chip Control is reactivated when power is turned off or power failure occurs Deactivate V Chip Con...

Page 36: ...ode or a cassette with record tab is not inserted two minutes before a Timer Recording is about to begin If head cleaning becomes necessary while playing back a tape If you press a function button other than STOP EJECT or POWER while the unit is in VCR Lock mode Page 8 10 12 12 13 4 14 23 14 22 23 4 30 VCR Status Clock Display Press DISPLAY to display or remove the overlay Whenever a blank section...

Page 37: ...d one hour Autumn Last Sunday in October DST ON Turns clock back one hour If your area does not observe Daylight Saving Time select DST OFF see Clock on pages 12 and 13 Keep these time changes in mind when programming the unit for timer recordings Features for a Quality Picture Digital Auto Tracking Continuously analyzes the signal and adjusts for optimum picture quality Manual Tracking Control to...

Page 38: ...hannel to be recorded Set recording Start Stop times correctly P 22 23 Timer recording may not be performed or continued if a power interruption of more than 1 minute occurs before or during a Timer recording even after power is restored Adjust TRACKING control in either direction P 37 Try Head Cleaning P 4 Make sure PLAY VCR LOCK is set to off P 26 30 Make sure unit is not in a Timer Record opera...

Page 39: ...16 Playback 14 PLAY button 6 14 Play Lock mode 26 Picture Adjustment 17 POWER button 6 9 Preset Caption 28 PROG button 6 18 22 23 PROG TIMER Indicator 7 14 22 Program End Search 25 Q Quality Picture 37 R Rapid Tune 16 REC button 6 14 REC Indicator 7 14 Rec ord 14 Record Playback Speed Settings 4 Remote Control Buttons 6 Remote Sensor 7 Repeat Play 26 Reset Language Channels Clock 12 13 Reset unit ...

Page 40: ...3500 Government Marketing Department 52 West Gude Drive Rockville MD 20850 301 738 3840 Matsushita Electric Corporation of America Corporate Sales Group Hawaii Region 99 859 Iwaiwa ST Alea Hl 96701 3267 808 488 7779 Panasonic Canada Inc 5770 Ambler Drive Mississauga Ontario L4W 2T3 905 624 5010 Panasonic Sales Company Division of Matsushita Electric of Puerto Rico Inc Ave 65 de infantería Km 9 5 S...

Reviews: