
Follow the instructions given below to insert an
SD memory card into the camera.
1. Turn off the camera.
2. Open the battery door.
3. Insert the SD card into the camera by clicking
it in.
Note
There is only one right direction to insert
the SD memory card into the slot. Do not force the
card into the slot, or it may damage both the
camera and the SD memory card.
Note
The SD memory card must be formatted
before taking photographs. See the following
section for more information.
1.
Mode / Menu
: Press to select PHOTO or VIDEO
mode. For PHOTO or VIDEO setting, press and
hold it for 2~3 seconds.
2.
LEFT
: For LEFT selection in menu mode.
3.
UP
: For UP selection in menu mode. Digital
zoom in.
4.
RIGHT
: For RIGHT selection in menu mode. To
change exposure value, set up in photo or video
mode.
5.
DELETE
/ Power on or off button: Press and
hold it for 2 seconds to turn ON/OFF the unit.
Press it to delete file in PLAYBACK mode.
6.
REC
: Press this button to take photographs.
To start or stop a video clip recording. Use to
confirm changes in menu mode.
7.
DOWN
: For DOWN selection in menu mode.
Digital zoom out.
8.
Playback
: Press to enter Playback mode.
1.
Recording mode
:
Photograph mode.
Video mode.
2.
Counting indicator
:
Show time left in Video mode.
Show picture left in Photo mode.
Show recording time during recording.
3.
Digital zoom
: Show digital zoom value.
4.
Battery indicator
:
Battery at full charge.
No charge left in battery.
5.
White balance
: White balance selection.
6.
Date stamp
: Date/ Time/ Date and Time / Off
7.
Selected resolution
:
Photo-3M,5M,8M.
Video-QVGA,WVGA,720P30.
8.
Normal / Macro mode indicator
:
Normal mode
(0.5m – infinity).
Macro mode
(11cm –18cm).
9.
SD card indication
:
The SD card is inserted and will be used as
storage for PHOTO and VIDEO.
10.
Self-timer
: On/Off.
In photo/video set up mode, select
SETUP
icon
by pressing ( ) button to enter basic set up mode.
Language
English/T-Chinese/
S-Chinese/French/
German/Italian/
Select display language
Spanish/Portuguese/
Dutch
TV standard
NTSC
American and Japanese
video format
PAL
European video format
Date / Time
Year / Month / Day /
Hour / Minute
Date and Time setting
Display
Off
No display
Date
Display the Date
Time
Display the time
Date / Time
Display the Date and
Time
Format
Yes / No
Format the SD card
Default
Yes / No
Refresh the default
setting
Auto Power-Off
Off
Auto Power-Off off
3 min
Auto power off after
3 mins if no operation
5 min
Auto power off after
5 mins if no operation
Version
Note: The camera will remain the last setting
when it is turned off.
The battery is partially charged at shipment and
must be fully charged before being used.
1. Open the battery cover.
2. Insert the 3.7V Li-ion rechargeable battery into
the camera.
3. Replace the battery cover.
1. Plug adaptor into socket.
Note
• Make sure the adaptor is not obstructed and is
easily accessible to the unit.
EXPLANATION OF THE STATUS ICONS
DETAILS FOR CAMERA SETTING
USING THE CAMERA
PHOTO SETTING
VIDEO SETTING
1
7
8
9
2
3
4
5
6
10
In photo mode, press the
(
MODE/MENU
)
button
and hold for 2 to 3 sec to enter photo set up mode.
Quality
Super Fine (Default) Picture quality setting
/Fine /Normal
Size
3.0M pixel resolution 2048 x 1536
5.0M pixel resolution 2592 x 1944
8.0M pixel resolution 3200 x 2400
Self-timer
On
Self-timer selected,
10 sec delay
Off
Turn off the self-timer,
disable
In video mode, press the
MODE/MENU
button
and hold for 2 to 3 sec to enter video set up mode.
Resolution
720P30
HD (1280x720),
up to 30fps
WVGA
WVGA (848x480),
up to 60fps
QVGA
QVGA (320x240),
up to 30fps
Quality
Super Fine(Default) Quality setting
/Fine /Normal
SETUP
INSTALLING THE BATTERY
ADAPTOR
Flicker
60Hz
Main American
electricity frequency
50Hz
Main European
electricity frequency
White Balance
Auto (Default)
Automatic white balance
Sunny
White balance selected
for Sunny surrounding
Cloudy
White balance selected
for cloudy surrounding
Fluorescent
White balance selected
for fluorescent
surrounding
Incandescent
White balance selected
for Incandescent lighting
Contrast
Standard /
Hard / Soft Contrast setting
Sharpness
Standard /
Hard / Soft Sharpness setting
AE meter
Center / Average /
Spot AE meter setting
AE ISO
Auto/100/200/400 AE ISO setting
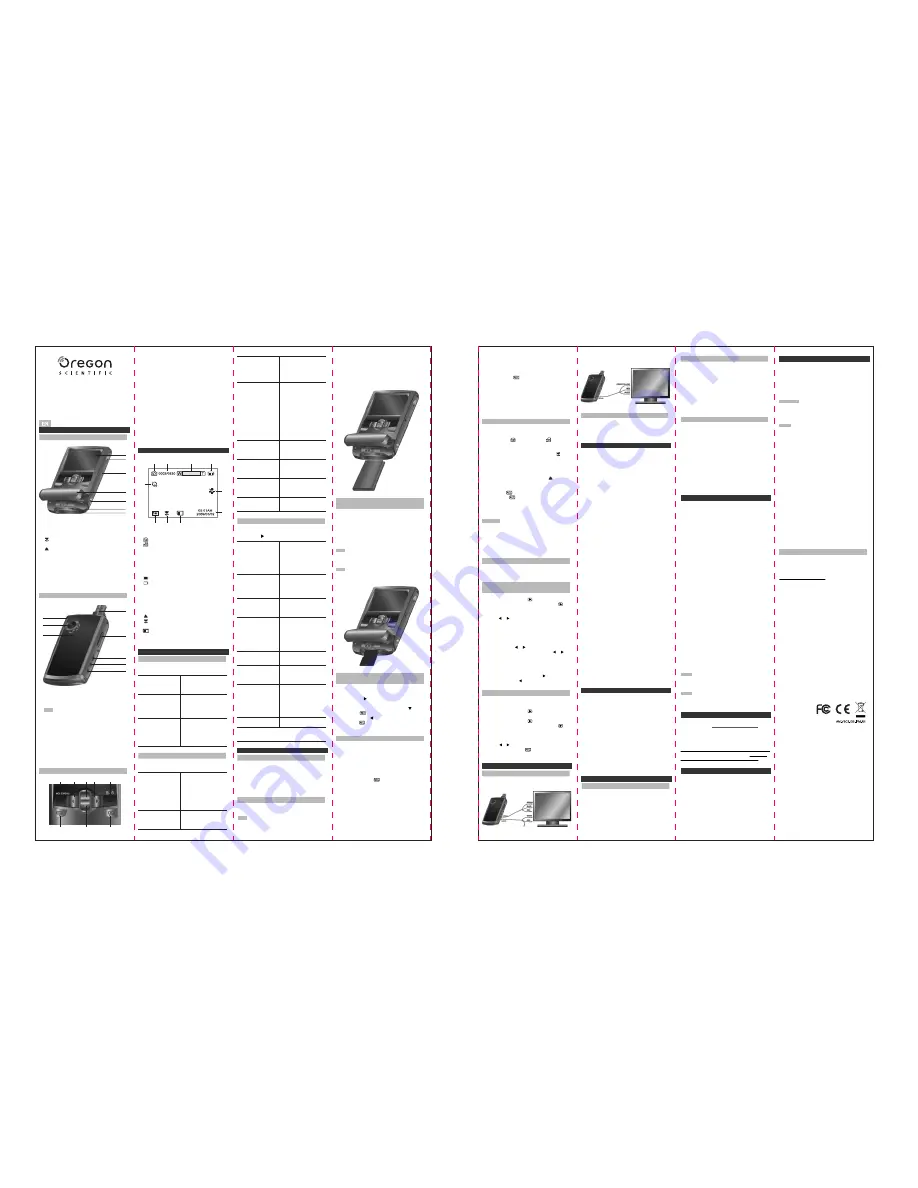
OVERVIEW
Digital Video Camera
Model: DV-80005
USER MANUAL
REAR VIEW
BUTON VIEW
1.
LCD screen
: Display photographs, video clips,
camera settings and menu.
2.
Macro switch
:
Macro mode
: Select this mode to take close
-up photographs (distance 11cm - 18cm).
Normal mode
: Select this mode to take
photographs from 0.5m - infinity.
3.
Speaker
: Speaker hole.
4.
Battery door
: Door for battery & SD card.
5.
Strap hook
: Hook for attaching the wrist strap to
the camera.
6.
SD card slot
: SD card storage location.
7.
Battery
: 3.7V Li-ion battery.
1.
LED indicator
: Illuminates while battery is
recharging.
2.
Lens
: Records the image .
Note
Keep the lens clean. Dirt and fingerprints
will affect the quality of the picture.
3.
Microphone
: For voice input.
4:
USB interface
: Download photographs and
video clips to a computer.
5.
USB switch
: Slide it to pop-up the USB
interface.
6.
DC in only
: Recharge the battery via
transformer provided.
7.
Video out
: Connect to output content to TV.
8.
Audio out
: Connect to output audio to TV.
1
2
3
4
5
6
7
1
2
3
4
5
6
7
8
1
2
3
4
5
8
7
6
FRONT VIEW
1. In photo/video set up mode, select SETUP icon
by pressing ( ) button to enter basic set up
mode.
2. Select FORMAT icon by pressing the ( ) button
and press( )button to confirm, select YES
by pressing the ( ) button.
3. Press the( )button to confirm formatting the
SD card.
The HD DV camera can be set to different
resolutions.
INSERTING A MEMORY CARD
(NOT INCLUDED)
FORMATTING THE MEMORY OR
SD CARD
SETTING THE RESOLUTION
VIDEO
1. Press and hold the (MODE/MENU) button in
video mode to enter the video set up menu.
2. Select the RESOLUTION by pressing the (▼)
button. Press the ( )button to enter the
resolution selection.
3. Different resolutions will be displayed. Select
the desired resolution by using the (▲) or (▼)
button. Press the REC button to confirm the
selection.
720P30 (1280 x 720),
WVGA (848 x 480),
QVGA (320 x 240).
• To completely disconnect from power, the
adaptor should be disconnected from the mains.
• The main unit and adaptor should not be
exposed to wet conditions. No objects filled with
liquid, such as vases, should be placed on the
main unit and adaptor.
Follow the instructions given below to delete a
photo/video clip.
1. Press the PLAYBACK ( ) button to enter the
photo/video clip playback mode.
2. Press the PLAYBACK ( ) button once to enter
the photo / video playback mode, press ( )
again to select either PHOTO / VIDEO
3. Press the DELETE button to enter the delete
mode.
4. Press ( or ) to select if delete this file or
delete all then press ( ) to confirm.
5. Press (MODE/MENU) to exit.
For high definition TV display, please connect the
component output as shown below:
The camera can be connected to the computer
as a mass storage device to download videos
and photos to a PC.
Sensor
5.0 Mega pixel CMOS sensor
Image resolution
DV
720P30 (1280x720), up to 30fps
WVGA (848x480), up to 60fps
QVGA (320x240), up to 30fps
DC
8.0 Mega pixels: (3200x2400)
(Hardware Interpolation)
5.0 Mega pixels: (2592x1944)
3.0 Mega pixels: (2048x1536)
Lens
F/2.8 f=8.5mm
Focus range
0.5m. ~ Infinity
Macro mode
11cm – 18cm
Digital zoom
3x
LCD display
2.4" true color LTPS TFT LCD
White balance
Auto / Sunny / Cloudy / Fluorescent /
Incandescent
DV mode
Up to 30fps@HD (1280x720)
External memory card
SD card supports up to 32G
File format
Picture: JPEG, Video: MOV,
PC interface
USB 2.0
TV-out
Component output / TV output
Power source
3.7V Li-ion rechargeable battery.
Operating System
Windows XP/Vista or above Win 7
Mac 10.4.9 or above
CPU
Pentium 4 / 3.0Ghz or above
RAM
At least 1GB
Interface
USB port
Display Card
nVidia Geforce 7600 or ATI X 1600 or above
CONNECT TO COMPUTER
DELETE PHOTOGRAPHS/VIDEO CLIPS
CONNECTING THE DV CAMERA
SPECIFICATIONS
SYSTEM REQUIREMENT
PRECAUTIONS
ABOUT OREGON SCIENTIFIC
EU-DECLARATION OF CONFORMITY
TROUBLESHOOTONG
CONNECT TO TV
PROBLEM
1. Turn on the HD DV camera.
2. Press the
(
MODE/MENU
)
button to select the
photo mode ( ) or video mode ( ).
3. Depending on the distance to the object being
photographed, use the Macro switch to adjust
the distance. Select the flower symbol ( ) if
you wish to take a close-up photograph
(11cm –18cm).
If you wish to take a video or photograph of
surroundings or people (0.5m - infinity), set the
Macro switch to the Normal mode ( ).
4. Use the LCD screen as a viewfinder to take
videos or photos.
5. Press the ( ) button once for photo taking,
or press the( ) button to start/stop video
recording.
6. The HD DV camera can zoom in up to 3 times.
Zoom in or out by pushing (▲ or ▼).
CAUTION
• Taking photos of fast-moving objects is not
recommended.
• Image may be distorted when taking pictures in
a moving vehicle.
• Max video file size is 4GB.The unit will stop
recording automatically.
The HD DV camera can zoom in up to 3 times.
Zoom in or out by pushing (▲ or ▼).
TAKING VIDEO OR PHOTOGRAPHS
ZOOM IN AND OUT
1. Press the
PLAYBACK
( ) button once to enter
the photo / video playback mode, press ( )
again to select either
PHOTO / VIDEO
2. Thumbnail views will be displayed. Use
(▲,▼, or ) to select photo/video.
3. Press
REC
button to confirm selection.
4. In viewing a photo, push (▲or▼) to zoom in
or out.
5. In viewing different parts of enlarged photo,
press
MODE/MENU
or
REC
button to move up
or down, press ( or ) to move left or right.
6. In viewing photo in full screen, press ( or ) to
view previous or next photo.
7. In viewing a video clips, Press the
REC
button
to start playing the video and press again to
pause.
8. When playing the video, press ( ) to fast
forward or press ( ) to rewind.
PLAYBACK PHOTOGRAPHS/VIDEOS
CLIPS
For standard quality TV display, connect as below:
1. Cannot turn on the unit.
2. Photos cannot be saved when taking pictures.
3. Cannot find removable disk after connecting
the camera to the computer.
4. The battery life is very short.
5. The photos are blurry.
CAUSE
1. Low battery power. Battery not inserted
properly.
2. The memory card hasn’t been formatted
properly or memory is full.
3. Connection failure.
4. Use of wrong type of battery.
5.1. The HD DV camera is not held steadily
5.2. The lens of HD DV camera is dirty.
5.3. The HD DV camera is set to the wrong focus
mode.
SOLUTION
1. Fully charge or install the battery correctly.
2. Format the memory in SETUP mode of the
camera. Please refer to section (Formatting the
memory or SD card).
3. Make sure all cable connections are secured
and restart the computer if necessary.
4. Replace with new 3.7V Li-ion rechargeable
battery.
5.1. Hold the HD DV camera steadily until it
beeps when taking video/photo.
5.2. Clean the lens with soft dry cloth.
5.3. Set the macro/normal mode according to the
distances of subject.
PHOTO
1. Press and hold the (MODE/MENU) button in
photo mode to enter the photo set up menu.
2. Select the SIZE icon by pressing the (▼) button
and press the ( ) button to confirm.
3. Different resolutions will be displayed. Select
the desired resolution by using the (▲) or (▼)
buttons and press the REC button to confirm
the selection.
3.0M (2048 x 1536),
5M (2592 x 1944),
8M (3200 x 2400).
1. Do not subject the unit to excessive force,
shock, dust, temperature or humidity.
2. Do not cover the ventilation holes with any
items such as newspapers, curtains etc.
3. Do not immerse the unit in water. If you
spill liquid over it, dry it immediately with
a soft, lint-free cloth.
4. Do not clean the unit with abrasive or
corrosive materials.
5. Do not tamper with the unit’s internal
components. This invalidates the warranty.
6. Images shown in this manual may differ
from the actual display.
7. When disposing of this product, ensure it
is collected separately for special
treatment and not as normal household
waste.
8. Placement of this product on certain types
of wood may result in damage to its finish
for which Oregon Scientific will not be
responsible. Consult the furniture
manufacturer’s care instructions for
information.
9. The contents of this manual may not be
reproduced without the permission of the
manufacturer.
10. Do not dispose old batteries as unsorted
municipal waste. Collection of such
waste separately for special treatment is
necessary.
11. Should there be any discrepancy
between the English and other language
versions, the English version shall apply
and prevail.
FCC STATEMENT
This device complies with Part 15 of the FCC
Rules. Operation is subject to the following two
conditions: (1) This device may not cause harmful
interference, and (2) This device must accept any
interference received, including interference that
may cause undesired operation.
WARNING
Changes or modifications not
expressly approved by the party responsible for
compliance could void the user's authority to
operate the equipment.
NOTE
This equipment has been tested and found
to comply with the limits for a Class B digital
device, pursuant to Part 15 of the FCC Rules.
These limits are designed to provide reasonable
protection against harmful interference in a
residential installation. This equipment generates,
uses and can radiate radio frequency energy and,
if not installed and used in accordance with the
instructions, may cause harmful interference to
radio communications. However, there is no
guarantee that interference will not occur in a
particular installation. If this equipment does
cause harmful interference to radio or television
reception, which can be determined by turning
the equipment off and on, the user is encouraged
to try to correct the interference by one or more of
the following measures:
1. Reorient or relocate the receiving antenna.
2. Increase the separation between the equipment
and receiver.
3. Connect the equipment into an outlet on a
circuit.
4. Consult the dealer or an experienced radio /
TV technician for help.
DECLARATION OF CONFORMITY
The following information is not to be used as
contact for support or sales. Please call our
customer service number (listed on our website at
www.oregonscientific.com), or on the warranty
card for this product) for all inquiries instead.
We
Name: Oregon Scientific, Inc.
Address: 19861 SW 95th Ave.,Tualatin,
Oregon 97062 USA
Telephone No.: 1-800-853-8883
Declare that the product
Product No.: DV-80005
Product Name: Digital Video Camera
Manufacturer: IDT Technology Limited
Address: Block C, 9/F, Kaiser Estate,
Phase 1, 41 Man Yue St.,
Hung Hom, Kowloon,
Hong Kong
is in conformity with Part 15 of the FCC Rules.
Operation is subject to the following two
conditions:
1) This device may not cause harmful interference,
2) This device must accept any interference
received, including interference that may
cause undesired operation.
NOTE
The technical specifications for this product
and the contents of the user manual are subject to
change without notice.
NOTE
Features and accessories will not be
available in all countries. For more information,
please contact your local retailer.
Visit our website (www.oregonscientific.com) to
learn more about Oregon Scientific products.
If you’re in the US and would like to contact our
Customer Care department directly, please visit:
https://us.oregonscientific.com/service/support.asp
For international inquiries, please visit: https://us.
oregonscientific.com/about/international.asp
Hereby, Oregon Scientific, declares that this
Digital Video Camera (Model: DV-80005) is in
compliance with the essential requirements and
other relevant provisions of Directive 1999/5/EC.
A copy of the signed and dated Declaration of
Conformity is available on request via our Oregon
Scientific Customer Service.
Front Side
Back Side
Size: 280x350mm


