OPGAL EyeCGas 2.0, User Manual
The OPGAL EyeCGas 2.0 is an advanced gas detection system designed to ensure safety and efficiency. Easily understand its features and operation with our comprehensive, easy-to-follow User Manual. Download it for free from our website and unlock the full potential of your EyeCGas 2.0.
Share
Download


Reviews:
No comments
Related manuals for EyeCGas 2.0

BC 40
Brand: Garmin Pages: 8
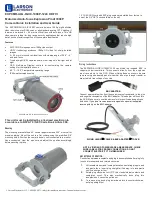
EXPCMR-ALG-OZ-IC-1080P-1224 HD-TVI
Brand: Larson Electronics Pages: 4

AV3125IRv1
Brand: Arecont Vision Pages: 2

Image System
Brand: Polaroid Pages: 11

Clipshot 11698
Brand: Vivitar Pages: 18

NAVCAM-GPS
Brand: Navig8r Pages: 18

VCMA-99
Brand: IP Camera Pages: 37

NVR 400
Brand: Braun Pages: 44

C754
Brand: DB POWER Pages: 28

QHY1253
Brand: QHYCCD Pages: 15

XL-ICA-206M3
Brand: XtendLan Pages: 33

DND7220 Series
Brand: Digimerge Pages: 20

PC-30 DATE
Brand: Pentax Pages: 7

CARPA-130
Brand: Capra Pages: 32

AVC452ZBN
Brand: NST Pages: 3

CS-CV316
Brand: Ezviz Pages: 12

Thinklite TT350O
Brand: Godox Pages: 13

FASTCAM Mini AX100
Brand: Photron Pages: 63


