

User Manual
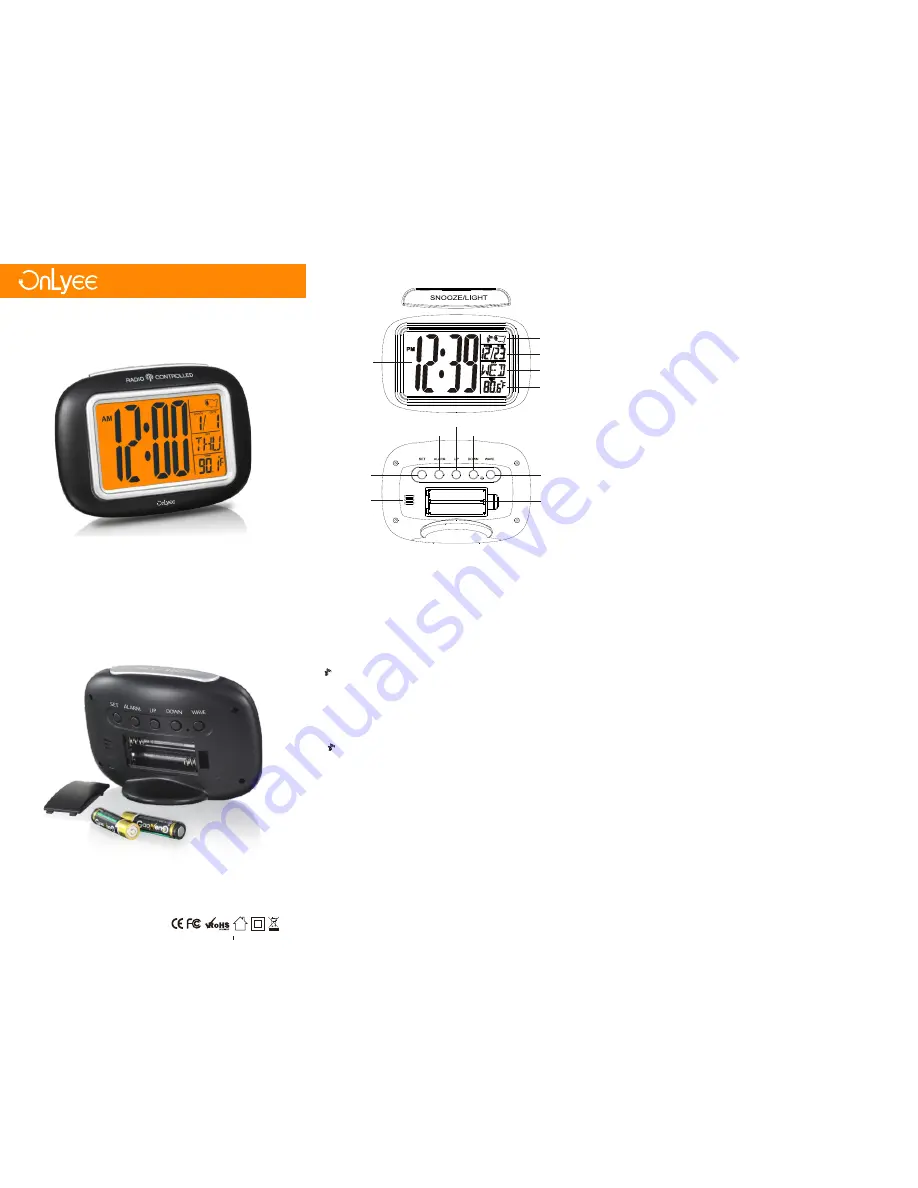
Time Zone
Calendar
Week
Temperature
Time
Wave button
Down button
UP button
Alarm button
Set button
Speaker
Clock battery
Compartment 2 AAA
Chapter 1
-1-
Chapter 2 Get Started
Open the battery compartment and Insert 2 new “AAA”batteries (included in
the package
)
into the back of clock .observe the current polarity .
-2-
Chapter 3 Radio Controlled Clock
1.The clock will look for the WWVB time signal for 8 minutes when batteries
are first installed. Buttons will not function during this search period.
( flashes on the LCD if the signal is OK )
2.The clock automatically search the time signal at 1:00 a.m. everyday to
maintain accurate timing. For failed reception in 5 minutes, scanning stops
and repeats again at 2:00 a.m. and 3:00 a.m.
3.The clock manually search the time signal by holding “WAVE” for 2 seconds.
For failed reception in 5 minutes, scanning stops.
4.Press the button “WAVE” to stop scanning when receiving WWVB signal.
5. turns on indicate signal received successfully.
6. If after 10 minutes the clock have not received the WWVB signal ,signal
strength icon will disappear from the LCD display.
IMPORTANT: The clock will search the WWVB time signal when batteries
are first installed. Buttons will not function during this search period.
Press the WAVE button once to stop the WWVB signal search and
manually set the time and time zone. The clock will search for the WWVB
time signal again after midnight.
-3-
Chapter 4 Manually Time Setting
1. Hold press the button”SET” for 2 seconds to enter time set mode, until
“24HR”or”12HR”flash on the display.
2. Press the button”UP”or “DOWN” to choose the time format you would
like.press the button”SET”to submit time format “12HR” or “24HR” your
choose.
HOUR setting
---Numbers of hour will flash after you submit time format,press
the button “UP”or “DOWN”to set the HOUR time as you desired.
MINUTE setting
---once finished setting HOUR time,press the button “SET “to
maintain the minute numbers flash on the display,press the button “UP”or
“Down”to set the MINUTE time as you desired.
Day setting
---when complete setting MINUTE time,press the button “SET” to
maintain the HOUR and MINUTE numbers flash on the display,and then press
the the button”UP”and “DOWN”to set DAY such as MONDAY other.
MONTH setting---when Day setting is done,press the button “SET”to maintain
the” MONTH “flash on the display,and then press the button”UP”and
“DOWN”set MONTH.
DATE setting
----when MONTH setting is completed,press the button”SET”to
maintain the DATE flash on the display,and then press the button”UP”and
“DOWN” to set DATE numbers.
AT last press the button”SET”to submit and exit setting.
TEPMPERATURE setting
---- Press the button “DOWN” to display Fahrenheit
or Celsius temperature.
-4-
Version 1.0
OnLyee Technology Made in China


