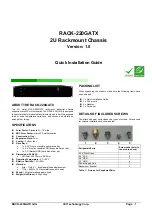
1U 19”
iConverter
®
XM5 NID Rack Mount Shelf
User Manual
PRODUCT OVERVIEW
The 8261-0 1U 19” XM5 Rack Mount Shelf accommodates two iConverter
®
XM5 Network
Interface Devices or two iConverter
®
XM5-1G Network Interface Devices.
1U Rack Mount Shelf
The shelf does not support the iConverter XM5 Aggregation Demarcation Device.
INSTALLATION PROCEDURE
1) Unpacking, Visual Inspection and Inventory
2) Rack Mounting
3) General Installation
4) Installing iConverter XM5 NIDs to the Shelf
1) UNPACKING, VISUAL INSPECTION AND INVENTORY
Review the contents. The following items should be included:
•
1U Rack Mount Shelf
•
User Manual
•
Four (4) Mounting Brackets
•
Eight (8) #4-40 1/4” Flathead screws
2) RACK MOUNTING
Mount and attach the shelf to the 19” standard rack using the appropriate rack mounting
screws (not included).
When rack-mounting the shelf, the rack should be appropriately earthgrounded. The shelf
provides NEBS ground posts to secure a grounding lug from the rack to the shelf.
Page 1
3) GENERAL INSTALLATION
Install the mounting brackets to the side of the XM5 using the supplied screws.
iConverter XM5 NIDs with mounting bracket
Remove any rubber feet before installing the module/chassis to the shelf.
4) INSTALLING ICONVERTER XM5 NIDS TO THE SHELF
Slide the XM5 into the mounting guide slots on the shelf.
Installing iConverter XM5 NIDs on the Shelf
Continue to slide the XM5 until it is flush with the front mount bracket on the shelf. Secure
the XM5 by fastening the thumbscrew (push in and turn clockwise to tighten) to the shelf.
XM5 NIDs Installed in the Shelf
Embedded cable tie down slots secure the power cord(s) and data cable(s) to the shelf
(cable ties not included).
Page 2