OmniPrint OM9300, Technical Manual
The OmniPrint OM9300 technical manual is available for free download on our website. This comprehensive manual provides detailed instructions on how to operate and maintain your OM9300 printer. Ensure optimal performance by accessing the manual at manualshive.com today.
Share
Download


Reviews:
No comments
Related manuals for OM9300

S2
Brand: Laspaziale Pages: 28

S50
Brand: La Spaziale Pages: 57

46000
Brand: Hamilton Beach Pages: 20

CMP 250
Brand: Gaggenau Pages: 7

CM 450
Brand: Gaggenau Pages: 24

CM 450
Brand: Gaggenau Pages: 24

CM 210
Brand: Gaggenau Pages: 6

NESPRESSO VERTUO NEXT
Brand: Breville Pages: 68

IOD 250
Brand: Ice-O-Matic Pages: 2

MCIM30TW
Brand: Magic Chef Pages: 20

E-Cool Wall B
Brand: EOS Pages: 58
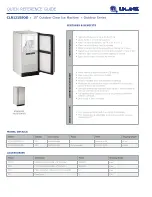
CLR1215SOD
Brand: U-Line Pages: 2

RHINO 6000
Brand: Dymo Pages: 2

SmartChef HCB-1
Brand: CaterMarket Pages: 5

MY3
Brand: Custom Audio Electronics Pages: 96

CEI-600
Brand: Fagor Pages: 14

Vortex 850R Series
Brand: RTI Pages: 138

BEC455TS
Brand: Baumatic Pages: 40


