


Reviews:
No comments
Related manuals for CAM-9T

RM Series
Brand: Yamaha Pages: 42
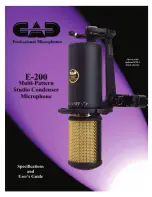
E-200
Brand: CAD Pages: 4

Electret Condenser Microphone MC32
Brand: Fostex Pages: 3

NEARSCAPES 4.1
Brand: Bogen Pages: 2

Graceland
Brand: auna multimedia Pages: 26

PCT-3000
Brand: Phonic Pages: 24

Snowball iCE
Brand: Blue Pages: 4

UHF-10
Brand: BoomToneDJ Pages: 19

527B
Brand: Shure Pages: 2

SR-AU01
Brand: 7RYMS Pages: 20

AEA N22
Brand: AEA Pages: 2

HCD-RXD6AV
Brand: Sony Pages: 13

hcd-tb20
Brand: Sony Pages: 36

HCD-TB10
Brand: Sony Pages: 56

hcd-vx888
Brand: Sony Pages: 84

HCD-VX550
Brand: Sony Pages: 82

HCD-VX88
Brand: Sony Pages: 84

HCD-VX77
Brand: Sony Pages: 84


