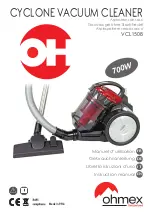
background image

Manuel d’utilisation

Gebrauchsanleitung

Libretto istruzioni d’uso

Instruction manual

VCL 1508

CYCLONE VACUUM CLEANER

Aspirateur sans sac

Staubsauger ohne Staubbeutel

Aspirapolvere senza sacco

FR

DE

IT

EN

700W

Made in P.R.C

Summary of Contents for VCL 1508

Page 1: ...ilisation Gebrauchsanleitung Libretto istruzioni d uso Instruction manual VCL 1508 CYCLONE VACUUM CLEANER Aspirateur sans sac Staubsauger ohne Staubbeutel Aspirapolvere senza sacco FR DE IT EN 700W Ma...

Page 2: ......

Page 3: ...ecke auf INDICE Istruzioni per l uso e la manutenzione Istruzioni originali Gentile Cliente Grazie per avere acquistato VCL 1508 Si prega di leggere attentamente questo manuale prima di mettere in fun...

Page 4: ...confermato dai risultati scientifici attualmente disponibili Questo apparecchio conforme alle direttive 2014 30 UE 2014 35 UE e 2011 65 UE Konformit tserkl rung Der Hersteller erkl rt auf seine Verant...

Page 5: ...F1 4a 18 21 21a 20 17a 16 17 19 4 2 8 1 5 14 3 6 15 9 11 8 12 10 7 14a 14b F2 16 19 3 F3 16 19 3...

Page 6: ...F4 20 17 F5 21 20 F6 20a 20 F7 red yellow F9 21 21a 18 F10 F8 21 21a 12 F11 17a 17 F12...

Page 7: ...F17 4b 6 25 F18 C 6a F19 14a 14b 11 F13 F15 MAX 4 F14 20 10 21 F16 8 4...

Page 8: ...ures Dans ce cas d brancher imm diatement la fiche de la prise de courant et amenerl appareildansuncentredeserviceapr s venteagr quieffectuera les v rifications n cessaires Signification de l avertiss...

Page 9: ...sauf s ils sont g sde8ansetplusetqu unadultelessurveille v Les enfants de moins de 8 ans doivent tre tenus distance de l appareil et du cordon d alimentation Avant de brancher l appareil s assurer que...

Page 10: ...il expos aux agents atmosph riques pluie soleil etc nepaslaisserdesenfantsoudespersonnesinvalidesutiliserl appareilsans surveillance En cas de panne et ou de mauvais fonctionnement arr ter l appareil...

Page 11: ...l craser Ne jamais laisser passer le c ble d alimentation sur des ar tes tranchantes Ne pas laisser l appareil expos aux agents atmosph riques pluie gel soleil etc L appareil doit tre rang exclusiveme...

Page 12: ...r uniquement de l eau Ne pas utiliser d essence de t r benthine de solvant ni autres d tergents abrasifs Utilisez l appareil dans des zones bien clair es Pour passer l aspirateur dans les diff rents l...

Page 13: ...ntres de collecte diff renci s appropri s pour les d chets lectroniques et lectro technique ou le retourner chez le concessionnaire lors de l achatd unnouvelappareil Lesbatteriesusag esdoivent trereti...

Page 14: ...au besoin la brosse multi usages 21 sur la rallonge t lescopique 20 Fig F5 R gler la longueur de la rallonge t lescopique 20 en poussant le curseur 20a vers l avant Fig F6 1 Bloc moteur 2 Poign e 3 Ra...

Page 15: ...tionn s correctement ou s ils sont sales ou endommag s UTILISATION DES ACCESSOIRES Rallonge t lescopique 20 Lorsqu elle est raccord e la poign e ergonomique elle permet d aspirer les d tritus de dimen...

Page 16: ...a n d viter qu il ne s entortille Ranger l appareil l horizontale ou la verticale pour r duire son encombrement Si on le souhaite on pourra accrocher la brosse usage multiple 21 raccord e la rallonge...

Page 17: ...le couvercle 4b Vider le r cipient 6 Fig F17 Refermer correctement le conteneur 4 Nettoyage des filtres Appuyer sur la touche 6a pour ouvrir le couvercle C Fig F18 Retirez le filtre HEPA 14a et le fil...

Page 18: ...eau Nettoyer galement le conteneur 4 Placez le r cipient 4 sur le bloc moteur 1 en le poussant jusqu ce que vous entendez le clic du bloc Attendrequelesfiltres 14et14b etleconteneur 6 soiententi reme...

Page 19: ...e sol le tube flexible ou rallonge t lescopique sont colmat s V rifiez si le bac poussi re est plein V rifier que le couvercle du bac poussi re est ferm V rifiez les filtres V rifier le raccordement e...

Page 20: ...ines der oben genannten F lle eintritt sofort den Stecker aus der Steckdose ziehen und das Ger t zu einer autorisierten Kundendienststelle bringen um die erforderlichen Kontrollen auszuf hren Bedeutun...

Page 21: ...d lter und werden beaufsichtigt Kinder j nger als 8 Jahre vom Ger t und der Anschlussleitung fernhalten BevorSiedasGer tandasStromnetzanschlie en immersicherstellen dass die Daten desTypenschilds mit...

Page 22: ...hen Das Ger t darf keinen Witterungseinfl ssen Regen Sonne usw ausgesetzt werden Nicht gestatten dass das Ger t von Kindern oder Unbefugten ohne Aufsicht benutzt wird Bei Funktionsst rungen oder Sch d...

Page 23: ...ef hrt werden SetzenSiedasGer tkeinenWitterungseinfl ssenRegen Sonne Frost usw aus Dieses Ger t muss in geschlossenen R umen aufbewahrt werden Das Ger t nicht in allzu staubigen Umgebungen verwenden D...

Page 24: ...mittel verwenden Verwenden Sie das Ger t in gut beleuchteten Bereichen Um in verschiedenen lokalen zu saugen ziehen Sie den Stecker aus der Steckdose und schlie en Sie es an die n chste Steckdose an F...

Page 25: ...das durchgekreuzte M llkontainer auf dem Typenschild des Ger ts oder auf Batterien dass das Produkt und die Batterien am Ende ihrer Lebensdauer getrennt von anderen Abf llen gesammelt werden m ssen D...

Page 26: ...n ergonomischen Griff 17 Abb F4 Schieben Sie wenn gew nscht die Mehrzweckb rste 21 auf die Teleskopverl ngerung 20 Abb F5 Regeln Sie die L nge derTeleskopverl ngerungen 20 durchVorw rtsschieben des Cu...

Page 27: ...steme richtig positioniert oder wenn sie verschmutzt oder besch digt sind VERWENDUNG DER ZUBEH RTEILE Teleskopverl ngerung 20 AndenergonomischenGriffangeschlossen erm glichtsiedasAnsaugenvonR ckst nde...

Page 28: ...rechter oder vertikaler Position wegstellen damit es weniger Platz ben tigt Falls gew nscht befestigen die B rste 21 mit demTeleskopfortsatz 20 verbunden ist in den Sitz 10 an der R ckseite des Motorg...

Page 29: ...h lter 6 leeren Abb F17 Den Beh lter 6 korrekt wieder schlie en Reinigung der Filter Die Taste 6a dr cken um den Deckel C zu ffnen Abb F18 Entfernen Sie den HEPA Filter 14a und den runden Filter 14b A...

Page 30: ...n Auch den Beh lter 4 reinigen Stellen Sie den Beh lter 4 auf dem Motortr ger 1 indem Sie ihn nach unten bis Sie zum Klick des Blocks Die Filter 14 und 14b S und den Beh lter 4 vor dem Wiedereinbau vo...

Page 31: ...Sie ob der Staubbeh lter voll ist Pr fen ob der Deckel des Staubbeh lters geschlossen ist berpr fen Sie die Filter Die korrekte Verbindung des Rohrs mit dem Ger tek rper berpr fen Pr fen ob das Kabel...

Page 32: ...e screpolature o rotture Nel caso si verifichi quanto sopra staccare subito la spina dalla presa di corrente e portare l apparecchio presso un centro di assistenza tecnica autorizzato per le necessari...

Page 33: ...enochenonabbianoun et superiore agli 8 anni e che siano assistiti da parte di un adulto Tenere lontano dall apparecchio e dal cavo di alimentazione i bambini di et inferiore agli 8 anni Primadicollega...

Page 34: ...oadagentiatmosferici pioggia sole ecc non permettere che l apparecchio sia usato da bambini o da incapaci senza sorveglianza In caso di guasto e o di cattivo funzionamento dell apparecchio spegnerlo e...

Page 35: ...ienti Nonlasciarel apparecchioespostoadagentiatmosfericiqualipioggia sole gelo etc Questo apparecchio deve essere riposto esclusivamente in ambienti chiusi Non utilizzare l apparecchio in ambienti tro...

Page 36: ...lla presa di corrente e collegarla alla presa pi vicina Prendere l apparecchio per l impugnatura Non tirare il cavo di alimentazione per spostare l apparecchio Riporre l apparecchio al chiuso in zone...

Page 37: ...a Le batterie esaurite devono essere rimosse dall apparecchio raccolte separatamente e consegnate gratuitamente ad un adeguato punto di raccolta delle pile fornito dai Comuniodaicentricommerciali Perm...

Page 38: ...stare se desiderato la spazzola multiuso 21 sulla prolunga telescopica 20 Fig F5 Regolare la lunghezza della prolunga telescopica 20 spingendo in avanti il cursore 20a Fig F6 1 Corpo motore 2 Impugnat...

Page 39: ...a i sistemi filtranti correttamente posizionati o se questi ultimi sono sporchi o danneggiati UTILIZZO ACCESSORI Prolunga telescopica 20 Collegata all impugnatura ergonomica permette di aspirare detri...

Page 40: ...i su s stesso Riporre l apparecchio in posizione orizzontale oppure in posizione verticale per ridurne l ingombro Se desiderato agganciare la spazzola multiuso 21 connessa alla prolunga telescopica 20...

Page 41: ...aprire il coperchio 4b Svuotare il contenitore 4 Fig F17 Richiudere correttamente il contenitore 4 Pulizia dei filtri Premere la leva 6a per aprire il coperchio C Fig F18 Rimuovere il filtro HEPA 14a...

Page 42: ...a o con acqua Pulire anche il contenitore 4 Riposizionare contenitore 4 sul corpo motore 1 premendolo verso il basso sino al click di aggancio Attendere che i filtri 14 e 14b e il contenitore 4 siano...

Page 43: ...la spazzola per pavimenti il tubo flessibile o la prolunga telescopica sono bloccati Verificare se il contenitore della polvere pieno Verificare che il coperchio del contenitore della polvere sia chiu...

Page 44: ...hes or parting If so immediately unplug the appliance from the mains outlet and take it to an authorised Customer Service Centre for necessary checking Meaning of the warning indications in the manual...

Page 45: ...ther clean or use the appliance alone unlessthey reof8yearsofageormoreandthey re assisted by an adult Keep children less than 8 years old away from the appliance and form the power cord Before startin...

Page 46: ...ceoutdoorswhereitcanbeexposedtothe weather conditions rain such etc never let children or disabled persons use the appliance unattended Turn off the appliance and do not tamper with it in any way if i...

Page 47: ...nce exposed to atmospheric agents like rain sun frost etc This appliance must be stored exclusively in closed environments Do not use the appliance in too dusty environments NEVER use the appliance if...

Page 48: ...the plug from the power socket and connect it to the closest outlet Hold the appliance by the handle Do not pull the power cord to move the appliance Store the appliance indoor in a zone without mois...

Page 49: ...ameplate or on its batteries indicates that the product and the batteries at the end of their useful life must be collected separately from other waste The user should therefore take the product to an...

Page 50: ...Fig F4 If desired insert the multi functional brush 21 in the telescopic extension 20 Fig F5 Adjust the telescopic extension 20 by pushing the cursor 20a forward Fig F6 1 Motor body 2 Handle 3 Air as...

Page 51: ...ng systems are not correctly placed or if they are dirty or damaged ACCESSORIES USE Telescopic extension 20 When it s connected to the ergonomic handle allows to aspirate medium sized debris even in h...

Page 52: ...nce in horizontal or vertical to reduce its footprint position If desired hook the multi functional brush 21 to its appropriate slot 10 in the motor body rear part when it s connected to the telescopi...

Page 53: ...cover 4b Empty the container 6 Fig F17 Correctly close the container 4 Cleaning the filters Press the lever 6a to open the lid C Fig F18 Remove the HEPA filter 14a and the round filter 14b Fig F19 Cl...

Page 54: ...rs 14 and 14b with a soft brush or with water Also clean the container 4 Reposition the lid 4 on the motor body 1 by pressing downwards until you hear the coupling click Waitforthefilters 14and14b and...

Page 55: ...appliance is turned on Check if the floors brush the flexible hose or the telescopic extension are blocked Check if the dust container is full Check that the dust container lid is closed Check the co...

Page 56: ...Ed 02 2020 OHMEX SA Route de Lully 5C 1131 Tolochenaz Switzerland www ohmex ch OHMEX SA Route de Lully 5C 1131 Tolochenaz Switzerland www ohmex ch...

Reviews: