

Guide for LAS X Navigator (Tile scanning)
1.
Initial set-up
~
Place slide on stage ‘coverslip
up
’.
~ For transmitted light imaging: reference Quick Guide for Bright Field (color) imaging.
~ For fluorescent light imaging: reference Quick Guide for Fluorescent imaging.
~ Focus on sample. Find cell/region of interest.
~ Set imaging settings as required by experiment.
2.
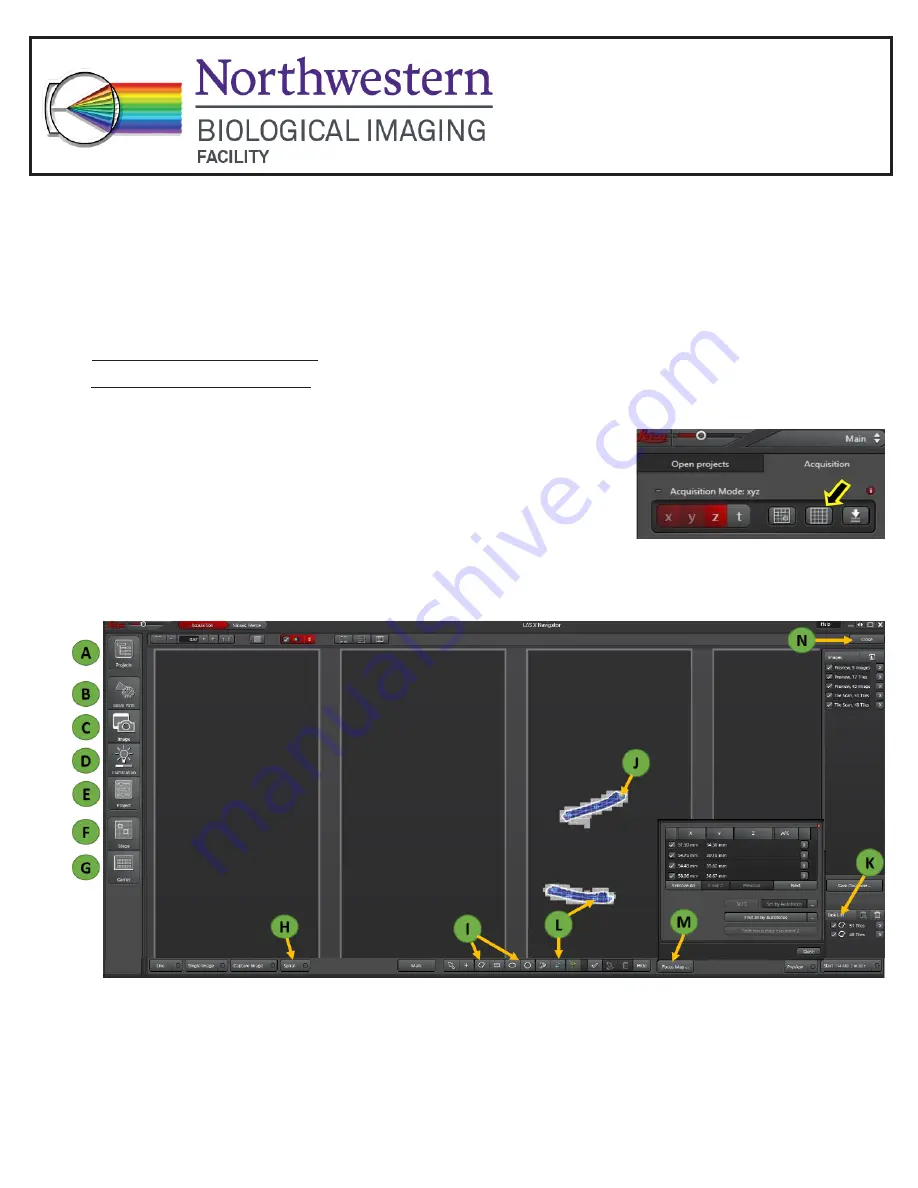
Setting up Tile Scanning
~
Press the Navigator button located near the top of the Open
Projects/Acquisition panel.
New window will open.
~ In the new window find access to the standard LAS X settings on the left side
(A-G)
. Adjust settings at
any time if required while staying in the Navigator mode.
~ Press “Carrier
(G)
> Well Plate > 4 slide” to view screen as 4 slide stage.
~ Using mouse wheel, zoom in/zoom out to the field of view of the interest.
~ Double clicking by left button of mouse will preview new areas of the slide. Also, Spiral button
(H)
can
be activated to preview sample by spiraling pattern. Stop it when needed.
~ Using one of Shape tools
(I)
draw border round the region(s) of interest
(J)
. Each selection will be listed
in a Task List
(K)
.
Leica DM6B Widefield
Quick Start Guide


