Instruction Manual
For indoor use only
Retain carton for storage purposes
12’(3.65 m) LIGHTED YUKON TREE
model no. 151-7190-4 | Toll-free number: 1-866-827-4985
IMPORTANT: Please read this manual carefully before assembly and save it for reference.
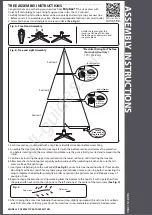
TREE ASSEMBLY INSTRUCTIONS
Carefully follow the instructions below to quickly and easily set up your new tree.
1.Before you start to assemble your tree, choose an appropriate location near a wall outlet.
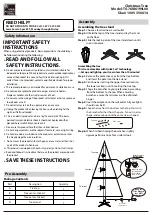
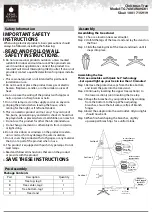
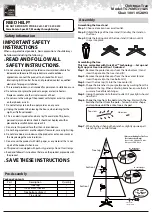
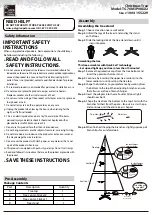
2.Assemble the tree stand and place on a level surface.
(See Fig. A.)
Fig. A - Tree Stand Assembly
Pull apart the legs of the stand so that they are snapped into an X-shape until
the screw holes are
aligned
and place the tree stand on a level surface.
Insert the tree screws into the screw holes and
turn 3 – 4 rotations only (if the screws are inserted too far you will not be able to fully insert the tree
pole).
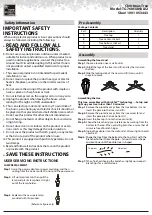
Section A
Section B
Section C
Section D
Section E
*Electrical rating for the
tree (For indoor use only)
5.1A, 120V, 60Hz
Foot Pedal
ON/OFF Switch
Insert
green-labeled
plug into wall
outlet
3.Each tree section is numbered with a tag. Please identify all sections before assembling.
4.Assemble the tree from the bottom to the top. Start with the bottom section and remove protective cap before inserting
into the assembled stand. Make sure the pole is firmly inserted and secured into the stand.
Fig. B - Tree and Light Assembly