background image

Micromax™ 17E

INSTRUCTIONS FOR USE

ADVANCE model:
908 7047 020

INSTRUCTIONS D’UTILISATION

Modèle ADVANCE:
908 7047 020

INSTRUCCIONES DE USO

Modelo ADVANCE:
908 7047 020

INSTRUÇÕES DE USO

Modelo ADVANCE:
908 7047 020

909 5473 000(2)2005-04

https://harrissupplyind.com - To Order Parts Call 608-268-8080

Содержание 908 7047 202

Страница 1: ...el 908 7047 020 INSTRUCTIONS D UTILISATION Modèle ADVANCE 908 7047 020 INSTRUCCIONES DE USO Modelo ADVANCE 908 7047 020 INSTRUÇÕES DE USO Modelo ADVANCE 908 7047 020 909 5473 000 2 2005 04 https harrissupplyind com To Order Parts Call 608 268 8080 ...

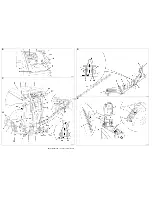
Страница 2: ...Micromax 17E 909 5473 000 2 2005 04 B S310054 C S310193 D S310048 E S310179 https harrissupplyind com To Order Parts Call 608 268 8080 ...

Страница 3: ...MAX 17E AUTOMATIC SCRUBBER OPERATION 4 TECHNICAL DATA 5 DIAGRAMS 5 ACCESSORIES OPTIONS 5 USE 6 BEFORE MACHINE START UP 6 STARTING AND STOPPING THE MACHINE 6 MACHINE OPERATION 7 TANK EMPTYING 7 AFTER USING THE MACHINE 7 FIRST PERIOD OF USE 7 MAINTENANCE 8 SCHEDULED MAINTENANCE TABLE 8 SQUEEGEE CLEANING 8 SQUEEGEE BLADE CHECK AND REPLACEMENT 9 BRUSH CLEANING 9 TANK AND VACUUM GRID WITH FLOAT CLEANIN...

Страница 4: ...benefits to the machines that were previously sold Any modifications and or addition of accessory must be approved and performed by the Manufacturer SAFETY The following symbols indicate potentially dangerous situations Always read this information carefully and take the necessary precautions to protect people and objects The machine Operator s cooperation is essential in order to prevent injury N...

Страница 5: ...low This machine cannot be used on roads or public streets Pay attention to the machine transfers when temperature is under freezing point The water in the recovery tank or in the pipes could freeze and damage the machine Use the brushes and the pads supplied with the machine and those specified in the Instructions for Use Using other brushes or pads could reduce safety To reduce the risk of fire ...

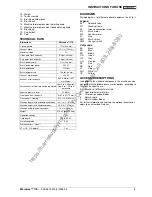
Страница 6: ...and have it checked by the Parcel Service that delivered it Call the Parcel Service immediately to fill in a request for a compensation for damages Please check that the following items have been supplied with the machine Technical documents Instructions for Use Spare Parts List Extension cord in case the machine is supplied with the no touching ground power cord MACHINE DESCRIPTION MICROMAX 17E A...

Страница 7: ...or further information concerning the optional accessories apply to an authorized Retailer Dimensions Micromax 17E Cleaning width 17 in 430 mm Vacuum width 30 3 in 770 mm Maximum slope 2 Clean water tank capacity 9 6 gal 36 liters Dirty water tank capacity 9 6 gal 36 liters Brush pad diameter 17 in 430 mm Brush pad motor power 550 W Brush pad speed 170 rpm Brush pad pressure 74 8 lbs 34 kg Vacuum ...

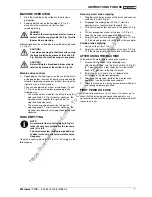
Страница 8: ...st be under 100 F 40 C STARTING AND STOPPING THE MACHINE Starting the machine 1 Prepare the machine as described in the previous paragraph 2 Unroll the supply cable 23 Fig C and introduce the supply plug 22 Fig C in the electrical mains socket 3 Lower the squeegee 10 Fig C by means of the lever 19 4 Lower the brush 8 Fig C by means of the pedal 20 5 Position the solution flow control lever 4 Fig B...

Страница 9: ...ans of the hose 17 Fig C If the cleaning is over rinse the tank with clean water Solution tank emptying 7 Carry out steps from 1 to 4 8 Empty the solution tank by means of the hose 18 Fig C If the cleaning is over rinse the tank with clean water AFTER USING THE MACHINE At the end of the work before leaving the machine 1 Disconnect the brush in the following way with the brush lifted turn the brush...

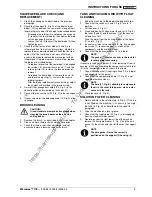
Страница 10: ... 3 and rear blades 4 are integral and free from cuts and lacerations otherwise replace them see the procedure in the following paragraph 7 Install in the reverse order of removal WARNING The operations must be carried out with the machine off and disconnected from the electrical mains Moreover carefully read the instructions in the Safety chapter before performing any maintenance operation NOTE Fo...

Страница 11: ...rush TANK AND VACUUM GRID WITH FLOAT CLEANING 1 Bring the machine to the appointed disposal area 2 Check that the switches 2 and 3 Fig B are in 0 position 3 Lift the cover 2 Fig H 4 Clean and wash with clean water the cover 4 Fig E the tanks 5 and 6 and the screen 1 of the vacuum automatic cut off Drain the water from the tanks by means of the hoses 17 and 18 Fig C 5 If necessary release the retai...

Страница 12: ...sed float Hose 25 Fig C disconnected from the squeegee Dirty squeegee or worn damaged squeegee blades 13 and 14 Fig C Incorrectly closed tank cover or damaged gasket 7 Fig E or clogged compensation hole 11 Fig E Insufficient solution flow to the brush Dirty solution filter 2 Fig F Dirty tank 7 Fig H clogged output hole Scoring caused by the squeegee Debris under the squeegee blades 13 and 14 Fig C...

Страница 13: ...ECHNIQUES 5 SCHEMAS 5 ACCESSOIRES OPTIONS 6 UTILISATION 6 AVANT LA MISE EN MARCHE DE LA MACHINE 6 MISE EN MARCHE ET ARRET DE LA MACHINE 6 FONCTIONNEMENT DE LA MACHINE 7 VIDANGE RESERVOIRS 7 APRES L UTILISATION DE LA MACHINE 7 PREMIERE PERIODE D UTILISATION 7 ENTRETIEN 8 PLAN RECAPITULATIF D ENTRETIEN PROGRAMME 8 NETTOYAGE DE L EMBOUCHURE 8 CONTROLE ET REMPLACEMENT DES LAMELLES EN CAOUTCHOUC DE L E...

Страница 14: ...ion d accessoires doit toujours être approuvée et réalisée par le fabricant SECURITE Les symboles suivants signalent les conditions de danger potentielles Lire toujours ces informations avec attention et prendre les précautions nécessaires pour protéger les personnes et les choses Pour éviter tout accident la collaboration de l opérateur de la machine est essentielle Aucun programme de prévention ...

Страница 15: ...ux pourrait se congeler et endommager sérieusement la machine Utiliser les brosses et les disques équipés et ceux spécifiés par le manuel d emploi et d entretien L utilisation d autres brosses ou disques peut compromettre la sécurité Pour réduire les risques d incendie d électrocution ou de blessures ne pas quitter l appareil lorsque qu il est branché sur la prise de courant Débrancher l unité de ...

Страница 16: ...goupille de mise à la terre Les rallonges reliées à cette machine doivent être uniquement du calibre 12 et à trois fils avec fiches et prises à trois broches NE PAS utiliser de rallonges de longueur supérieure à 15 m 50 ft DEBALLAGE Pour déballer la machine respecter attentivement les instructions indiquées sur l emballage Lors de la livraison de la machine contrôler attentivement que l emballage ...

Страница 17: ...Bouton de réglage de vitesse de marche avant machine 18 Brosse disque 19 Plateau support disque 20 Disque CARACTERISTIQUES TECHNIQUES SCHEMAS Schémas électriques des équipements optionnels différents voir Fig I Légende EV1 Electrovanne FR Châssis de la machine H1 Vis de mise à la terre M1 Moteur de brosses M2 Moteur d aspiration PL Fiche SW1 Interrupteur de brosses SW2 Interrupteur d aspiration Co...

Страница 18: ...omplètement le réservoir de la solution mais laisser toujours quelques centimètres libres du bord Respecter toujours les instructions sur la dilution indiquées sur l étiquette du conteneur du produit chimique utilisé pour la solution La température de la solution ne doit jamais être supérieure à 40 C 100 F MISE EN MARCHE ET ARRET DE LA MACHINE Mise en marche 1 Préparer la machine comme décrit dans...

Страница 19: ...6 Vider le réservoir de récupération au moyen du tuyau flexible 17 Fig C A la fin du nettoyage rincer le réservoir avec de l eau propre Vidange réservoir de la solution 7 Exécuter les points de 1 à 4 8 Vider le réservoir de la solution au moyen du tuyau flexible 18 Fig C A la fin du nettoyage rincer le réservoir avec de l eau propre APRES L UTILISATION DE LA MACHINE Le travail effectué avant de la...

Страница 20: ... de coupures ou de lacérations en cas contraire les remplacer voir la procédure au paragraphe suivant 7 Pour la repose procéder dans l ordre inverse de la dépose ATTENTION Les opérations doivent être effectuées avec la machine arrêtée et débranchée du réseau électrique En outre lire attentivement toutes les instructions du chapitre Sécurité avant d effectuer les opérations d entretien REMARQUE Pou...

Страница 21: ...xcessivement usés en cas contraire remplacer la brosse NETTOYAGE DES RESERVOIRS ET DE LA GRILLE D ASPIRATION AVEC FLOTTEUR 1 Amener la machine dans la zone d écoulement déterminée 2 Contrôler que les interrupteurs 2 et 3 Fig B sont en position 0 3 Soulever le couvercle 2 Fig H 4 Nettoyer et laver à l eau propre le couvercle 4 Fig E les réservoirs 5 et 6 et la grille 1 de la fermeture automatique d...

Страница 22: ...bouchure L embouchure est sale ou les lamelles en caoutchouc de l embouchure 13 et 14 Fig C sont usées ou endommagées Le couvercle des réservoirs n est pas fermé correctement ou le joint d étanchéité 7 Fig E est endommagé ou l orifice de compensation 11 Fig E est obstrué Le flux de solution aux brosses est insuffisant Le filtre de la solution 2 Fig F est sale Le réservoir 7 Fig H est sale l orific...

Страница 23: ...ROMAX 17E 4 DATOS TÉCNICOS 5 DIAGRAMAS 5 ACCESORIOS OPCIONES 6 USO 6 ANTES DE LA PUESTA EN MARCHA DE LA MÁQUINA 6 PUESTA EN MARCHA Y PARADA DE LA MÁQUINA 6 FUNCIONAMIENTO DE LA MÁQUINA 7 VACIADO DE LOS DEPÓSITOS 7 DESPUÉS DE LA UTILIZACIÓN DE LA MÁQUINA 7 PRIMER PERIODO DE UTILIZACIÓN 7 MANTENIMIENTO 8 ESQUEMA DE MANTENIMIENTO PROGRAMADO 8 LIMPIEZA DE LA BOQUILLA 8 CONTROL Y SUSTITUCIÓN DEL CAUCHO...

Страница 24: ... máquinas vendidas previamente Sólo el fabricante puede aprobar y efectuar cualquier modificación y o instalación de accesorios SEGURIDAD La siguiente simbología sirve para señalizar situaciones de peligro potencial Leer siempre cuidadosamente estas informaciones y tomar las precauciones necesarias para proteger personas y cosas Para evitar desgracias la cooperación del operador de la máquina es f...

Страница 25: ...reteras o vías públicas Tener cuidado durante el traslado de la máquina en condiciones por debajo de la temperatura de congelación El agua en el tanque de recuperación o en los tubos podría congelarse y dañar la máquina Utilizar sólo los cepillos y los fieltros suministrados con la máquina y aquellos especificados en las Instrucciones de uso Utilizar otros cepillos o fieltros puede perjudicar la s...

Страница 26: ...a está dañado o roto El hilo verde o verde amarillo en el cable es el hilo de tierra Cuando se sustituye el enchufe el filo debe estar conectado sólo al terminal de tierra Usar solamente extensiones trifilares que tengan un enchufe de conexión a tierra de 3 hojas y un receptáculo de triple ranura que acepte el enchufe de la máquina NO UTILIZAR extensiones con longitud superior a 15 m 50 ft DESEMBA...

Страница 27: ...o portafieltro 15 Cabezal portacepillo 16 Empuñadura de ajuste de la marcha adelante 17 Empuñadura de ajuste de la velocidad en marcha adelante 18 Cepillo fieltro 19 Portafieltro 20 Fieltro DATOS TÉCNICOS DIAGRAMAS Esquemas eléctricos para los componentes opcionales véase Fig I Leyenda EV1 Electroválvula FR Bastidor máquina H1 Tornillo de conexión a tierra M1 Motor cepillo M2 Motor de aspiración P...

Страница 28: ...etamente el depósito del detergente dejar unos centímetros del borde Seguir las instrucciones indicadas en la etiqueta para la diluición del producto químico utilizado para componer el detergente La temperatura del detergente no debe superar los 40 C 100 F PUESTA EN MARCHA Y PARADA DE LA MÁQUINA Puesta en marcha 1 Preparar la máquina como indicado en el párrafo antecedente 2 Desenrollar el cable d...

Страница 29: ...n caso de trabajo acabado enjuagar el depósito con agua limpia Vaciado del depósito del detergente 7 Llevar a cabo los pasos de 1 a 4 8 Vaciar el depósito del detergente mediante el tubo 18 Fig C En caso de trabajo acabado enjuagar el depósito con agua limpia DESPUÉS DE LA UTILIZACIÓN DE LA MÁQUINA Cuando el trabajo está acabado antes de alejarse de la máquina 1 Desconectar el cepillo según el pro...

Страница 30: ...sgarrados de lo contrario sustituirlos véase el procedimiento en el párrafo siguiente 7 Instalar en el orden contrario a la remoción ATENCIÓN Las operaciones deben efectuarse con la máquina apagada y desconectada de la red eléctrica Antes de efectuar las operaciones de mantenimiento leer cuidadosamente todas las instrucciones del capítulo Seguridad NOTA Para las operaciones de mantenimiento no ind...

Страница 31: ... sustituir el cepillo LIMPIEZA DEL DEPÓSITO Y DE LA REJILLA DE ASPIRACIÓN CON FLOTADOR 1 Llevar la máquina al área de eliminación designada 2 Controlar que los interruptores 2 y 3 Fig B estén en posición 0 3 Abrir la tapa 2 Fig H 4 Limpiar con agua limpia la tapa 4 Fig E los depósitos 5 y 6 y la rejilla 1 del cierre automático de la aspiración Descargar el agua de los depósitos mediante los tubos ...

Страница 32: ...a boquilla La boquilla está sucia o los cauchos de la boquilla 13 y 14 Fig C están desgastados dañados La tapa de los depósitos no está correctamente cerrada o la guarnición 7 Fig E está dañada o el orificio de compensación 11 Fig E está obstruido El flujo del detergente al cepillo es insuficiente El filtro del detergente 2 Fig F está sucio El depósito 7 Fig H está sucio obstrucción del orificio d...

Страница 33: ...M AUTOMÁTICA DE PISOS MACROMAX 17E 4 DADOS TÉCNICOS 5 DIAGRAMAS 5 ACESSÓRIOS OPÇÕES 6 USO 6 ANTES DA PARTIDA DA MÁQUINA 6 PARTIDA E PARADA DA MÁQUINA 6 OPERAÇÃO DA MÁQUINA 7 ESVAZIAMENTO DE TANQUE 7 APÓS O USO DA MÁQUINA 7 PERÍODO INICIAL DE USO 7 MANUTENÇÃO 8 TABELA DE MANUTENÇÃO PROGRAMADA 8 LIMPEZA DO RODO 8 INSPEÇÃO E SUBSTITUIÇÃO DAS BORRACHAS DO RODO 9 LIMPEZA DA ESCOVA 9 LIMPEZA DO TANQUE E...

Страница 34: ...ero de série da máquina MODIFICAÇÕES E MELHORIAS A nossa empresa está em constante processo de aperfeiçoamento de seus produtos reservando se assim o direito de fazer modificações e melhorias a seu critério sem obrigação de aplicar tais modificações e melhorias às unidades previamente vendidas Qualquer modificação e ou acréscimo de acessórios devem ser aprovados e realizados pelo Fabricante SEGURA...

Страница 35: ...as mantenha as aberturas da máquina livres de pó fios pêlos e qualquer outro corpo estranho que possa reduzir o fluxo de ar A máquina não pode ser utilizada em rodovias ou vias públicas Preste atenção durante o transporte da máquina quando as condições de temperatura forem negativas A água no tanque de recuperação ou nas mangueiras pode congelar e danificar a máquina Use somente as escovas e os fe...

Страница 36: ...no de aterramento estiver danificado ou quebrado O fio Verde ou Verde Amarelo no cabo é o fio terra Ao substituir um plugue este fio deve ser preso apenas no pino de aterramento Os cabos de extensão conectados a esta máquina devem ser cabos trifilares bitola 12 com três plugues forcados e tomadas NÃO UTILIZE cabos de extensão com mais de 15 metros 50 pés de comprimento DESEMBALAGEM Para desembalar...

Страница 37: ...otão de ajuste do movimento de avanço da máquina 17 Botão de ajuste de velocidade do movimento de avanço da máquina 18 Escova feltro 19 Porta feltro 20 Feltro DADOS TÉCNICOS DIAGRAMAS Diagramas elétricos para equipamentos opcionais diferentes veja a Fig I Legenda EV1 Válvula solenóide FR Chassis da máquina H1 Parafuso de conexão terra M1 Motor de escova M2 Motor de aspiração PL Plugue SW1 Interrup...

Страница 38: ... através das marcas 26 Fig C Não encha o tanque completamente deixe alguns centímetros livres no nível de detergente Siga sempre as instruções de diluição indicadas na etiqueta do produto químico usado no detergente A temperatura do detergente não deve ultrapassar 40 C 100 F PARTIDA E PARADA DA MÁQUINA Partida da máquina 1 Prepare a máquina como descrito no parágrafo anterior 2 Desenrole o cabo de...

Страница 39: ...impeza lave o tanque com água limpa Esvaziamento do tanque de detergente 7 Execute os passos de 1 a 4 8 Esvazie o tanque de detergente usando a mangueira 18 Fig C Ao concluir a limpeza lave o tanque com água limpa APÓS O USO DA MÁQUINA Ao concluir o trabalho antes de guardar a máquina 1 Desconecte a escova da seguinte maneira com a escova elevada gire o interruptor de escova 2 Fig B para a posição...

Страница 40: ... traseira 4 veja se estão em bom estado sem cortes ou lacerações substitua as se necessário veja o procedimento descrito no parágrafo seguinte 7 Instale na ordem inversa da remoção ATENÇÃO As operações devem ser conduzidas com a máquina desligada e desconectada da rede elétrica Antes de realizar qualquer operação de manutenção leia cuidadosamente as instruções fornecidas no capítulo Segurança NOTA...

Страница 41: ...ão em bom estado e sem desgaste excessivo substitua as se necessário LIMPEZA DO TANQUE E GRADE DE ASPIRAÇÃO COM BÓIA 1 Leve a máquina para a área de descarte indicada 2 Verifique se os interruptores 2 e 3 Fig B estão na posição 0 3 Levante a tampa 2 Fig H 4 Limpe e lave a tampa 4 Fig E os tanques 5 e 6 e a tela 1 do fechamento automático de aspiração com água limpa Remova a água dos tanques usando...

Страница 42: ...ou bóia fechada presa Mangueira 25 Fig C desconectada do rodo Rodo sujo ou borrachas do rodo desgastadas danificadas 13 e 14 Fig C Tampa do tanque fechada incorretamente ou vedação danificada 7 Fig E ou orifício de compensação 11 Fig E entupido Fluxo insuficiente de detergente para a escova Filtro de detergente sujo 2 Fig F Tanque sujo 7 Fig H entupimento do orifício de saída Riscos causados pelo ...

Страница 43: ...Micromax 17E 909 5473 000 2 2005 04 F G S310180 H S310194 1 2 3 4 5 6 7 A B C https harrissupplyind com To Order Parts Call 608 268 8080 ...

Страница 44: ...Micromax 17E 909 5473 000 2 2005 04 I S310182 BK BK 2 BK 2 BK 2 WH BK 1 BK 1 BK 1 YE GN YE GN YE GN YE GN EV1 M2 M1 SW2 SW1 PL H1 FR https harrissupplyind com To Order Parts Call 608 268 8080 ...

Отзывы: