New England !VALON, Assembly Instructions Manual
Introducing the "New England !VALON" - a premium quality product designed to elevate your assembly experience. With our comprehensive Assembly Instructions Manual, you'll find step-by-step guidance to effortlessly assemble your !VALON. Download the detailed manual for free from our website, manualshive.com, and start enjoying your !VALON hassle-free.
Share
Download


Reviews:
No comments
Related manuals for !VALON
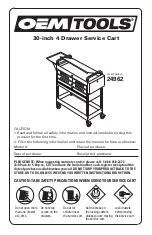
24962
Brand: OEM Tools Pages: 8

DEFY
Brand: Safco Pages: 2

FT-302
Brand: Campania International Pages: 3

DIAMOND
Brand: calligaris Pages: 2

Noah PA02
Brand: E15 Pages: 9

Carousel
Brand: Landscape Forms Pages: 2

Yukon
Brand: Palram Pages: 100

Haven
Brand: WATSON Pages: 4

Monterosso AX8
Brand: Made Pages: 8

Elsy
Brand: Naomi Home Pages: 19

PRATO 147163BEIG
Brand: CAFOM SOURCING Pages: 4

Westwood Modula Wall Unit
Brand: JD Williams Pages: 16

Parker DSK6400
Brand: SAFAVIEH COUTURE Pages: 2

39454-HBCLED
Brand: GLUCKSTEIN ELEMENTS Pages: 8

Gabe
Brand: Argos Pages: 8

1936F-1
Brand: Homelegance Pages: 1

Exquisit Series
Brand: Summit Pages: 2

Metal Base
Brand: Tuft & Needle Pages: 12


