background image

1


WOODBOX

®

 TECHNOLOGY 

MQ33 

INSTRUCTIONS 

Summary of Contents for WOODBOX MQ33

Page 1: ...1 WOODBOX TECHNOLOGY MQ33 INSTRUCTIONS ...

Page 2: ...2 ...

Page 3: ...bserve a distance of at least 80cm all around the appliance in the case of a rotating appliance It is prohibited to place the appliance directly onto a fl oor of fl ammable material carpet parquet In the event of a fl oor made of fl ammable material the appliance must be raised to a minimal height corresponding to the height of the low base optional extra In the event of the appliance being placed...

Page 4: ...rds It is equipped with Woodbox technology which constitutes an important technical advance in the fi eld of wood fuel Performance Power kW CO emissions Vol Weight Kg 77 6 8 0 07 210 List of contents 1 stove 1 air control tool 1 poker 1 All purposeglove 1 Rear flue outlet 1 stopgap flue outlet gasket 2 flue outlet fi xing screws 1 instructions manual ...

Page 5: ...the appliance must be as equally airtight and made of non combustible materials protected if possible against oxidation enamelled sheet metal aluminium stainless steel HEIGHT OF THE CHIMNEY The chimney must be high enough and unconstructed to avoid backdraft It should be protected with insulating materials to lower the risk of sooting in the high part of the chimney fl ue and if necessary it shoul...

Page 6: ...nd Horizontal connection through the stand Warning for this kind of connection install a ground protection plate Create a hole of a 100mm diameter in the floor Connect the flexible aluminium air duct Ce type de raccordement n est possible qu avec un socle vendu en option Screw the stopgap until the stand s air intake is blocked Pass a pipe of 100mm diameter through the wall Connect the pipe to the...

Page 7: ...e an outside air intake system thanks to the flue outlet provided LOG STORE STAND This cast iron stand allows you to have a 360 swivelling stove due to the integrated bearings It is equipped to receive a direct exterior air intake system and a space to store wood logs It also has four leveling feet If it is required to connect an exterior air intake it is possible to doing it vertically by removin...

Page 8: ...system but you also have the possibility of modifying it for an air intake system through the bottom To do this 1 With a screwdriver unscrew the square stopgap which is situated under the air box on the stand see diagram 2 Unscrew the back plate fitted with collar and replace it eith the plain stop gap cover OPTIONAL BEARINGS Thanks to the optional bearings you have the possibility to mount your s...

Page 9: ... it in with the Allen key Photo 2 Replace the control panel and the base cover using the screwdriver or screw gun Warning the tighter the screw is the more resistance there will be in moving the stove MOTOR AND RECEIVER To install the motor and receiver proceed as follows 1 Remove the control panel 2 screws 2 Pull back the strap of the magnet then wedge the muff of the motor against the magnet 3 R...

Page 10: ...er of the log is important for the heat However this classifi cation is only an indication as the best fi re wood is always the driest Wood provided at a ready to use length stored immediately in a well aired place dry quicker than those left in steres Blocks dry quicker than logs Wood chucks that are too small to be split must be drained To do this remove a portion of the bark Drying the wood wil...

Page 11: ... provided to adjust the controls Tool provided The LOWER AIR SUPPLY control used for coal fires or to make lighting wood fires easier The UPPER AIR SUPPLY control used for wood fires The controls operate valves that open and close in several ways bringing the air to the fi re in a way that optimises the combustion according to the fuel and desired intensity WARNING DO NOT USE ANY GRATES ANDIONS OR...

Page 12: ... above and below at the same time rapidly and intensively stoke the fi re Such adjustments can be used to light the fi re easier or to burn the soot deposits on the glass pane However the buffer settings can only be used for short periods as it can cause the appliance to overheat Wood Closed Open One flap is open bringing the air from above the fire By going around the heater the air is warmed bef...

Page 13: ...tice you will quickly be able to fi nd the position that suits you best USING WOOD LIGHTING WITH THE REMOTE CONTROL Set the UPPER AIR SUPPLY to maximum by pressing the button on the remote control Set the LOWER AIR SUPPLY to maximum Tip leave the door slightly open to stoke the fi re It will increase the draw and allow an ember bed to be achieved On the grate place some paper or shavings kindling ...

Page 14: ...is possible to have a fi re burning continuously for 8 10 hours or even more To build a slow fi re that can last a long time while at the same time keeping the window clean Refi ll the appliance in the manner described above Do not use round pieces of wood or logs that have not been split as they risk rolling against the glass pane and dirtying it Set the UPPER AIR SUPPLY control to maximum Leave ...

Page 15: ...fi re in the appliance Adjust it in accordance with the pull of your chimney if necessary The minimum setting screw is situated behind the control panel Using a cross headed screwdriver tighten the regulating screw clockwise to decrease or to completely close the minimum air intake Turn it anti clockwise to increase the minimum air intake EMPTYING THE ASHTRAY To avoid an overfl ow of ashes empty t...

Page 16: ... glass pane of the appliance is specially made to withstand high temperatures and certain cleaning products contain chemical products which can weaken or mark the glass pane Some newspaper dampened with water and a few drops of vinegar is enough to remove the majority of marks For tougher marks gently rub them with a scourer of fi ne steel wool lubricated with a little dish soap However be careful...

Page 17: ...G THE PLEXUS CONTROL UNIT It is possible to remove the control unit for maintenance This must be carried out by a qualified technician Open the door and the gate Unscrew and remove the control panel using a screwdriver Unscrew the 4 fixing screws from the control unit by going through the holes provided in the cast iron support Pull the control unit out towards the front Front door Glass Cast iron...

Page 18: ...ell as any damages occurred to the remote control if dropped All maintenance procedures and or the replacement of parts must be carried out by a maintenance company or a specialist recognised by NESTORMARTIN To make a warranty request for a faulty part have the part replaced and send the faulty part to a NESTOR MARTIN distributor for inspection If the fault is covered by the warranty you will not ...

Page 19: ...19 DIMENSIONS AFMETINGEN DIMENSIONI DIMENSIONES DIMENSIONS SOCLE SOKKEL BASE BASE STAND 993900216 ...

Page 20: ...20 PERMUTATION DU BUSELOT DESSUS ARRIERE HET OMBOUWEN VOOR BOVENAFVOER ACHTERAFVOER COLLEGAMENTO RACCORDO FUMI PERMUTACIÓN DE LA SALIDA DE HUMOS INTERCHANGING THE TOP BACK FLUE OUTLETS 1 2 3 4 5 6 ...

Page 21: ...21 PERMUTATION DU BUSELOT DESSUS ARRIERE HET OMBOUWEN VOOR BOVENAFVOER ACHTERAFVOER COLLEGAMENTO RACCORDO FUMI PERMUTACIÓN DE LA SALIDA DE HUMOS INTERCHANGING THE TOP BACK FLUE OUTLETS 7 8 9 10 ...

Page 22: ... 993062698 B4 993062270 B5 993062591 B6 993063045 B8 993043665 B9 993062695 B10 993043519 B11 993900204 B12 993900206 B13 993900223 B14 993062243 B15 993064544 B16 993900211 B23 993900224 B24 9920536 B25 993900225 Nº MQ33 38333153 C1 993045228 C2 993900226 C3 993900227 C4 993011838 C5 993900212 C6 993900228 C7 993900229 C8 993900230 D1 993062097 D3 993062092 D6 993900231 E1 993047631 E2 993020017 ...

Page 23: ...23 ...

Page 24: ...90 ...

Page 25: ...91 ...
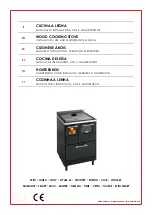
Page 26: ...26 WOODBOX TECHNOLOGY SOTO DE LA MARINA CANTABRIA Apdo de correos 208 SANTANDER C07100DC126_1 09 2018 ...

Reviews: