manualshive.com logo in svg
background image

[en] INSTRUCTION MANUAL 

Built-in oven 

B25CR22.1B

Содержание B25CR22.1B

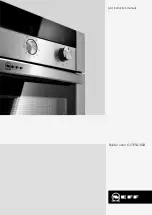
Страница 1: ... en INSTRUCTION MANUAL Built in oven B25CR22 1B ...

Страница 2: ......

Страница 3: ...tomatic childproof lock 15 One time childproof lock 15 Q Basic settings 16 Changing the basic settings 16 List of basic settings 16 Setting favourites 16 F Sabbath mode 17 Starting Sabbath mode 17 Cancelling Sabbath mode 17 D Cleaning agent 17 Suitable cleaning agents 17 Keeping the appliance clean 18 Cleaning function 19 Self cleaning 19 EasyClean 20 p Rails 21 Detaching and refitting the rails 2...

Страница 4: ...portantsafetyinformation General information Warning Risk of fire Combustible items stored in the cooking compartment may catch fire Never store combustible items in the cooking compartment Never open the appliance door if there is smoke inside Switch off the appliance and unplug it from the mains or switch off the circuit breaker in the fuse box Risk of fire A draught is created when the applianc...

Страница 5: ...ers or insulin pumps Wearers of electronic implants must stay at least 10 cm away from the control panel Halogen lamp Warning Risk of electric shock When replacing the cooking compartment bulb the bulb socket contacts are live Before replacing the bulb unplug the appliance from the mains or switch off the circuit breaker in the fuse box Cleaning function Warning Risk of fire Loose food residues gr...

Страница 6: ...er universal pan Extremely dirty seal If the seal is very dirty the appliance door will no longer close properly during operation The fronts of adjacent units could be damaged Always keep the seal clean Appliance door as a seat shelf or worktop Do not sit on the appliance door or place or hang anything on it Do not place any cookware or accessories on the appliance door Inserting accessories depen...

Страница 7: ...u stop scrolling through the values quickly LUFR7KHUP KRW DLU µ É Ý Å Display 0 Touch buttons 8 ShiftControl control Touch button Use on off Switching the appliance on or off Switching the appliance on and off on page 12 0 Main menu Selecting operating modes and set tings Setting and starting the appliance operation on page 12 3 Time setting options Setting the timer cooking time or Ready at start...

Страница 8: ...tting 50 275 C For preparing pizza and dishes which require a lot of heat from underneath The bottom heating element and the ring heating element in the back panel heat up Bread baking 180 240 C For baking bread bread rolls and baked items that require high temperatures ˆ Grill large area 50 290 C For grilling flat items such as steaks or sausages for making toast and for au gratin dishes The whol...

Страница 9: ...the cooling fan continues to run for a certain period afterwards Note You can change how long the cooling fan continues to run for in the basic settings Basic settings on page 16 _Accessories Accessories Your appliance is accompanied by a range of accessories Here you can find an overview of the accessories included and information on how to use them correctly Accessories included Your appliance i...

Страница 10: ... or on the Internet You will find a comprehensive range of products for your appliance in our brochures and on the Internet Both availability and whether it is possible to order online differ between countries Please see your sales documents for more details When purchasing please always quote the exact order number of the optional accessory Note Not all optional accessories are suitable for every...

Страница 11: ...current year 11 Use the button to return to Year 12 Use the button to apply the settings The initial use is complete Notes You can change these settings at any time in the basic settings Basic settings on page 16 After connecting the appliance to the power or following a power cut the settings for initial use are shown in the display Cleaning the cooking compartment To remove the new appliance sme...

Страница 12: ...ture Note Depending on the operating mode different settings are available For each further setting use the button to navigate to the next line Use the or button to select the setting 5 Touch the touch button to start the appliance operation The heating bar and run time appear on the display Note If you would like to go directly to the 0 main menu after switching on the appliance you can select th...

Страница 13: ... lit the Rapid heat up or PowerBoost function can be activated To deactivate the Rapid heat up or PowerBoost function before it has finished touch the touch button Activating the Rapid heat up function 1 Set top bottom heating ƒ and the temperature Note Set a temperature above 100 C to allow the appliance to preheat quickly 2 Touch the touch button to start the appliance operation 3 Touch the touc...

Страница 14: ...cooking time As soon as the cooking time has elapsed an audible signal sounds and the appliance ends the operation automatically Touch the 0 touch button to end the audible signal Start delay Ready at The appliance switches on automatically and switches off at the preset end time To do this set the cooking time and determine the end time for the operation The start delay can only be used in combin...

Страница 15: ...ouch button until Childproof lock deactivated appears on the display 2 Touch the touch button 3 Switch on the required appliance operation Deactivating 1 Press and hold the 0 touch button until Childproof lock deactivated appears on the display 2 Touch the touch button 3 Touch the 0 touch button 4 Use the or button to select the Settings 5 Use the button to navigate to the next line 6 Use the or b...

Страница 16: ...Use the button to navigate to the next line 9 Use the or button to select Activated or Deactivated Note If you have selected Activated the type of heating is shown in the Types of heating menu If you have selected Deactivated the type of heating is shown in the Types of heating menu 10 Touch the 0 touch button 11 To save the setting use the button to select Save To discard the setting use the butt...

Страница 17: ...ble cleaning agents To ensure that the different surfaces are not damaged by using the wrong cleaning agent observe the information in the table Depending on the appliance model not all of the areas listed may be on in your appliance Caution Risk of surface damage Do not use Harsh or abrasive cleaning agents Cleaning agents with a high alcohol content Hard scouring pads or cleaning sponges High pr...

Страница 18: ...uring pad Door handle Hot soapy water Clean with a dish cloth and then dry with a soft cloth If descaler comes into contact with the door han dle wipe it off immediately Otherwise any stains will not be able to be removed Appliance exterior Enamel surfaces Hot soapy water or a vinegar solution Clean with a dish cloth and then dry with a soft cloth Soften baked on food residues with a damp cloth an...

Страница 19: ...d at the same time You cannot clean any of the wire racks when using the cleaning function The wire racks are not suitable for cleaning using the cleaning function this will discolour them Further accessories suitable for cleaning using the cleaning function are listed in the table for special accessories Accessories on page 9 Warning Risk of fire Loose food residues grease and meat juices may cat...

Страница 20: ...nt must be removed promptly Do not leave the remaining water in the cooking compartment for a long time e g overnight The appliance must not be operated when the cooking compartment is still wet or damp Final cleaning 1 Open the appliance door and remove the remaining water with an absorbent sponge cloth 2 Clean the smooth surfaces in the cooking compartment with a dish cloth or a soft brush Stubb...

Страница 21: ...door With good care and cleaning your appliance will retain its appearance and remain fully functional for a long time to come This will tell you how to remove the appliance door and clean it Removing and fitting the appliance door For cleaning purposes and to remove the door panels you can detach the appliance door The appliance door hinges each have a locking lever When the locking levers are cl...

Страница 22: ... the appliance door fully Fold both locking levers closed again figure 3 Close the cooking compartment door Removing the door cover The stainless steel inlay in the door cover may become discoloured To carry out thorough cleaning you can remove the cover 1 Open the appliance door slightly 2 Press on the right and left side of the cover figure 3 Remove the cover figure Close the appliance door care...

Страница 23: ...r sharp or abrasive cleaning aids or detergents Risk of injury The hinges on the appliance door move when opening and closing the door and you may be trapped Keep your hands away from the hinges Fitting the door on the appliance When fitting the intermediate panel make sure that the arrow is in the top right of the panel and that it aligns with the arrow on the metal panel 1 Insert the intermediat...

Страница 24: ...e box to make sure that the fuse for the appliance is OK After switching on an operating mode a message is shown on the display which indicates that the temperature is too high The appliance has not cooled down sufficiently Allow the appliance to cool down and switch the oper ating mode on again The appliance cannot be switched on the 1 symbol is shown on the dis play The automatic childproof lock...

Страница 25: ... not turn it figure Insert the new bulb making sure that the pins are in the correct position Push the bulb in firmly 4 Screw the glass cover back in 5 Remove the tea towel and switch on the circuit breaker Glass cover If the glass cover of the halogen bulb is damaged it must be replaced You can obtain a new glass cover from the after sales service Please specify the E number and FD number of your...

Страница 26: ... do so slide the universal pan in at level 2 Baking on two levels Use CircoTherm Baked items that are placed into the oven on trays or in baking tins dishes at the same time will not necessarily be ready at the same time Universal pan Level 3 Baking tray Level 1 Baking tins dishes on the wire rack First wire rack Level 3 Second wire rack Level 1 By preparing several dishes at the same time you can...

Страница 27: ... eggs springform cake tin Ø26 cm 2 160 170 25 35 Sponge flan 6 eggs springform cake tin Ø28 cm 2 150 170 30 50 Swiss roll swiss roll tin 3 180 190 10 15 Tart plate Ø20 cm or pie tin 2 160 170 50 60 Tart plate Ø20 cm or pie tin 2 170 190 50 65 Quiche quiche tin dark coated 3 190 210 30 40 White Bread loaf tin 1x 900 g or 2x 450 g 2 ƒ 190 210 25 40 White Bread loaf tin 1x 900 g or 2x 450 g 2 180 200...

Страница 28: ...ally too light in col our If the shelf position and the cookware are correct then you should increase the temperature if necessary or extend the baking time The cake is too light on top and too dark underneath Bake the cake one level higher in the oven the next time The cake is too dark on top and too light underneath Bake the cake one level lower in the oven the next time Select a lower temperatu...

Страница 29: ... amount of liquid is dependent on the type of meat the cookware material and also on whether or not a lid is used If preparing meat in an enamelled or dark metal roasting dish it will need a little more liquid than if cooked in glass cookware The steam evaporates in the cookware when roasting Carefully pour in more liquid if required Shiny roasting dishes made from stainless steel or aluminium ref...

Страница 30: ...ork Roast joint wire rack 2 180 190 35 35 Loin joint wire rack 2 170 180 30 30 Belly wire rack 2 160 170 30 25 Gammon joint wire rack 2 160 170 30 30 Poultry Chicken whole wire rack 2 170 180 25 25 Chicken portion je 200 250 g wire rack 2 190 200 35 45 Chicken quarter je 450 g wire rack 2 180 190 40 60 Duck 2 3 kg wire rack 2 180 190 20 20 Turkey crown wire rack 2 160 170 20 15 Turkey drumstick wi...

Страница 31: ...attached Ensure that the wire rack is correctly positioned on the universal pan Accessories on page 9 Roasting in cookware It is more convenient to roast and braise meat in cookware You can take the joint out of the cooking compartment more easily in the cookware and prepare the sauce in the cookware itself Only use cookware which is suitable for use in an oven Check whether the cookware fits in t...

Страница 32: ...irectly onto the wire rack Use tongs to turn the pieces of food you are grilling If you pierce the meat with a fork the juices will run out and it will become dry Do not add salt to the meat until after it has been grilled Salt draws water from the meat Notes The grill element switches itself on and off continuously this is normal The set temperature determines how frequently this occurs Smoke may...

Страница 33: ...wire rack 2 180 200 30 25 Poultry Chicken drumstick 150 g each wire rack 3 210 230 20 30 Chicken breast boneless 150 g each wire rack 4 ˆ 275 1st side 10 15 2nd side 10 15 Chicken whole wire rack 2 200 220 20 15 Chicken portion 200 250 g each wire rack 3 210 230 1st side 15 20 2nd side 10 15 Chicken quarter 450 g each wire rack 2 210 230 1st side 20 25 2nd side 15 20 Duck 2 3 kg wire rack 2 190 21...

Страница 34: ...appliance door Greaseproof paper Only use greaseproof paper that is suitable for the selected temperature Always cut greaseproof paper to size Recommended setting values In the table you can find the ideal heating type for various dishes Temperature and cooking time depend on the quantity and composition of the product Setting ranges are indicated for this reason Try using the lower values at firs...

Страница 35: ... browns universal pan 3 200 220 25 35 Potatoe wedges universal pan 3 190 210 25 35 Baked goods frozen prebaked Rolls baguettes universal pan 3 180 200 10 15 White bread universal pan 3 180 200 15 30 Fried food frozen Fish fingers universal pan 3 ƒ 200 220 20 30 Chicken nuggets universal pan 3 190 210 20 25 Food chilled Lasagna 400 g ovenproof dish on wire rack 2 190 210 30 35 Lasagna 1 2 kg ovenpr...

Страница 36: ...nly use greaseproof paper that is suitable for the selected temperature Always cut greaseproof paper to size Recommended setting values Here you can find specifications for the various dishes with CircoTherm Eco and Top bottom heating Eco The temperature and baking time depend on the consistency and amount of the dough Settings ranges are indicated for this reason Try with the lower values first A...

Страница 37: ...w cookware e g a glass porcelain serving dish Place the cookware into the cooking compartment to preheat it Always place the uncovered cookware onto the wire rack at level 2 You can find additional information in the tips on slow cooking attached to the settings table Your appliance features the heating type Slow cook Only start operation when the cooking compartment has fully cooled down Allow th...

Страница 38: ...eef rump 6 7 cm thick 1 5 kg Cookware uncovered 2 Š 8 10 80 210 270 Beef tenderloin whole 1 kg Cookware uncovered 2 Š 4 6 80 150 210 Sirloin 5 6 cm thick Cookware uncovered 2 Š 6 8 80 210 270 Beef medallions rump steak 4 cm thick Cookware uncovered 2 Š 5 7 80 30 60 Veal Joint of veal 4 5 cm thick 1 5 kg Cookware uncovered 2 Š 8 10 80 210 240 Joint of veal 10 15 cm thick 1 5 kg Cookware uncovered 2...

Страница 39: ...1 or 1 litre preserving jars at the same time Do not use jars that are larger or taller than this The lids could rupture Preserving jars must not touch one another in the cooking compartment during the preserving process Preparing fruit and vegetables Only use fruit and vegetables that are in good condition Wash them thoroughly Peel core and chop fruit and vegetables appropriate to their type and ...

Страница 40: ... door during the proving process as moisture will escape Do not cover the dough Condensation builds during operation which steams up the door pane Wipe out the cooking compartment after dough proving Loosen any limescale with a little vinegar and wipe with clean water Final fermentation Place your baked item into the oven at the shelf position indicated in the table If you want to preheat the oven...

Страница 41: ...dishes if necessary Test dishes These tables have been produced for test institutes to facilitate the inspection of the appliance In accordance with EN 60350 1 2013 and IEC 60350 1 2011 Baking Baked items that are placed into the oven on trays or in baking tins dishes at the same time will not necessarily be ready at the same time Shelf positions for baking on two levels Universal pan Level 3 Baki...

Страница 42: ...ray 3 1 150 25 35 Small cakes 3 levels Baking trays universal pan 4 3 1 140 35 45 Hot water sponge cake Springform cake tin diameter 26 cm 2 ƒ 160 170 25 35 Hot water sponge cake Springform cake tin diameter 26 cm 2 160 170 25 35 Hot water sponge cake 2 levels Springform cake tin diameter 26 cm 3 1 150 170 30 50 Double crusted apple pie 2 x black plate tins diameter 20 cm 2 170 180 60 80 Double cr...

Страница 43: ...6 ...

Страница 44: ...www neff international com 9001082124 9001082124 950428 Constructa Neff Vertriebs GmbH Carl Wery Straße 34 D 81739 München Register your product online ...

Отзывы: