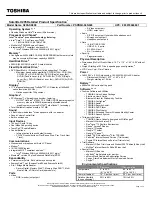
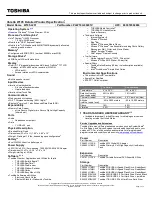
background image


VERSA E3100 

Disassembly Manual 


Summary of Contents for Versa E3100

Page 1: ...VERSA E3100 Disassembly Manual ...

Page 2: ...ery 6 Removing the Memory and Wireless LAN Module 7 Removing the Hard Disk Drive 8 Removing the Optical Disk Drive 9 Removing the Keyboard 11 Removing the LCD Module 13 Removing the LCD Panel 15 Removing the Switch Board Module 17 Removing the Top Cover Assembly 18 Removing the Main Board 20 Removing the CPU 22 Removing the MDC Modem 23 Removing the Touch Pad 23 Removing the Bluetooth Module 24 Re...

Page 3: ...ns to any printed wiring board Improper repairs can create a safety hazard Any indication of component replacement or printed wiring board modifications may void any warranty or exchange allowances Disassembly Instructions When disassembling the system follow these general rules Do not disassemble the system into part smaller than illustrated by this manual Label all removed connectors Note where ...

Page 4: ... is un installed in the computer Power Supply Unit Under no circumstances should you attempt to disassemble the power supply The power supply contains no user serviceable parts Inside the power supply are hazardous voltages that can cause serious personal injury Always return a defective power supply to your dealer WARNING Ensure that the computer disconnected from its power source and from all te...

Page 5: ...NEC VERSA E3100 Disassembly Manual Page 5 ...

Page 6: ...emoving the Battery Perform the following steps to remove the battery 1 Make sure to power off the VERSA E3100 2 Turn the unit upside down 3 Unlock the battery and slide it out of its place as the arrow shows in Fig 1 Fig 1 Removing the battery ...

Page 7: ...e Removing the Battery then perform the following steps 1 Release the two screws retaining the memory and wireless LAN module cover Fig 2 Removing the screws retaining the memory and wireless LAN module slot cover 2 Remove the two wireless LAN cable and unclip the memory and wireless module as shown in Fig 3 Fig 3 Removing the memory and wireless LAN module ...

Page 8: ...ry see Removing the Battery then perform the following steps 1 Remove the screws as shown in Fig 4 Fig 4 Removing the Hard disk drive cover 2 Release the screws that secure HDD module as shown in Fig 5 and carefully pull the HDD module out from the base unit Fig 5 Screw retaining the HDD module M2 5X4 5 Black M2 5X6 5 Black ...

Page 9: ... ODD first remove the battery see Removing the Battery then perform the following steps 1 Remove the screws retaining the optical drive as shown in Fig 6 Fig 6 Releasing the optical drive 2 Eject the optical drive using pin as shown in Fig 7 Fig 7 Ejecting the optical drive M2 5X6 5 Black ...

Page 10: ...NEC VERSA E3100 Disassembly Manual Page 10 3 Pull the ODD module out from the base unit as shown in Fig 8 Fig 8 Pulling the optical drive out from the base unit ...

Page 11: ...the following steps 1 Unscrew the keyboard cover from the rear of the system as shown in Fig 9 Fig 9 Releasing the keyboard cover 2 Lift up the keyboard cover carefully as shown in Fig 10 Fig 10 Lifting up the Keyboard Cover 3 Unscrew the two keyboard screws as shown in Fig 11 Fig 11 Unscrewing the two screws on the keyboard M2 5X4 5 Black M2X4 Silver ...

Page 12: ...n the system over remove another screw as shown in Fig 12 Fig 12 Removing the screw at the bottom of the notebook 5 Lift up the keyboard and disconnect it from the base system as shown in Fig 13 Fig 13 Removing the keyboard flex cable M2 5X6 5 Black ...

Page 13: ... Module first remove the battery see Removing the Battery and remove the Keyboard see Removing the Keyboard then perform the following steps 1 Turn the system over and slowly push the wireless LAN cable as shown in Fig 14 Fig 14 Pushing the Wireless LAN cable to the front of the system ...

Page 14: ...e 14 2 Turn the notebook back a remove the two tape b disconnect the LCD cable from the connector c unscrew the 4 screws all these steps is as shown on Fig 15 Fig 15 Steps to remove LCD Module 3 Gentle removes the LCD module M2 5X6 5 Black ...

Page 15: ...LCD module as shown in Fig 16 2 Remove all screws as shown in Fig 16 and carefully remove the LCD cover Fig 16 Removing the rubber covers screws on the LCD Module 3 Remove the cables attached to the inverter board and slowly remove the inverter board as shown on Fig 17 The Inverter Board is still on the LCD back cover using double sided tape Fig 17 Removing the two cables and slowly pull up the in...

Page 16: ...NEC VERSA E3100 Disassembly Manual Page 16 4 To remove the LCD remove the 4 screws as shown in Fig 18 Fig 18 Removing the LCD panel M2 5X4 5 Black ...

Page 17: ...e Switch Board Module first remove the battery see Removing the Battery and remove the Keyboard see Removing the Keyboard then perform the following steps 1 Unscrew the screw on the switch board and detached the flex cable as shown on Fig 19 Fig 19 Uninstalling the switch board M2X4 Silver ...

Page 18: ...r Assembly first remove the battery see Removing the Battery remove the Keyboard see Removing the Keyboard and remove the LCD module See Removing LCD module then perform the following steps 1 Remove a screw and the three cables as shown on Fig 20 Fig 20 Removing a screw and 3 cables M2 5X6 5 Black ...

Page 19: ...Turn the system over and remove all the 14 screws as shown on Fig 21 Fig 21 Remove all the 14 screws 3 Turn the system back slowly remove the top cover assembly as shown in Fig 22 Fig 22 Removing the screws retaining the Heat Plate M2 5X6 5 Black ...

Page 20: ... see Removing Top Cover Assembly then perform the following steps 1 Remove the 6 screws and detached the three connectors as shown on Fig 23 Fig 23 Removing screws and the connectors on the main board 2 Remove the two hex screws from the VGA port as shown in Fig 24 Fig 24 Removing the two hex screw M2 5X4 5 Black M2 5X5 Silver ...

Page 21: ...NEC VERSA E3100 Disassembly Manual Page 21 3 Slowly lift up the main board as shown in Fig 25 Fig 25 Slowly removing the main board ...

Page 22: ...he following steps 1 Disconnect Fan connection and remove the CPU Heat sink screws in descending order 5Æ4Æ3Æ2Æ1 then lift up the CPU heat sink Fan as shown in Fig 26 Fig 26 Removing the screws and fan connector 2 Use flat screwdriver to unlock the CPU from the CPU socket and lift up the CPU carefully as shown in Fig 27 Fig 27 Removing the CPU ...

Page 23: ...lowing steps 1 Unscrew the two screws and disconnect the connector as shown on Fig 28 Fig 28 Removing MDC modem Removing the Touch Pad To remove the touch pad first remove the top cover see Removing the Top Cover then perform the following steps 1 Unscrew the screws on the Top Cover as shown in Fig 29 Fig 29 Removing the Inverter Board M2 5X4 5 Black M2X4 Silver ...

Page 24: ... the bottom cover as shown in Fig 30 Fig 30 Bluetooth Module Removing the Speaker Assembly To remove the Speaker Assembly first remove the Main Board see Removing the Main Board then perform the following steps 1 Remove the 4 screws holding Speaker Assembly as shown in Fig 31 Fig 31 Speaker Assembly 2 Carefully remove the Speaker assembly from Bottom Cover Screws M2x4Sliver M2 5X4 5 Black M2 5x6 5...

Page 25: ...NICAL OR EDITORIAL ERRORS OR OMISSIONS CONTAINED HEREIN NOR FOR INCIDENTAL OR CONSEQUENTIAL DAMAGES RESULTING FROM THE FURNISHING PERFORMANCE OR USE OF THIS MATERIAL Copyright 2005 NEC Computers Asia Pacific all rights reserved NEC is a trademark of NEC Computer Asia Pacific The names of actual companies and products mentioned herein may be trademarks and or registered trademarks of their respecti...

Reviews: