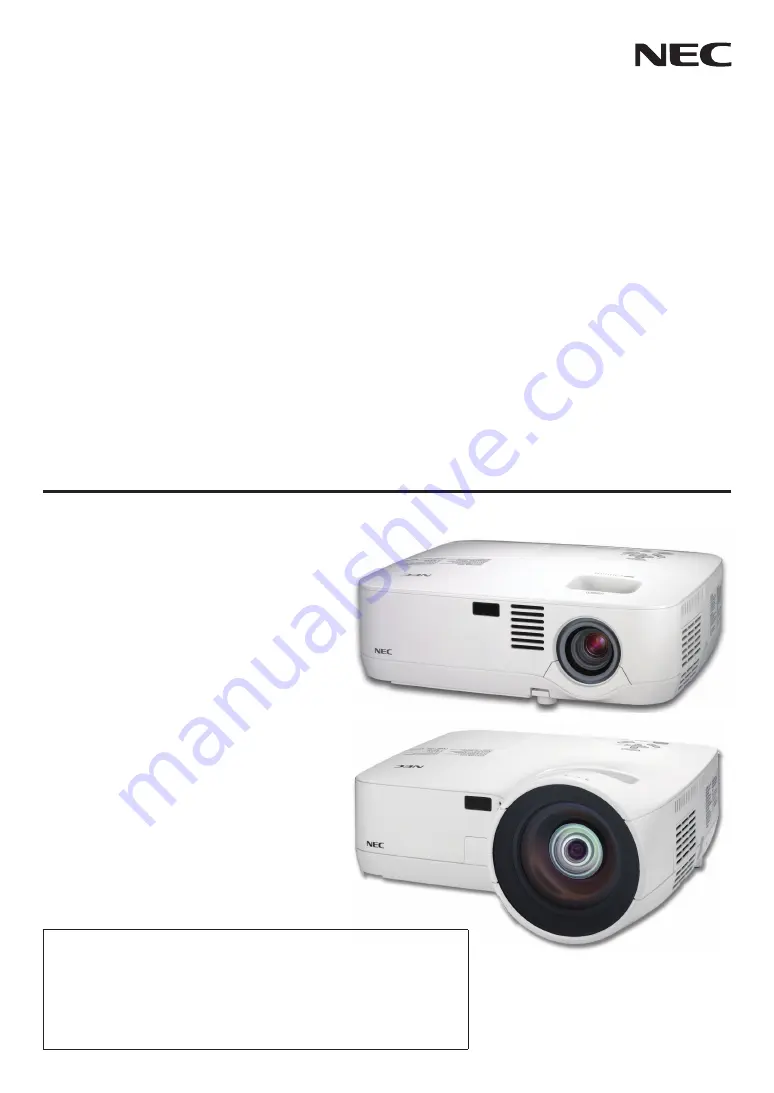
background image

Portable Projector

NP600/NP500/NP400/

NP300/NP500W 

NP600S/NP500WS

User’s Manual

The projector’s model name indicated on the projector’s label is NP600, 
NP500,  NP400,  NP300,  NP500W,  NP600S,  NP500WS,  NP600G, 
NP500G, NP400G, NP300G, NP500WG, NP600SG, and NP500WSG 
respectively.
All  the  models  are  referred  to  as  NP600,  NP500,  NP400,  NP300, 
NP500W, NP600S, and NP500WS throughout the user’s manual except 
some of the specification pages.

Summary of Contents for NP300 Series

Page 1: ... indicated on the projector s label is NP600 NP500 NP400 NP300 NP500W NP600S NP500WS NP600G NP500G NP400G NP300G NP500WG NP600SG and NP500WSG respectively All the models are referred to as NP600 NP500 NP400 NP300 NP500W NP600S and NP500WS throughout the user s manual except some of the specification pages ...

Page 2: ... Products Group a division of ACCO Brands Other product and company names mentioned in this user s manual may be the trademarks or registered trademarks of their respective holders NOTES 1 The contents of this user s manual may not be reprinted in part or whole without permission 2 The contents of this user s manual are subject to change without notice 3 Great care has been taken in the preparatio...

Page 3: ...tice for Canada only This Class B digital apparatus meets all requirements of the Canadian Interference Causing Equipment Regula tions Machine Noise Information Regulation 3 GPSGV The highest sound pressure level is less than 70 dB A in accordance with EN ISO 7779 CAUTION Avoid displaying stationary images for a prolonged period of time Doing so can result in these images being temporarily sustain...

Page 4: ...couraged to try to correct the interference by one or more of the following measures Reorient or relocate the receiving antenna Increase the separation between the equipment and receiver Connect the equipment into an outlet on a circuit different from that to which the receiver is connected Consult the dealer or an experienced radio TV technician for help For UK only In UK a BS approved power cabl...

Page 5: ...P500G NP400G NP300G NP500WG NP600SG NP500WSG Ensure that your power supply fits this requirement before attempting to use your projector Do not look into the lens while the projector is on Serious damage to your eyes could result Keep any items such as magnifying glass out of the light path of the projector The light being projected from the lens is extensive therefore any kind of abnormal objects...

Page 6: ...nded period of time When using a LAN cable For safety do not connect to the connector for peripheral device wiring that might have excessive voltage CAUTION Do not use the tilt foot for purposes other than originally intended Misuses such as gripping the tilt foot or hang ing on the wall can cause damage to the projector Do not send the projector in the soft case by parcel delivery service or carg...

Page 7: ...ltitude mode Set FAN MODE to HIGH ALTITUDE when using the projector at altitudes approximately 5500 feet 1600 meters or higher Using the projector at altitudes approximately 5500 feet 1600 meters or higher without setting to HIGH ALTITUDE can cause the projector to overheat and the protector could shut down If this happens wait a couple minutes and turn on the projector Using the projector at alti...

Page 8: ...necting Your PC or Macintosh Computer 17 When Viewing a DVI Digital Signal 19 Using Two Analog COMPUTER Inputs Simultaneously 20 Connecting an External Monitor 21 Connecting Your DVD Player with Component Output 22 Connecting Your VCR 23 Connecting to a Network 24 Connecting the Supplied Power Cable 25 3 Projecting an Image Basic Operation 26 Turning on the Projector 26 Note on Startup screen Menu...

Page 9: ...ts 52 3 List of Menu Items 53 4 Menu Descriptions Functions SOURCE 55 5 Menu Descriptions Functions ADJUST 56 6 Menu Descriptions Functions SETUP 63 7 Menu Descriptions Functions INFO 73 8 Menu Descriptions Functions RESET 75 6 Maintenance 76 Cleaning or Replacing the Filters 76 2 Cleaning the Cabinet and the Lens 78 Replacing the Lamp 79 7 Appendix 82 Troubleshooting 82 Indicator Messages 82 Spec...

Page 10: ... Policy on our Web Site www nec display solutions com Quick Setup Guide 7N8P9291 Important Information 7N8P9301 V O LU M E S V ID E O V ID E O L C LI C K E N TE R E X IT M E N U U P M A G N IF Y P A G E O F F P O W E R O N P IC M U T E D O W N M O U S E R C LI C K AU TO AD J LA M P M O D E C O M PU TE R A S P E C T H E LP F R E E Z E P IC T U R E 1 2 Remote control 7N900731 Batteries AAA 2 DVI to ...

Page 11: ... and AUTO POWER OFF features The AUTO POWER ON AC AUTO POWER ON COMP1 AUTO POWER OFF and OFFTIMER features eliminate the need to always use the POWER button on the remote control or projector cabinet Short throw distances NP600S NP500WS Short focal lenses provide for a larger image using a shorter throw distance when compared to a typical projector lens Virtual Remote function The Virtual Remote f...

Page 12: ...ergy saving technology Selecting POWER SAVING for STANDBY MODE from the menu can put the projector in power saving mode that consume less power than the normal standby condition Optional remote mouse receiver You can use the supplied wireless remote control and the optional remote mouse receiver to operate your PC mouse from across the room The optional remote mouse receiver NP01MR supports almost...

Page 13: ...tput 2 3 in NORMAL mode page 85 87 3500 lumens 3000 lumens 2600 lumens 2200 lumens 3000 lumens 2600 lumens 2100 lumens Zoom page 32 Using the manual zoom lever Using the DIGITAL ZOOM function from the menu Focus page 33 Using the manual focus ring Using the manual focus lever Lamp Replace ment Time aver age page 73 3000 H in NORMAL 4000 H in ECO For further details on the specifications see page 8...

Page 14: ... 31 Security chain opening Attach an anti theft device The security chain opening accepts se curity wires or chains up to 0 18 inch 4 6 mm in diameter NP600S NP500WS ST AT US LA M P AU TO AD J SO UR CE SE LE CT M EN U EXIT ENTER FO CU S Controls page 7 Lens Lens Cap Built in Security Slot Focus Lever page 33 Remote sensor page 10 Ventilation inlet Filter Cover page 76 Adjustable Tilt Foot page 31 ...

Page 15: ...d power cable into an active wall outlet and turn on the Main Power the POWER indicator turns orange and the projector is in standby mode page 26 38 Terminal Panel page 8 Monaural Speaker 7W Ventilation outlet Heated air is exhausted from here Ventilation inlet Filter Cover page 76 Lamp Cover page 80 Rear Foot page 31 Spacer black rubber To fine adjust the height of the rear foot remove the spacer...

Page 16: ... 4 7 8 10 9 3 1 POWER Button page 27 38 2 POWER Indicator page 26 38 82 3 STATUS Indicator page 82 4 LAMP Indicator page 79 82 5 SOURCE Button page 29 6 AUTO ADJ Button page 37 7 MENU Button page 51 8 SELECT Volume Buttons Keystone Buttons page 34 37 9 ENTER Button page 51 10 EXIT Button page 51 ...

Page 17: ...ck Stereo Mini page 21 5 MONITOR OUT COMP 1 Connector Mini D Sub 15 Pin page 21 6 S VIDEO IN Connector Mini DIN 4 Pin page 23 7 VIDEO IN Connector RCA page 23 8 AUDIO Input Jacks L R RCA page 23 9 PC CONTROL PC CONTROL Port D Sub 9 Pin page 93 Use this port to connect a PC or control system This enables you to control the projector using serial communication protocol If you are writing your own pr...

Page 18: ... PIC MUTE DOWN MOUSE R CLICK COMPUTER ASPECT HELP FREEZE PICTURE S VIDEO VIDEO COMPUTER AUTO ADJ LAMP MODE 2 1 1 3 4 7 6 9 2 8 10 11 13 14 12 21 22 20 16 15 18 5 17 19 12 MOUSE R CLICK Button page 45 46 13 VIDEO Button page 29 14 S VIDEO Button page 29 15 COMPUTER 1 2 Button page 29 16 AUTO ADJ Button page 37 17 VOLUME Button page 37 18 LAMP MODE Button page 41 19 ASPECT Button page 60 20 PICTURE ...

Page 19: ...y cover off 2 Install new batteries AAA En sure that you have the batteries polarity aligned correctly The infrared signal operates by line of sight up to a distance of about 22 feet 7 m and within a 60 degree angle of the remote sensor on the projector cabinet The projector will not respond if there are objects between the remote control and the sensor or if strong light falls on the sensor Weak ...

Page 20: ...e can be is approximately 21 0 53 m measured diagonally when the projector is roughly 30 inches 0 8 m from the wall or screen The largest the image can be is 300 7 6 m when the projector is about 407 inches 10 3 m from the wall or screen 300 240 D i s t a n c e U n i t m i n c h Lens center Screen Size Screen Size Unit cm inch 200 180 150 120 100 80 1 0 3 4 0 7 8 3 3 2 5 6 2 2 4 4 5 1 2 0 3 4 1 1 ...

Page 21: ... 9 7 3 8 4 7 8 3 0 7 5 8 2 3 0 4 9 1 9 1 3 9 1 5 3 3 2 1 2 7 2 6 1 0 2 1 9 7 6 1 3 5 0 40 6 5 2 5 5 60 SELECT MENU EXIT ENTER STATUS LAMP AUTOADJ SOURCE FOCUS 30 21 0 9 4 3 8 0 7 2 8 646 2 W 403 9 H 254 W 159 H 516 9 W 323 1 H 204 W 127 H 430 8 W 269 2 H 170 W 106 H 323 1 W 201 9 H 127 W 79 H 387 7 W 242 3 H 153 W 95 H 258 5 W 161 5 H 102 W 64 H 215 4 W 134 6 H 85 W 53 H 172 3 W 107 7 H 68 W 42 H ...

Page 22: ...i n c h Lens center Screen Size Screen Size Unit cm inch 223 5 W 167 6 H 88 W 66 H 203 2 W 152 4 H 80 W 60 H 182 9 W 137 2 H 72 W 54 H 162 6 W 121 9 H 64 W 48 H 156 5 W 117 3 H 62 W 46 H 142 2 W 106 7 H 56 W 42 H 130 0 W 97 5 H 51 W 38 H 121 9 W 91 4 H 48 W 36 H 100 90 80 77 70 1 6 7 6 6 1 5 1 5 9 1 3 6 5 3 1 2 0 4 7 1 1 6 4 6 1 0 5 4 1 0 9 6 3 8 0 9 0 3 5 60 64 SELECT MENU EXIT ENTER STATUS LAMP ...

Page 23: ...i n c h Lens center Screen Size Screen Size Unit cm inch 224 0 W 140 0 H 88 W 55 H 215 4 W 134 6 H 85 W 53 H 193 9 W 121 2 H 76 W 48 H 187 4 W 117 1 H 74 W 46 H 172 3 W 107 7 H 68 W 42 H 150 8 W 94 2 H 59 W 37 H 129 2 W 80 8 H 51 W 32 H 122 8 W 76 7 H 48 W 30 H 100 90 87 80 70 1 6 7 6 6 1 6 0 6 3 1 4 4 5 7 1 3 9 5 5 1 2 8 5 0 1 1 1 4 4 0 9 5 3 7 0 9 0 3 6 57 60 SELECT MENU EXIT ENTER STATUS LAMP A...

Page 24: ...8 0 200 5080 160 4064 120 3048 41 1048 246 6241 295 7501 19 476 9 5 8 0 210 5334 168 4267 126 3200 43 1100 258 6555 310 7878 20 500 9 5 7 9 240 6096 192 4877 144 3658 50 1257 295 7497 355 9009 23 572 9 5 7 9 270 6858 216 5486 162 4115 56 1414 332 8439 399 10140 25 643 9 5 7 9 300 7620 240 6096 180 4572 62 1572 369 9381 444 11271 28 714 9 5 7 9 NP500W Screen Size B C D α Diagonal Width Height wide ...

Page 25: ...r NEC dealer for more information Do not attempt to install the projector yourself Only use your projector on a solid level surface If the projector falls to the ground you can be injured and the projector severely damaged Do not use the projector where temperatures vary greatly The projector must be used at temperatures between 41 F 5 C and 104 F 40 C Eco mode se lected automatically at 95 F to 1...

Page 26: ...le the external display Usually the combination of the Fn key along with one of the 12 function keys gets the external display to come on or off For example NEC laptops use Fn F3 while Dell laptops use Fn F8 key combinations to toggle through external display selections Connecting Your PC or Macintosh Computer NOTE Signals supported by Plug Play DDC2 Model INPUT COMPUTER 1 IN COMPUTER 2 IN analog ...

Page 27: ...ble with video decoded outputs of the NEC ISS 6020 switcher NOTE An image may not be displayed correctly when a Video or S Video source is played back via a commercially available scan converter This is because the projector will process a video signal as a computer signal at the default setting In that case do the following When an image is displayed with the lower and upper black portion of the ...

Page 28: ...DVI cable while the projector is running If the signal cable has been disconnected and then re connected an image may not be correctly displayed Should this happen restart your PC NOTE Use a DVI cable or the one compliant with the DDWG Digital Display Working Group DVI Digital Visual Interface revision 1 0 standard The DVI cable should be within 5 m 196 long Both single and dual types of DVI cable...

Page 29: ...sh Desktop type VGA signal cable not supplied DVI to VGA adapter supplied NOTE When the DVI to VGA adapter is not to be used for an extended period of time remove it from the projector Failure to do so may cause damage to the connector of the projector Using Two Analog COMPUTER Inputs Simultaneously If you need to use two analog COMPUTER inputs simultaneously connect a VGA signal cable as shown be...

Page 30: ...to your projector to simultaneously view on a monitor the computer analog image you re projecting NOTE Daisy chain connection is not possible When audio equipment is connected the projector speaker is disabled AUDIO IN PHONE MONITOR OUT COMP 1 AUDIO OUT VGA signal cable sup plied VGA signal cable not supplied ...

Page 31: ...priate input connector after turning on the projector Input connector SOURCE button on the projector cabinet Button on the remote control COMPUTER 1 IN COMPUTER1 COMPUTER 1 NOTE Refer to your DVD player s owner s manual for more information about your DVD player s video output requirements AUDIO IN L R AUDIO OUT L R Component Y Cb Cr COMPUTER 1 IN AUDIO IN Audio cable not supplied 15 pin to RCA fe...

Page 32: ... IN L and R jacks RCA are shared between the Video and S Video inputs NOTE Refer to your VCR owner s manual for more information about your equipment s video output requirements NOTE An image may not be displayed correctly when a Video or S Video source is played back in fast forward or fast rewind via a scan converter AUDIO IN L R AUDIO OUT L R VIDEO OUT S VIDEO VIDEO S VIDEO IN AUDIO IN VIDEO IN...

Page 33: ...e Network Settings and the Alert Mail Settings for the projector over a LAN To use a LAN connection you are required to assign an IP address to the projector on the PROJECTOR NETWORK SETTINGS screen of the web browser on your computer For setting see page 47 48 49 Example of LAN connection Example of wired LAN connection LAN Server Hub LAN cable not supplied NOTE Use a Category 5 or higher LAN cab...

Page 34: ...f the supplied power cable in the wall outlet CAUTION Do not try to touch the ventilation outlet on the left front when seen from the front as it can become heated while the projector is turned on and immediately after the projector is turned off SELE CT MENU EXIT ENTER STA TU S LA MP AUTO ADJ SOURCE F O C U S STATUS LAMP AUTO ADJ SOURCE Make sure that the prongs are fully inserted into both the A...

Page 35: ...re to do so may cause damage to the projector 1 Remove the lens cap Do not remove the lens cap by pulling on the string Doing so can cause mechanical damage to the part around the lens 2 To turn on the main power to the projector press the Main Power switch to the on position I The POWER indicator will light orange See the Power Indicator section page 82 S TA T U S L A M P A U TO A D J S O U R C E...

Page 36: ...n page 42 After you turn on your projector ensure that the computer or video source is turned on and that your lens cap is removed NOTE When no signal is available the NEC logo blue default or black screen will be displayed When the projector displays the NEC logo a blue or black screen the projector will automatically switch to the ECO mode The projector will return to the NORMAL mode once a sign...

Page 37: ...ture lamp failure When the LAMP MODE is set to ECO the LAMP indicator will light green If one of the following things happens the projector will not turn on If the internal temperature of the projector is too high the projector detects abnormal high temperature In this condition the projector will not turn on to protect the internal system If this happens wait for the projector s internal componen...

Page 38: ...nput signal is present the input will be skipped Using the Remote Control Press any one of the COMPUTER 1 2 VIDEO and S VIDEO buttons TIP The COMPUTER 2 button on the remote control toggles the Computer 2 source between COMPUTER2 DIGITAL and COMPUTER2 ANALOG Selecting Default Source You can set a source as the default source so that it will be displayed each time the projector is turned on 1 Press...

Page 39: ... Adjusting the left and right tilt of an image Rear foot page 31 SELECT MENU EXIT ENTER STATUS LAMP AUTOA DJ SOURC E FOC US Finely adjusting the size of an image Zoom function page 32 SELECT MENU EXIT ENTER STATUS LAMP AUTOA DJ SOURC E FOC US Adjusting the focus Focus ring page 33 SELECT MENU EXIT ENTER STATUS LAMP AUTOA DJ SOURC E FOC US Adjusting the keystone correction KEYSTONE page 34 SELECT M...

Page 40: ...rojector Rotate the rear foot to the desired height in order to square the image on the projection surface CAUTION Do not use the tilt foot for purposes other than originally intended Misuses such as using the tilt foot to carry or hang from the wall or ceiling the projector can cause damage to the projector Adjusting the left and right tilt of an image Rear foot 1 Remove the spacer black rubber f...

Page 41: ... lever to adjust the image size on the screen Zoom Lever NP600S NP500WS The image size can be adjusted electronically from the menu To do so follow the steps below 1 Press the MENU button The menu will be displayed 2 Press the SELECT button to select SETUP and press the ENTER button The GENERAL tab will be highlighted 3 Press the SELECT button The DIGITAL ZOOM will be highlighted ...

Page 42: ...to adjust the image size 5 After completing adjustment press the EXIT button three times The menu will be closed Focus NP600 NP500 NP400 NP300 NP500W Use the FOCUS ring to obtain the best focus Focus Ring NP600S NP500WS Use the FOCUS lever to obtain the best focus S TA TU S LA M P A U TO A D J S O U R C E S EL EC T M EN U EXIT ENTER FO C U S FOCUS Focus Lever ...

Page 43: ...ct ratio selection Adjusting with buttons on the cabinet 1 Press the SELECT or button with no menus displayed The keystone bar will be displayed SELECT MENU E X I T E N T E R STATUS LAMP AUTO ADJ SOURCE 2 Use the SELECT or to correct the keystone distortion The keystone bar will be closed after a period of time 3 Press the ENTER button The keystone bar will be closed NOTE When the menu is displaye...

Page 44: ...TER button The GENERAL screen will be displayed 3 Press the SELECT button to select KEYSTONE 4 Press the SELECT or button Adjust so that the image is rectangular 5 Press the MENU button The menu will be closed NOTE The Keystone correction can cause an image to be slightly blurred because the correction is made electronically TIP The changes can be saved with KEYSTONE SAVE page 36 63 ...

Page 45: ...enu will be closed NOTE The maximum range of vertical keystone correction is 30 degrees on the NP600 NP500 NP400 NP300 NP500W and 20 degrees on the NP600S NP500WS The maximum range of keystone correction may be lower depending on the signal or aspect ratio selection The range of keystone correction is not the maximum tilt angle of projector The Auto Keystone correction will take effect in 2 second...

Page 46: ...LUME L CLICK MOUSE R CLICK ASPECT HELP FREEZE PICTURE AUTO ADJ S VIDEO VIDEO COMPUTER LAMP MODE 1 2 NOTE Some signals may take time to display or may not be displayed correctly The Auto Adjust function does not work for component video and DVI digital signals If the Auto Adjust operation cannot optimize the computer signal try to adjust HORIZONTAL VERTICAL CLOCK and PHASE manually page 58 59 Turni...

Page 47: ...rojector and display ing an image you cannot turn off the projector for 60 seconds 3 Finally turn off the Main Power switch The power indi cator will go out NOTE Do not turn off the main power within 10 seconds of making adjustment or setting changes and closing the menu Doing so can cause loss of adjustments and settings Power On Fan running Standby Steady green light Blinking orange light Steady...

Page 48: ...is is to prevent the lens from damage NOTE The NP600S and the NP500WS do not come with a soft case NOTE When placing the projector in the soft case retract the tilt foot and the rear feet Failure to do so may case damage to the projector CAUTION Use caution when putting the projector in the soft case immediately after the projector has been operating The projector cabinet is hot S E L E C T M E N ...

Page 49: ...t the original video is still playing back Enlarging a Picture You can enlarge the picture up to four times NOTE The maximum magnification may be less than four times depending on the signal To do so 1 Press the MAGNIFY button to magnify the picture To move the magnified image use the SELECT or button 4 Convenient Features ENTER EXIT MENU UP MAGNIFY PAGE OFF POWER ON PIC MUTE DOWN SOURCE PIC MUTE ...

Page 50: ...cally switch to ECO The projector will return to the NORMAL once a signal is accepted If the projector is overheated in NORMAL mode there may be a case where the LAMP MODE automatically changes to ECO mode to protect the projector When the projector is in ECO mode the picture brightness decreases When the projector comes back to normal temperature the LAMP MODE returns to NORMAL mode Thermometer s...

Page 51: ...ecurity function 1 Press the MENU button The menu will be displayed 2 Press the SELECT button twice to select SETUP and press the SELECT button or the ENTER button to select GENERAL 3 Press the SELECT button to select INSTALLATION 4 Press the SELECT button three times to select SECURITY and press the ENTER button The OFF ON menu will be displayed 5 Press the SELECT button to select ON and press th...

Page 52: ...o turn on the projector when SECURITY is enabled 1 Press and hold the POWER button for about 1 second The projector will be turned on and display a message to the effect that the projector is locked 2 Press the MENU button 3 Type in the correct keyword and press the ENTER button The projector will display an image NOTE The security disable mode is maintained until the main power is turned off or u...

Page 53: ...utton The KEYWORD CONFIRMATION screen will be displayed 4 Type in your keyword and press the ENTER button When the correct keyword is entered the SECURITY function will be disabled NOTE If you forget your keyword contact your dealer Your dealer will provide you with your keyword in exchange for your request code Your request code is displayed in the Keyword Confirmation screen In this example K992...

Page 54: ...omputer settings When operating a computer via the remote mouse receiver When connecting using the USB terminal For PC the mouse receiver can only be used with a Windows 98 Me XP Windows 2000 Windows Vista or Mac OS X 10 0 0 or later operating system NOTE In SP1 or older version of Windows XP if the mouse cursor will not move correctly do the following Clear the Enhance pointer precision check box...

Page 55: ... button with the menu displayed both the menu and the mouse pointer will be affected Close the menu and perform the mouse operation The PAGE UP and DOWN buttons do not work with PowerPoint for Macintosh About Drag Mode By pressing the MOUSE L CLICK or R CLICK button for 2 or 3 seconds then releasing the drag mode is set and the drag operation can be performed simply by pressing the SELECT button T...

Page 56: ...t your network administrator The projector may not respond if its buttons are repeatedly pressed in rapid intervals Should this happen wait a moment and repeat If you still can t get any response turn off and back on the projector Preparation Before Use Connect the projector to a commercially available LAN cable before engaging in browser operations page 24 Operation with a browser that uses a pro...

Page 57: ...s selected for DHCP SUBNET MASK Set your subnet mask number of the network connected to the projector when DISABLE is selected for DHCP DEFAULT GATEWAY Set your default gateway of the network connected to the projector when DISABLE is selected for DHCP DNS PRIMARY Set your primary DNS settings of the network connected to the projector DNS SECONDARY Set your secondary DNS settings of the network co...

Page 58: ...ing ENABLE will turn on the Alert Mail feature Checking DISABLE will turn off the Alert Mail feature SENDER S ADDRESS Type in the senders address Up to 60 alphanumeric and symbols characters can be used SMTP SERVER NAME Type in the SMTP server name to be connected to the projector Up to 60 alphanumeric characters can be used RECIPIENT S ADDRESS 1 to 3 Type in your recipient s address Up to 60 alph...

Page 59: ...er The optional utility software Virtual Remote Tool designed exclusively for our projector is required to use DDC CI Check with our website http www nec display com dl en index html NOTE Use the supplied VGA signal cable to connect the COMPUTER 1 IN connector directly with the monitor output connector of the computer to use Virtual Remote Tool Using a switcher scan converter or other cables than ...

Page 60: ...projector cabinet to select the item you want to adjust or set You can use the SELECT buttons on the remote control or the projector cabinet to select the tab you want 5 Press the ENTER button on the remote control or the projector cabinet to display the submenu window 6 Adjust the level or turn the selected item on or off by using the SELECT buttons on the remote control or the projector cabinet ...

Page 61: ...front Radio button Use this round button to select an option in a dialog box Source Indicates the currently selected source Off Timer remaining time Indicates the remaining countdown time when the OFF TIMER is preset Slide bar Indicates settings or the direction of adjustment Key Lock symbol Indicates the CONTROL PANEL LOCK is enabled Thermometer symbol Indicates the lamp mode is forcibly set to E...

Page 62: ...00WS AUTO 4 3 16 9 15 9 16 10 LETTERBOX NATIVE POSITION 0 Not available on NP500W NP500WS VIDEO FILTER OFF LESS MORE SETUP GENERAL DIGITAL ZOOM NP600S NP500WS 100 80 100 AUTO KEYSTONE OFF OFF ON KEYSTONE 0 KEYSTONE SAVE OFF OFF ON WALL COLOR OFF OFF WHITEBOARD BLACKBOARD BLACKBOARD GRAY LIGHT YELLOW LIGHT GREEN LIGHT BLUE SKY BLUE LIGHT ROSE PINK LAMP MODE NORMAL NORMAL ECO CLOSED CAPTION OFF OFF ...

Page 63: ... N PAL60 SECAM WXGA MODE NP600 NP500 NP400 NP300 NP600S OFF NP500W NP500WS ON OFF ON DEINTERLACE ON OFF ON BEEP ON OFF ON OPTIONS 2 OFF TIMER OFF OFF 0 30 1 00 2 00 4 00 8 00 12 00 16 00 STANDBY MODE NORMAL NORMAL POWER SAVING AUTO POWER ON AC OFF OFF ON AUTO POWER ON COMP1 OFF OFF ON AUTO POWER OFF OFF OFF 0 05 0 10 0 20 0 30 DEFAULT SOURCE SELECT LAST LAST AUTO COMPUTER1 COMPUTER2 DIGITAL COMPUT...

Page 64: ...will determine if the input signal is RGB or component signal COMPUTER2 DIGITAL ANALOG Selects the computer connected to your COMPUTER 2 IN DVI I connector VIDEO Selects what is connected to your VIDEO input VCR DVD player or document camera S VIDEO Selects what is connected to your S VIDEO input VCR or DVD player NOTE A frame may freeze for a brief period of time when a video is played back in fa...

Page 65: ...various types of images You can also use DETAIL SETTINGS to set user adjustable settings to customize each gamma or color Your settings can be stored in PRESET 1 to PRESET 6 HIGH BRIGHT Recommended for use in a brightly lit room PRESENTATION Recommended for making a presentation using a PowerPoint file VIDEO Recommended for typical TV program viewing MOVIE Recommended for movies GRAPHIC Recommende...

Page 66: ...EMPERATURE This option allows you to select the color temperature of your choice NOTE When PRESENTATION or HIGH BRIGHT is selected in REFERENCE this function is not available Adjusting White Balance WHITE BALANCE This allows you to adjust the white balance Contrast for each color RGB to adjust the white level of the screen Brightness for each color RGB is used to adjust the black level of the scre...

Page 67: ...nd Phase CLOCK PHASE This allows you to manually adjust CLOCK and PHASE CLOCK Use this item to fine tune the computer image or to remove any vertical banding that might appear This function adjusts the clock frequencies that eliminate the horizontal banding in the image This adjustment may be necessary when you connect your computer for the first time PHASE Use this item to adjust the clock phase ...

Page 68: ...signal The next time you project the signal with the same resolution horizontal and vertical frequency its adjustments will be called up and applied To delete adjustments stored in memory from the menu you select RESET CURRENT SIGNAL or ALL DATA and reset the adjustments Selecting Overscan Percentage Overscan Select overscan percentage 0 5 and 10 for signal Projected image Overscaned by 10 NOTE Th...

Page 69: ...6 9 aspect ratio 15 9 The image is displayed in 15 9 aspect ratio 16 10 The image is displayed in 16 10 aspect ratio WIDE ZOOM NP600 NP500 NP400 NP300 NP600S The image is stretched left and right Parts of the displayed image are cropped at the left and right edges and therefore not visible LETTERBOX NP500W NP500WS The image of a letterbox signal is stretched equally in the horizontal and vertical ...

Page 70: ... the appro priate aspect ratio is automati cally determined Video signal Aspect ratio of incoming signal 4 3 Letterbox Squeeze Sample image when the as pect ratio is automatically de termined NOTE To display a letterbox signal prop erly select LETTERBOX NOTE To display a squeezed signal prop erly select 16 9 TIP Image position can be adjusted vertically using POSITION when the 16 9 15 9 or 16 10 a...

Page 71: ...tical position from the top to the bottom of the black area Selecting Video Filter Level VIDEO FILTER not available for Digital RGB Video and S Video Select one of the three levels for reducing video noise OFF LESS or MORE OFF The low pass filter is turned off LESS The low pass filter is applied partially MORE The low pass filter is applied fully NOTE Selecting OFF will give best image quality by ...

Page 72: ...ect ON To adjust the KEYSTONE feature manually select OFF Correcting Vertical Keystone Distortion Manually KEYSTONE You can correct vertical distortion manually page 34 TIP When this option is highlighted pressing the ENTER button will display its slide bar for adjustment Saving Vertical Keystone Correction KEYSTONE SAVE This option enables you to save your current keystone settings OFF Does not s...

Page 73: ...GE TIME Select INFO USAGE TIME page 73 The projector is always in NORMAL for one minute after the lamp is turned on and while the POWER indicator is blinking green The lamp condition will not be affected even when LAMP MODE is changed If there is no signal for about one minute the projector will display a blue black or logo background depending on setting and go into ECO The projector will return ...

Page 74: ...rrect the image excessively Selecting 16 10 or 16 9 from ASPECT RATIO Using the POSITION not available on NP500W NP500WS Selecting Menu Language LANGUAGE You can choose one of 21 languages for on screen instructions NOTE Your setting will not be affected even when RESET is done from the menu MENU Selecting Menu Color COLOR SELECT You can choose between two options for menu color COLOR and MONOCHRO...

Page 75: ...ill not be affected even when RESET is done from the menu Turning ON OFF Control ID ID DISPLAY Available only when the optional remote control NP02RC is used ID DISPLAY This option turns on or off the ID number which is displayed when the ID SET button on the remote control is pressed INSTALLATION Selecting Projector Orientation ORIENTATION This reorients your image for your type of projection The...

Page 76: ...bling Security SECURITY This feature turns on or off the SECURITY function Unless the correct keyword is entered the projector cannot project an image page 42 NOTE Your setting will not be affected even when RESET is done from the menu Selecting Communication Speed COMMUNICATION SPEED This feature sets the baud rate of the PC Control port D Sub 9P It supports data rates from 4800 to 19200 bps The ...

Page 77: ...trol ID 1 Turn on the projector 2 Press the ID SET button on the remote control NP02RC The CONTROL ID screen will be displayed If the projector can be operated with the current remote control ID the ACTIVE will be displayed If the projector cannot be operated with the current remote control ID the INACTIVE will be displayed To operate the inactive projector assign the control ID used for the proje...

Page 78: ... built in fans run at a high speed Select this option when using the projector at altitudes approximately 5500 feet 1600 meters or higher When you wish to cool down the temperature inside the projector quickly select HIGH NOTE It is recommended that you select High speed mode if you use the projector non stop for consecutive days Set FAN MODE to HIGH ALTITUDE when using the projector at altitudes ...

Page 79: ...the video standard select the appropriate video standard from the menu This must be done for VIDEO and S VIDEO respectively Enabling or Disabling WXGA Mode WXGA MODE Selecting ON will give priority to a WXGA 1280 x 768 signal in recognizing an input signal When WXGA MODE is set to ON an XGA 1024 x 768 signal may not be recognized on NP600 NP500 NP400 NP300 or NP600S In this case select OFF Enablin...

Page 80: ...lows you to put the projector in the power saving condition which consumes less power than the NORMAL mode The projector is preset for NORMAL mode at the factory NORMAL Power indicator Orange light STATUS indicator Green light POWER SAVING Power indicator Orange light STATUS indicator Off The following connectors buttons or functions will not work during this mode PC CONTROL port MONITOR OUT conne...

Page 81: ...en the projector is turned off the AUTO POWER ON COMP1 will not work and the projector remains in standby mode Enabling Power Management AUTO POWER OFF When this option is selected you can enable the projector to automatically turn off at the selected time 5min 10min 20min 30min if there is no signal received by any input or if no operation is performed Selecting Default Source DEFAULT SOURCE SELE...

Page 82: ...unt of lamp usage When the remaining lamp time reaches 0 the LAMP LIFE REMAINING bar indicator changes from 0 to 100 Hours and starts counting down If the remaining lamp time reaches 0 hours the projector will not turn on regardless of whether the LAMP MODE is set to NORMAL or ECO The message to the effect that the lamp or the filters should be replaced will be displayed for one minute when the pr...

Page 83: ...RCE INDEX HORIZONTAL FREQUENCY VERTICAL FREQUENCY SIGNAL TYPE VIDEO TYPE SYNC TYPE SYNC POLARITY SCAN TYPE WIRED LAN PROJECTOR NAME MAC ADDRESS VERSION PRODUCT SERIAL NUMBER FIRMWARE Version DATA Version CONTROL ID when CONTROL ID is set ...

Page 84: ...aring Networking Settings NETWORK SETTINGS Returns DHCP IP ADDRESS SUBNET MASK and GATEWAY to the default settings Clearing Lamp Hour Meter CLEAR LAMP HOURS Resets the lamp clock back to zero Selecting this option displays submenu for a confirmation Select YES and press the ENTER button NOTE Elapsed time of the lamp use will not be affected even when RESET is done from the menu NOTE The projector ...

Page 85: ...cancel the message press any button on the projector cabinet or the remote control CAUTION Turn off the projector turn off the main power switch and unplug the projector before replacing the filters Only clean the outside of the filter cover with a vacuum cleaner Do not attempt to operate the projector without the filter cover To clean the air filter Vacuum the filter through the filter cover To r...

Page 86: ...filter usage time NOTE Do not wash the filter with soap and water Soap and water will damage the filter membrane Before replacing the filter remove dust and dirt from the projector cabinet Keep out dust and dirt during filter replacement NOTE When you replace the lamp it is also wise to replace the filter The filter comes in the same package with your replacement lamp SE LE CT M EN U EXIT ENTER ST...

Page 87: ...e Lens NP600 NP500 NP400 NP300 NP500W Use a blower or lens paper to clean the lens and be careful not to scratch or mar the lens ST AT U S LA M P AU TO A D J SO U R C E SE LE C T M EN U EXIT ENTER FO C U S Note on Cleaning the Lens NP600S NP500WS ST AT US LA M P AU TO AD J SO UR CE SE LE CT M EN U EXIT ENTER FO CU S The NP600S and NP500WS have a plastic lens Use a commercially available plastic le...

Page 88: ...Leaving finger prints on the glass surface might cause an unwanted shadow and poor picture quality The projector will turn off and go into standby mode when you continue to use the projector for another 100 hours after the lamp has reached the end of its life If this happens be sure to replace the lamp If you continue to use the lamp after the lamp reaches the end of its life the lamp bulb may sha...

Page 89: ... lamp housing by holding it SE LE CT ME NU EXIT ENTER ST AT US LA MP AU TO AD J SO UR CE F O C U S SE LE CT ME NU EXIT ENTER ST AT US LA MP AU TO AD J SO UR CE F O C U S Interlock 1 Remove the lamp cover 1 Loosen the lamp cover screw The lamp cover screw is not removable 2 Push and slide the lamp cover off SE LE CT ME NU EXIT ENTER ST AT US LA MP AU TO AD J SO UR CE F O C U S SE LE CT ME NU EXIT E...

Page 90: ... EXIT ENTER ST AT US LA MP AU TO AD J SO UR CE F O C U S SE LE CT ME NU EXIT ENTER ST AT US LA MP AU TO AD J SO UR CE F O C U S SE LE CT ME NU EXIT ENTER ST AT US LA MP AU TO AD J SO UR CE F O C U S SE LE CT ME NU EXIT ENTER ST AT US LA MP AU TO AD J SO UR CE F O C U S 4 Reattach the lamp cover 1 Slide the lamp cover back until it snaps into place 2 Tighten the screw to secure the lamp cover Be su...

Page 91: ...ans will not work correctly 6 cycle 0 5 sec On 0 5 sec Off Lamp error Lamp fails to light Wait a full minute and then turn on again Green Re firing the lamp The projector is cooling down The projector is re firing Wait for a moment Steady light Green Standby NORMAL for STANDBY MODE Orange Cabinet button is locked You have pressed cabinet button when Cabinet Button is locked Lamp Indicator Indicato...

Page 92: ...g the RESET in the Menu page 75 Enter your registered keyword if the Security function is enabled page 42 Be sure to connect the projector and notebook PC while the projector is in standby mode and before turning on the power to the notebook PC In most cases the output signal from the notebook PC is not turned on unless connected to the projector before being powered up If the screen goes blank wh...

Page 93: ...ayed correctly Should this happen deactivate the notebook PC s LCD screen when the projector display is in use Each notebook PC has a different way of deactivate reactivate the local LCD screens as described in the previous step Refer to your computer s documentation for detailed information Image displayed is incorrect when using a Macintosh When using a Macintosh with the projector set the DIPsw...

Page 94: ...e the light output value may drop slightly 3 Compliance with ISO21118 2005 Electrical Inputs 1 RGB Component D Sub 15 P 1 RGB Digital Analog DVI I 29 P HDCP 4 supported 1 S Video DIN 4 P 1 Video RCA 1 L R RCA Audio 2 Stereo Mini Audio Outputs 1 RGB D Sub 15P 1 Stereo Mini Audio PC Control 1 PC Control Port D Sub 9P Wired LAN Port RJ 45 External Control RS232 IR Wired LAN Color Reproduction 16 7 mi...

Page 95: ...e 3W in POWER SAV ING Mode 325W in Lamp NORMAL Mode 240W in Lamp ECO Mode 11W in STANDBY Mode 3W in POWER SAVING Mode Mechanical Installation Orientation Desktop Front Desktop Rear Ceiling Front Ceiling Rear Dimensions 12 1 W 2 3 7 H 2 10 3 D 308 mm W 2 93 5 mm H 2 262 mm D not including protrusions Weight 6 57 lbs 2 98 kg Environmental Considerations Operational Temperatures 41 to 104 F 5 to 40 C...

Page 96: ...og VGA SVGA XGA WXGA WXGA SXGA SXGA UXGA 480i 480p 576i 576p 720p 1080i Digital VGA SVGA XGA WXGA SXGA Video Bandwidth RGB 80 MHz Max Horizontal Resolution 540 TV lines NTSC NTSC4 43 PAL PAL M PAL N PAL60 300 TV lines SECAM Scan Rate Horizontal 15 kHz to 100 kHz RGB 24 kHz or over Vertical 50 Hz to 120 Hz Sync Compatibility Separate Sync Composite Sync Sync on G Built in Speaker 7W monaural Power ...

Page 97: ... 14 to 122 F 10 to 50 C 20 to 80 humidity non condensing Regulations UL C UL Approved UL 60950 1 CSA 60950 1 Meets DOC Canada Class B requirements Meets FCC Class B requirements Meets AS NZS CISPR 22 Class B Meets EMC Directive EN55022 EN55024 EN61000 3 2 EN61000 3 3 Meets Low Voltage Directive EN60950 1 TÜV GS Approved For additional information visit US http www necdisplay com Europe http www ne...

Page 98: ...ppendix SELECT MENU E X IT E N T E R STATUS LAMP AUTO ADJ SOURCE FOCUS 263 10 4 78 3 1 108 5 4 3 55 3 2 2 76 3 0 308 12 1 Cabinet Dimensions NP600 NP500 NP400 NP300 NP500W Lens center Lens center Unit mm inch ...

Page 99: ...90 7 Appendix NP600S NP500WS SELECT MENU E X IT E N T E R STATUS LAMP AUTO ADJ SOURCE FOCUS 78 3 1 308 12 1 76 3 143 2 5 6 301 5 11 9 75 5 3 Lens center Lens center Unit mm inch ...

Page 100: ... 1 4 2 3 10 11 12 13 14 15 6 9 7 8 Pin No RGB Signal Analog YCbCr Signal 1 Red Cr 2 Green or Sync on Green Y 3 Blue Cb 4 Ground 5 Ground 6 Red Ground Cr Ground 7 Green Ground Y Ground 8 Blue Ground Cb Ground 9 No Connection 10 Sync Signal Ground 11 No Connection 12 Bi directional DATA SDA 13 Horizontal Sync or Composite Sync 14 Vertical Sync 15 Data Clock ...

Page 101: ... 900 55 9 59 9 1600 1200 75 0 60 0 1600 1200 81 3 65 0 1600 1200 87 5 70 0 1600 1200 93 8 75 0 Apple Macintosh 640 480 35 0 66 7 832 624 49 7 74 6 1024 768 60 2 74 9 1152 870 68 7 75 1 1280 1024 64 3 60 4 1280 1024 69 9 65 2 1280 1024 78 4 73 7 HDTV 1080i 60 1920 1080 33 8 60 0 1080i 50 1920 1080 28 1 50 0 1280 720 45 0 60 0 SDTV 480p 720 480 31 5 59 9 DVD YCbCr 720 480 15 7 59 9 720 576 15 6 50 0...

Page 102: ... 00H 00H 02H 01H 01H 09H INPUT SELECT COMPUTER 2 Digital 02H 03H 00H 00H 02H 01H 1AH 22H INPUT SELECT COMPUTER 2 Analog 02H 03H 00H 00H 02H 01H 02H 0AH INPUT SELECT VIDEO 02H 03H 00H 00H 02H 01H 06H 0EH INPUT SELECT S VIDEO 02H 03H 00H 00H 02H 01H 0BH 13H PICTURE MUTE ON 02H 10H 00H 00H 00H 12H PICTURE MUTE OFF 02H 11H 00H 00H 00H 13H SOUND MUTE ON 02H 12H 00H 00H 00H 14H SOUND MUTE OFF 02H 13H 00...

Page 103: ... outlet Lamp cover is installed correctly AUTO POWER OFF is turned off only models with the AUTO POWER OFF function OFF TIMER is turned off only models with the OFF TIMER function Video and Audio Image is too dark Remains unchanged even though you adjust the brightness and or the contrast Image is distorted Image appears to be trapezoidal unchanged even though you carry out the KEYSTONE adjustment...

Page 104: ...able Model number Length inch m Distribution amplifier Model number Switcher Model number Adapter Model number Projector PC DVD player Installation environment Screen size inch Screen type White matte Beads Polarization Wide angle High contrast Throw distance feet inch m Orientation Ceiling mount Desktop Power outlet connection Connected directly to wall outlet Connected to power cord extender or ...

Page 105: ... the warranty or have been altered 2 Problems or damage caused by dropping or shocks during ship ment or movement by the customer or by improper handling by the customers 3 Problems or damage caused by improper usage or unwarrantable alterations or repairs by the customer 4 Problems or damage caused by fire salt damage gas damage earthquakes lightning damage storm or flood damage or other natural ...

Page 106: ...dress chamsedin samir photo com Regions Covered Saudi Arabia NOTE In countries designated with an asterisk replacement product rental service are offered Western Australia Perth 45 Sarich Court Osborne Park WA 6017 Telephone 131 632 WEB Address http www nec com au Regions Covered Australia New Zealand In Asia and Middle East NEC Display Solutions Ltd Address 686 1 Nishioi Oi Machi Ashigarakami Gun...

Page 107: ...eriod I also confirm following information is correct Regards Application Sheet for TravelCare Service Program P 1 Date Country product purchased User s Company Name User s Company Address Phone No Fax No User s Name User s Address Phone No Fax No Local Contact office Local Contact office Address Phone No Fax No User s Model Name Date of Purchase Serial No on cabinet Problem of units per User Requ...

Page 108: ... problem Enduser is required to fill in Application Sheet Enduser needs to confirm the availability of the Service to NEC Authorized Service Stations 3 Loan Only For this service NEC Authorized Service Station supplies the cus tomer with a loan unit for US 200 up to 12 days Customer keeps the inoperable unit and when customer returns home customer arranges to have the projector serviced in the hom...

Page 109: ... NEC Display Solutions Ltd 2008 2009 7N951301 ...

Reviews: