background image

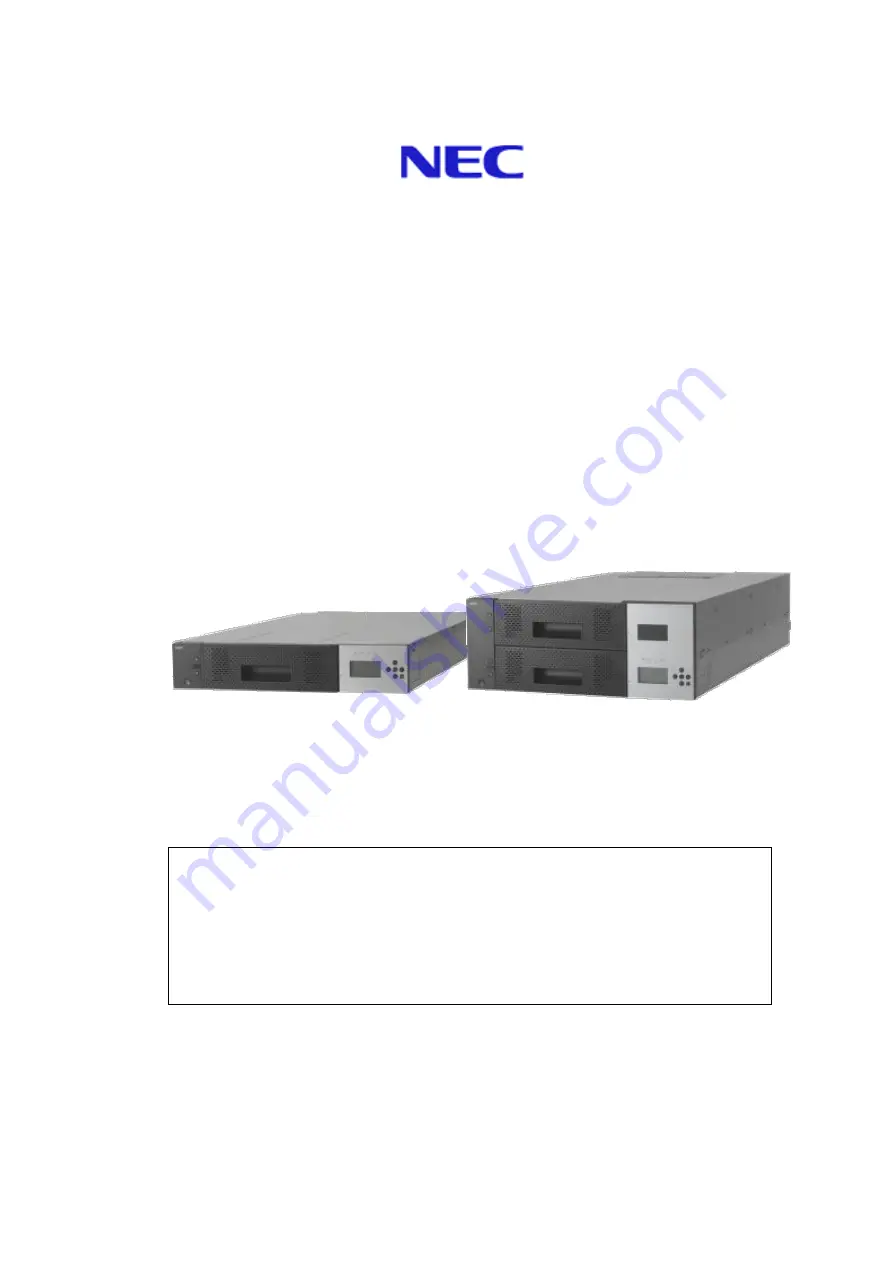
T30A / T60A Tape Library 

LL030F/LL060F 

User’s Guide 

Rev.7


T30A


T60A


-This User's Guide provides information to use the unit safely and correctly and to avoid a

personal injury and/or a damage to the customer's properties. Thoroughly read this manual to
fully understand handling of the unit. 

-Keep this User's Guide with the unit to see whenever it is necessary.
-Make sure to provide this User's Guide along with the unit to a third party.

856-129409-160-A 

Summary of Contents for LL030F

Page 1: ...ely and correctly and to avoid a personal injury and or a damage to the customer s properties Thoroughly read this manual to fully understand handling of the unit Keep this User s Guide with the unit...

Page 2: ...ts carrying the mark left must be disposed of separately from normal household waste This includes tape library or electrical components such as tape drive AC power supply When you dispose of such pro...

Page 3: ...a residential area is likely to cause harmful interference in which case the user will be required to correct the interference at his own expense ICES acceptance statement Industry Canada Class A Emi...

Page 4: ...de or warning labels WARNING or CAUTION is used to indicate a degree of danger These terms are defined as follows Indicates the presence of a hazard that may result in death or serious personal injury...

Page 5: ...isassemble repair or modify the server Otherwise an electric shock or a fire may be caused Do not touch the server components with wet hand Otherwise an electric shock may be caused Do not touch any o...

Page 6: ...to the rack installation environment Failure to follow these instructions may cause some bad influences to be imposed on the product and other systems installed on the rack and also a fire or personal...

Page 7: ...centrated on a specific point Install stabilizers on the rack or connect more than one rack with each other to distribute the load to avoid the weight is concentrated on one spot Failure to follow thi...

Page 8: ...ompatible with the maximum ambient temperature Tma specified by the manufacturer Reduced Air Flow Installation of the equipment in a rack should be such that the amount of air flow required for safe o...

Page 9: ...install the product where you need an extension cord Use of a cord that does not meet the power specifications of the product may heat up the cord and cause a fire Do not connect the power cord to an...

Page 10: ...the cord harness Do not pinch the power cord Do not bend the power cord Keep chemicals away from the power cord Do not twist the power cord Do not place any object on the power cord Do not step on th...

Page 11: ...a humid place such as near a boiler a place exposed to direct sunlight an unstable place Do not install the parts other than specified Do not install third party products or options on the device Ope...

Page 12: ...h causes no injury if human is exposed to it Prevent damage from electrostatic discharge Components in the device is sensitive to static electricity Even a slight discharge could damage the electrical...

Page 13: ...sation is formed on a dusty plug which may cause a fire Avoid installation in extreme temperature conditions Immediately after the device is powered off its internal components are very hot Please wor...

Page 14: ...chanism to automatically open If you are peeping into the device during magazine operations it may be injured part of the magazine hit the face Do not put the finger in the opening of the magazine whi...

Page 15: ...unreadable contact your local maintenance service company Warning Label Meaning Location T30A T60A Do not disassemble Only the maintenance Personnelcan disassemble the unit Heavy load To avoid persona...

Page 16: ...g signs are used in this manual Kind of display Kind Content It explains the content for which attention is especially necessary in operating It explains information on the limitations in the operatio...

Page 17: ...2 2 LCD 4 1 3 2 3 Button 4 1 3 3 Magazine operation panel 5 1 3 3 1 Magazine Status LED 5 1 3 3 2 Button 5 1 3 3 3 Ethernet connector for maintenance 6 1 3 4 Magazine 7 1 3 4 1 Slot number 7 1 3 4 2...

Page 18: ...sage screen 39 4 2 Menu Tree 40 4 3 Login 44 4 3 1 Service Login 45 4 4 Top Menu 46 4 4 1 Commands 47 4 4 2 Configuration 48 4 4 2 1 Library Settings 49 4 4 2 2 Network Settings 50 4 4 2 3 Drive Setti...

Page 19: ...Manage Library 93 5 6 4 1 Move Cartridge window Move Cartridge 93 5 6 4 2 Unload Drive window Unload Drive 95 5 6 4 3 Clean Drive window Clean Drive 96 5 6 4 4 Library State OFFLINE ONLINE switching...

Page 20: ...Encryption Key For Each Tape Medium 140 6 3 3 1 When to import the encryption key 141 6 3 3 2 To import the encryption key 141 6 3 3 3 To export an encryption key 143 6 3 4 Disabling the Encryption M...

Page 21: ...g the Drive Module 173 10 6 Replacing the Power Supply Module 174 10 7 Replacing the Operator Panel PKG 175 10 8 Replacing the Escape Slot 177 10 9 Replacing the Front Magazine and Rear Magazine 177 1...

Page 22: ...Magazine is Opened 35 Figure 4 6 Magazine Icon I O Station is set 35 Figure 4 7 Magazine Icon I O Station is opened 36 Figure 4 8 Magazine Icon Slot Image 36 Figure 4 9 Root screen of Top Menu 46 Fig...

Page 23: ...32 Figure 6 7 Export of Master key 133 Figure 6 8 Encryption Detail 134 Figure 6 9 Encryption Detail 138 Figure 6 10 Encryption Setting 139 Figure 6 11 manual inputting of the encryption key 141 Figur...

Page 24: ...Table 4 15 IPv4 Setting Submenu 50 Table 4 16 IPv6 Setting Submenu 50 Table 4 17 Drive Settings Submenu 51 Table 4 18 port setting submenu 51 Table 4 19 OP Panel Settings Submenu 52 Table 4 20 Date T...

Page 25: ...A HP is registered trademarks of Hewlett Packard Company of the U S A in the United States Windows is registered trademarks of Microsoft Corporation in the United States and other countries Java and...

Page 26: ...bility for the accompanying damages e g profit loss or business interruption arising from the use or unserviceable state 5 NEC assumes no liability for the damages caused by ignoring the description i...

Page 27: ...xxvi This page is intentionally blank...

Page 28: ...t to sudden changes in temperature The product is made up of precision electronic components Avoid applying shock to the product and do not store or use the product in a place subject to vibration Do...

Page 29: ...to mount the library in the rack see 1 7Installing the Rack Mounting Kit 1 3 1 Front View Figure 1 1 Front of the Library Above T30A Below T60A 1 Magazine operation panel When the front panel is remo...

Page 30: ...s opend Library is offline state Drive cleaning indicator Lighting The drive is requesting cleaning Blinking The drive is being cleaned Cartridge error indicator Lighting This Orange LED is on when th...

Page 31: ...utomatically turned off if the specified time elapses without any operation being performed 1 3 2 3 Button Table 1 2 Button on OperatorPanel Direction button It is used for the selection of the operat...

Page 32: ...the LED is green 1 3 3 2 Button Table 1 4 Button on Magazine Operation panel Magazine unlock button indicator Magazine unlock request button This Green LED is on when the button is enabled I O Station...

Page 33: ...for logging in to the remote management interface as a user with maintenance personnel authority The IP address of the maintenance port is 192 0 2 1 In the Ethernet connector for maintenance a remote...

Page 34: ...cape slot module is provided for temporarily storing tape cartridges 1 3 4 1 Slot number The slot numbers range from 1 to 30 for T30A and from 1 to 60 for T60A In each column the slot in the back has...

Page 35: ...side this product When only one drive is mounted an escape slot module is provided at the location where an additional drive is usually mounted and this module is used as the escape slot When two or m...

Page 36: ...ve Sled indicator refer to 1 3 6 5 SAS access port or FC access port SAS Drive Two connectors are mounted on the device back and forth front port A back port B not use FC Drive Two connectors are moun...

Page 37: ...ply On Power is supplied Off Power is not supplied LED indicates the communication status to the library On Recognized from the library Blinking Data transfer Off Not recognized from the library LED i...

Page 38: ...that shows the following is mounted on the back side of the power source module AC When the AC voltage is supplied it lights DC When the DC voltage is supplied it lights Alarm When abnormality occurs...

Page 39: ...d by default It is enabled when a license key is input from the remote management interface When enabled the encryption function behaves as follows Setting the encryption function requires administrat...

Page 40: ...For details contact the relevant local authority Data stored in a tape cartridge It is your responsibility to properly erase the data stored in a used tape cartridge so that confidential data e g bus...

Page 41: ...places 2 The exterior box has two fasteners called joints one on each side Pull the tab at the right end of the joint toward you and remove the joint 3 Hold the corners of the exterior box and pull up...

Page 42: ...15 4 Remove the cushioning material to take out the library 5 Open the plastic bag and remove the library...

Page 43: ...below Figure 1 7 Components of Rack mount kit parts Table 1 6 component list of rack mount kit parts Item No Name Qty 1 Rack mount rail L 1 2 Rack mount rail R 1 3 Rack mount bracket L 1 4 Rack mount...

Page 44: ...rsal pitch 2 There must be air vents in the front and rear to enable adequate cooling of the device 3 The rack must have bars at the front and rear for attaching the device as illustrated below Illust...

Page 45: ...al Dimension Requirements for rack Site Description Requirement A Distance from front device mounting bracket to inner side of front door 25mm or above B Gap between front and rear device mounting bra...

Page 46: ...ion Attach four flat head screws M6 each to the front and back of the rack to attach the rack mount rails Figure 1 10 Rack mount rail attachment position Library bottom front of rack Library bottom Ra...

Page 47: ...Use four flat head screws M6 to attach the rack mount rail L to the front and rear of the rack 2 Use four flat head screws M6 to attach the rack mount rail R to the front and rear of the rack Figure...

Page 48: ...the rack mount bracket R to the right of the library 2 Use four screws M3 to attach the rack mount bracket L to the left of the library Figure 1 12 attachment of rack mount bracket R left T30A right...

Page 49: ...nsport and install of the rack by two people or more The rack falls and it causes the injury and the damage of surroundings Especially the rack 44U etc with height is not fixed to the delicate state b...

Page 50: ...23 Use two screws M5 to attach the left and right of the Library s front side Figure 1 15 attachment of rack ears T30A T60A...

Page 51: ...24 1 7 7 Attachment of Rack ear Attach the left and right rack ears to the left and right of the Library s front side Figure 1 16 Fastening of Library s front side T30A T60A...

Page 52: ...25 1 7 8 Attachment of label plate Attach the label plate with repetition belt to the left of library s back side Figure 1 17 attachment of label plate...

Page 53: ...fore using the Library be sure to unfasten this screw Make sure that the shipment stabilizer screw has been unfastened If the power is turned on while the screw is still fastened operation faults may...

Page 54: ...drives and the T30A library can house up to two drives 2 1 1 Connection of SAS Cable Connect each SAS drive of the library to a server by using an SAS cable The product has an SAS connector on the bac...

Page 55: ...protection caps The product will not work if the cable is connected to Port B Connector on the upper side of the drive shown on the right is the connector with the caps removed For information about...

Page 56: ...e media changer path of the robot Topology Point to Point loop Loop ID 0 to 125 Link Speed Auto 1Gbps 2Gbps 4Gbps 8Gbps Power Save Mode The setting of drive power save mode When a wrong topology Loop...

Page 57: ...unnecessary items such as components connectors or tools left in the library 3 Check that the magazines are mounted 4 It is confirmed whether the time displayed in the library is correct If time shif...

Page 58: ...ted to the server or workstation to shut down the system When shutting down the system use your backup application or check for messages on the LCD to make sure that no cartridges have been loaded int...

Page 59: ...screen is for real time display of the internal state of library unit The Asynchronization message screen display the message to draw attention to the operator Described below is detailed explanation...

Page 60: ...een has the Library State that displays a status of library and Drive State that displays a status of drive Each screen can be switched by pressing buttons other than Enter 4 1 2 1 Library State In th...

Page 61: ...drive EXCHANGE SLOTFULL A cartridge is stored in the exchange slot CARTRIDGE WRONG INSERTION A cartridge has been incorrectly inserted in the drive ENDURANCE COUNT OVER The number of Accessor mechani...

Page 62: ...igure 4 5 Magazine Icon Magazine is Opened When I O Station is set it is displayed as follows Figure 4 6 Magazine Icon I O Station is set When the I O Station is Opened the display changes as shown be...

Page 63: ...tape is inserted into the tape drive Indicates that the cartridge tape was ejected from the tape drive Indicates that the tape drive detected error Indicates that the tape drive initializes 5 Library...

Page 64: ...es that the tape drive is initialing Empty Indicates that no cartridge tape is inserted into the tape drive Ejected Indicates that the cartridge tape was ejected from the tape drive Loading Indicates...

Page 65: ...icon is displayed it is shown that it is a state of Prevent 5 Fan Error Icon Indicates the fan error status of drive 6 Encryption mode Icon Indicates whether an encryption setup of a drive is effectiv...

Page 66: ...he Magazine lock release from the main management task Message off End of lock release Magazine is unlocked T30A Unlocked of Magazine Indication End of lock release Message off Opening the Magazine or...

Page 67: ...ble 4 6 Menu tree of commands Top Menu Submenu Commands Move Cartridge Unload Clean Drive Shipping Move Reboot Drive Reboot Library Library State Online Offline Drive State Selecting of drive Online O...

Page 68: ...Half Protocol Stack IPv4 IPv6 IPv4 Settings DHCP IPv4 Enable Disable IP Address Subnet Mask Gateway Apply IPv6 Settings Stateless DHCP Enable Disable DHCP IPv6 Enable Disable IP Address Prefix Length...

Page 69: ...rent Information Setting Information Library Setting Network Settings Drive Settings OP Panel Settings Slot Information T30A View Magazine View Drive View Escape Slot View Accessor T60A View Upper Mag...

Page 70: ...ly service login Enable Disable View Revision Drive Replacement only service login Advanced Services only service login Mechanism Test Demo Slot Drv Slot Demo Slot Slot MSBF Test X Move Test Y Move Te...

Page 71: ...user password is set as 0000 4 If the password entered does not match the one stored in the library unit the following message is displayed If this message is displayed repeat steps from 3 Retry for...

Page 72: ...can be done when inputting once after it returns to the screen of three 2355 Service Login in Login Mode Disable Push the right and left button of an operator panel for 10 seconds It changes to a logi...

Page 73: ...46 4 4 Top Menu After Log in the following screen is displayed Figure 4 9 Root screen of Top Menu...

Page 74: ...See Section 4 8 1 for details Shipping Move To carry the library moves the robot to the carriage position Note Take all the cartridges out from the magazine before running this command Before carryin...

Page 75: ...This submenu can be used to enter various network related settings Drive Settings This submenu can be used to enter various drive settings OP Panel Settings This submenu can be used to enter various s...

Page 76: ...d be set when using backup software Sequential Mode Loop Mode Operation does not stop after the cartridge has been unloaded by the host from the last slot Instead the first slot s cartridge is loaded...

Page 77: ...1 This sets the IP address for access via a network Subnet Mask 255 255 255 0 This enables the Autoloader to be accessed from a subnet Gateway 192 168 1 254 This indicates a gateway connection betwee...

Page 78: ...e mentioned setting is applied Table 4 18 port setting submenu Submenu item Default Description Drive path Port A Enbale Setting of port A Enable Disable Link Speed SAS model 3Gbps Link Speed Specify...

Page 79: ...et login mode Auto Logout Enable This submenu can be used to set auto logout Enable Sets Auto Logout time Change Password 0000 This submenu can be used to change the login password 4 4 2 5 Date Time T...

Page 80: ...DHCP IPv4 IP Address IPv4 subnet mask IPv4 gateway IPv4 stateless DHCP DHCP IPv6 IP address IPv6 Prifix Length Gateway IPv6 Drive Settings Port A Port B Media Changer Power Save Mode OP Panel Setting...

Page 81: ...g This checks the library log 4 4 4 1 View Error Status Table 4 25 Information to be displayed on View Error Status Submenu item Description View Library Error This checks the errors in Library View D...

Page 82: ...on in the Error 4 4 4 4 Telnet Service Port This menu is used to enable and disable the TELNET port 4 4 4 5 View Revision This menu is used to check the firmware revision of the library and the instal...

Page 83: ...Demo Slot Slot MSBF Test X Move Test Y Move Test Pick Put Test Pick Put Move Test Vibration Test LCD LED test LCD LED test can be executed Do not use it usually Phy test Ethernet phy test can be exec...

Page 84: ...figuration information of the library is displayed To view the firmware version of the library select View Revision from service of Top menu 4 5 2 Change password The following describes how to change...

Page 85: ...58 Once the above message is displayed the new password is valid If the entered passwords do not match the following message will appear If the above message is displayed start again from step 4...

Page 86: ...s how to set SAS Serial Attached SCSI interface configuration for tape drive installed in the unit In case of SAS drive set drive path and robot control path Refer to 4 5 3 3 Setting robot control pat...

Page 87: ...Selecting Apply the port of the drive is reset and the setting is applied 3 Setting of Loop ID 1 Select Set Loop ID 2 Input three digit number for Loop ID 3 Selecting Apply the port of the drive is re...

Page 88: ...l path 1 Login See Section 4 3Login for detail 2 Select Configuration 3 Select Drive Settings from Configuration 4 Select the drive that sets the robot control passing 5 Select Enable under Media Chan...

Page 89: ...indicated Setting is applied by Yes 4 5 4 Switching between ONLINE and OFFLINE The Library usually starts in online mode When operating the Library by itself switch to offline mode The following desc...

Page 90: ...ot You can change the number of slots logically in the library unit Described below is setting procedure 1 Login See Section 4 3Login for detail 2 Select Configuration 3 Select Library Setting from Co...

Page 91: ...See Section 4 3Login for detail 2 Put Magazine Unlock button refer to 1 3 3 2Button 3 The message of Magazine is unlocked is displayed in Library state on LCD screen and magazine is unlocked Next dra...

Page 92: ...ure with drawing out the front magazine 6 A rear magazine is drawn out according to the procedure3 4 similar to the procedure for drawing out the front magazine Refer to follwing picture about the loc...

Page 93: ...re inserting For description of magazine slot numbers see 1 3 4 1Slot number Insert the cartridges correctly If a cartridge is inserted in the wrong direction or it is not fully inserted into the slot...

Page 94: ...eed Moreover please note that it causes the breakdown of the transportation device accessor and the magazine when the tape cartridge is taken out while operating The steps for removing the magazine fr...

Page 95: ...See Section 4 3Login for detail 2 Push Magazine I O station Unlock button refer to 1 3 3 2Button 3 The message of Push Enter Key is displayed in Library state on LCD screen 4 Push Enter button and I O...

Page 96: ...In this example the cartridge in slot 1 will be loaded into the drive 1 1 Login See Section 4 3Login for detail 2 Select Commands 3 Select Move Cartridge from Commands 4 The screen to specify the Sour...

Page 97: ...tination and the slot where the no cartridge is stored is displayed In this example slect Drive1 Figure 4 12 Select Destination Screen 7 Select Execute the cartridge is moved and inserted into the dri...

Page 98: ...fline See Section 4 5 4Switching between ONLINE and OFFLINE for details Select Unload from Commands to eject a cartridge from the drive If you select Unload you are prompted to select the drive to unl...

Page 99: ...on and the slot where the no cartridge is stored is displayed In this example slect Slot01 Figure 4 16 Select Destination screen 7 Select Execute the cartridge is ejected from the drive and moved to t...

Page 100: ...clean Move Cartridge Clean drive should be performed only when there are no backup software jobs being executed 1 Check that the cleaning cartridge is appropriate to the target drive and its use count...

Page 101: ...of the Library When errors have occurred in the Accessor and or drive The following describes the steps for rebooting the library 1 Login See Section 4 3Login for detail 2 Make sure that all jobs have...

Page 102: ...red a reboot of the Library When errors have occurred in the Accessor and or drive The following describes the steps for rebooting the library 1 Login See Section 4 3Login for detail 2 Make sure that...

Page 103: ...et Explorer 8 Internet Explorer 9 Internet Explorer 10 Internet Explorer 11 Firefox3 6 3 SNMP function SNMP Manager Trap reception and MIB extraction by an MIB browser are enabled Various settings are...

Page 104: ...set This can also be set automatically by DHCP Gateway 192 168 1 254 The gateway is specified for access from a different subnet mask This setting is not necessary when access is always within the sa...

Page 105: ...s that was set for the Library as the URL Figure 5 1 Input URL If this product and the terminal are normally connected with the network respectively the log in screen is displayed as the first stage s...

Page 106: ...erface in https is as follows 1 Https IP address set to the tape device is input 2 When connecting it with the Web service not registered on the attestation site like the remote manager interface warn...

Page 107: ...t connector for 1 3 3 3 Refer to 5 6 5 1 for user s setting method 2 Simultaneous login It is usually recommended to use it by one user because there is a possibility of worsening of the response thou...

Page 108: ...banner section and a section of specific information for each page Although the web page can be viewed on an 800 600 dot monitor at least 1280 1024 dots is recommended The basic menu varies according...

Page 109: ...r the current user access level are not displayed See the following table for details Table 5 3 Menus available at various user access levels Menu Meaning User Super user Admini strator Monitor System...

Page 110: ...e created in User Access 2 Password Enter the password for username The entered characters are indicated by asterisks 3 Login button When Login button is clicked the system checks if the entered usern...

Page 111: ...g menu Monitor Sytem 5 6 3 1 Library Basic Information System Summary Monitor System System Summary All users Function This menu shows the image and basic information of the Library Figure 5 4 Library...

Page 112: ...e Counts These indicate the slot settings and the number of cartridges 1 Drive When the Cartridge value is 0 it means there are no cartridges in the drive When it is 1 it means a cartridge is in the d...

Page 113: ...y Map All users Function This menu describes the cartridges loaded in various slots and the Library s various parts Information This window includes detailed information along the right side which var...

Page 114: ...displayed when there is no barcode label Remain Indicates the number of cleaning cartridges remaining This is shown only when the cartridge type is cleaning cartridge Media Status Indicates the cartr...

Page 115: ...ation Displays the event information including an error that occurred in the accessor and an event of articles of consumption exchange notification It is not displayed when there is no event Cartridge...

Page 116: ...Disable Enable Auto cleaning Indicates the auto cleaning settings Disable Enable Bar code label length Indicates settings of the bar code label lenghth Notice nearly expired Indicates the setup of th...

Page 117: ...Subnet mask Indicates the IPv4 s subnet mask Gateway Address Indicates the IPv4 s gateway address DCHPv4 Indicates the DHCPv4 s setup status Enabled Disabled IPv6 Settings IPv6 address Indicates the...

Page 118: ...nder address Indicates the e mail address of library Subject Indicates the subject of e mail the library sends MailRecipients Indicates the mail address SNMP Settings Community Indicates Community nam...

Page 119: ...the setting of media changer path World Wide ID Indicates the drive s WWN 2 Cartridge Information When there is a cartridge in the drive the cartridge s detailed information is shown Cartridge label...

Page 120: ...user Function This window s functions are similar to those of the operation panel s Move Cartridge menu which moves the cartridges by specifying the source and destination of each cartridge to be move...

Page 121: ...idge is stored is displayed Element Address can be narrowed with Row and Slot 3 Slot map Slot information is displayed in similar Library Map The source slot and the target slot can be selected from t...

Page 122: ...e unloaded and displays an unload completion dialog box when this operation is completed The Unload Drive function cannot be executed unless there is a cartridge in the drive Use method 1 Specify the...

Page 123: ...ng request from the drive clean the drive Each cleaning cartridge can be used up to 50 times Record the number of use and when 50 times is reached replace the cleaning cartridge The drive will not be...

Page 124: ...method 1 Click the Bring Offline Bring Online button to view the confirmation screen 2 Select Yes to execute switching Information Figure 5 15 Library state Figure 5 16 confirmation screen 1 Current...

Page 125: ...he Select Action scroll box to select Add User and to remove a user first select the current user to be removed then use the Select Action scroll box to select Remove Users Information Figure 5 17 Use...

Page 126: ...name to be registered 2 New password Enter a password for the user to be registered 3 Confirm password Enter the password again for confirmation Enter the same new password 4 Role Select a user level...

Page 127: ...en Remove is selected the following dialog box is displayed 3 Select Yes to remove the user Figure 5 19 Remove a User confirmation screen The user himself cannot be deleted Service cannot be displayed...

Page 128: ...y name The Library s name can be registered 2 Power Save mode Configure the power save mode of a drive Enable Power save mode validity Disable Power save mode invalidity Time to shift to power save mo...

Page 129: ...tup window Logical Configure Library Logical Service Administrator Function This window is used to set the Library s operation mode I O slot and number of active slots Information Figure 5 21 Logcal 1...

Page 130: ...et to Active slots is set to the cleaning Inactive slot 4 Auto cleaning Sets auto cleaning When you use the library with backup software please set up an Auto Cleaning Mode Disable If the backup softw...

Page 131: ...e n ports In case of SAS drive sets Drive Path Link speed In case of FC drive sets Drive Path topology Loop ID and Link speed 11 Submit button Click this button to confirm the settings When complete a...

Page 132: ...ll 100Base TX Half 1000Base T Full or 1000Base T Half 2 Security setting When Enable SSL for Web is checked SSL is used between the Library and the Applet to set encrypted communications 3 IPv4 Settin...

Page 133: ...and gateway are set automatically Obtain an IP address automatically DHCP Information is retrieved by DHCP and the IPv6 address prefix length and gateway are set automatically Use static IP address Th...

Page 134: ...retrieved from the NTP server Disable Time information is not retrieved from the NTP server 2 NTP server address Specify the NTP server s address here 3 Time Zone GMT Select the local time zone from...

Page 135: ...cify the destination email addresses for Library information 3 Notice Level Select one type of event for email notification Emergency Only Over Error Over Warning Over Information Disable If Emergency...

Page 136: ...igure 5 25 SNMP setup 1 SNMP Enabled The SNMP function is made effective Trap is not transmitted in the state where SNMP Enabled is not checked Since a setup of Community of Agent Setting is indispens...

Page 137: ...the user information that is required to monitor the MIB data on devices accessed by the Manager using the SNMPv3 protocol The user names registered here are used to enable execution of snmpget and sn...

Page 138: ...tion or Privacy a password is needed Set Notice level at the levels other than Disable to enable to make the trap list who registered effective Moreover Version of SNMP can be set It corresponds in Ve...

Page 139: ...Encryption Basis setup 1 Library Managed Encryption This sets library managed encryption setting as enabled or disabled 2 Master Key Import This sets master key Master Key was registered It is shown...

Page 140: ...Encryption Detail Configure Library Encryption Detail Administrator Function This window is used to set the encryption basis setting Please refer to section Chapter6 for details Figure 5 29 Encryption...

Page 141: ...enses Registration Configure Library Licenses Registration Service Administrator Function This window is used to input the activation key to make the function of the option effective Figure 5 30 Licen...

Page 142: ...ore the saved set value The setting of the device can be succeeded by restoring the data saved when the maintenance chassis are exchanged to a new maintenance chassis Information Figure 5 31 Save Rest...

Page 143: ...Execute Case where are before and after exchange and a drive serial number is not changed The work of a drive new recognition by backup software becomes unnecessary However since the serial number in...

Page 144: ...s Figure 5 32 View Library logs 1 Select log Select the displayed log Command log Error log Retry log Mechanical Motion log Event log encryption log Cleaning log 2 Refresh button Will read the current...

Page 145: ...rive s logs Click the Download button to download these logs In the case of download of the drive s log the drive becomes offline Display Contens Figure 5 33 Download Logs 1 Target drive Select the dr...

Page 146: ...trator Function Reset the library or drive Display contents Figure 5 34 Reset Library Drive 1 Target device Select Loader or Drive 2 Reset button After selecting the Target device clicking this button...

Page 147: ...re Update Select library firmware file The file designation is only possible by clicking the Browse Button 2 Update button Clicking Update Button will start the firmware update process 3 Drive Firmwar...

Page 148: ...e Statistics Service Library Usage Statistics Service Function Display the statistical information of the three types of robot of the library namely Motion Counts Retry Counts and Error Counts Display...

Page 149: ...122 5 6 6 6 Web Shell web shell Service Library Web Shell Service Function The command prompt can be used Display contents Figure 5 37 Web Shell...

Page 150: ...on fails 17 emergency 2 I O SLOT unlock failed CHK 00D7 Drive error 21 error 3 DRIVE0x Error CHK xxxx 1 Accessor error 22 error 3 ACCESSOR Error CHK xxxx 2 Drive FAN error 31 error 3 DRIVE0x Cooling e...

Page 151: ...VE0x Not Ready The library enters online state 102 info 5 LIBRARY Online The library enters Not Ready state 102 info 5 LIBRARY Not Ready The library enters offline state 102 info 5 LIBRARY Offline Cha...

Page 152: ...gement function of the Library is enabled and you can record encrypted data to tape media An LTO4 LTO5 LTO6 and LTO7 drive incorporates hardware for encrypting data using the AES 256 bits With this ha...

Page 153: ...f encryption keys are individually set to each tape medium tape medium cannot be shared even if the same master key is set When using such encryption keys import the corresponding encryption key into...

Page 154: ...dium without using the master key by individually setting an encryption key to the tape media containing the tape medium you want to share 6 1 3 3 Backup of encryption key If an encryption key is lost...

Page 155: ...Tape media in the Library All are LTO4 LTO5 LTO6 LTO7 medium Key to be used Master key only Encryption keys are not used Sharing tape medium among multiple libraries Enabled by setting the same master...

Page 156: ...inserted in the tape drive before registering the license key 6 2 1 2 Checking the license key registration status If the Setting screen in Figure 6 2 is displayed the activation key has been registe...

Page 157: ...yption key management function to use it After enabling encryption register the master key if it is not yet registered See 6 2 1 4Registering importing the master key If the master key is already regi...

Page 158: ...s little as possible If you change the master key the encrypted data previously created in the tape media can no longer be read If the master key is lost you can no longer restore the encrypted data A...

Page 159: ...ster key cannot be imported if you forget that password Figure 6 6 File Input of Master key When you click Submit the message below should appear Click Yes After rebooting the device automatically the...

Page 160: ...ome impossible to decrypt encrypted data if the master key is lost You can share tape medium by importing the exported master key to other Libraries For details about how to share medium using the mas...

Page 161: ...l Use the initial settings in which Encryption is specified for all tape media The cleaning cartridge becomes disable automatically Remark You can see the encryption setting status of each slot from t...

Page 162: ...equent Libraries Remark To import the master key See 6 2 1 4Registering importing the master key To export the master key See 6 2 1 5Exporting backing up the master key 6 2 4 Maintenance 6 2 4 1 Backu...

Page 163: ...log The encryption information log items are overwritten and cleared starting with the oldest one If you keep log records in the past Please save them periodically Encryption Log is included in Librar...

Page 164: ...urpose Be sure to back up the KEY database after changing the settings described in this chapter If the database is not backed up and encryption key information is corrupted due to a device failure it...

Page 165: ...nvalid 6 3 2 Enabling or Disableing Enctyption for Each tape medium You can enable or disable encryption for each tape media All slots are encrypted by default You can check the setting for each tape...

Page 166: ...t Although tape medium can contain encrypted data and plain text data at the same time it is not possible to determine which data is encrypted Therefore be sure to use single encryption setting for ea...

Page 167: ...lure it might become impossible to decrypt data recorded in tape medium 6 3 3 Importing and Exporting the Encryption Key For Each Tape Medium You can set an encryption key to each tape medium When you...

Page 168: ...the tape medium with bar code label because it memorizes it in the library However you do not need to import an encryption key automatically generated from the master key 6 3 3 2 To import the encrypt...

Page 169: ...ange the Key ID setting from Auto 2 Inputting the encryption key file Select Import and File for Key Type input values for File Path and Password and then click Submit No password is required when imp...

Page 170: ...ta The password set at this time is needed at import Figure 6 13 Export of the encryption key An automatically generated encryption key is not generated until the tape media is loaded into the drive I...

Page 171: ...ment Function When Encryption management function is disabled the setting of an individual tape medium becomes invalid too Again please note that all the tape medium return to initialization when you...

Page 172: ...er key When you change the master key all automatically generated encryption keys are changed and the previously created tape medium become unreadable Therefore before changing the master key please p...

Page 173: ...pressed the save screen is displayed The file preservation place is specified and it saves a file Figure 6 17 Backup of KEY Database 6 3 6 2 Restoring the KEY database The password of the backup of K...

Page 174: ...Y database before clearing it 6 3 7 1 To clear encryption information It executes it by confirming there is no tape medium in the drive and pressing the Clear button with Clear Encryption Setting of M...

Page 175: ...ed for recording data 2 Make sure that the tape media is not LTO1 LTO2 or LTO3 medium 3 Make sure that encryption is enabled for the Library and tape medium Data cannot be decrypted 1 Make sure that t...

Page 176: ...import the exported encryption keys after changing the master key It is therefore not recommended that you change the master key once operation starts Q1 5 How to clear encryption information A Use R...

Page 177: ...porting the encryption key Encryption Key was imported Succeeded in restoring the encryption key Encryption keys were backed up Succeeded in backing up the KEY database Encryption keys were restored S...

Page 178: ...of T60A please install the drive module detaching the screw two places where the drive cover is fixed when increasing it in drive 3 4 Please abandon detached escape slot and drive cover 5 Stick the n...

Page 179: ...hed to a license option in the label plate installed in the rack mount kit back side Chapter8 Cartridges This chapter describes handling of the cartridges used by the Library and how they are used The...

Page 180: ...cartridge door helps keep the cartridge clean when it is removed from the drive The write protection switch prevents data from being written onto a data cartridge The label attachment area is where th...

Page 181: ...SER Media ID Ultrium3 Data Cartridge L3 400 G byte non compression Ultrium3 WORM Cartridge LT 400 G byte non compression Ultrium4 Data Cartridge L4 800 G byte non compression Ultrium4 WORM Cartridge L...

Page 182: ...ch a label on any other location than specified Use the label where the paste does not remain after it is peeled off Make sure that the barcode including volume serial number VOLSER and Media ID is pr...

Page 183: ...write protection plug at the same location however the indication on the switch may differ Refer to the manual that comes with the cartridge When the new tape cartridge never loaded into the tape driv...

Page 184: ...ide by hands Do not bring a substance which generate magnetic close to the cartridge Do not place the cartridge in a place subject to direct sunlight or a place near a heater Do not apply strong shock...

Page 185: ...ose which generate write read errors Periodically check the data cartridge records and the cartridge labels and if they indicate that the data cartridge at hand has been used for so long that write or...

Page 186: ...easures such as turning off the backup software service Use a special cleaning cartridge with a bar code label that supports the drive to be cleaned Clean the drive once a month or a backup of 100 hou...

Page 187: ...or code is shown to an operator panel so please push Enter button to advance check movement first after confirmation A special diagnostic medium is needed for the diagnostic test Do not use the user m...

Page 188: ...from the magazine bezel part by using a vacuum cleaner or similar device Lightly place the cleaner nozzle on magazine bezel holes in the rectangular areas in the figure below and suction out the dirt...

Page 189: ...ersion You can confirm the version of the library and drive firmware from the remote management interface or the operator panel 1 Checking the firmware version from the remote management interface Log...

Page 190: ...e 1 Start the remote management interface and log in as a user with service authority Use the following account and password for login Account service Password ser001 2 Select Firmware Update from Ser...

Page 191: ...gure 9 3 Firmware Update Window Drive Firmware Update 3 Select the drive whose firmware is to be updated from Target Drive at the bottom of the Drive Firmware Update window 4 Specify the name and path...

Page 192: ...mote management interface see Chapter5 1 Log in as a user with maintenance personnale authority 2 Select Download Logs from Service Library and download the following logs Drive Normal logs only for t...

Page 193: ...en the screw for transportation on the back of machine Do the following work even when you cannot tighten the screw 6 Turn OFF the power switch of the machine 7 Remove the AC Power Cable Interface Cab...

Page 194: ...019 217 A 10 5 LTO4 FC drive module T30A T60A 243 539019 224 A 10 5 LTO5 FC drive module T30A T60A 243 539019 225 A 10 5 LTO6 FC drive module T30A T60A 243 539019 226 A 10 5 LTO7 FC drive module T30A...

Page 195: ...nance Information 1 Log into the remote management interface as a user with service authority Account name service password ser001 2 Click the Save Restore menu and click the Download button Figure 10...

Page 196: ...Save Restore menu and click the Restore button Figure 10 2 Save Restore Window 3 Choose the replaced unit by a check box 4 Specify the maintenance information file saved in 10 1 1 Saving Maintenance I...

Page 197: ...driver is suspended The Windows version Networker stops a server 2 If there is a cartridge in the drive move it to the magazine slot by using the backup software or by using the operating panel 3 Save...

Page 198: ...tops a server 2 If there is a cartridge in the drive move it to the magazine slot by using the backup software or by using the operating panel 3 Save the maintenance information referring to 10 1 1 Sa...

Page 199: ...ite procedure to the procedure used to demount them 9 Turn on the power to the library 10 Fault LED lights up after turn on the power to the library and it is displayed on an operator panel as UNMATCH...

Page 200: ...o exchange and select Remove Drive 7 Unfasten the two screws shown below and extract the drive to be replaced 8 Mount the new drive and anchor it with two screws shown above 9 Select Drive Replacement...

Page 201: ...dows version Networker stops a server 2 If there is a cartridge in the drive move it to the magazine slot by using the backup software or by using the operating panel 3 Turn off the power to the libra...

Page 202: ...he operator panel PKG connectors The figure below shows T60A For T30A remove only the left cable No cable is connected to the right connector Remove the two screws shown below and demount the LCD cove...

Page 203: ...e opposite procedure to the procedure used to demount it Confirm that the FFC cable is latched and mount the operator panel PKG 6 Mount front bezel R and the front magazine This completes replacement...

Page 204: ...e pull it out 4 Replace the save slot 5 Turn on the power to the library 6 If a cartridge was removed in step 3 return it to the library 10 9 Replacing the Front Magazine and Rear Magazine 1 Remove th...

Page 205: ...ine 2 Place the front magazine on a stable place such as a desk Make sure that the bezel section is positioned over the edge of the desk so that it does not touch the surface of the desk as shown in t...

Page 206: ...179 4 Remove the four screws anchoring the bezel and demount it Screws...

Page 207: ...he claws with your finger to confirm that the claws have completely latched onto the sheet metal hole edges 7 Insert the removed bezel and temporarily fasten the four screws removed in step 4 8 Tighte...

Page 208: ...screw anchoring the drive cover and demount the drive cover When removing the cover it is necessary to open the left latch shown below a little in the direction of the arrow to release the latch 3 Loo...

Page 209: ...the cables from the cord keeper 5 Pull out the drive further When pulling it out be careful not to bend the internal cables causing the wires to break 6 Remove the three fan bracket screws shown below...

Page 210: ...e used to demount it Wire the fan cable as shown below Take care not to get the cables caught when pushing in the drive Take care not to get the cables caught when mounting the drive cover To mount th...

Page 211: ...be removed by using your fingers the space is too narrow so remove it by picking it up with tweezers from above 4 Pull out the drive from the chassis and remove the drive side connector of the intern...

Page 212: ...sh its underside 2 Remove front bezel L of the magazine operating panel Remove it while pushing the left lock 3 Mount front bezel L and rack ear L using the opposite procedure to the procedure used to...

Page 213: ...rary from the rack and remove the upper and lower front magazines 4 Remove the four right screws from the front of the library and remove rack bracket front R 5 Remove the three left screws of bezel R...

Page 214: ...the X movement operation 11 1 5 Y Move Test Repeats only the Y movement operation 11 1 6 Pick Put Test Repeats only the Pick Put operation of the media 11 1 7 Pick Put Move Test Repeats only tape tran...

Page 215: ...software In the unlikely event that smoke strange odors or strange sounds are emitted from this device turn its power switch off immediately then pull the power plug from the socket Continued use unde...

Page 216: ...ect this product Confirm whether the cable is correctly installed in this product Confirm whether this product is recognized by the operating system Performance It is inefficient of the backup of data...

Page 217: ...m the setting of the backup application Change to specification that does Eject after the backup ends Execute Unload Drive from Commands ERROR indicator is lit 1 Check which error code is shown on the...

Page 218: ...e 240MB s in the compression mode LTO Ultrium6 160MB s in the non compression mode 400MB s in the compression mode LTO Ultrium7 300MB s in the non compression mode 600MB s in the compression mode SAS...

Page 219: ...to put the data cartridge in the protective case and store it in a place free of dust and dirt You can place it horizontally or vertically During transportation Ambient temperature 23 49 Relative humi...

Page 220: ...if C appears on the single character display Green blink The tape drive provides tape read write rewind locate or load unload operation Yellow ON The tape drive is being started or in the maintenance...

Page 221: ...not insert a new cartridge 6 Cartridge drive media error It has been confirmed that the drive has detected an error but it is impossible to tell whether the cause is in the hardware or the cartridge...

Page 222: ...0004 Reserved 0005 Reserved 0006 Reserved 0007 Cannot detect rear magazine FRU Magazine Maintenance chassis CHK 0007 1 Check rear magazine 2 To power cycle the library 0008 Cannot detect available dri...

Page 223: ...er FRU Time Server LAN cable Controller board 1 Check server 2 Check NTP configuration 3 Check LAN cable connection 4 To power cycle the library 0012 Reserved 0013 Reserved 0014 The abnormalities of t...

Page 224: ...Panel Indicator Action 0020 Reserved 0021 Reserved 0022 Reserved 0023 Reserved 0024 Reserved 0025 Reserved 0026 Reserved 0027 Reserved 0028 Reserved 0029 Reserved 002A Reserved 002B Reserved 002C Res...

Page 225: ...Panel Indicator Action 0030 Reserved 0031 Reserved 0032 Reserved 0033 Reserved 0034 Reserved 0035 Reserved 0036 Reserved 0037 Reserved 0038 Reserved 0039 Reserved 003A Reserved 003B Reserved 003C Res...

Page 226: ...Panel Indicator Action 0040 Reserved 0041 Reserved 0042 Reserved 0043 Reserved 0044 Reserved 0045 Reserved 0046 Reserved 0047 Reserved 0048 Reserved 0049 Reserved 004A Reserved 004B Reserved 004C Res...

Page 227: ...OARD CHK 0058 0059 Defect in FLASH control of barcode reader FRU Maintenance chassis CONTROLLER BOARD CHK 0059 005A Defect in barcode reader verify FRU Maintenance chassis CONTROLLER BOARD CHK 005A 00...

Page 228: ...r write to accessor EEPROM FRU Maintenance chassis CONTROLLER BOARD CHK 0060 To power cycle the library 0061 Reserved 0062 Reserved 0063 Reserved 0064 Reserved 0065 Reserved 0066 Reserved 0067 Reserve...

Page 229: ...edium 2 To power cycle the library 0075 Cannot put medium because picker does not have a medium FRU Maintenance chassis CONTROLLER BOARD CHK 0075 1 Check picker if it has a medium 2 To power cycle the...

Page 230: ...Maintenance chassis CONTROLLER BOARD CHK 0083 To power cycle the library 0084 Cannot detect X origin position during initializing FRU Maintenance chassis CONTROLLER BOARD CHK 0084 To power cycle the l...

Page 231: ...Maintenance chassis CONTROLLER BOARD CHK 0092 To power cycle the library 0093 Reserved CHK 0093 0094 Cannot detect Y origin position during initializing FRU Maintenance chassis CONTROLLER BOARD CHK 0...

Page 232: ...Panel Indicator Action 00A0 Reserved 00A1 Reserved 00A2 Reserved 00A3 Reserved 00A4 Reserved 00A5 Reserved 00A6 Reserved 00A7 Reserved 00A8 Reserved 00A9 Reserved 00AA Reserved 00AB Reserved 00AC Res...

Page 233: ...on medium position P3 P4 P5 P6 during GET mothion Detected picker origin or Not detected FWD FRU Maintenance chassis CONTROLLER BOARD CHK 00B7 1 To power cycle the library 2 Check the medium 3 Check t...

Page 234: ...the motion other than GET PUT Not Detected picker origin or FWD FRU Maintenance chassis CONTROLLER BOARD CHK 00C7 1 To power cycle the library 2 Check the medium 3 Check the magazine 00C8 Reserved 00C...

Page 235: ...208 CONTROLLER BOARD 00CF Reserved...

Page 236: ...0D4 Detected error during BCR F Wchecking FRU Maintenance chassis F W CHK 00D4 To power cycle the library 00D5 Reserved 00D6 The lock could not be released at the time of magazine ejection FRU Mainten...

Page 237: ...onds FRU CONTROLLER BOARD CHK 00E1 To power cycle the library 00E2 An error was detected in unit configuration data area stored in flash memory FRU CONTROLLER BOARD CHK 00E2 To power cycle the library...

Page 238: ...nk check I O station sensor 2 abnomaly detected FRU Maintenance chassis CHK 00F5 00F6 Sensor Abnomaly 7 At blink check I O station sensor 3 abnomaly detected FRU Maintenance chassis CHK 00F6 00F7 Sens...

Page 239: ...212 Maintenance chassis 00FD Reserved 00FE Reserved 00FF Reserved...

Page 240: ...n FRU Drive n I F cable Drive n CONTROLLER BOARD 0m02h An illegal data was received from drive n FRU Drive n I F cable Drive n CONTROLLER BOARD 0m03h Drive n is disconnected FRU Drive n I F cable Dri...

Page 241: ...Drive n became a parameter error FRU F W Drive F W CHK 0m15 0m16h Detected time out of the data response with Drive n FRU Drive n I F cable Drive n CONTROLLER BOARD CHK 0m16 0m17h Command cannot execu...

Page 242: ...execute for disconnection of Drive n FRU Drive n I F cable Drive n CONTROLLER BOARD CHK 01mE 0m1Fh Detected the initialization time out with Drive n FRU Drive n I F cable Drive n CONTROLLER BOARD CHK...

Page 243: ...Drive n or Logical Unit Reset was received and the command was interrupted FRU Cartridge Drive CHK 0m21 0m22h Reserved 0m23h Reserved 0m24h Reserved 0m25h Reserved 0m26h Reserved 0m27h Reserved 0m28h...

Page 244: ...medium because drive is in state of Prevent Medium Removal FRU Drive n I F cable Drive n CONTROLLER BOARD CHK 0m31 0m32h Detected the FAN error with Drive n FRU Drive n FAN CHK 0m32 0m33h Reserved 0m3...

Page 245: ...Drive n CHK 0m45 0m46h Detected Drive error 6 with Drive n Drive or Meida Error FRU Drive n cartridge CHK 0m46 0m47h Detected Drive error 7 with Drive n Media Error FRU cartridge CHK 0m47 0m48h Detect...

Page 246: ...rive n 2 drives on fiber loop have the same APL_PA FRU Drive n setting CHK 0m53 0m54h Detected Drive error e with Drive n The drive detected a configuration or set up error prior to an encryption oper...

Page 247: ...f retries before succeeding If events occur continues call the maintenance staff 14 Library Place Retry Operation to place a cartridge in a slot had to perform an excessive number of retries before su...

Page 248: ...ridge 10 No Removal A manual or software unload was attempted when Prevent Media Removal was on Allow medium removal via Prevent Allow Medium Removal command 11 Cleaning Media The tape in the drive is...

Page 249: ...hardware Execute the corresponding error if other as has occurred 39 Diagnostics Required Diagnostics required Call to maintenance staff 51 Tape Directory Invalid at Unload Tape directory invalid at u...

Page 250: ...5AS LL060A D1H06AS LL060A D1H07AS LL060A D1H04AF LL060A D1H05AF LL060A D1H06AF LL060A D1H07AF 3 Escape Slot LL060A D1ES1 Procedure 1 Insert item 2 in the lower side of item 1 and tighten two screws by...

Page 251: ...m Insert item 2 or item 3 in the second step from the bottom of item 1 and tighten two screws by 150 10 cN m Insert item3 in the second step from the bottom of item 1 at one drive composition Insert...

Page 252: ...ight notice this list of conditions and the following disclaimer in the documentation and or other materials provided with the distribution 3 All advertising materials mentioning features or use of th...

Page 253: ...sl core openssl org 5 Products derived from this software may not be called OpenSSL nor may OpenSSL appear in their names without prior written permission of the OpenSSL Project 6 Redistributions of a...

Page 254: ...ion 5 7 1 SHIBA MINATOKU TOKYO JAPAN TEL 81 33 454 1111 Reception NEC Corporation 2011 2016 A part or all of this document cannot be reproduced or modified without prior permission of NEC Information...

Reviews: