background image

e8

08

N &

 e8

08

S p

ro

du

ct m

an

ua

l

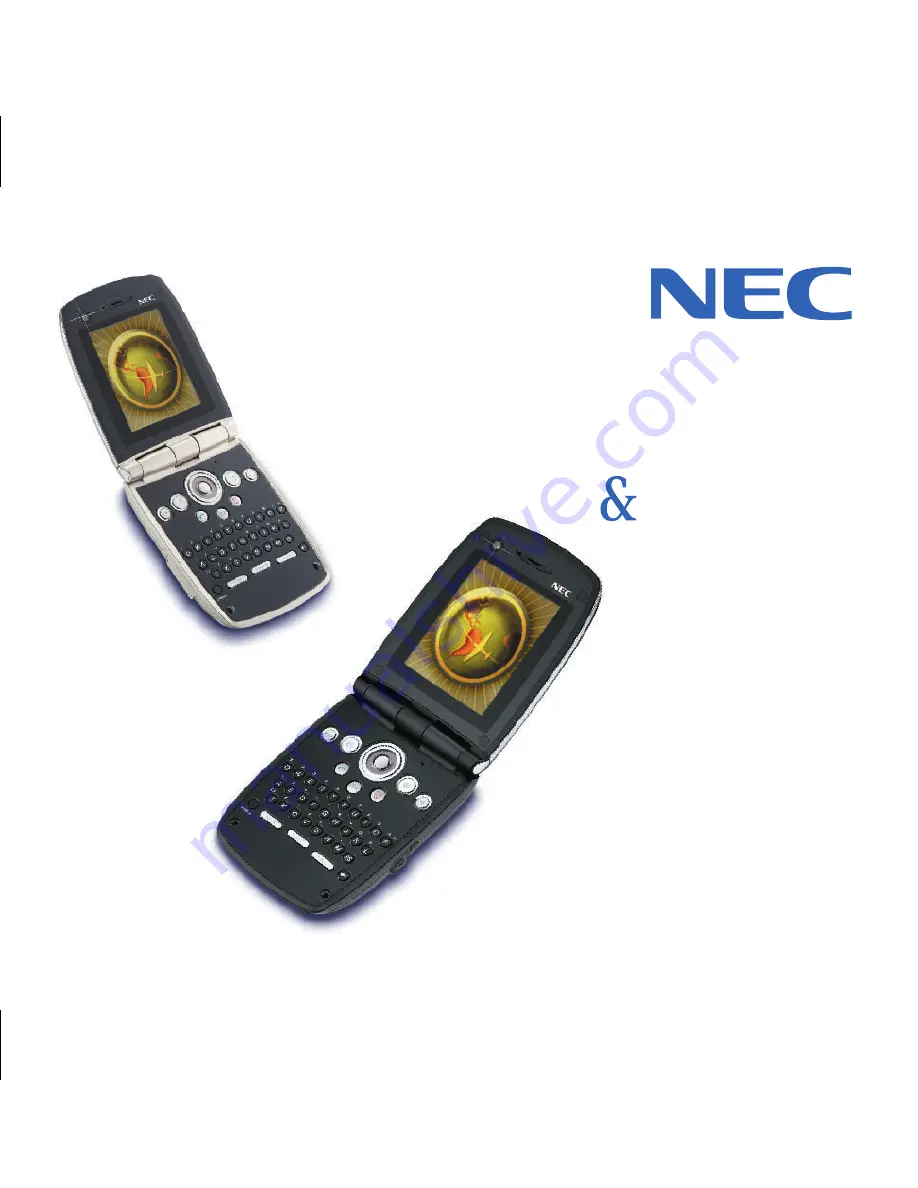
e808N

e808S

product manual

e808N

e808S

product manual

www.nec.co.uk

www.neceurope.com

Copyright © 2003 NEC Corporation. All rights reserved.

NEC is a registered trademark of NEC Corporation, Japan.

www.nec.co.uk

www.neceurope.com

Copyright © 2003 NEC Corporation. All rights reserved.

NEC is a registered trademark of NEC Corporation, Japan.

Summary of Contents for e808n

Page 1: ...e808N e808S product manual e808N e808S product manual ...

Page 2: ... Windows XP and Windows 2000 are either registered trademarks or trademarks of Microsoft Corporation in the United States and or other countries ...

Page 3: ...onary to maintain contact The 112 emergency number service is available on every digital network service whilst in the UK an alternative is 999 and in Australia 000 Note that these can only be used with a valid USIM Due to the nature of the cellular system the connection of emergency calls cannot be guaranteed General care A handset contains delicate electronic circuitry magnets and battery system...

Page 4: ...r cigarette lighter charger Do not pierce battery with a sharp object such as a needle Do not hit with a hammer step on throw or drop to cause strong shock When the battery is thrown away be sure it is non conducting by applying vinyl tape to the and terminals Do not immerse in water Do not disassemble or modify the battery Do not solder a battery directly Stop using the battery if abnormal heat o...

Page 5: ...ch as those near petrol stations chemicals or explosives and turn off handset device If you have a heart condition be careful with the settings of call vibration or tone volume Do not allow children to play with the handset charger or batteries Do not use the handset where blasting is in progress The operation of some medical electronic devices such as hearing aids and pacemakers may be affected i...

Page 6: ...t s operation For example use only the NEC mains cable supplied with the AC charger Service The handset batteries and charger contain no user serviceable parts We recommend that your NEC handset be serviced or repaired by an NEC authorised service centre Please contact 3 or NEC for advice Efficient use The handset has the internal antenna For optimum performance with minimum power consumption plea...

Page 7: ... responsibility that the product s detailed in this manual and in combination with our accessories conform with the essential requirements of European Union Directive 1999 5 EC Radio and Telecommunications Terminal Equipment Directive requirements 3 1 a 3 1 b 3 2 Con la presente NEC dichiara sotto la propria responsabilità che il prodotto descritto in questo manuale e in combinazione con i propri ...

Page 8: ...Calls 10 Making a Voice Call 11 Receiving a Voice Call 13 During a Voice Call 15 Making and Receiving a Video Call 18 To Make a Video Call to a Video Capable Handset 18 To Make a Video Call to a PC with Webcam 19 To Receive a Video Call 20 Settings During a Video Call 21 Showing and Hiding Your CLI 23 Text Entry 24 Text Mode and Numeric Mode 24 Keys 25 Text edit 25 Display Information 28 Contacts ...

Page 9: ...xternal Connect 56 USB 56 Message 57 Overview 57 Message Service Provided by e808 57 Message Memory Maintenance 58 Maximum Number of Characters 58 Messaging Operation List 58 Email 76 Email Menu List 77 Email Operation List 77 Email Settings 79 Email Basic Operations 80 Email Memory Cash Maintenance 91 Java 93 Settings 96 Phone 96 VT Settings 98 Profile 98 Time 99 Display 100 Clock 101 Security 10...

Page 10: ... Clock 126 Calculator 127 Currency Calculation 128 Voice Notes 129 Text Notes 130 User Data 131 Contacts 132 Owner Info 132 Calls Received 132 Calls Made 132 Ringtune 133 Used Memory 134 Data Transfer 134 To From USIM 134 To From PC 137 Shortcut keys 139 Index 143 ...

Page 11: ...as 3G as well as GSM Global System for Mobile Communications or 2G 3G will allow much greater data speeds than 2G networks and will enable you to make video calls send emails and multimedia messages and view photos and videos and much more Views Keys and Display of e808 Views Camera Back Away from me I O connector for USB cable or charger LED indicator Front Flip closed Left Right ...

Page 12: ...key SYMBOL key SK2 Softkey 2 key 4 Way navigation Display Refer to the next page Microphone Camera Front Towards me SK1 Softkey 1 key MENU key CLR Clear key Start key Up Down Left Right key CAP Capital key SHIFT key BS Backspace key Enter key ...

Page 13: ...ssage Signal strength 2G 3G roaming mode Packet switched connect Circuit switched connect USB connect Multitask SK1 key SK2 key 4 Way navigation Up Down Left Right Enter key Profile Missed call Date Local time Remote time Operator name Area setting mode Schedule or Alarm on Service provider name ...

Page 14: ...onal Identification Number The USIM card contains your personal subscriber data and must be inserted into your handset If the USIM card is removed then the handset becomes unusable until a valid USIM is inserted The holder for the USIM card is located underneath the battery Always turn off the handset and disconnect the charger and other accessories from the handset before inserting and removing t...

Page 15: ...card holder lock 4 Open the USIM card holder 5 Insert the USIM card into the USIM card holder 6 Slide and lock the USIM card holder 8 Slide the back cover back in place 7 Insert the battery and push down until it clicks into place ...

Page 16: ...ff If the handset is switched on press and hold the End On Off key until power is off 2 Slide the back cover backward and lift it away from the handset 3 Lift the battery away from the handset The battery is not fully charged when you buy your handset but there may be enough power in the battery to turn the handset on A battery that has not been used for a long period of time needs to be completel...

Page 17: ...ard and pull it away from the e808 I O connector Even if the handset remains connected to the charger battery residual capacity may decrease when the handset is used The battery must be charged in the room temperatures between 0 C and 45 C Ensure that your handset is switched off If the handset temperature is high wait until it returns to a normal temperature The recommended battery charge time is...

Page 18: ...larm sound indicate low power After approximately 20 seconds the call will be disconnected When the ringing volume level is set to Level 0 silent the low power warning alarm will turn on at Level 1 the softest level When the volume level is between 1 and 6 it will come on at Level 3 medium level Date and Time When using your e808 for the first time please remember to set the date and time This wil...

Page 19: ...ress and hold is equivalent to a key press time of approximately 2 seconds To Power Off In standby mode press and hold the End On Off key until power is off There may be some delay while the handset powers down Do not repower the handset during this time Entering PIN Code You can enter your PIN code Proceed as described below To Enter PIN 1 Ensure that your USIM card is in your e808 and that the b...

Page 20: ...ing alarm setting etc without setting the clock Also if the clock is not set the date and time are not displayed for the messages in Inbox Sent Items Draft Email Inbox Saved Email Draft Email Email Outbox Making and Receiving Calls To make and receive calls e808 must first be turned on When the power turns on and the PIN number is entered e808 automatically searches for the network registered in t...

Page 21: ... list or Quick Recall function A maximum of 32 keypad characters 0 9 Q and p for pause press and hold and press and hold 0 can be used to make a call The following shows the display images of phone number input When the USIM card supports Alternate Line Service ALS the call will be made from the selected ALS line number Refer to Select ALS Line on page 97 for details When a call is made and e808 h...

Page 22: ...ose the handset Note When the stereo headset is plugged in closing the handset will not end the call Operation Procedure Making an emergency call Input the emergency number 999 UK only 000 Australia only or 112 Press the Start key to dial the phone number Tell the operator your location and which emergency service you require ambulance police rescue services etc If possible remain stationary and k...

Page 23: ...display Calls Made Select the phone number Press the Start key to dial the phone number Making a call from Calls Received number list Press the Left key to display Calls Received Select the phone number Press the Start key to dial the phone number Quick Recall Input the memory number 3 digits max and press the key The contact list memory will be displayed Press the Start key to dial the phone numb...

Page 24: ...ugged in closing the handset will not end the call Tips Rejecting a call Do one of the following Press the End key Press the SK2 Submenu key and select Reject new call or Close the handset Valid only when the stereo headset is not plugged in Note Rejected calls will be cut off When you miss a call If for some reason you miss a call it will be indicated as a missed call by an icon on the standby sc...

Page 25: ...oice call are shown below To Make a Second Call Rejecting and diverting a Voice Call available in 3G mode only Press the SK2 Submenu key and select Divert new call The registered call rejection number is displayed Check the phone number and press the SK1 OK key The call will be diverted to the phone number registered in Call Rejection setting Refer to Call Rejection on page 105 for details If you ...

Page 26: ...during a call Answer the second call Press the SK1 Answer key The first call will automatically be put on hold Or press the SK2 Submenu key and select one of the following Hold call take new to put the first on hold and answer the second or End call take new to end the first and answer the second 2 Talk To switch calls Press the SK2 Submenu key and select Switch calls 3 End the call To end the cur...

Page 27: ...ll remain displayed on the screen after the call is finished You can use this function as a screen scratchpad Adjust the earpiece volume Press the Up or Down key and on Earpiece Volume displayed use the Up or Down key to adjust the volume level Press the SK1 Done key when you finish adjusting Add the caller to the contact list While talking press the SK2 Submenu key and select Add to Contacts Sear...

Page 28: ...ng different ringtune illumination or vibrate function Basic Operations The possible operations making and receiving a video call are shown below To Make a Video Call to a Video Capable Handset Receive a third call When a third call is received while already there are two calls on line the current call and the call held you can receive the third call only if you end one of the current held calls P...

Page 29: ...all While the video call is connecting you will see your own image after the other party has answered their image will be displayed on screen 4 Talk and see Adjust the camera position if necessary 5 End the call Press the End key or close the handset To Do This 1 Select the email address from the contact list Select the email address from the contact list the Calls Made Received list etc 2 Ensure ...

Page 30: ...ereo headset plugged in 3 Answer the call Press the Start key or SK1 Answer key 4 Talk and see You will see your own image before the video call is connected You can then adjust the camera position if necessary When the video call is connected the caller s image will be displayed 5 End the call Press the End key or close the handset Operation Procedure Making a video call using the contact list 1 ...

Page 31: ...select the addressee s phone number email address 3 Press the SK1 Video key to dial the phone number email address Making a video call from Calls Made number list 1 Press the Right key to display Calls Made 2 Select the phone number email address 3 Press the SK1 Video key to dial the phone number Adding the caller to the contact list During a video call press the SK2 Submenu key and select Add to ...

Page 32: ...r s handset and your captured image window Zoom Press the SK2 Submenu key and select Zoom When this function is set to On e808 will capture image with 2x zoom The image will be sent as displayed on your handset Only available when Camera is on Mirror Image Press the SK2 Submenu key and select Mirror Image When this function is turned on the captured image will be displayed in reverse This setting ...

Page 33: ...estriction COLR service will hide your 3 number from the caller When making a call the receiver s identity phone number can be displayed on your handset s display if you subscribed to the Connected Line Identity Presentation COLP service and your 3 number will be notified to the receiver if you have subscribed to the Calling Line Identity Presentation CLIP The current subscription status of these ...

Page 34: ...lly set for example when you enter a phone number to call add phone numbers to the contacts and select a number from a submenu list You can check the current mode on the handset display ABC is displayed during the text mode and 123 during the numeric mode Refer to Display Information on page 28 for the display image The following describes how to switch between the text mode and the numeric mode w...

Page 35: ...BOL Key You can enter symbols or special characters by pressing the SYMBOL key A list of symbols will appear on the handset screen Select a symbol by using the Up Down Left and Right keys The SYMBOL key can also be used to shift between the text mode and the numeric mode by pressing and holding the SYMBOL key BS Key You can delete the character number symbol change line or space on the left side o...

Page 36: ...pecified copy starting point by pressing the CLR key 3 Specify the copy ending point Move the cursor to the ending point of the block to copy by using the Up Down Left or Right key and press the Enter key Note A maximum of 512 characters can be copied 4 Specify the paste point Move the cursor to the paste point by using the Up Down Left or Right key 5 Paste the block Press the SK2 Submenu key in t...

Page 37: ... starting point by pressing the CLR key 3 Specify the cut ending point Move the cursor to the ending point of the block to cut by using the Up Down Left or Right key and press the Enter key The specified text is cut Note A maximum of 512 characters can be cut 4 Specify the paste point Move the cursor to the paste point by using the Up Down Left or Right key 5 Paste the block Press the SK2 Submenu ...

Page 38: ...ily Friends etc 2 5 0 Ins A B C Number of remaining characters displayed in max of 3 digits For 1000 or more the number is displayed in thousands e g 5K Right justified Number of remaining Text Msg characters displayed in max of 3 digits Right justified Displayed when editing Text Msg Indicates Insert Mode Ins or Overwrite Mode Ov ABC Text mode NUM Numeric mode lCopy Start A prompt to specify the ...

Page 39: ...1 phone number 32 characters max Email address 3 email addresses and a call type icon for each email address You can set a call type icon to indicate an email address for messaging 50 characters max Note Though an email address can contain up to 50 characters when you register in the contacts it is limited to 31 characters when you send video calls 1 email address 50 characters or less depending o...

Page 40: ...s icon Phone No Home Home FAX Office Office FAX Car Pager PC and Close friend Email address Email address Home Email address Office address office email address Mobile phone address and Video Call Email address a video call will be made for an email address with this icon Phone No Mobile phone Home Home FAX Office Office FAX Car Pager PC Close friend Video phone Email address Home Email address Of...

Page 41: ... address Switch Contacts Selects which contacts to use as the default when searching contact entries or setting a category Phone Contacts in the e808 memory USIM Contacts in the USIM card memory Search Contacts Scrolls and searches the contacts entries Alphabetical List Scrolls in alphabetical order Name Search Searches by a part of the name Phone No Search Searches by a part of the phone number A...

Page 42: ...call is received from the callers registered in the category Call Msg Video Indicator Selects the indicator pattern activated when a voice call a message or a video call is received from the callers registered in the category Note The settings cannot be changed for Category 00 Delete All Deletes all contacts data entered in the e808 memory SDN Display Displays the Service Dial Numbers SDN saved in...

Page 43: ...Save contact The entry is saved To Do this 1 Start the Contacts search function Press the SK2 Contact key or press the MENU key and select User Data and Contacts Select Search Contacts Note The contacts selected in Switch Contacts setting will be searched 2 Select a search method On Search Contacts select the easiest search method Refer to Search Contacts on page 31 3 Select the match and display ...

Page 44: ...y and select Write message Deleting a registered phone number email address Search and select the entry and press the Enter key Select the number address press the SK2 Submenu key and select Delete Phone No Delete Address Deleting personal data Search and select the entry and press the Enter key Press the SK2 Submenu key and select Delete Name Copying a phone number email address Search and select...

Page 45: ... or editing a contact entry using a shortcut key 1 With a dialed number displayed on a voice or video call or on standby press the SK2 Save key or With the Calls Made or Calls Received list displayed press the SK2 Submenu key and select Add to Contacts 2 Select the contacts from Phone Contacts List or USIM Contacts List 3 Select New entry or Edit entry 4 When New entry has been selected enter the ...

Page 46: ...okmark Delete all Deletes all the bookmarks Save page Saves the page on display as an off line file A maximum of 25 pages can be saved To avoid accidental deletion 10 Saved Pages can be protected Saved pages Displays the list of pages saved offline Move the highlight to a file and press the Enter key to open Alternatively press the SK2 Menu key and the following submenus are provided Edit title Ed...

Page 47: ...e protection of the selected file Delete Deletes the file View URL Displays the URL of the file Save image Saves an image to the Image List Send as message Starts the message writer to edit a new message with the URL of the displayed page in the message text Reload Reloads the page displayed Enter URL Starts an input screen You can directly input a URL and display it History Displays the URL histo...

Page 48: ...es stored in e808 Move the highlight to a certificate and press the SK2 Menu key and the following submenus are provided Check certificate Displays the contents of the selected certificate Validate Invalidate Selects the validation of the selected certificate Cookies Selects the method of Cookie reception from Accept Block and Prompt View settings Displays the setting status of the Cookies Reset s...

Page 49: ...nformation Saved pages History Bookmarks and settings about the browser application to the factory settings This requires the Code Number to avoid accidental operation Refer to page 102 for details on the Code Number To Do this 1 End a browser Press the End key To Do this 1 Start the browser Browse and search for an image 2 Download the image Display the image to download select the link and press...

Page 50: ...watch the latest sports results and call your friends to tell them about it at the same time Messaging send simple text multimedia or even video messages Operation Procedure Links and Anchors Pressing the Enter key on a link anchor will Make a voice call to the phone number Start message email writer to edit a new message email to the email address Jump to the URL Register data in the contact list...

Page 51: ...h new shirt to buy simply take a picture and send it from the e808 To make the visual experience even more appealing record a short movie with e808 and send it by Video message To Take a Photo Make a Video Clip and Send it Attached to a Video Message Refer to page 114 109 and 65 for details on taking photos making video and sending a Video message To Do this 1 Dial and start a video call Input the...

Page 52: ...timedia message Video message Java Application Contacts Settings Accessories What is a Task A task is a set of operations There are groups of functions that share the same task You cannot use two or more functions in a task at the same time The following shows functions that belong to the same task Application Message Text message Multimedia message Browser Java PPP connecting a PC to the Internet...

Page 53: ...nual in pdf format on your e808 Tools and Utilities CD ROM When you use the USB cable install driver and WP TCP software in the CD ROM Follow the installation wizard What is a WP TCP software This software optimises the registry setting of your PC If you want to have the best PC communication To Do this 1 Go back to the standby screen Press the MENU key for a few seconds 2 Start another task Dial ...

Page 54: ...ck cable connection Check the cable connection between PC and e808 2 Turn e808 power on Refer to Power On Off on page 9 for details 3 Select External Connect Press the MENU key and select External Connect Network connection standby screen is displayed To Do this 1 Connect to the Internet Double click the dial up network icon Note The dial up network icon can be created by the Network Connection Wi...

Page 55: ...is only available in the 3G mode Refer to Message on page 57 for details Suggestions For business Send a slide show of a new house listing to a client with a message For fun Snap a photo of a celebrity and send to a friend Video message is a form of Multimedia messaging and allows you to send a message with up to 60 attachments total file size 100KB max take a photo or record a short movie and att...

Page 56: ...Refer to Multimedia on page 108 for details The following shows the display images of the video audio player Data Transfer to from a PC By connecting e808 and a PC with the attached USB cable you can transfer data files to from the PC Contact list data calendars ringtunes video clips images audio files and voice data can be copied from e808 to the PC Using this function you can backup e808 s data ...

Page 57: ...the number key shown on the same line of the menu as a shortcut If there are more than 9 menus under the category you can scroll with the Up and Down keys or press the Left and Right keys to display the next page Pressing the Up key on the first menu displays the page with the last menu ITEMS OPTIONS An item option is a named link to function settings The handling of an item option is the same as ...

Page 58: ... provides more operations and detailed settings for that particular function Operations in Detail The following shows how to access the e808 functions through the menu function using the operations to adjust the display colour contrast select the standby screen image and turn on off the any key answer function as examples To Adjust the Display Colour Contrast To Do This 1 Display Task Menu Press t...

Page 59: ...elect key or Enter key or Press 1 6 Adjust the contrast level Press the Up and Down keys to select the contrast level and press the SK1 OK key or Enter key The contrast level is changed and Display is displayed To Do This 1 Display Task Menu Press the MENU key Task Menu is displayed 2 Highlight Settings icon Press the Up Down Left and Right keys to move the highlight a highlighted icon will appear...

Page 60: ...ect key or Enter key or Press 1 Standby Screen is displayed 7 Select the image Press the Up and Down keys to move the highlight a highlighted menu will appear in reverse highlight to the image and press the SK1 Select key or Enter key or Press the number shown on the same line of the image The standby screen image is changed and an image preview is displayed After 3 seconds or by pressing the CLR ...

Page 61: ...and Down keys to move the highlight a highlighted menu will appear in reverse highlight to Any Key Answer and press the SK1 Select key or Enter key or Press 2 6 Turn on off the function To turn on Press the Up and Down keys to move the highlight to on and press the SK1 Select key or Enter key or Press 1 To turn off Press the Up and Down keys to move the highlight to off and press the SK1 Select ke...

Page 62: ...1 Level 2 Level 3 Message Create Message Text Message Multimedia Message Video Message Email Inbox Draft Sent Items Email Create Email Email Inbox Saved Email Draft Email Email Outbox Email settings Message Settings External Connect Service SAT Java Settings Phone Quality Alarm Any Key Answer ...

Page 63: ...e Profile Normal Meeting Pocket Car Time Call Time Display Setting Total Reset Call Time Display Display Contrast Screen Display Language Font Screen Colour Clock Clock Display Format Display Format Date Time Summer Time Security USIM PIN Lock now Level 1 Level 2 Level 3 ...

Page 64: ...Change Password Direct Input Service Provisioning MMS Server HTTP Proxy Host APN Network Set Area Mode PLMN Setting Change USIM List Other Setting Reset Memory Reset Multimedia Video Make Video Viewer Settings Image Take Photo Viewer Settings Audio Player Library Level 1 Level 2 Level 3 ...

Page 65: ...ote at Standby Text Notes User Data Contacts Search Contacts Add to Contacts Switch Contacts Contact Entries Category Setting Delete All SDN Display Owner Info Calls Received Calls Made Ringtune Used Memory Data Transfer To From USIM Contacts Text Message To From PC Level 1 Level 2 Level 3 ...

Page 66: ...on will provide a much faster transfer rate than a standard modem USB connection also enables data transfer to from the PC Refer to To From PC on page 137 for details To Establish a Dialup Connection for a PC with an USB Cable To Do this 1 Connect e808 and the PC with a USB cable Insert the USB cable to the I O connector of e808 and the USB HUB on the PC Note Use the USB cable attached to e808 Not...

Page 67: ...ext messaging or SMS service subscriber Multimedia messaging allows you to send messages as a slide show containing images text and audio files AMR When you receive a Multimedia message you will be notified by a message from the MMS centre You can receive the contents of a Multimedia message automatically or manually Multimedia messaging is only available in the 3G mode Video messaging is a functi...

Page 68: ...ls Maximum Number of Characters The maximum number of characters are defined as the number of single byte characters alphanumeric characters etc allowed in a field item If a double or triple byte character such as a special symbol is used the number of characters allowed will vary accordingly Refer to Text entry on page 24 for details Messaging Operation List The following lists the basic operatio...

Page 69: ...pying message data to a PC T M V 75 Deleting a message T M V 75 Deleting all messages T M V 76 Deleting an attachment V 76 Deleting the message being edited T M V 68 Displaying an URL in the message text T M V 73 Displaying detailed information on a message M V 73 Displaying the next previous message T M V 72 Downloading an attachment V 74 Editing a message saved in the Draft T M V 69 Editing and ...

Page 70: ... the message sorting order T M V 72 Setting the priority M V 68 Item Description Create Message Writes and sends a new Text message Multimedia message Video message or Email Inbox Displays the received Text Multimedia and Video messages as a list Draft Displays the unsent and saved Text Multimedia and Video messages as a list Sent Items Displays the sent Text Multimedia and Video messages as a lis...

Page 71: ...k to from Requested and press the SK1 OK key to confirm the check Set Valid Period Selects the period of time the Text message is stored on the server while trying to deliver the Text message Set SMS Centre Edits the SMS Centre address This address is saved in the USIM card When the address field is left blank and the SK1 OK key is pressed the address returns to the previous setting Confirm Settin...

Page 72: ...e Delivery Report Selects whether to request a delivery report of the sent Multimedia message and make a delivery status report Press the Enter key to place remove a check to from Request for sent and Allow for received and press the SK1 OK key to confirm the check Set Valid Period Selects the period of time the Multimedia message is stored on the server while trying to deliver the message Set MMS...

Page 73: ...endings To Do this 1 Start the message function Press the SK1 Message key or press the MENU key and select Message 2 Display Create Msg for Text message Select Create Message On the Create Msg displayed select Text Message New messages is displayed 3 Input the message text Select Message input the message and press the Enter key 160 characters max 4 Set the addressee Select To input the addressee ...

Page 74: ... Refer to To Take Photo on page 115 for details 3 Compose a slide show Press the SK2 Submenu key to use the various functions of composer Refer to To Edit a Slide Show on page 70 for details When you finish editing press the Enter key New messages is displayed Note To display Composer and edit the slide show again select the slide show title on New messages 4 Input the subject Select Subject and i...

Page 75: ...the SK2 Submenu key and selecting Send video on Library Refer to To Make Video on page 110 for details 3 Attach files Press the SK2 Submenu key and select from Attach video Attach image Attach audio and Attach ringtune 4 Input the message text Select Message input the message and press the Enter key 5 Input the subject Select Subject and input the title 50 characters max 6 Set the addressee Select...

Page 76: ...ideo Message Reply Message will be displayed with the sender s address and Re original subject for Multimedia message and Video message Note When the sender s address is an email address for Multimedia message or Video message you cannot reply to it using a Text message As a result reply message type Text Message will grey out 5 Input the message text Select message input the message and press the...

Page 77: ...h the text contents attached files and Fw original subject for Multimedia message and Video message 5 Set the addressee Select To input the address and press the Enter key Note To set the addressee from the Contacts refer to Setting the addressee from the contact entries on page 68 6 Input the subject If necessary select Subject and edit the title 50 characters max 7 Input the message text If nece...

Page 78: ...g a message before sending Press the SK2 Submenu key and select Preview message Note For Multimedia message pressing the SK1 Preview key on Composer also displays the preview T M V Saving an unfinished and unsent message Press the SK2 Submenu key and select Save The message is saved in the Draft T M V Attaching a header footer Press the SK2 Submenu key and select Paste header or Paste footer T V D...

Page 79: ...the original message You can reply to a message with quotes from the original message Select the message and press the Enter key to display the message text Press the SK2 Submenu key and select Quoted reply The original message with quoted reply mark is inserted in the Text Note When the sender s address is an email address for Video message you cannot reply to it using a Text message As a result ...

Page 80: ... Select the layout and press the Enter key Adding a slide Select a slide press the SK2 Submenu key and select Add slide A new slide is added after the selected slide Inserting a slide in between slides Select a slide press the SK2 Submenu key and select Insert slide A new slide is inserted before the selected slide Attaching an image or an audio file Press the SK2 Submenu key and select Attach ima...

Page 81: ... Receive setting default The contents of the Multimedia message or Video message is downloaded automatically from the MMS centre For Manual Receive setting Press the SK1 Receive key to download the contents of the Multimedia message or Video message or press the SK2 Cancel key to receive the contents later Refer to To Receive a Multimedia message or Video message Manually for details If cancelled ...

Page 82: ...ssage Select the message and press the Enter key to display the message text While the message text is displayed press the Right key to display the next message and the Left key to display the previous message T M V Filtering the received messages Press the SK2 Submenu key and select Filters The filters provided for Inbox are as follows Show all Unread only Read only Protect only Text Msg only Mul...

Page 83: ...ter key to display the message text The URL will be displayed in reverse highlight Press the Enter key The browser will be displayed with the selected URL Note If there is more than one URL you can move the highlight with the Up and Down keys For Multimedia message Select the message press the Enter key to display the message text Press the SK2 Go to key The browser will be displayed with the sele...

Page 84: ...ddress will not be displayed in reverse highlight for Multimedia message T V Adding an URL in the message text to the Bookmarks Select the message and press the Enter key to display the message text The URL will be displayed in reverse highlight If there is more than one URL move the highlight with the Up and Down keys Do one of the following Press and hold the Enter key or Press the SK2 Submenu k...

Page 85: ...lect the message press the SK2 Submenu key and select Move T Copying a message to USIM card memory or the phone memory Select the message press the SK2 Submenu key and select Copy T Moving message data to a PC Press the MENU key and select Data Transfer Refer to Data Transfer on page 134 for details T M V Copying message data to a PC Press the MENU key and select Data Transfer Refer to Data Transf...

Page 86: ...username from Username in Email settings and access the server all the received emails stored in the Email Inbox cache are discarded You can carry out the synchronisation of the email list by selecting Refresh Inbox from the submenus Also the new emails received will be added to the list by selecting Check for new Email Email service is only available in the 3G mode Deleting all messages Press the...

Page 87: ...re is a change in the list in the Email Inbox that change is applied to the list of stored emails on the email server and vice versa Saved Email Displays the emails saved from the Inbox as a list A maximum of 250 emails can be saved Draft Email Displays a list of unsent and saved emails A maximum of 7 emails can be stored Email Outbox Displays sent emails as a list A maximum of 1000 emails can be ...

Page 88: ... 92 Deleting all emails 92 Deleting cache memory of an email 93 Deleting all cache memory 93 Deleting the email being edited 86 Displaying an URL in the message text 89 Displaying detailed information on an email 89 Displaying the next previous email 88 Downloading an attachment 90 Editing an email saved in the Draft Email 87 Editing and resending an email saved in the Email Outbox 87 Filtering th...

Page 89: ...e addressee from the contact entries 86 Setting the email sorting order 88 Setting the priority 86 Writing an email to an email address in the message text 89 Item Description Header Footer Edits the header footer and quoted reply mark for emails Header Selects whether to add a header automatically or not and edits the header for email Footer Selects whether to add a footer automatically or not an...

Page 90: ...Note If the username field is left blank and the SK1 OK key is pressed the username returns to the previous setting To Do this 1 Start the message function Press the SK1 Message key or press the MENU key and select Message 2 Display New messages Do one of the following Select Create Message and on Create Msg displayed select Email Select Email and on Email displayed select Create Email New message...

Page 91: ... and press the Enter key 90 characters max for an addressee Add more addressees if necessary Refer to Sending an email to more than one addressee on page 86 for details Note A maximum of 10 addresses can be set in Cc field Note To set the addressee from the Contacts refer to Setting the addressee from the contact entries on page 86 8 Set the addressee to send a Blind Carbon Copy Select Bcc input t...

Page 92: ...rea and manually send the saved email Open the Email Outbox select the email and press the Enter key to display the email Press the SK2 Submenu key and select Send e808 becomes online and the email is sent To Do this 1 Start the message function Press the SK1 Message key or press the MENU key and select Message 2 Select the received email to reply to and Replay Select Email and Email Inbox Do one ...

Page 93: ...outside the 3G service area The email is saved in the Email Outbox with an icon indicating that the email is unsent Place the handset in the 3G service area and manually send the saved email Open the Email Outbox select the email and press the Enter key to display the email Press the SK2 Submenu key and select Send e808 becomes online and the email is sent To Do this 1 Start the message function P...

Page 94: ...s and press the Enter key 90 characters max for an addressee A maximum of 10 addresses each can be set for the To and Cc fields and 5 for the Bcc field Note To set the addressee from the Contacts refer to Setting the addressee from the contact entries on page 86 5 Input the subject If necessary select Subject and edit the title 50 characters max 6 Input the message text If necessary select Message...

Page 95: ...dset and an arrow before the title on the Email Inbox Note Downloaded email content is stored in the cache area of e808 3 Receive and read the email content Move the highlight to the email and press the Enter key The message text and the list of attachments are downloaded from the email server and displayed Note If the message text exceeds 100KB e808 will download the message text up to 100KB and ...

Page 96: ...ving an unfinished and unsent email Press the SK2 Submenu key and select Save The email is saved in the Draft Email Attaching a header footer Press the SK2 Submenu key and select Paste header or Paste footer Deleting the email being edited Press the SK2 Submenu key and select Delete Setting the priority Press the SK2 Submenu key and select Set priority Select from Low Normal and High Sending an em...

Page 97: ...e Message Replying to an email with multiple addressees You can reply to an email with multiple addressees Select the email and press the Enter key to display the message text Note Only a total of 10 email addresses can be displayed on the message text screen however the hidden email addresses can still be replied to Press the SK2 Submenu key move the highlight to Reply or Quoted reply and press t...

Page 98: ...ter key to display the message text While the message text is displayed press the Right key to display the next email and the Left key to display the previous email Filtering the received emails Press the SK2 Submenu key and select Filters The filters provided for the Email Inbox are as follows Show all Unread only Read only and Cached only The filters provided for the Email Outbox are as follows ...

Page 99: ...nter key to display the message text The phone number will be displayed in reverse highlight If there is more than one phone number move the highlight with the Up and Down keys Press the Enter key The phone number is input automatically Writing an email to an email address in the message text Select the email press the Enter key to display the message text The email address will be displayed in re...

Page 100: ...one URL move the highlight with the Up and Down keys Press and hold the Enter key or press the SK2 Submenu key and select Add bookmark Register the URL on Bookmark Downloading an attachment Select the email and press the Enter key to display the message text Scroll to the bottom of the email and move the highlight to the attachment file name Note An attachment which is not yet downloaded is indica...

Page 101: ...d the email status change is applied to the list on the email server Outside the 3G service area The email status change is applied to the list on the email server when the handset is placed in the 3G service are and the submenu Refresh Inbox is selected or the Email Inbox is opened Checking newly received emails Press the SK2 Submenu key and select Check for new Email If there are any newly recei...

Page 102: ...l is deleted from the Email Inbox Inside the 3G service area e808 automatically becomes online and the email is deleted from the email server Outside the 3G service area The email will be deleted from the email server when the handset is placed inside the 3G service area and the submenu Refresh Inbox is selected or the Email Inbox is opened again Deleting all emails Press the SK2 Submenu key and s...

Page 103: ...Deleting cache memory of an email Select the email press the SK2 Submenu key and select Cache delete The email is deleted from the cache memory and an icon with a handset and an arrow indicating that the email content is not yet downloaded will be displayed before the title Deleting all cache memory Press the SK2 Submenu key and select Cache delete all All data will be deleted from the cache memor...

Page 104: ...key or SK1 OK key to end the application program Pause the application program Press the Start key Resume after pause Press the SK1 Restart key or Start key End after pause Press the End key to close JavaTM or press the CLR key or SK1 OK key to end the application program Item Description Edit application name Edits the name of the selected application A maximum of 16 characters can be entered Dis...

Page 105: ...etting select Java and press the SK1 Select key or Enter key Set Downl Display press MENU key select Java icon select Set Downl Display or press and hold Enter key in standby mode select Set Downl Display You can choose to display or not to display application information during download of a Java application program To Turn On Off the Application Information Display Function 1 Select On or Off an...

Page 106: ...ey select Settings icon select Phone Phone allows you to change the settings for the following functions services quality alarm any key answer switch to earphones pause dial and ALS Item Description Quality Alarm available only in 3G mode Turns the quality alarm on off This function notifies possible call disconnection when e808 moves to a weak signal reception area while talking Alarm None no ala...

Page 107: ...eforehand XX XXXX XXXX the service centre answers press the SK1 Send key XXXX Pause dial entry function is useful for sending messages to a pager etc Only keypad characters 0 9 Q and and pause press and hold the key displayed as p can be input A pause at the beginning or repeated pauses cannot be registered A pause at the end is deleted when registered Registered pause dial entry can only be used ...

Page 108: ...tures the image The captured image will be displayed on the receiver s handset and your captured image window Off The camera does not capture the image There will be no image captured and sent on a video call and a blue screen will be displayed on the receiver s handset and your captured image window Picture Position The position of the image captured by e808 on the display screen Select from Norm...

Page 109: ...l is first received Valid for both incoming calls and video calls Backlight Turns the display and key backlight on off and adjusts the brightness Key Sound Turns on off the key sounds The key sound is output when any key is pressed Service Tone Turns the service tone on off The service tone notifies that e808 is in service area Item Description Call Time Display Setting Turns the call time display...

Page 110: ...up Screen Selects the wake up screen image displayed when e808 is turned on Note PNG files cannot be selected as the standby wake up screen Language Selects the display language All guidance in the e808 is displayed in the selected language Font Sets the character font for the e808 display Font Switching Selects the font type from Proportional or Fixed Wordwrap Setting Turns the wordwrap function ...

Page 111: ...rmat from 12 hours or 24 hours Date Time Sets the date and time for the local clock the time for the remote clock and selects the time zone of the local area to sort the messages by the standard time Input the current time in 24 hours counting e g 2145 for 9 45 p m regardless of the Display Format setting Summer Time Turns the summer time function on off This function adds an hour to the local tim...

Page 112: ...ny key To turn the dial lock function off press a number key and enter the Code Number Start up lock Turns the start up lock function on off This function turns the dial lock setting on automatically when e808 is turned on Change code Changes the Code Number required to confirm important actions such as deleting all contacts This requires the Code Number to avoid accidental operation To change the...

Page 113: ...ices CLIP status Provided to the receiver side Displays the caller ID CLIR status Provided to the caller side Enables making calls without caller ID notification to the receiver COLP status Provided to the caller side Acquires the destination phone number that answered the call and COLR status Provided to the receiver side Enables answering of calls without receiver ID notification to the caller N...

Page 114: ...ack after an emergency call Int l Roam BIC Roam Call Barring of Incoming Calls when outside the home country Rejects all incoming calls while roaming except for call back after an emergency call Bar Calls Out ALL outgoing call barring services off Bar Calls In All incoming call barring services off and ALL services All call barring services off Note All services have individual setting options for...

Page 115: ...c and No Answer CFNRy All Calls For all diverting services Also from this menu you can subscribe to delete start stop and check the current service status of the following call diverting services Note All services have individual setting options for diverting ALL Voice call FAX Text message Video and ALS2 Call Rejection Registers the forwarding destination number when a voice call is rejected and ...

Page 116: ...call barring setting of e808 Direct Input Service Edits and sends Supplementary Service code to the 3 to change service settings directly The e808 recognises a string of keypad characters starting with Q or and ending with a as an SS code and sends it to 3 A maximum of 182 keypad characters 0 9 Q and can be used Direct SS code input can also be sent from the standby screen 32 keypad characters max...

Page 117: ...de automatically after a while PLMN Setting Selects the network operator Public Land Mobile Network PLMN automatically manually When Auto is selected e808 searches and selects PLMN in order of priority automatically When Manual is selected a list of valid PLMNs will be displayed Select a PLMN from the list The e808 will try to establish a connection to that PLMN When this connection is unsuccessfu...

Page 118: ...mber of files that can be stored in your e808 the maximum size of each file and capacity Item Description Setting Reset Resets the function settings Memory Reset Resets all the personal data registered in the memory This requires the Code Number to avoid accidental operation Refer to page 102 for details on the Code Number Item Valid File Type Number of Files File Size Capacity Video MPEG4 Video 1...

Page 119: ... video is automatically saved in a file Viewer Plays video downloaded from a browser attached to multimedia messages or made by using the Make Video function You can choose to play either a particular video on the Library or several videos saved in a Play List The Library contains all videos stored in your e808 The Play List contains videos you have selected from the Library Edits the title of a v...

Page 120: ...om key and SK2 Front Back key respectively The following settings can be changed To Do this Zoom in or out Press the SK1 Zoom Normal key Change camera direction To change the setting before recording press the SK2 Submenu key and select Camera Direction To change the setting during recording press the SK2 Front Back key Towards me Camera facing inward i e the display side Away from me Camera facin...

Page 121: ... interruption may occur Set self timer Press the SK2 Submenu key and select Self timer If you want to use the self timer for example when you want to include yourself in the picture select On and set the timer to 5 10 15 or 20 seconds The recording automatically starts when the self timer expires Display a mirror image Press the SK2 Submenu key and select Mirror Image On The picture is displayed i...

Page 122: ...ht transfer permitted prohibited by pressing the Enter key before pressing the SK1 Play key Note Pressing the SK1 Play key or the Enter key on the property screen will also play the video 4 Do any of the following Adjust volume level Press the Up and Down keys Seek forward backward To seek forward or backward in a file press and hold the Right or Left key You can start playing video from the seek ...

Page 123: ...ption Edit title Edits the title Edit List Edits the Play List On the Edit List screen select the video file you want to move insert or delete and press the SK2 Submenu key Move Moves the selected file anywhere within the Play List Select Move to end to move the selected file to the end of the list Insert Inserts a video file selected from the Library before the selected file Select Insert at end ...

Page 124: ...otion capture has priority over the picture quality Medium Normal picture quality High The picture quality has priority over the motion capture Mirror Image Displays mirror images On Images are displayed in mirror view Off Images are displayed as you normally see them Camera Zoom Zooms video image Select Off normal or On zoom Item Description Take Photo Takes a photo The image is automatically sav...

Page 125: ...era facing outward Change image quality Press the SK2 Submenu key and select Image Quality Low Poor image quality Medium Normal image quality High High image quality Set self timer Press the SK2 Submenu key and select Self timer If you want to use the self timer for example when you want to include yourself in the picture select On and set the timer to 5 10 15 or 20 seconds A photo is automaticall...

Page 126: ...e you want to view and press the SK1 Display key You can check the file properties e g file name image type title file size created date and copyright transfer permitted prohibited by pressing the Enter key before pressing the SK1 Display key Note Pressing the SK1 Play key or the Enter key on the property screen will also display the image Item Description Send image Sends the image as an attachme...

Page 127: ...eceive send a message while playing audio sound interruption may occur To Play Audio Files Mirror Image Displays a mirror image On Image is displayed in mirror view Off Image is displayed as you normally see it Camera Zoom Zooms image Select Off normal or On zoom Note Zoom cannot be set when the Picture Size is set to Full Size Picture Size Changes the picture size Message Size 128 x 96 pixels Con...

Page 128: ...t you desire Skip forward backward in a Play List To skip forward or backward in a Play List press the Right or Left key You can skip files you do not want to play The skip function is valid when a Play List contains more than one file Repeat playing file s in a Play List Press the Enter key to switch among repeat off repeat 1 repeat all Pause audio Press the SK1 Pause key To Do this Repeat off Re...

Page 129: ...ption Edit Title Edits the title Edit List Edits the Play List On the Edit List screen select the audio file you want to move insert or delete and press the SK2 Submenu key Move Moves the selected file anywhere within the Play List Select Move to end to move the selected file to the end of the list Insert Inserts an audio file selected from the Library before the selected file Select Insert at end...

Page 130: ...w the message refer to Attaching an image or an audio file on page 70 To Record Voice 1 Press the Enter key to start recording Other File Type press MENU key select Multimedia select Other File Type Other File Type allows you to change the title of a file or delete a file which is transferred from a PC to e808 via an USB cable received with an email or downloaded from internet but not saved as a v...

Page 131: ...alendar feature allows you to enter a schedule appointment for a particular date and time You can save up to 100 calendar entries together with the ToDo entries To Display Your Calendar To Do this 1 Display your calendar Press the MENU key and select Accessories and Calendar 2 Do any of the following Switch between weekly calendar and monthly calendar Press the SK2 Submenu key Select Week View to ...

Page 132: ...t setting Select one of the following cycles No repeat Daily Weekly Monthly Yearly No repeat indicates the appointment is non recurrent Weekly is used to set days of week Select one or more days using the SK1 Select key and press the SK1 Select key or Enter key 3 Set clock alarm tune Select the clock alarm tune and press the SK1 Select key or Enter key Select the tune you want and press the Enter ...

Page 133: ...or Enter key to end the editing The Day View screen shows all the schedules set for the date To Do this Meal Car Journey Tennis Golf Doctor Date Meeting Work Pub Train Journey Plane Journey Lecture Shopping Private Travel Bus Journey Birthday Appointment Party ...

Page 134: ...e by changing the time or contents To Delete a Schedule You can delete a particular schedule all schedules up to the day before the selected date or all schedules The following describes the basic operations of schedule deletion To Do this 1 Select a date Select a date from the Month View or Week View screen and press the Enter key 2 Select a schedule Select a schedule from Day View and press the ...

Page 135: ...ate Select Set Date and press the SK1 Select key or Enter key Set the start date and due date and press the SK1 OK key or Enter key 2 Set status Select Set Status and press the SK1 Select key or Enter key Select ToDo and press the SK1 OK key or Enter key 3 Set priority Select Set Priority and press the SK1 Select key or Enter key Select High Medium or Low and press the SK1 Select key or Enter key ...

Page 136: ...elow Alarm Clock press MENU key select Accessories select Alarm Clock You can use e808 as your alarm clock which rings and vibrates at a specific time even if the power is off To Do this 1 Delete a task Select a task from ToDo List or Filter List and press the SK2 Submenu key Select Delete and press the SK1 Select key or Enter key Delete all completed tasks Press the SK2 Submenu key and select Del...

Page 137: ...s key Use Left key as key Use Up key as key To Do this 1 Set alarm clock to on Press the SK1 Edit key or Enter key select On and press the SK1 Select key or Enter key 2 Set time Set time in 24 hour clock and press the SK1 OK or Enter key 3 Set repeat setting Select one of the following cycles and press the SK1 Select key or Enter key Daily Weekly or No repeat Weekly is used to set days of week Sel...

Page 138: ...ing to convert 100 Pounds to Euro To Do this 1 Enter 10 5 Press 1 0 Enter and 5 keys 2 Multiply Press the Up key 3 Enter 10 Press 1 and 0 keys 4 Get the answer Press the SK1 key 5 Clear the display Press the SK2 key To Do this 1 Select a currency With the cursor on the abbreviation of currency unit press the SK2 Submenu key Select Currency Unit List and press the SK1 Select key or Enter key Scroll...

Page 139: ... or Enter key Voice Notes press MENU key select Accessories select Voice Notes The Voice Notes feature allows you to record a short audio message up to 20 seconds in the standby mode or during a call You can use a voice note to temporarily store phone numbers addresses or reminders Only one voice note can be saved in e808 To Record a Voice Note 3 Modify exchange rate If you want to modify the exch...

Page 140: ...r a schedule and 32 characters for a ToDo can be pasted Select a text note you want to copy To Do this 1 Select a voice note to play Select Play Delete VN on the Voice Notes screen and press the SK1 Select key or Enter key 2 Start playing Select Play and press the SK1 Select key or Enter key To Do this 1 Select deleting voice note Select Play Delete VN on the Voice Notes screen and press the SK1 S...

Page 141: ...ibed Contacts Owner Info Calls Received Calls Made To Do this 1 Select the text note you want to edit Select a text note from the list and press the SK1 Edit key 2 Edit a text message Edit a text message up to 1 000 characters and press the Enter key To Do this 1 Delete a text note Select a text note from the list and press the SK2 Submenu key Select Delete and press the SK1 Select key or Enter ke...

Page 142: ... may be edited When e808 is in the 3G mode PIN2 number entry may be required or the numbers cannot be edited depending on the access condition of the USIM card Calls Received press the MENU key select User Data icon select Calls Received Calls Received displays the last 20 received calls in a list To make a call select the item and press the Start key to make a video call press the SK1 Video key T...

Page 143: ...f 340KB in 10KB 20KB ringtune files can be saved in the e808 memory e g ten 10KB files and twelve 20KB files To Play a Registered Ringtune 1 Select the title and press the SK1 Start key Play Ringtune will be displayed with the ringtune title and the volume level and the selected ringtune will be played Pressing the SK1 Stop key stops the ringtune The following submenus are provided Delete All Dele...

Page 144: ...nd the Text message data can be moved or copied to from the USIM card or copied between the e808 memory and a PC When the data transfer operation is activated the e808 automatically cancels any communications and shuts down other applications The following operations are described To From USIM To From PC To From USIM press the MENU key select Data Transfer icon select To From USIM The contact list...

Page 145: ...email address The data exceeding that limit will be discarded The maximum number of characters may vary depending on the USIM card To Do this 1 Start data transfer Press the MENU key and select Data Transfer 2 Display To From USIM Select To From USIM 3 Select the data type Select Contacts 4 Select the operation Select the operation from Move data is cut and moved to the other and Copy data is copi...

Page 146: ... contact entries are copied or Start Copy all all phone number and email address registered in the selected contact entries are copied The selected contact entries are copied to the USIM card or the e808 memory Note Here only one phone number or one email address can be stored in a USIM contact entry Therefore if Start Copy all is selected up to 7 entries with the same name will be created in the ...

Page 147: ...o move Select the title To copy To select one or more entries Select the title and press the SK1 Select key Multiple titles can be selected To cancel the selection select the title and press the SK1 Cancel key To select all entries Press the SK2 Submenu key and select Select All To cancel the selection press the SK2 Submenu key and select Delete All 8 Start moving copying To move Press the SK1 Mov...

Page 148: ...52 x 288 pixels or smaller in size to be displayed on Viewer Basic Operations The basic operation for transferring data between the e808 and the PC is shown below To Transfer Data between the Phone and a PC This operation can only be controlled from the PC side To Do this 1 Connect the e808 and the PC Insert an USB cable to the power connector of the e808 and a USB port of the PC 2 Start data tran...

Page 149: ...e SK2 Contacts SK2 long Add to Contacts Up Category list of the contacts Up long Volume setting Down Alphabetical list of the contacts Down long Volume setting Left Calls received list Right Calls made list Enter long Java application Triangle 3 sites Triangle long Switches to 3G mode Note Available only when Dual USIM is inserted and when 2G is selected by Auto Selection MENU Displays Menu MENU l...

Page 150: ...ual USIM is inserted and when 2G is selected by Auto Selection MENU Displays Menu MENU long Switches tasks when multi task activated End Deletes the number End long Deletes the number and turns the power off CLR Deletes one digit CLR long Deletes all digits 0 long Enters for international call after entering 3 digits or less Displays contact list for quick recall Enters long Enters p pause Mode Ke...

Page 151: ...ns ringtune off Other than above Any key answer During a call SK1 Voice note SK2 Submenu Up Volume setting Up long Category list of the contacts Down Volume setting Down long Alphabetical list of the contacts Left Calls received list Right Calls made list Triangle 3 sites Triangle long Switches to 3G mode Note Available only when Dual USIM is inserted and when 2G is selected by Auto Selection Mode...

Page 152: ...g Up Moves up Down Moves down Left Moves left Right Moves right End Discards the text End long Turns power off CLR Deletes one character to the right of the cursor CLR long Deletes all characters to the right of the cursor BS Deletes one character to the left of the cursor BS long Deletes all characters to the left of the cursor Text entry using numeric mode End Discards the text End long Turns po...

Page 153: ...acklight 22 95 98 99 BAIC 104 BAOC 104 Bar Calls In 104 Bar Calls Out 104 Battery 6 C Camera display 21 Category name 32 Clock 10 101 CLI 23 Showing and Hiding 23 CLR key 25 Code Number 102 COLP 23 103 COLR 23 103 Composer 64 68 Contacts 28 31 73 89 132 Add to Contacts 17 21 31 32 35 73 90 132 Category setting 32 SDN display 32 Search 31 34 ...

Page 154: ...30 123 Image 37 39 41 65 86 98 108 110 114 Image quality 22 98 110 114 115 116 K Key sound 99 L Language 100 Library 109 111 113 117 119 M Memory reset 108 Menu 48 Message 57 Email 28 30 34 45 57 76 134 Multimedia 45 57 62 64 70 71 Receiving and reading 70 Text 45 57 61 Video 45 57 70 132 Writing and sending 63 Microphone 2 10 22 Mirror Image 22 98 111 114 115 117 MMS see multimedia message MMS se...

Page 155: ...0 97 Pause dial 13 97 Quality alarm 96 Phone to USIM 135 136 Picture position 98 Picture size 115 PIN 9 101 Play list 109 111 113 117 119 Backlight 99 Indicator 99 Key sound 99 Ringtone 98 Ringtune 98 Service tone 99 Vibrate 99 Provisioning 106 PUK 9 Q Quality alarm 96 Quick recall 13 R Ringtune 29 31 32 46 65 69 80 86 98 133 S SAT 55 Schedule 121 Scratchpad 17 Screen colour 100 ...

Page 156: ... 24 Copy and paste 26 Cut and paste 27 Numeric 24 Symbol 25 Text mode 24 Text message 45 57 61 Text notes 130 Used memory 134 USIM list 107 USIM to phone 135 136 V Vibrate 99 Video 109 Video call 18 Video Telephony 98 Voice call 11 Voice notes 129 Volume 8 17 98 112 118 126 VT settings 98 W Wake up screen 100 Wordwrap setting 100 WP TCP software 43 Z Zoom 110 110 114 115 117 ...

Page 157: ......

Page 158: ...ight 2003 NEC Corporation All rights reserved NEC is a registered trademark of NEC Corporation Japan www nec co uk www neceurope com Copyright 2003 NEC Corporation All rights reserved NEC is a registered trademark of NEC Corporation Japan ...

Reviews: