background image

Confidential and proprietary information of NCR.

Unauthorized use, reproduction and/or distribution is strictly prohibited

7360-K066

Issue E

Kit Instructions

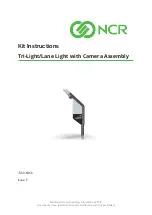
Tri-Light/Lane Light with Camera Assembly

Summary of Contents for 7360-K066

Page 1: ...Confidential and proprietary information of NCR Unauthorized use reproduction and or distribution is strictly prohibited 7360 K066 Issue E Kit Instructions Tri Light Lane Light with Camera Assembly...

Page 2: ...es and other countries Where creation of derivative works modifications or copies of this NCR copyrighted documentation is permitted under the terms and conditions of an agreement you have with NCR NC...

Page 3: ...uting the Tri Light Lane Light Cable on a Fixed unit on page 13 l Added Routing the Tri Light Lane Light Cable on a Convertible unit on page 15 D Jan 2023 Updated with IP Guild Styles E Nov 2023 l Mod...

Page 4: ...ling a Tri Light Lane Light with Camera Assembly to an NCR SelfServ Checkout 7360 unit Kit Contents Part Number Description 497 0525295 7360 K066 Tri Light Lane Light with Camera 497 0524107 Tri Light...

Page 5: ...d or distribution is strictly prohibited 2 Part Number Description 497 0525183 Assy Pack for SCO R6 Tri Light with Camera 497 0511101 Lane Light Graphics Label NCR Fastlane 497 0423108 Instructions Ki...

Page 6: ...ssary For more information refer to Removing the Tri Light Lane Light R6 on page 6 2 Install the new Tri Light with Camera Assembly For more information refer to Installing Tri Light Lane Light with C...

Page 7: ...n of NCR Unauthorized use reproduction and or distribution is strictly prohibited 4 c Enter the following default login credentials Username admin Password HikVision1 The browser opens a live feed of...

Page 8: ...l areas are visible l Customer area is visible l Cart area is visible Note Refer to the image below for an example of an ideal camera view For the purpose of illustration only the image below shows a...

Page 9: ...ion is strictly prohibited 6 Removing the Tri Light Lane Light R6 To remove the Tri Light Lane Light Assembly follow these steps 1 Turn off the NCR SelfServ Checkout software and hardware systems 2 Re...

Page 10: ...d use reproduction and or distribution is strictly prohibited 7 3 Lift the Tri Light Lane Light Assembly and then disconnect the cables Tip Mark all cables as to where they are connected to quickly de...

Page 11: ...Assembly follow these steps Note Ensure that the NCR Customer Helpdesk is informed when the Tri Light Lane Light with Camera is installed in the store 1 Remove the existing Tri Light Lane Light assemb...

Page 12: ...Confidential and proprietary information of NCR Unauthorized use reproduction and or distribution is strictly prohibited 9 3 Connect the Tri Light Lane Light with Camera Assembly cables...

Page 13: ...or distribution is strictly prohibited 10 4 Install three 3 cable ties on each side of the power connector and on the Ethernet cable to provide strain relief as shown in the image below 5 Orient the...

Page 14: ...Light Assembly into the Tri Light Lane Light pole Ensure that the pole holes are aligned Tip To easily insert the cables with connectors through the pole insert first the LAN cable followed by the Pow...

Page 15: ...the corresponding I O Box port destinations Tri Light Destination Connection Location Tri Light Lane Light cable extender I O Box Tri Light Lane Light port Ethernet LAN cable extender Ethernet LAN I...

Page 16: ...a Fixed unit To route the Terminal Display cables follow these steps 1 Do the following a From the Tower Frame pole duct route the Tri Light Lane Light cable down through the built in hooks inside th...

Page 17: ...ohibited 14 2 From the corner cable access hole route the cable down the Core Cabinet wall and connect to the I O Box Tri Light Lane Light port Use cable ties to secure the cable on bridge lances Note...

Page 18: ...ps 1 Raise the Tower Frame assembly 2 Do the following a From the Tower Frame pole duct route the Tri Light Lane Light cable down through the built in hooks inside the Tower Frame down the center of t...

Page 19: ...ohibited 16 3 From the corner cable access hole route the cable down the Core Cabinet wall and connect to the I O Box Tri Light Lane Light port Use cable ties to secure the cable on bridge lances Note...

Page 20: ...Lane Light cable down through the built in hooks inside the Tower Frame b Route the cable down the Scanner Scale bucket floor Use cable ties to secure the cable on bridge lances c Secure the cable to...

Page 21: ...trictly prohibited 18 KIO Board and 150 W PSU Configuration Note Units with KIO Board and 150 W PSU Configuration use a Tri Light cable with ferrite a Measure at least 100 mm length from the Tri Light...

Page 22: ...ution is strictly prohibited 19 b Connect the Tri Light cable to its corresponding port in the KIO Board Note For the Tri Light Lane Light with Camera Assembly mate the Camera Power cable to the Tri L...

Page 23: ...formation of NCR Unauthorized use reproduction and or distribution is strictly prohibited 20 I O Box Configuration Note For the Tri Light Lane Light with Camera Assembly connect the Camera Power cable...

Page 24: ...contact an NCR Representative or the Retailer s Help Desk Note For new camera installation IP Addresses are pre allocated by the Retailer s IT Team B Install the Tri Light Lane Light with Camera Asse...

Page 25: ...and the device DVA lane computer or laptop used for configuration are connected to the same network 1 Install the HikVision Search Active Devices Protocol SADP tool if necessary For more information...

Page 26: ...horized use reproduction and or distribution is strictly prohibited 23 4 Modify the network parameters by the doing the following if necessary a Select the camera to modify by checking the check box b...

Page 27: ...ormation of NCR Unauthorized use reproduction and or distribution is strictly prohibited 24 The side panel opens and displays settings of the selected camera c Update the IP Address of the camera d Se...

Page 28: ...twork information of online devices For more information about SADP Tool refer to HikVision Tools Download Note Ensure that the camera and the device DVA lane computer or laptop used for configuration...

Page 29: ...Unauthorized use reproduction and or distribution is strictly prohibited 26 4 Select Next The installation window shows the default destination folder 5 Select Change to enter a different destination...

Page 30: ...use reproduction and or distribution is strictly prohibited 27 6 Select Next throughout the process to choose all default settings until the window notifies that installation is complete A setup wind...

Page 31: ...nauthorized use reproduction and or distribution is strictly prohibited 28 7 Select Next The installation window shows the default destination folder 8 Select Change to enter a different destination f...

Page 32: ...horized use reproduction and or distribution is strictly prohibited 29 9 Select Next to continue The Windows Security Alert appears 10 Select Next to proceed with the installation The SADP Tool icon a...

Page 33: ...ote Configure the camera settings using Batch Configuration Tool if the IP address of the camera is static Note Ensure that the camera and the device DVA lane computer or laptop used for configuration...

Page 34: ...and proprietary information of NCR Unauthorized use reproduction and or distribution is strictly prohibited 31 4 Download the User Manual to access procedures specific to the parameter that needs to b...

Page 35: ...batch Note Ensure that the camera and the device DVA lane computer or laptop used for configuration are connected to the same network To install the Batch Configuration Tool follow these steps 1 Unzi...

Page 36: ...rmation of NCR Unauthorized use reproduction and or distribution is strictly prohibited 33 window shows the default destination folder 5 Select Change to enter a different destination from the default...

Page 37: ...y information of NCR Unauthorized use reproduction and or distribution is strictly prohibited 34 6 Select Next to proceed with the installation The Batch Configuration icon appears on the desktop once...

Reviews: