

H
ardware Installation
Follow the steps
to install the VGA card :
1. Remove the computer case.
2. Locate the AGP slot on your mainboard.
Warning: Inserting the VGA card into a wrong
slot (e.g. PCI slot)will damage your card (refer
to your mainboard manual for more Information).
3. Put the card directly over the AGP slot and
press one end of the card into the slot first.
Gently but firmly press the other end until it is
fully seated in the slot.
4. Secure the card with a bracket screw.
below
S
oftware Installation
(for )
Windows
XP/ 2000/ 98SE/ ME
R
I
TM
TM
nstalling MSI Live Update 3
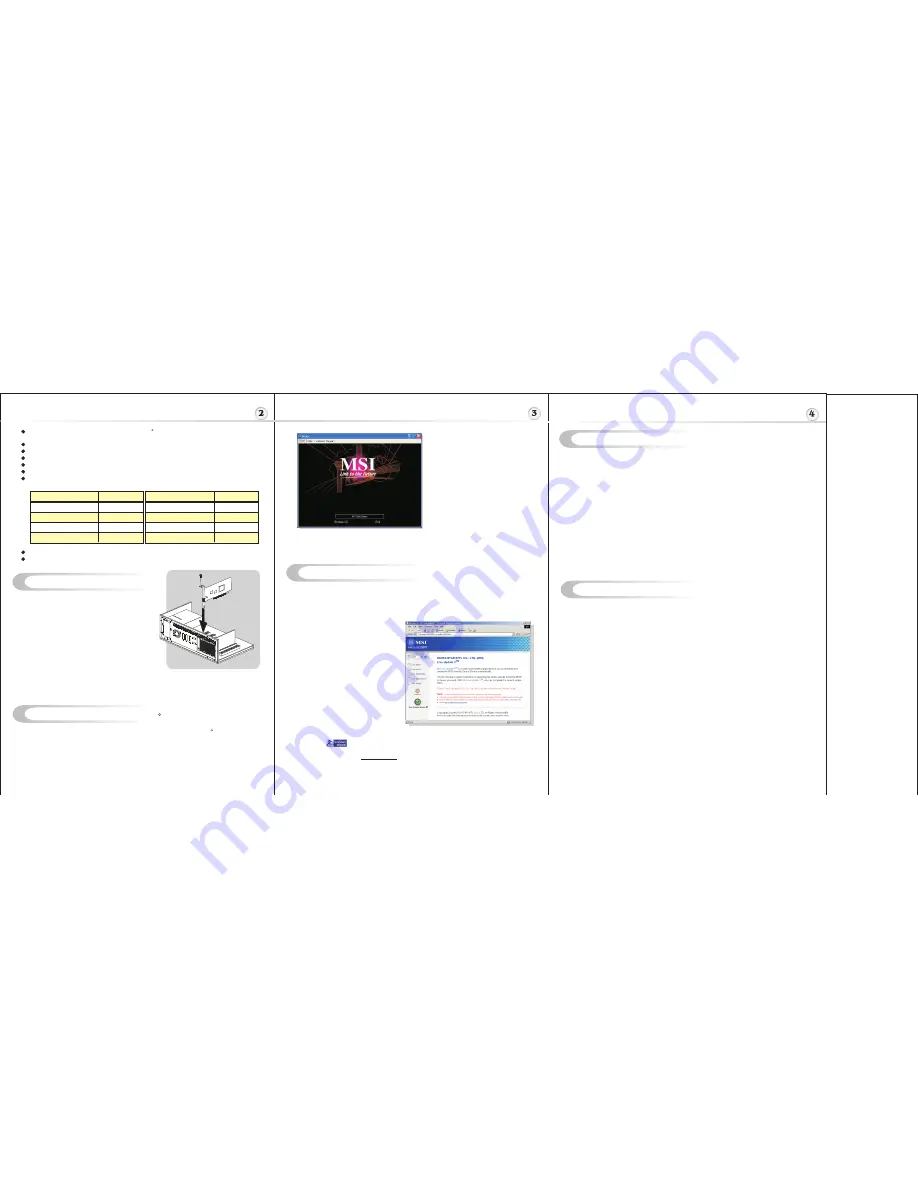
To install the driver of the VGA card to your computer running
CD
Windows XP/ 2000/
98SE/ ME, please follow the steps below:
1. Turn on the computer.
2. Insert the
into the CD-ROM drive. The Autorun program will start the Setup
program, and show the setup screen as follows:
R
TM
MSI Live Update 3 is a useful utility for you to upgrade your MSI mainboard and
VGA card. Thanks to the powerful capacity of this utility, you can conveniently download
and automatically update the BIOS and the drivers on-line, without spending much time in
searching many Web sites to find the BIOS or drivers you want.
TM
TM
Tip
: If, on your computer, the
Autorun program does not execute
automatically, please 1) enable the
CD-ROM drive Auto-detect function
from Control Panel; or 2) find and
run the setup.exe file manually from
the CD.
3. Click
ATI
VGA Drivers
. Follow the on-screen instructions to complete the installation.
4. After finishing the installation, restart the computer as instructed.
U
TM
TM
sing MSI Live VGA Driver Update
MSI Live VGA Driver Update
This service enables you to update the latest VGA driver for your VGA card.
1. To update the MSI Live VGA Driver , click Live VGA Driver item on the left
column of the main page.
TM
TM
TM
TM
TM
2. This utility will start checking your platform and the information on the VGA card, and
display the information in a list.
3. Click the graph button on the bottom to connect MSI Live Update Series Server.
Then, it will automatically connect the Internet and compare the version of the driver
in the database.
4. It may take several minutes to detect the required drivers. Please wait while
proceeding detection.
5. Click the
InstallShield Wizard
button on the right side of the table to download and
update the driver. All actions will proceed automatically.
6. Follow the on-screen instructions to complete the updating procedure.
3.
TM
Click the
InstallShield Wizard button to have the program of MSI Live
TM
TM
Update 3 with MSI Live monitor downloaded and installed on your system
automatically, or click here (manual) to download and install the program manually.
4. Follow the on-screen instructions to complete the installation.
TM
SMARTSHADERTM 2.1 offers complete DirectX 9.0 support, enabling cinematic quality
lighting effects
TM
SMOOTHVISIONTM 2.1delivers the sharpest, clearest textures
Comprehensive AGP 8X/4X/2X support
RADEON 9800 PRO Visual Processing Unit (VPU)
One display (VGA or DVI) simultaneously connected with a TV or VCR
YPrPb output adapter (available in North America only)
Core Clock: 378 Mhz
Clock: 338 MHz
2D Display Modes: Resolutions, colors and masimum refresh rates(Hz) in 256, 65K Or 16.7M
colors
Memory
R
640x480
200Hz
800x600
200Hz
1024x768
200Hz
1152x864
200Hz
1280x1024
160Hz
1600x1200
120Hz
1920x1080
120Hz
1920x1200
100Hz
1920x1440
90Hz
2048x1536
85Hz
5. Install all other cards and devices and connect all the cables, and then install the case.
6. Connect the monitor. Now, you are ready to install the software on your computer.
Installing from the CD-Title
1. Insert the CD into the CD-ROM
drive, and start the
Setup
program.
2. Click the
Utility
tab on the setup
screen.
3. Click the
MSI Live Update 3
.
Follow the on-screen instructions to
complete the installation.
Installing from the MSI Web Site
1. Make connection to MSI's website at
http://www.msi.com.tw
2. Select
/Support/Live Update 3/
on
the upper part of the MSI's
homepage to enter the setup page.
TM
TM
TM
U
TM
TM
sing MSI Live VGA BIOS Update
MSI Live VGA BIOS Update
This service enables you to update the latest VGA BIOS for your VGA card.
1. To update your VGA BIOS, click Live VGA BIOS item on the left column of the main
page.
TM
TM
TM
TM
2. If your VGA card does not support the Live VGA BIOS function, you will receive a
warning message on the screen.
TM
3. If your VGA card do support the Live VGA BIOS function, please pay attention to the
message shown on the screen telling you that in what circumstance flashing BIOS
may fail to reboot.
4. Click Yes if you would like to try it at your own risk or No to return to the main page
with everything unchanged.
5. If you click Yes to continue, it will check the information and BIOS version of your
VGA card, and list them in a table.
TM
TM
6. Click the graph button at the bottom to connect the MSI Live Update 3 Server.
TM
TM
7. The MSI Live VGA BIOS will automatically connect the Internet and search the
TM
supported BIOS in the database of MSI .
8. If it has found one (or several) supported BIOS for your VGA card, click the
InstallShield Wizard button on the right side of the table to have the new BIOS
downloaded and updated automatically.
9. Follow the on-screen instructions to complete the updating procedure.


