Motorola XTNI Non-display Model, User Manual
The Motorola XTNI Non-display Model is a high-performance two-way radio perfect for professional communication needs. For obtaining detailed instructions on its setup and use, you can easily download the free User Manual from our website. Equip yourself with this essential resource today, available for instant access at manualshive.com.
Share
Download


Reviews:
No comments
Related manuals for XTNI Non-display Model

SoundWorks Radio 820HD
Brand: Cambridge SoundWorks Pages: 12

Kite
Brand: MAJORITY Pages: 20

VXD-720 digital
Brand: Vertex Standard Pages: 28

ATS-909
Brand: Sangean Pages: 1

FRS-101
Brand: Radio Shack Pages: 4

C1179
Brand: Midland Pages: 17

COTTENHAM II
Brand: MAJORITY Pages: 28

BR-Klassik DIR3121M
Brand: Hama Pages: 45

M00-20-6020
Brand: OPW Pages: 22

APX 8000HXE
Brand: Motorola solutions Pages: 89

Msat G2
Brand: SKYTERRA Pages: 40

BTS1200
Brand: Uniden Pages: 36

Polifemo
Brand: Microgate Pages: 11

Pofung 10RX Series
Brand: Baofeng Pages: 45

RF-SW70
Brand: Panasonic Pages: 2

RF-521
Brand: Panasonic Pages: 1
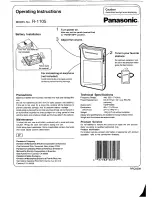
R-1105
Brand: Panasonic Pages: 1

RF-2400
Brand: Panasonic Pages: 4


