Motorola MBP86SN, User Manual
The Motorola MBP86SN is a high-quality baby monitor that ensures optimal safety and peace of mind for parents. With its advanced features and functionality, it is important to have the User Manual for a thorough understanding. Download the manual for free from manualshive.com to maximize the benefits of this exceptional product.
Share
Download


Reviews:
No comments
Related manuals for MBP86SN

CH-D008WDP7-20LD
Brand: Cooper & Hunter Pages: 66

HD60002
Brand: Emerson Pages: 12

MoistAIR HD1405
Brand: Emerson Pages: 16

MoistAIR HD1205
Brand: Emerson Pages: 16

MoistAir MA 1200
Brand: Emerson Pages: 20

HD13002
Brand: Emerson Pages: 16
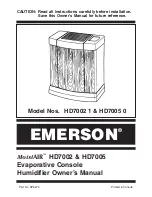
HD7002-1
Brand: Emerson Pages: 16

MA0800
Brand: Emerson Pages: 16

MA1200-1
Brand: Emerson Pages: 19

CA-604B Smart
Brand: Clean Air Optima Pages: 178

DDR2509EE
Brand: Danby Pages: 24

BT25
Brand: Nemaxx Pages: 86

1850
Brand: Topcom Pages: 92

W2055A
Brand: Boneco Pages: 128

GD160
Brand: Goldair Pages: 8

GD215
Brand: Goldair Pages: 12

HWM705 series
Brand: Kaz Pages: 4

3000
Brand: Kaz Pages: 20


