background image

IMPORTANT! 

The installation instructions contained in this 

manual should only be carried out by a qualified technician.

INST

ALLA

TION

/

USER MANU

AL

back

Table of Contents

1.0

General Warnings

2.0

Hardware Kit Contents

3.0

Tools Required

4.0

Prior to Installation- Important! 

5.0

Matrx Mini Installation

6.0

Disengaging the Matrx Mini

7.0

Care and Maintenance Instructions

8.0

One-Hand Cord Release Mechanism (Optional)

9.0

Lumbar Support (Optional)

S

AFETY

S

YMBOLS

:

Proper set-up and safe use of your Invacare Matrx Mini Back depends on your
own good judgement and common sense, as well as that of your provider,
caregiver and/or health professional.  The following symbols are used
throughout this manual to identify warnings, cautions and important notes.  It
is very important that you read and understand them completely.  

CAUTION!

Failure to heed the cautions in this manual may result

in damage to your Matrx Seating product.

WARNING! 

Failure to heed the warnings in this manual may result

in personal injury.

IMPORTANT!

Important information to remember during installation

and set-up of you Matrx Seating product.

IMPORTANT!

Please refer to the Wheelchair Owners/Operators

Manual for additional safety information, warnings and cautions related to
the operation of your wheelchair.

2

Содержание Invacare Matrx Mini back

Страница 1: ...wn good judgement and common sense as well as that of your provider caregiver and or health professional The following symbols are used throughout this manual to identify warnings cautions and importa...

Страница 2: ...wn good judgement and common sense as well as that of your provider caregiver and or health professional The following symbols are used throughout this manual to identify warnings cautions and importa...

Страница 3: ...ILT IN SPACE RECLINE POSITION and or SEAT DEPTH before use Use extreme caution when using a new seating position When a Matrx Mini is added to a TILT and or RECLINING chair a RIGIDIZER BAR or CROSSBAR...

Страница 4: ...ILT IN SPACE RECLINE POSITION and or SEAT DEPTH before use Use extreme caution when using a new seating position When a Matrx Mini is added to a TILT and or RECLINING chair a RIGIDIZER BAR or CROSSBAR...

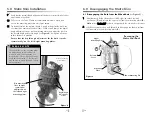
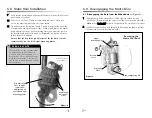
Страница 5: ...igned to provide 1 5 38mm of fore and aft adjustment relative to the cane clamp To reconfigure a mounting plate cane clamp to the forwardmost orientation detach the Mounting Plate from the Cane Clamp...

Страница 6: ...igned to provide 1 5 38mm of fore and aft adjustment relative to the cane clamp To reconfigure a mounting plate cane clamp to the forwardmost orientation detach the Mounting Plate from the Cane Clamp...

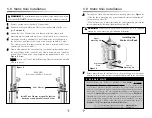
Страница 7: ...e mounting plates see Figure 6 Slide the lower mounting pins into the hooked slots at the bottom of each mounting plate 1 With the lower pins in place lock snap the upper mounting pins into the latch...

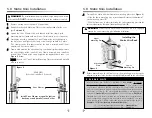
Страница 8: ...e mounting plates see Figure 6 Slide the lower mounting pins into the hooked slots at the bottom of each mounting plate 1 With the lower pins in place lock snap the upper mounting pins into the latch...

Страница 9: ...move the backrest from the wheelchair and use the wrench provided to loosen each flange nut If necessary replace the standard mounting pins with long mounting pins iii Adjust the mounting pin depth cl...

Страница 10: ...move the backrest from the wheelchair and use the wrench provided to loosen each flange nut If necessary replace the standard mounting pins with long mounting pins iii Adjust the mounting pin depth cl...

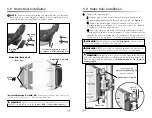
Страница 11: ...cally on the left right mounting plates The vertical lines on the mounting plates are designed as a point of reference to assist with symmetrical mounting see image below The back position can be angl...

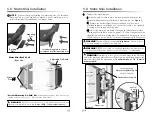
Страница 12: ...cally on the left right mounting plates The vertical lines on the mounting plates are designed as a point of reference to assist with symmetrical mounting see image below The back position can be angl...

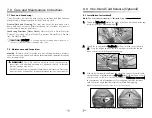
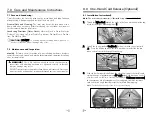
Страница 13: ...f problems are discovered Corrective measures can be perfomred at or arranged through your equipment supplier 14 8 0 One Hand Cord Release Optional 8 1 Installation Instructions 1 Thread the Nylon Cor...

Страница 14: ...f problems are discovered Corrective measures can be perfomred at or arranged through your equipment supplier 14 8 0 One Hand Cord Release Optional 8 1 Installation Instructions 1 Thread the Nylon Cor...

Страница 15: ...d as needed to meet the needs of the end user 15 WARRANTY Every Invacare Matrx Mini back is carefully inspected and tested to provide optimum performance Each back is guaranteed to be free from defect...

Страница 16: ...d as needed to meet the needs of the end user 15 WARRANTY Every Invacare Matrx Mini back is carefully inspected and tested to provide optimum performance Each back is guaranteed to be free from defect...

Отзывы: