molgen PurePrep 32, Operation Manual
The molgen PurePrep 32 is a high-quality laboratory equipment that streamlines DNA purification processes. For detailed instructions on how to operate this product, download the Operation Manual for free from manualshive.com. This manual provides step-by-step guidance for optimal performance and efficiency.
Share
Download


Reviews:
No comments
Related manuals for PurePrep 32
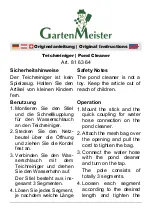
81 63 64
Brand: Garten Meister Pages: 4

2005 SERIES
Brand: Bissell Pages: 16

WUC-A Series
Brand: Daihan Scientific Pages: 18

TBS-606
Brand: TECHWOOD Pages: 8

UMO-WA1345
Brand: Martin-Till Pages: 19

UMO-WA1360
Brand: Martin-Till Pages: 20

epv1100
Brand: Ewbank Pages: 24

WC 305
Brand: Ewbank Pages: 42

4040-XTS
Brand: X-Tronic Pages: 16

HHEM300WT
Brand: nedis Pages: 64

56380561
Brand: U.S. Products Pages: 32

tufTURBO H1.007
Brand: V-TUF Pages: 2

4076D
Brand: Makita Pages: 6

SR236
Brand: Sonix 4 Ultrasonics Pages: 8

Hybrid Compact/Pegasus SD21
Brand: Ecolab Pages: 78

Foamatic
Brand: Ecolab Pages: 93

Matrix PLUS
Brand: Disan Pages: 50

VSC28A
Brand: CIXI V-MART Pages: 56


