background image

EP2050

Thank you for choosing Minolta.

This operator’s manual explains how to operate the copier and replenish its
supplies. It also gives some troubleshooting tips as well as general precautions to
be observed when operating the copier.

To ensure the best performance and effective use of your copier, read this manual
carefully until you familiarize yourself thoroughly with its operation and features.
After you have read through the manual, keep it for ready reference.
Please use this manual as a quick and handy reference tool for immediately
clarifying any questions which may arise.

1136O053AA

i

Summary of Contents for EP2050

Page 1: ...be observed when operating the copier To ensure the best performance and effective use of your copier read this manual carefully until you familiarize yourself thoroughly with its operation and features After you have read through the manual keep it for ready reference Please use this manual as a quick and handy reference tool for immediately clarifying any questions which may arise 1136O053AA i ...

Page 2: ... Using This Manual Organization viii Page Organization ix Terms and Symbols for the Type of Originals and Copy Paper x Chapter 1 Safety Notes 1 1 Installing The Copier Installation Site 2 Power Source 2 Grounding 2 Space Requirements 3 2 Precautions for Use Operating Environment 4 Using the Copier Properly 4 Care of Copier Supplies 4 Moving 5 ii ...

Page 3: ...eder 17 20 Bin Staple Sorter and Sorter 18 10 Bin Staple Sorter and Sorter 19 Data Controller 20 3 Control Panel Keys and Indicators Basic Panel 22 System Panel 24 Supplementary Panel 26 Display Panel 28 4 Turning On and Off and Resetting The Copier Turning On and Off 30 When Copier is Turned On 31 Auto Copy Start Function 32 Energy Saver Mode 33 Initial Mode and Panel Resetting 34 Auto Reset Func...

Page 4: ...r Mode 62 Special Paper Mode 64 Number of Copies 66 Copy Cycle Start 67 Interrupt Mode 68 Multi Bypass Copying 70 3 System Copying Overview 72 4 System Copying Procedure Original Copy Type Type I 74 Type II 76 Original Count Mode 82 Finishing Mode Finishing Modes 86 Auto Dual Function 88 Selecting the Finishing Mode 90 Typical Finishing Mode 94 5 Supplementary Copying Overview 96 6 Supplementary F...

Page 5: ...es and Indicator Lights 144 2 Detailed Instructions for Messages Indicator Lights Add Toner Indicator 146 Add Paper Indicator 148 Add Staples Indicator 154 Closure Failure Indicator 162 Misfeed Indicator Misfeed Indicator and Monitor Display 166 Misfeed Clearing Procedure Copier 168 Paper Feed Cabinet 172 Duplex Unit 176 Duplexing Document Feeder 178 Automatic Document Feeder 179 Sorter Staple Sor...

Page 6: ...ntrol Panel light up 188 The Message Display shows nothing 188 Pressing The Start Key does not start the copy cycle 188 Control panel keys do not start the copy cycle 188 The Copier is not activated when the Power Switch is turned ON 188 Chapter 7 Specifications 191 1 Copier 192 2 Paper Feed Cabinet 194 3 Duplexing Document Feeder 196 4 Automatic Document Feeder 197 5 20 Bin Staple Sorter 198 6 10...

Page 7: ...cription of Paper Size 216 4 Zoom Ratio Table Original Size to Paper Size 217 5 Index 218 Chapter 1 Safety Notes Chapter 2 First Things to Know about EP2050 Chapter 3 Making Copies Chapter 4 Special Functions Chapter 5 When a Warning Message Appears Chapter 6 Troubleshooting Chapter 7 Specifications Chapter 8 Miscellaneous vii ...

Page 8: ... Overview is p 72 Supplementary Copying Overview is p 96 These pages offer quick at a glance flowcharts for making copies Each step is keyed to a page number where you will find more detailed information Chapter 4 Special Functions About the special functions that can be used for specific purposes Chapter 5 When a Warning Message Appears About the various warning indications given on the Message D...

Page 9: ... the control panel is indicated as follows 1139O4760A 1139O4760A Steady Light p XX Cross reference Shows the page to refer to for more detailed information Index To locate your Chapter quickly Section title Table of contents of the Chapter To quickly locate your page in the Chapter 1076O298 1139O4770A 1139O4770A Blinking Light Using This Manual ix ...

Page 10: ...to the Exit Tray In the figure below the direction in which the copy paper is fed as indicated by the arrow is called the feeding direction Terms and Symbols for the Type of Originals and Copy Paper A few special terms and symbols are used in this manual to designate types of originals and copy paper These two pages explain about these terms and symbols 1139O1702A Using This Manual x ...

Page 11: ...ength A Width B Length Terms and Symbols Used 1139O1610A Lengthwise When the original or copy has a length longer than its width we call it lengthwise and use symbol L or 1139O1620A Crosswise When the original or copy has a length shorter than its width we call it crosswise and use symbol C or Using This Manual xi ...

Page 12: ...xii ...

Page 13: ...ironment conditions and precautions for use 1 Installing the Copier Installation Site 2 Power Source 2 Grounding 2 Space Requirements 3 2 Precautions for Use Operating Environment 4 Using the Copier Properly 4 Care of Copier Supplies 4 Moving 5 Chapter 1 Safety Notes 1 ...

Page 14: ...same power outlet make sure that the capacity of the outlet is not exceeded The outlet should be located near the copier and easily accessible Never connect any other appliances or machines by means of a multiple socket to the outlet being used for the copier If an extension cord is needed use one with a capacity more than the power consumption of the copier Make sure that no unusual excessive for...

Page 15: ... adhere to the recommended space requirements detailed below 1136O163AA 1139O163AA 1 350 150 Scale mm 1136O162AA 1136O162AA 2 165 300 200 1 Installing the Copier Be sure to allow a clearance of 150 mm or more at the back of the copier as there is a ventilation duct NOTE Chapter 1 Safety Notes 3 ...

Page 16: ...ble sprays near the copier NEVER place a vase or vessel containing water on the copier NEVER drop paper clips staples or other small pieces of metal into the copier NEVER attempt to remove any Cover that is secured ALWAYS insert the Power Plug all the way into the outlet ALWAYS make sure that the outlet is visible clear of the copier or copier cabinet ALWAYS ensure that the copier does not ride on...

Page 17: ...n a dry clean environment Store paper which has been removed from its wrapper but not loaded into the Drawer in a sealed plastic bag in a cool dark place Keep supplies out of the reach of children If your hands become soiled with toner wash them with soap and water immediately Moving If you need to transport the copier over a long distance consult your Technical Representative 1 Precautions for Us...

Page 18: ...6 ...

Page 19: ...xing Document Feeder 16 Automatic Document Feeder 17 20 Bin Staple Sorter and Sorter 18 10 Bin Staple Sorter and Sorter 19 Data Controller 20 3 Control Panel Keys and Indicators Basic Panel 22 System Panel 24 Supplementary Panel 26 Display Panel 28 4 Turning ON and OFF and Resetting The Copier Turning ON and OFF 30 When Copier is Turned ON 31 Auto Copy Start Function 32 Energy Saver Mode 33 Initia...

Page 20: ...t are sorted or grouped in addition to the functions provided by the ST 101 1136O059AA 1139O1222A Duplex Unit AD 5 Option Mounted in the 3rd Drawer of the Paper Feed Cabinet it turns over 1 sided copies to make 2 sided copies p 80 Duplex Cabinet PF 2D Option Turns over 1 sided copies to make 2 sided copies It is also equipped with a storage drawer for keeping copy paper and toner p 74 Sorters Opti...

Page 21: ...ts of copy paper 80 g m2 p 152 1139O0010A Duplexing Document Feeder AFR 7 Option In addition to the functions of the AF 3 it can turn over 2 sided originals p 42 EP2050 Equipped with two Paper Drawers to hold up to 500 sheets of copy paper 80 g m2 The Multi Bypass Table allows you to make up to 50 copies on paper which is not loaded in any of the Drawers and which is fed into the copier automatica...

Page 22: ...tch Use to turn the copier ON and OFF p 30 4 Total Counter Shows the total number of copies made so far 5 Right Door Lock Release Lever Operate to open the Right Door 6 Multi Bypass Table Use for manual feeding of paper into the copier p 70 7 Right Door Open to clear a paper misfeed pp 169 171 8 Multi Bypass Extender Slide this Extender out when making copies on large size paper p 70 1 2 8 7 1136O...

Page 23: ...eft Door Lock Release Lever Operate to open the Left Door 13 Front Door Open to Replace the Toner Bottle p 146 Clear a paper misfeed p 168 Clean the Corona Units p 210 Closing the Front Door after a misfeed has been cleared will turn the Misfeed Indicator on the control panel OFF 14 1st 2nd Drawer Each holds up to 250 sheets of paper p 148 2 Copier Parts and Accessories Chapter 2 First Things to K...

Page 24: ...lder Swing open to replace the Toner Bottle 3 Original Width Length Scale Place the original along these Scales for correct positioning p 40 4 Original Pad Holds the original in position on the Original Glass pp 40 208 5 Original Glass Place the original face down on this Glass pp 40 208 2 Copier Parts and Accessories Chapter 2 First Things to Know about EP2050 12 ...

Page 25: ...er is turned OFF 8 Corona Unit Cleaning Lever Upper Lower Operate the Lever to clean the corresponding Corona Unit if unwanted lines are produced on the copy p 210 M2 Transport Section Release Lever Swing down to release the Transport Section p 168 M1 Misfeed Removal Knobs Use to clear a sheet of paper misfed pp 168 169 M3 2 Copier Parts and Accessories Chapter 2 First Things to Know about EP2050 ...

Page 26: ...0 2 4th Drawer PF 202 Holds up to 500 sheets of paper p 150 3 3rd Drawer PF 102 Holds up to 2 500 sheets of paper p 152 4 Paper Descent Key Press before sliding the Drawer out of the copier pp 152 174 5 Lower Right Door Open to clear a paper misfeed 2 Copier Parts and Accessories Chapter 2 First Things to Know about EP2050 14 ...

Page 27: ...sfeed Removal Guide Plate Open to clear a paper misfeed pp 167 176 3 Duplex Unit Turns over 1 sided copies for making 2 sided copies 4 Storage Drawer Holds copy paper toner and other supplies 5 Lower Left Door Open to clear a paper misfeed pp 167 176 2 Copier Parts and Accessories Chapter 2 First Things to Know about EP2050 15 ...

Page 28: ...rom the Document Feed Tray to the Document Exit Tray p 211 5 Lock Release Lever Press upward to raise the AFR 7 6 Document Exit Tray Extender Pull out to make copies on larger paper p 43 Document Feed Unit Door F1 Document Turnover Exit Unit Door F3 Document Turnover Feed Unit Guide Plate F4 Open to clear an original misfeed p 178 F2 Document Turnover Exit Unit Door Lock Release Key F2 Press to op...

Page 29: ... 43 4 Document Release Key Press to clear an original misfeed Holding down the lever pull out the original p 179 5 Document Feed Unit Guide Plate Open to clear an original misfeed p 179 6 Document Transport Belt Moves the original from the Document Feed Tray to the Document Exit Tray p 211 7 Lock Release Lever Press upward to raise the AF 3 8 Document Exit Tray Extender Pull out to make copies on ...

Page 30: ...g up to 50 p 88 3 Lock Release Lever Press to unlock the Sorter 4 Staple Cover Open to replace the Staple Cartridge ST 206 only p 158 5 Staple Cartridge Release Lever Move the Lever up to replace the Staple Cartridge ST 206 only p 158 S Misfeed Removal Guide Plate Open to clear a paper misfeed p 181 2 Copier Parts and Accessories 1136O069AA S Chapter 2 First Things to Know about EP2050 18 ...

Page 31: ... Bins up to 25 copies a maximum of 275 copies p 88 2 Lock Release Lever Press to unlock the Sorter 3 Staple Cover Open to replace the Staple Cartridge ST 101 only p 154 4 Staple Cartridge Release Lever Move the Lever up to replace the Staple Cartridge ST 101 only p 154 3 1 2 4 1139O1080A 2 Copier Parts and Accessories Chapter 2 First Things to Know about EP2050 19 ...

Page 32: ...six different types of cards available Use the right one according to your specific purpose 4 NEXT Key Press to go to the next or previous screen 5 PREV Key 6 Printer Connector Use to hook up an optional printer to the Data Controller 1 2 1074O203 3 4 5 6 2 Copier Parts and Accessories Chapter 2 First Things to Know about EP2050 20 ...

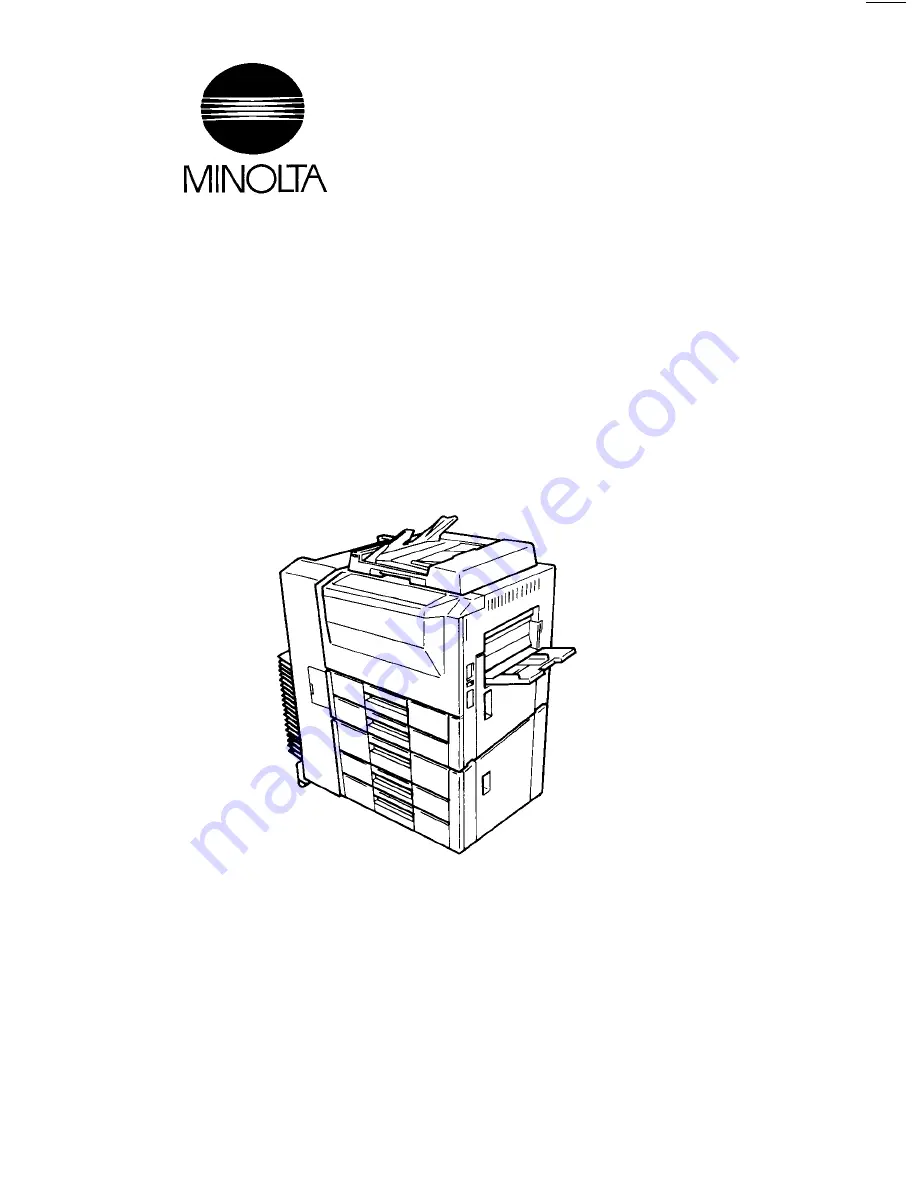
Page 33: ...2 Copier Parts and Accessories Chapter 2 First Things to Know about EP2050 21 ...

Page 34: ...r the Auto or Manual Exposure Mode p 49 6 Exposure Control Key Darker Press as necessary to make the exposure level higher in the Manual Exposure Mode p 49 7 Display Panel See the other pages in this manual p 28 8 Multi Copy Keys Use to enter the number of copies to be made and other numeric data p 66 9 Access Mode Key ID Key Press to enter and leave the Administrator mode The key becomes valid on...

Page 35: ...to Paper Mode p 62 18 Enlargement Key Press to select a desired fixed enlargement ratio p 52 19 Full Size Key Press to select full size 100 p 52 20 Reduction Key Press to select a desired fixed reduction ratio p 52 21 Zoom Up Down Keys Press as necessary to make the zoom ratio larger or smaller in 0 1 increments p 53 22 Message Display Serves as the basic source of information showing such informa...

Page 36: ...hich originals of assorted sizes are loaded together p 44 3 Original Count Mode Key Press to select the appropriate original count mode p 80 4 Original Copy Type Select Key II Press as necessary to select the type of copying job making 1 or 2 sided copies from 1 or 2 sided originals p 83 5 Original Copy Type Select Key I Press as necessary to select the type of 2 in 1 copying job you wish to perfo...

Page 37: ...3 Control Panel Keys and Indicators Chapter 2 First Things to Know about EP2050 25 ...

Page 38: ... 3 Meter Count Key Press to check for each of the current counts of different electronic counters of the copier p 128 4 Memory Input Key Press to store a copying job program or a zoom ratio in the memory p 54 5 Job Memory Select Key Press to recall a copying job program previously stored in the job memory p 126 6 Zoom Memory Select Key Press when storing a zoom ratio in or calling one up from the ...

Page 39: ... 103 12 Book Mode Key Press to set the copier into the Book Copy Mode p 107 13 Drum Dehumidify Key Press to remove condensation formed on the surface of the PC Drum p 131 14 Auxiliary Toner Replenishing Key Press when the image on the copy becomes too light p 130 3 Control Panel Keys and Indicators Chapter 2 First Things to Know about EP2050 27 ...

Page 40: ...e Failure Indicator Indicates that a Door is left open pp 145 162 The location of the Door left open is also indicated by a round marker Example Indicates that the Right Door is left Example open Misfeed Indicator Indicates that a paper misfeed has occurred together with the location of the misfeed pp 145 166 Example Shows that a misfeed has occurred Example inside the copier 1 5 1 2 1136P46OAA 11...

Page 41: ...Counter option is unplugged or Magnetic Card option removed p 145 10 Add Staples Indicator Indicates that the Staple Cartridge is running out of staples Replace the Staple Cartridge as soon as possible pp 145 154 158 11 Toner Collecting Box Full Indicator Indicates that the Toner Collecting Box is full of spent toner Call your Technical Representative as soon as possible once the Indicator has lit...

Page 42: ...ing Copier ON Press the Power Switch to the position 1136O070AA Turning Copier OFF Press the Power Switch to the position 1136O071AA 4 Turning ON and OFF and Resetting the Copier Chapter 2 First Things to Know about EP2050 30 ...

Page 43: ...2 0 Reduce Full size Enlarge A Auto Select Paper Zoom Exposure 1 2 1 2 2 1 1 2in1 1 2 2in1 Orig Copy 2 1 1 2in1 1 2 2in1 Finishing Hole Punch Sort Sort Staple Group Mixed Orng Detect Manual Steple Auto Count Even Odd of Origs 1136P257CA X1 000 AUTO 1136P257CA We call the settings established on the control panel at this time the initial settings p 34 4 Turning ON and OFF and Resetting the Copier N...

Page 44: ...y turns orange 2 4 Turning ON and OFF and Resetting the Copier 1 2 3 4 5 6 7 8 9 0 C x0 5 x2 0 Reduce Full size Enlarge A Auto Select Paper 1136P259CA X1 000 AUTO 1136P259CA As soon as the copier completes warming up the Wait Indicator goes out and the copy cycle is started automatically 1136O190AA Place the Original onto the Original Glass or in the Document Feeder pp 40 43 Chapter 2 First Things...

Page 45: ...xcept the Start Key which remains lit green 1 2 3 4 5 6 7 8 9 0 C Auto Darker A Lighter x0 5 x2 0 Reduce Full size Enlarge A Auto Select Paper Zoom Exposure 1 2 1 2 2 1 1 2in1 1 2 2in1 Orig Copy 2 1 1 2in1 1 2 2in1 Finishing Hole Punch Sort Sort Staple Group Mixed Orng Detect Manual Steple Auto Count Even Odd of Origs X1 000 AUTO 1136P261DA Lit Up Green 1139O2360A Leaving the Energy Saving Mode To...

Page 46: ... C Auto Darker A Lighter x0 5 x2 0 Reduce Full size Enlarge A Auto Select Paper Zoom Exposure 1 2 1 2 2 1 1 2in1 1 2 2in1 Orig Copy 2 1 1 2in1 1 2 2in1 Finishing Hole Punch Sort Sort Staple Group Mixed Orng Detect Manual Steple Auto Count Even Odd of Origs 1136P262CA X1 000 Auto 1136P262CA From 1 sided original to 1 sided copy Sort Non Sort for copiers not equipped with a Sorter Number of copies t...

Page 47: ... Reset Key resets all control panel settings to initial mode including the number of copies to be made and zoom ratio Auto Reset Function If no Key on the control panel is pressed within about 60 seconds after a copy cycle has been completed or copy settings made the Auto Reset Function is activated to cause the copier to return to the initial mode automatically The Auto Reset Function can be enab...

Page 48: ... the 4 digit access number and press the Access Mode Key 1 X1 000 AUTO 1136P396CA The Message Display changes from the Access prompt to initial screen A copy cycle can now start Make your copies as necessary Access 1136P371CA When the copy cycle is completed press the Access Mode Key a second time The Display changes from the normal to the Access prompt screen 2 Do not forget to press the Access M...

Page 49: ... Feeder 42 Image Density 48 Zoom Ratio Types of Zoom Ratio 50 Auto Size Mode 56 Zoom Ratio Table Original Size to Paper Size 58 Paper Size Manual Mode 60 Auto Paper Mode 62 Special Paper Mode 64 Number of Copies 66 Copy Cycle Start 67 Interrupt Mode 68 Multi Bypass Copying 70 3 System Copying Overview 72 4 System Copying Procedure Original Copy Type Types I 74 Types II 76 Original Count Mode 82 Fi...

Page 50: ...1139O0210A 1 2 1 2 2 1 1 2in1 1 2 2in1 Orig Copy 2 1 1 2in1 1 2 2in1 Finishing Hole Punch Sort Sort Staple Group Mixed Orng Detect Manual Steple Auto Count Even Odd of Origs 1 Basic Copying Overview 2 Setting the Image Density Select the Auto Exposure Mode p 49 OR Set the image density in the Manual Exposure Mode p 49 1136P441CA x0 5 x2 0 1136P441CA 3 Selecting the Zoom Ratio Select the Auto Size ...

Page 51: ...d then enter the correct number 6 Starting the Copy Cycle Press the Start Key to start the copy cycle p 67 Press the Stop Key to stop the copy cycle 1136P268CA X1 000 AUTO A Auto Select 1136P268CA 1136 B5 A4 M FEED A4 B4 A5 A Auto Select 1136P269CA 2 3 5 6 8 9 0 C 113 1139O2640A 1139O2360A 1139O2360A 1 2 3 4 5 6 7 8 9 0 C Auto 123 Darker A Lighter x0 5 x2 0 Reduce Full size Enlarge A Auto Select P...

Page 52: ...rear left corner with the marker on the Original Width Scale on the left side of the platen Gently lower the Original Cover 1 2 1139O0070A Place the original in the same way as the sheet originals Place a blank sheet of paper of the same size as the original over the original Then lower the Original Cover Highly Transparent Originals 1 2 If this is not done the copier will not be able to detect th...

Page 53: ...k directly at the Original Glass surface as a very intense beam of light can be emitted NOTES 2 Basic Copying Procedure Be sure to raise the Original Cover 15 or more before placing the original If the Cover is raised only to an angle less than 15 the copier may fail to select the correct copy paper size or zoom raio Do not place an original weighing more than 3 kg on the Original Glass Also you s...

Page 54: ... to 110g m2 2 sided originals 60 to 90g m2 Lightweight Original Mode 40 to 110g m2 Lightweight Original Mode This mode allows you to use originals weighing in the range between 40g m2 and 110g m2 when the copier is in the standard or Mixed Original Detection mode Be sure to use the Original Thickness function of the User s Choice to allow the use of these originals when you need to make copies of ...

Page 55: ... Make sure that the top level of the original stack does not exceed the marking Also make sure that the Document Guide Plates are in touch with the edges of the original stack NOTES 3 Sheet Original 1136O191AA 2 Basic Copying Procedure 1136O193AA Swing the Document Exit Tray back again Pull out the Document Exit Tray Extender if you are using larger paper The copy cycle cannot be initiated unless ...

Page 56: ...th 1 2 Mixed Original Detection Mode Copying Ex Auto Paper Mode Original Stack Copy Stack 1140O277 1 2 1 2 2 1 1 2in1 1 2 2in1 Orig Copy 2 1 1 2in1 1 2 2in1 Finishing Hole Punch Sort Sort Staple Group Mixed Orng Detect Manual Steple Auto Count Even Odd of Origs 1136P251CA You can load originals of different widths and lengths in the AF 3 AFR 7 and make copies automatically Auto Paper Auto Size as ...

Page 57: ...nual Staple Auto Count Even Odd 1136P272CA Press the Mixed Original Detection Mode Key This completes the setting procedure Now make your copies by following the steps given in Basic Copying Overview on p 38 4 1139O0100A Swing the Document Exit Tray back again and pull out the Document Exit Tray Extender 3 2 Basic Copying Procedure Chapter 3 Making Copies 45 ...

Page 58: ...ble Operation on the AF 3 AFR 7 1139O0920A Original Positioning Plate Original Width Scale Raise the AF 3 AFR 7 and place the original face down on the Original Glass Align the rear left corner of the original with the marker on the Original Width Scale Then press the rear edge of the original up against the Original Positioning Plate at the rear side of the Original Glass 1 2 3 1136O170AA Gently ...

Page 59: ...2 Basic Copying Procedure Chapter 3 Making Copies 47 ...

Page 60: ...can be varied by using the User s Choice to suit your needs pp 132 135 The copier has been factory set to automatically select the Auto Exposure Mode The User s Choice can be used to change this default setting to the Manual Exposure Mode pp 132 134 Useful Tips 1136P275CA 1136P275CA In the Manual Exposure Mode you can vary the exposure level to make a copy with a desired image density Manual Expos...

Page 61: ...Exposure Mode Key A is pressed the Manual and Auto Exposure Mode are selected alternately Selecting the Exposure Mode Auto Exposure Mode 1 2 136P278CA Darker A Lighter Exposure 1136P278CA Hold down the Exposure Control Key or until the desired exposure level is reached To make the image darker Press or hold down the Exposure Control Key 1136P279CA Darker A Lighter Exposure 1136P279CA To make the i...

Page 62: ...iate mode according to your needs The selected zoom ratio is shown on the Message Display Auto A3 A4 B4 B5 x0 707 1136P281CA Reduce Full size Enlarge 1136P281CA Three reduction ratios 0 500 0 707 0 816 Three enlargement ratios 1 154 1 414 2 000 And Full Size 1 000 Types of Zoom Ratios Fixed Zoom Ratios Auto x1 500 1136P282CA x0 5 x2 0 Zoom 1136P282CA Any ratio from 50 to 200 in 0 1 increments othe...

Page 63: ...ssary for use in your copying job Up to two different zoom ratios can be stored in memory The following two zoom ratios have been factory set Memory 1 1 000 full size Memory 2 0 930 Zoom Memory 1136P284CA Auto Size AUTO A4 1136P284CA When in this mode the copier automatically selects the zoom ratio based on the original size and copy paper size currently selected for use Auto Size Mode Chapter 3 M...

Page 64: ...3 A4 B4 B5 x0 707 1136P286CA Reduction Each time the Reduction Key is pressed it selects a new reduction ratio 1136P287CA Auto B4 A3 B5 A4 x1 154 Auto x2 000 Auto A4 A3 B5 B4 x1 414 1136P287CA Enlargement Each time the Enlargement Key is pressed it selects a new enlargement ratio 1136P288CA Auto x1 000 1136P288CA Full Size Press the Full Size Key to select full size 1 000 2 Basic Copying Procedure...

Page 65: ...ratio is reached Zoom Down Key makes the ratio smaller Zoom Up Key makes the ratio greater Setting a Zoom Ratio Zoom range 0 500 to 2 000 To save time first select the fixed ratio nearest to the target zoom ratio before using the Zoom Up or Down Key Useful Tip 2 Basic Copying Procedure Chapter 3 Making Copies 53 ...

Page 66: ...ile the Job Memory Select Key LED goes out The Zoom prompt screen appears on the Message Display allowing you to select either one of the two zoom memory locations 2 1136P538C Zoom Input 1 X1 000 2 X0 930 1136P538CA Press the Select Key as necessary to select the memory number Each time the key is pressed the selected number alternates between 1 and 2 3 1136P293CA Display OK 9 0 C 1136P293CA Press...

Page 67: ...ting range From 0 500 to 2 000 Press the Enter Key The initial screen reappears on the Message Display At this time the set zoom ratio has been stored in the specified memory location 1 Select Zoom 1 X1 000 2 X0 930 1136P539CA Press the Select Key as necessary to select the memory number Each time the key is pressed the selected number alternates between 1 and 2 2 1136P433CA OK OK 1136P433AA Press...

Page 68: ... copier automatically selects the correct zoom ratio according to the original size and copy paper size 2 Basic Copying Procedure 1136P297CA AUTO A4 Paper Zoom 1136P297CA Auto appears on the Message Display above the label Zoom 1 Auto Size 1136P540CA Press the Auto Size Mode Key 2 Chapter 3 Making Copies 56 ...

Page 69: ...any of the following conditions The original has been placed on the Original Glass without raising the Original Cover to an angle greater than 15 The required zoom ratio for auto sizing is beyond the range of 50 to 200 When this happens cancel the Auto Size Mode and use the Manual Mode 2 Basic Copying Procedure 3 1136P298CA FLS M FEED A4 B4 A3 A Auto Select 1136P298CA Select the copy paper size p ...

Page 70: ...154 B4 2 000 B5 1 414 Inch Size Original Size Copy Paper Size Zoom Ratio 11 17 11 14 0 823 279 4 431 8 mm Legal 0 772 Foolscap 0 764 Letter 0 647 Invoice 0 500 11 15 11 14 0 933 279 4 381 mm Legal 0 722 Foolscap 0 772 Letter 0 733 Invoice 0 500 11 14 Legal 0 772 279 4 355 6 mm Foolscap 0 772 Letter 0 772 Invoice 0 500 Legal Foolscap 0 928 8 1 2 14 Letter 0 785 215 9 355 6 mm Invoice 0 607 11 17 1 ...

Page 71: ...2 Basic Copying Procedure Chapter 3 Making Copies 59 ...

Page 72: ...the Manual Mode Select the appropriate mode according to your needs The selected copy paper size and the paper source loaded with that paper are indicated on the control panel FLS M FEED A4 B4 A3 A Auto Select 1136P300CA Press the Paper Select Key once The currently selected paper size is indicated by an arrow Example A4 Manual Mode This mode allows you to select the copy paper size and set the zo...

Page 73: ...aper Size Indicators 1136P541CA Each time the Paper Select Key is pressed the lights on the Paper Size Indicator arrow and Paper Source Indicator cycle through the different paper sizes and source locations as shown below 1136P303DA FLS M FEED A4 B4 A3 FLS M FEED A4 B4 A3 FLS M FEED A4 B4 A3 FLS M FEED A4 B4 A3 FLS M FEED A4 B4 A3 1136P303DA 2 Basic Copying Procedure Chapter 3 Making Copies 61 ...

Page 74: ... make copies on paper of the same size as your originals Useful Tip 1136P304CA 2 Basic Copying Procedure This feature is a great advantage when you need to make a large number of copies on the same size paper For example it is possible to make up to 1 000 copies without interruption by using the AF 3 or AFR 7 if the 3rd and 4th Drawers are loaded with paper of the same size and in the same directi...

Page 75: ...e Auto Paper Mode and use the Manual Mode to make copies on a different size paper Zoom Ratio Table Original Size to Copy Paper Size p 58 1136P306CA X1 000 A4 Exact paper size cannot be found 1136P306CA 2 Basic Copying Procedure If the Paper Select Key is pressed in the Auto Paper Mode it automatically cancels the Auto Paper Mode and switches to the Manual Mode The copier has been factory set to a...

Page 76: ...lain S1 paper and using mainly the recycled paper you may set the plain paper for S1 S1 Then the copier excludes the plain paper when selecting paper size in S1 the Auto Paper Mode S2 This setting precludes both Auto Paper Mode and Automatic Drawer S1 Switching S3 This setting blocks 2 sided copying S1 Again it is sensible of you to set the used 1 sided copy paper for the S3 S1 setting The Drawer ...

Page 77: ...2 Basic Copying Procedure Chapter 3 Making Copies 65 ...

Page 78: ...g the Number of Copies 1136P142AA 1136P142AA Example To make 18 copies press Key and in that order The Multi Copy Display now shows 18 1 2 3 4 5 6 7 8 9 0 C 1139O2620A To correct or reset a number entry press the Clear Key The Multi Copy Display is reset to 1 Correcting the Number Entry 1136P144AA 1136P144AA 2 Basic Copying Procedure Chapter 3 Making Copies 66 ...

Page 79: ...r A Lighter x0 5 x2 0 Reduce Full size Enlarge A Auto Select Paper Zoom Exposure 1136P273DA 2 Basic Copying Procedure 1139O2360A 1139O2360A Check the control panel to make sure that you have set up your copy job correctly Press the Start Key if it is green The Start Key turns orange when the copy cycle starts In a multi copy cycle the number on the Multi Copy Display is decreased by 1 each time a ...

Page 80: ...will be resumed as soon as the Interrupt Mode is canceled Interrupt 1139O2602A 1139O2602A Press the Interrupt Key The Key may be pressed even while the current job is in progress Interrupting a Copy Cycle The Interrupt Key lights up and the message Copy job has been canceled appears After a short time the current copy cycle stops 1 2 Enter the control panel settings for the interrupt job and press...

Page 81: ...lear Key If the current job involves the Sort Group or Sort and Staple Mode only Non Sort mode can be selected in the Interrupt Mode The copier does not accept an Interrupt mode if the 2 sided copying Cover Page Insertion or OHP Interleaving has previously been selected If the copier is in an Interrupt mode 2 sided copying Cover Page Insertion or OHP Interleaving is not accepted NOTES 2 Basic Copy...

Page 82: ...g m2 Transparencies translucent paper Paper Size Width 100 to 297mm Length 140 to 432mm Capacity Plain paper blank 50 sheets or less Plain paper 1 sided copies 20 sheets or less Heavyweight paper transparencies translucent paper 20 sheets or less 2 Basic Copying Procedure 1139O0130A Place the original on the Original Glass and make the control panel settings Swing down the Multi Bypass Table and s...

Page 83: ...u are using heavyweight paper NOTES 1139O2360A Set the number of copies to be made and press the Start Key to start the copy cycle 4 Do not insert the paper while the copier is in the warm up cycle or a multi copy cycle The Auto Paper Auto Size 2 Sided Copy Margin by Reduction Erase Modes or any of the Finishing Modes cannot be selected for multi bypass copying NOTES 2 Basic Copying Procedure Chap...

Page 84: ...e zoom ratio p 50 Select the copy paper size p 60 Set the number of copies to be made p 66 1 2 1 2 2 1 1 2in1 1 2 2in1 Orig Copy 2 1 1 2in1 1 2 2in1 1136P308CA 1 2 1 2 2 1 1 2in1 1 2 2in1 Orig Copy 2 1 1 2in1 1 2 2in1 1136P309CA 1 2 1 2 2 1 1 2in1 1 2 2in1 Orig Copy 2 1 1 2in1 1 2 2in1 Finishing Hole Punch Sort Sort Staple Group Mixed Orng Detect Manual Steple Auto Count Even Odd of Origs Chapter ...

Page 85: ...e copy cycle p 67 Press the Stop Key to stop the copy cycle 3 System Copying Overview Finishing Hole Punch Sort Sort Staple Group 1136P311CA Finishing Hole Punch Sort Staple Group Sort 1136P312CA 1136P313CA 1 2 3 4 5 6 7 8 9 0 C Auto 123 Darker A Lighter x0 5 x2 0 Reduce Full size Enlarge A Auto Select Paper Zoom Exposure 1136P310DA Chapter 3 Making Copies 73 ...

Page 86: ...sided 2 sided 1 sided Type II 1 sided 1 sided 2 in 1 1 sided 2 sided 2 in 1 1 sided 2 in 1 1 sided 2 sided 2 in 1 1 sided Select the appropriate Orig Copy type 1 sided 2 sided 2 sided 2 sided 1136P428AA 1136P204AA Originals Copies 1 sided 1 sided Select this type to make 1 sided copies from 1 sided originals No LEDs on the Orig Copy panel are lit up while 1 1 is selected Original Copy Type Type I ...

Page 87: ...r of originals you have either even or odd Let the copier perform the original count sequence using the Original Count Mode Key p 83 NOTE 1136P427AA 1136P206AA Original Copies 2 sided 1 sided Select 2 1 to make 1 sided copies from 2 sided original s 1136P207AA Original Copy 1136P207AA 2 sided 2 sided Select 2 2 to make 2 sided copies from 2 sided originals 4 System Job Setting Chapter 3 Making Cop...

Page 88: ... 2 in 1 copy onto two separate sheets of paper each copy containing different parts of the original 1136P208AA 1136P208AA Originals Copy 1 Sided 1 sided 2 in 1 2 in 1 copy Select 1 1 2in1 to make a 1 sided 2 in 1 copy The copier copies through reduction the texts images of two different originals onto one side of a single sheet of paper This saves one sheet of copy paper 1 sided originals 2 in 1 c...

Page 89: ...h sides of a single sheet of paper each side containing the texts images of two different originals This saves three sheets of copy paper The copier has to know whether it needs to make the odd page correction depending on the number of originals you have either even or odd Let the copier perform the original count sequence using the Original Count Mode Key p 83 NOTE 4 System Job Setting Chapter 3...

Page 90: ...opier copies through enlargement the texts images of a 2 sided original which is the result of a 2 sided 2 in 1 copy onto one side of four separate sheets of paper each copy containing different parts of the original 4 System Job Setting The 2 in 1 functions can be selected only when the copier is equipped with a Duplexing Document Feeder AFR 7 and not an Automatic Document Feeder AF 3 Be also sur...

Page 91: ...4 System Job Setting Chapter 3 Making Copies 79 ...

Page 92: ... newly selected type indicator lights as shown If there are no lights 1 sided 1 sided is set Type I 1 1136P316CA No lights 1 1 1 2 1 2 2 2 1136P316CA Auto Count Even Odd of Origs 1136P317CA 1136P317CA If you have selected 1 2 use the Original Count Mode to let the copier perform an original count sequence Original Count Mode p 83 This completes the selection of Orig Copy Type I 2 4 System Job Sett...

Page 93: ...type indicator lights as shown below Type II 1136P542CA 1 1 2in1 1 2 2in1 1 1 2in1 1 2 2in1 1 1 No lights 1136P542CA Auto Count Even Odd of Origs 1136P317CA 1136P317CA If you have selected 1 1 2in1 or 1 2 2in1 use the Original Count Mode to let the copier perform an original count sequence Original Count Mode p 83 This completes the selection of Orig Copy Type II 1 4 System Job Setting Chapter 3 M...

Page 94: ... page beside page 1 on the last copy See below The Copier Makes No Odd Page Correction The Copier Makes an Odd Page Correction Select either one of the following three functions to let the copier perform the original count sequence Auto Count The copier counts the number of originals loaded onto the AFR 7 to determine whether the number is odd or even If the number is odd the copier automatically ...

Page 95: ... Tray Then press the Start Key The copy cycle is run in the Orig Copy type selected 5 Be sure to perform the original count sequence after you have selected the Orig Copy type NOTE 2 1 2 2 Orig Copy 1 1 2in1 1 2 2in1 1136P320CA Using the Original Count Mode 1136P320CA Select the Orig Copy type p 80 Press the Original Count Mode Key to select the appropriate function according to the number of orig...

Page 96: ... originals Load the originals crosswise If the originals are loaded lengthwise the directions of the copy images will be mixed up Correct 2 Sided Originals Loaded Crosswise 1 Sided Copies 1139O1120A Incorrect 2 Sided Originals Loaded Lengthwise 1 Sided Copies 1139O1130A 4 System Job Setting Chapter 3 Making Copies 84 ...

Page 97: ...copier has completed the first copy cycle of a 2 sided copying cycle there are one or more 1 sided copies stored in the Duplex Unit If you want to cancel the 2 sided copying mode at this point these 1 sided copies must be fed out of the Duplex Unit and copier onto the Copy Tray 1136P5 Press the Start Key to eject all the copies at 1136P543CA Press the Panel Reset Key The message on the Message Dis...

Page 98: ...stapled If there are no Finishing Mode Lights lit the Non Sort Mode is set Finishing Modes Finishing Modes Sort 1st Bin Originals 2nd Bin 3rd Bin Copies Copies 1076O146 Copies In the Sort Mode copies are sorted into complete sets of the originals Copies are fed into the Sorter Bins This mode is effective when making multiple copies from multiple originals Sort and Staple Originals Copies 1076O149 ...

Page 99: ...copies made in the Non Sort Only when the copier is equipped with a Staple Sorter 1st Bin 3rd Bin Copies Originals 2nd Bin Copies Copies 1136O171CA Hole Punch This mode allows you to have holes punched for filing the copy sets made in the Non Sort Sort Group or Sort and Staple Mode Only when the copier is equipped with a Staple Sorter ST 206 4 System Job Setting The copier has been factory set to ...

Page 100: ... Sorter is automatically switched into the Auto Dual Function Mode using the 11th 6th to 20th 10th Bins Copies Bins in Use 1st to 50th 25th sorted copies Top or 1st to 10th 5th Bins 51st 26th to 100th 50th sorted copies 11th 6th to 20th 10th Bins If the number of copies selected exceeds 10 5 the new copy cycle stops at the 50th 25th original Auto Dual Function Each of the Sorter Bins holds up to 5...

Page 101: ...uping the copies Original Copies Bins Used 1st 1st to 50th 25th copies 1st Bin 51st 26th and subsequent copies 2nd Bin 2nd to Nth Same way up to 20th 10th Example Separating copies made from 2 different originals into two groups when each group contains 35 copies by using the 10 Bin Sorter Copies of 1st original Top Bin 25 2nd Bin 10 Copies of 2nd original 3rd Bin 25 4th Bin 10 2 Originals Separat...

Page 102: ... the S 205 and ST 206 and 25 for the S 104 and ST 101 NOTE If this capacity is exceeded the Remove Copies Indicator lights up on the control panel and the Start Key turns orange inhibiting the initiation of a new copy cycle 1139O3400A 4 System Job Setting Manual Staple 1139O2732A 1139O2732A To staple copies after they have been made Make sure that each copy set or stack has been fed into the Sorte...

Page 103: ...is invisible from the outside at the front right corner in the Bin Up to 50 sheets 80g m2 of paper can be stapled for the ST 206 and 25sheets 80g m2 for ST 101 Never attempt to reach the stapling position in the Bin with your hand This can be very dangerous NOTES 20 Bin Staple Sorter Sort Bins 4 System Job Setting 3 This feature is efficient for stapling originals after making copies Useful Tip 11...

Page 104: ...hat the stapling position marked with is positioned as shown Original Direction and Stapling Position 4 System Job Setting Correct Originals Loaded Crosswise Copy Set Stack Stapled at Top Left Corner Stapling Position 1139O1160A Corner You Want to Staple Stapling Position Incorrect Originals Loaded Lengthwise Copy Set Stack Stapled at Top Right Corner 1139O1170A Stapling Position Stapling Position...

Page 105: ...4 System Job Setting Chapter 3 Making Copies 93 ...

Page 106: ...rting copies into 2 copy sets and having them Example stapled manually Group Possible Example Separating copies into 3 groups each group Example containing 2 copies and having each stapled Example manually OK Original Set Copy Stack 1076O154 4 System Job Setting Typical Finishing Mode Copy Stacks Original Set Manual Stapling 1140O076 OK Chapter 3 Making Copies 94 ...

Page 107: ...es into 2 copy sets Sort Hole Punch Group Hole Punch Sort Staple Hole Punch Possible Example Sorting or separating copies into 2 sets stacks Example punching holes in them and then having each Example stapled manually OK 4 System Job Setting Punched Copies Copy Sets Sorted Stapled Copy Sets 1136O172CA Original Set Chapter 3 Making Copies 95 ...

Page 108: ...ing Overview 2 Selecting the Erase Mode p 100 4 Selecting the Book Mode p 107 3 Selecting the Margin Mode p 103 1136P323CA Erase 1 Erase 2 Erase 3 Erase 4 1136P323CA 1136P324CA Margin 1 Margin 2 1136P324CA Book 1 Book 2 1136P325CA 1136P325CA Input Job Memory Zoom Memory Auto Size Meter Count Toner Book 1 OHP Inter leaving Page Insertion Cover Front Book 2 Margin 1 Margin 2 Erase 1 Erase 2 Erase 3 ...

Page 109: ...CA Job Memory Zoom Memory 1136P328CA 1136P115AA 1136P115AA 1136P329CA 1 2 3 4 5 6 7 8 9 0 C Auto 123 Darker A Lighter x0 5 x2 0 Reduce Full size Enlarge A Auto Select Paper Zoom Exposure 1136P329DA 7 Selecting the Job Program Memory Calling Up a Program p 126 OR Store a job program into memory p 125 Input 1136P29 1136P290CA 8 Starting the Copy Cycle Press the Start Key to start the copy cycle p 67...

Page 110: ...ar margin area to prevent shadows from being produced even if 2 sided originals of a landscape format with punch holes are fed through the AFR 7 The erase width is 10 mm 6 Supplementary Function Setting 1136P330CA Input Job Memory Zoom Memory Auto Size Meter Count Toner Book 1 OHP Inter leaving Page Insertion Cover Front Book 2 Margin 1 Margin 2 Erase 1 Erase 2 Erase 3 Erase 4 Display OK Drum Dehu...

Page 111: ...ctive for example when making a copy from a document received by fax The erase width is 10 mm 1136P216AA 1136P216AA Original Book Copy Erase 4 Center Erase The copier erases a set width at the center to prevent shadows from being produced when a copy is made from for example an open thick book The erase width can be either 10 mm 15 mm or 20 mm Chapter 3 Making Copies 99 ...

Page 112: ...EDs Lights Up Erase 1 Erase 2 Erase 3 Erase 4 1136P335CA 1136P333CA Display OK 1136P333CA If you have selected Erase 1 or 4 a screen that allows you to select the margin width appears on the Message Display Press the Select Key as necessary to select the desired erase width Each time the Key is pressed the cursor in the Message Display moves to a new erase width as follows 10 mm 15 mm 20 mm 2 1136...

Page 113: ...1136O116AA 1136O120AA 1136O117AA 1136O121AA 1136O118AA 1136O122AA 1136O119AA 1136O123AA Erase Mode On Original Glass Using AF 3 AFR 7 Erase 1 Punch Hole Erase I Erase edge on the right Erase edge on the left Erase 2 Punch Hole Erase II Erase edge in the rear Erase edge in the rear Erase 3 Frame Erase Edges aligned with Original Scales Originals positioned on the Document Feed Tray Erase 4 Center E...

Page 114: ... one that is most suited to your need 1136P218AA 1136P218AA Original Copy Margin 1 Shift for Margin The image of the original which has almost no file margins along the sides is shifted in the crosswise direction to make a margin The margin width can be selected from among 10 mm 15 mm and 1136P222AA 1136P222AA Original Copy Margin 2 Reduce for Margin The image of the original which has almost no f...

Page 115: ...A screen that allows you to select the margin width appears on the Message Display Press the Select Key as necessary to select the desired margin width Each time the Key is pressed the cursor in the Message Display moves to a new margin width as follows 10 mm 15 mm 20 mm 2 Erase width 10mm 15mm 20mm 1136P332DA 1136P340CA Display OK 1136P340CA Press the Enter Key to validate the selection of margin...

Page 116: ... 1 Shift for Margin could result in part of the image missing on the copy Try to keep a logical margin width NOTE Loading the Originals in Margin Mode On Original Glass Using the AF 3 AFR 7 Margin side on the right Margin side on the left 1136O126AA 1136O127AA Chapter 3 Making Copies 104 ...

Page 117: ...6 Supplementary Function Setting Chapter 3 Making Copies 105 ...

Page 118: ...mory Zoom Memory Auto Size Meter Count Toner Book 1 OHP Inter leaving Page Insertion Cover Front Book 2 Margin 1 Margin 2 Erase 1 Erase 2 Erase 3 Erase 4 Display OK Drum Dehumidify Cover Front Back 1136P330CA You may want to fit each page of an open book onto a separate sheet The copier provides two different Book functions to choose from Select one that best suits yours need 6 Supplementary Funct...

Page 119: ...Book Function Press the Book Mode Key to select the desired book function Each time the Key is pressed a new book function is selected as indicated by a lit LED This completes the setting of the Book Mode 1136P342CA Book 1 Book 2 None of Two LEDs Light Up 1136P342CA Chapter 3 Making Copies 107 ...

Page 120: ...rgo a copy process 1136P330CA Input Job Memory Zoom Memory Auto Size Meter Count Toner Book 1 OHP Inter leaving Page Insertion Cover Front Book 2 Margin 1 Margin 2 Erase 1 Erase 2 Erase 3 Erase 4 Display OK Drum Dehumidify Cover Front Back 1136P330CA Cover Mode lets you make a front cover or a front and back cover for a copy set by copying the first page or the first and last page of an original s...

Page 121: ...fter the copy set The cover sheets do not undergo a copy process The copier must be equipped with the Automatic Duplexing Document Feeder AF 3 AFR 7 Cover cannot be combined with the 2 in 1 separation OHP Interleaving or Book NOTES 1136O130AA Original Set Copy Set Cover Cover Cover Front Back Copied Cover The first and last pages of the original set are copied onto a different type of paper Chapte...

Page 122: ...s pressed the cursor moves to a new option as follows YES NO 2 Copy an image on the Cover YES NO 1136P397CA 1136P345CA Display OK 1136P345CA Press the Enter Key to validate your selection A prompt about the number of originals you have appears on the Message Display Different messages appear depending on whether the copier is equipped with an AFR 7 or AF 3 3 of originals Auto Count 10 key Input 11...

Page 123: ... onward on next 10 Key Input page 4 Load originals onto the Document Feeder 1136P400CA When you have selected Auto Count 5 1136P115AA 1136P115AA 1139O0110A Load your originals onto the AFR 7 Original Placement p 43 Press the Start Key to start the original count sequence The AFR 7 starts feeding the originals loaded onto it to count the number of originals At this time no copy cycle is run Unload ...

Page 124: ... screen reappears on the Message Display and this completes the setting 6 1139O0140A Place the paper for covers on the Multi Bypass Table Copies of pages other than the cover are made on the paper loaded in the Drawer currently selected for use Multi Bypass Copying p 70 Loading the Paper for Covers Be sure to load the paper for covers onto the Multi Bypass Table No cover mode copy can be made unle...

Page 125: ...6 Supplementary Function Setting Chapter 3 Making Copies 113 ...

Page 126: ...make a number of copies each from several different originals Page Insertion allows you to insert a blank sheet of paper colored paper between the copy stacks Two different functions are available Select the appropriate insertion function according to your need Load the paper for inserts onto the Multi Bypass Table NOTE 1136P330CA Input Job Memory Zoom Memory Auto Size Meter Count Toner Book 1 OHP...

Page 127: ...ize different from the originals at your desired places in the original set for convenience let us call this paper the insert setting paper load the original set onto the AFR 7 and let the copier start the original count sequence This allows the copier to detect the places for inserts 1136O135AA Original Set Copy Set 10 Key Input Ex 2nd from page 1 Copied Insert Non Copied Insert Insert Insert 10 ...

Page 128: ...Original Set Copy Sets Multi Copy Entry 3 Copy Copied Interleaves OHP Multiple Copy Only when the copier is equipped with an ST 206 or S 205 The copier sorts copies into the specified number of sets of originals The first set of copies are on OHP transparencies and the remaining sets are on the normal copy paper The copier interleaves the first copy set with copies made on normal paper Chapter 3 M...

Page 129: ...s and the remaining sets are on the normal copy paper The copier interleaves the first copy set with blank sheets of normal paper A multi copy cycle of OHP Interleaving is not possible on a copier system equipped with an ST 101 or S 104 A multi copy cycle of OHP Interleaving accepts only the Sort Mode Load the OHP transparencies onto the Multi Bypass Table The A4 copy paper loaded in any Drawer is...

Page 130: ...our selection Then a screen allowing you to select the method to define where to put inserts appears on the Message Display Select Auto Detection using the Select Key and press the Enter Key to validate that selection Then the message Load originals into the Document Feeder appears on the Message Display Sheet Placement Auto Detection 10 Key Input 1136P384CA 1 3 2 1136O140AA 1 2 3 4 5 1136O140AA P...

Page 131: ...e for inserts At this time no copy cycle is run Remove the insert setting paper from the originals ejected onto the Document Exit Tray 1136O142AA Insert Setting Paper 5 6 7 1136O143AA Unload the original set and reload it onto the Document Feed Tray 8 1139O140AA Load the paper for inserts onto the Multi Bypass Table Multi Bypass Copying p 70 Press the Start Key The copy cycle is run for page inser...

Page 132: ...e Enter Key to validate your selection Then a screen allowing you to select the method to define where to put inserts appears on the Message Display Select 10 Key Input using the Select Key and press the Enter Key to validate that selection Then the message Input the number of originals appears on the Message Display Using the Multi Copy Keys enter the number of originals you have and press the En...

Page 133: ...ng you to enter the place for another insert no 2 appears on the Message Display Repeat steps 5 and 6 to set as many places for inserts as desired up to 20 6 7 Insert Sheet 2 before Original 1136P388CA Press the Enter Key to validate the settings for inserts The initial screen reappears on the Message Display and this completes the setting for Page Insertion by 10 Key Input 8 Display OK 1136P349CA...

Page 134: ... a new option as follows YES NO Display OK 1136P348CA 2 1136P350CA OHP Inter leaving Page Insertion 1136P350CA Press the Insertion Mode Key to select OHP Interleaving The Message Display then asks you if you want a copied interleaf 1 Display OK 1136P349CA Press the Enter Key to validate your selection The initial screen reappears on the Message Display 3 Chapter 3 Making Copies 122 6 Supplementary...

Page 135: ...cycle of OHP Interleaving is not possible on a copier system equipped with an ST 101 NOTE 1139O014CA Load the originals onto the AFR 7 and load the transparencies onto the Multi Bypass Table Original Placement p 43 Multi Bypass Copying p 70 5 1136P115AA Press the Start Key The copy cycle is run for OHP interleaving 6 Chapter 3 Making Copies 123 6 Supplementary Function Setting ...

Page 136: ...ode Manual exposure level Orig Copy Type Finishing Mode Mixed Original Detect Erase Mode File Margin Mode Book Mode Cover Mode Insertion Mode The number of originals and the places of inserts are not stored for the Cover and Page Insertion mode Only the Auto function is stored Cover Auto Count p 111 Insertion Auto Detection p 118 NOTE 1136P330CA Input Job Memory Zoom Memory Auto Size Meter Count T...

Page 137: ... the Key is pressed the cursor moves to a new number 4 If you have set up the job inappropriately or if you want to change it to a new one repeat steps 1 through 4 1136P430AA OK OK 1136P430AA Press the Enter Key This stores the job program in the specified memory number 5 Input 1136P290CA 1136P290CA Make the necessary control panel settings for the job to be stored in memory Press the Memory Input...

Page 138: ...A OK OK 1136P430AA Press the Enter Key The selected program is now recalled from memory and set up on the control panel 3 1136P351CA Job Memory Zoom Memory 1136P351CA Press the Job Memory Select Key on the control panel A screen appears on the Message Display to allow you to call up a program from the memory 1 To recall the Job Chapter 3 Making Copies 126 6 Supplementary Function Setting ...

Page 139: ...ns about the special functions that can be used for specific purposes 1 Meter Count Function 128 2 Auxiliary Toner Replenishing Mode Increasing the Image Density 130 3 Drum Dehumidify Function 131 4 User s Choice 132 Chapter 4 Special Functions 127 ...

Page 140: ... Counters Total Counter Shows the total number of copies made since the installation of the copier Size Counter Shows the number of copies made on paper of a size preset by the Technical Representative 2 Sided Total Counter 2 Total Shows the number of 2 sided copies made Activated only when the copier is equipped with the Duplex Unit 2 Sided Size Counter 2 Size Shows the number of 2 sided copies m...

Page 141: ...eter Count 1136P353CA With the counts of the 2 Sided Total and 2 Sided Size Counters displayed press the Meter Count Key This restores the copier to the state before entering the Meter Count function 3 1 Meter Count Function Meter Count Total 370553 Size 17320 Meter Count 2 Total 5810 2 Size 823 1136P402CA Ex Total Counter count 370 553 copies Size Counter count 17 320 copies Ex 2 Sided Total Coun...

Page 142: ...Drum Dehumidify Cover Front Back 1136P354CA The copier tends to exhaust the supply of toner rapidly when making a number of copies from an original with dark solid areas As a result the image density of the copy will become lighter In such a case you can set the copier into the Auxiliary Toner Replenishing Mode Original Copy Copy Made After Auxiliary Toner Replenishing Even if you continue making ...

Page 143: ...humidify 1 Condensation A phenomenon in which small drops of water are formed on cold surfaces such as the surface of the PC Drum 2 PC Drum Functions in the copier as film in a camera 1136P358CA Press the Drum Dehumidify Key This sets the copier into the Drum Dehumidify Mode which lasts for 3 minutes Make a copy to check that the copy image is clear Run the Drum Dehumidify cycle once again if the ...

Page 144: ... for the paper size zoom ratio and other settings that are most frequently used time and effort to make extra settings will be eliminated when the copier is turned ON or when the auto reset function is activated For more details consult your Technical Representative Book Mode Enter Press and hold key for 3 seconds Quit Press key Language Select Security Mode Drum Dehumidity Special Paper Tray Prio...

Page 145: ...s in addition to the standard ones or not Standard when he she make copies using the Duplexing Automatic Document Feeder AFR 7 AF 3 The initial setting is Standard Copy Mode Priority Specifies the priority mode selected automatically in the initial mode either Auto Paper Auto Size or Manual The initial setting is A Paper Auto Paper 4 User s Choice Language Select German English French Dutch Langua...

Page 146: ... between EXP1 to 9 level set after Auto is canceled Manual The exposure level can be set ranging between EXP1 to 9 Use the Exposure Control Keys Lighter Darker to set the exposure level in the Manual Exposure Mode The initial setting is Auto Exposure and EXP5 for the priority exposure level in the Manual Exposure Mode as it is selected when the Auto Exposure Mode is canceled Paper Pr 2 A4 1 A4 3 A...

Page 147: ...he copier has been set so that the Manual Exposure Mode is selected in the initial mode Mode 1 For users who frequently use originals with halftone images such as photos Mode 2 For users who use a wide range of types of originals Mode 3 For users who frequently use originals with a colored background or faint text The initial setting is Mode 1 Sorter Priority Non Sort Sort Group Staple 1136P409CA ...

Page 148: ...ent Feeder Condition The copy cycle is initiated using a single original in the Sort Mode The copy cycle is initiated to make two or more copies using two or more originals in the Non Sort Mode The initial setting is YES Energy Saver Selects whether to set YES the copier into the Energy Saving Mode after a given time after a copy cycle has been completed or a Key operated or not NO The time it tak...

Page 149: ...nto the Drum Dehumidify Mode automatically as soon as the copier completes warming up with the Wait Indicator going out or not NO The initial setting is NO Special Paper Sets up a Drawer for special paper loading S1 S2 and S3 For this setting use the Multi Copy Keys See p 64 for the Special Paper Mode S1 S2 S3 The initial setting is that the Drawers are not set for special paper loading S0 4 User ...

Page 150: ...your own data Only 10 mm is available for Erase and Margin The initial settings are as follows Paper Auto Zoom 0 707 Margin 0 none Erase 0 none Custom Book It is possible to store in memory various settings that are automatically called up when the Book mode is selected Setting Procedure Paper Use the Paper Select Key to make your own setting Zoom Use the Reduction Full Size or Enlargement Key to ...

Page 151: ...make your own setting Zoom Use the Reduction Full Size or Enlargement Key to make your own setting Erase Margin Use the appropriate Multi Copy Keys to set your own data Only 10 mm is available for Erase and Margin The initial settings are as follows Paper Auto Zoom 1 414 Margin 0 none Erase 0 none Administrator This mode is used only by the administrator of the EP2050 copier The Administrator menu...

Page 152: ...dity Special Paper Tray Priority Exposure Priority Mixed Orig Detect Original Thickness Intelligent Sort Energy Saver Mode Auto Panel Reset Copy Mode Priority Finishing Priority Auto Exp Level Manual Exp Adjust Counter Removal Separation User s Choice Card 2in1 2in1 OK Enter Press and hold key for 3 seconds Quit Press key Custom 1136P443CA Press the appropriate key on the control panel to make you...

Page 153: ... 10 minutes in 1 minute increments 4 User s Choice Energy Saver YES min NO Message Display 1136P552CA If you have entered awrong number press the Clear Key then enter the correct one NOTE Energy Saver YES 1min NO Message Display 1136P551CA Book Mode Language Select Security Mode Drum Dehumidity Special Paper Tray Priority Exposure Priority Mixed Orig Detect Original Thickness Intelligent Sort Ener...

Page 154: ...nel Reset Key This terminates the User s Choice and the initial screen reappears on the Message Display Remove the User s Choice Card 7 Store the User s Choice Card in a safe place NOTE 4 User s Choice 8 Chapter 4 Special Functions 142 ...

Page 155: ...ference for Warning Messages and Indicator Lights 144 2 Detailed Instructions for Messages Indicator Lights Add Toner Indicator 146 Add Paper Indicator 148 Add Staples Indicator 154 Closure Failure Indicator 162 Misfeed Indicator Misfeed Indicator and Monitor Display 166 Misfeed Clearing Procedure Copier 168 Multi Bypass Table 171 Paper Feed Cabinet 172 Duplex Unit 176 Duplexing Document Feeder 17...

Page 156: ... operator s intervention during a copy cycle The following table explains the most important warning conditions You will find more detailed procedures on the page referenced in the Action column Warning Indicators Messages Indicator Message Copier State Action Wait Indicator The copier is warming up Copy cycle cannot be initiated while the Wait Indicator remains lit Wait until the Wait Indicator g...

Page 157: ...the steps given in the Add Staple Indicator section pp 154 158 A regularly scheduled preventive maintenance call becomes necessary Note A copy cycle can still be initiated Call your Tech Rep immediately The copier has developed a technical malfunction If the Call Tech Rep Indicator remains lit even after you have reset it call your Technical Representative p 182 The Plug In Counter is unplugged Pl...

Page 158: ...ator lights up Once it has lit up replace the Toner Bottle with a new one as soon as possible by following the procedure given below Add Toner Indicator Copying possible 1136P51OAA Add toner MT Toner 201B When the Toner Bottle has run out of toner the message shown on the left appears on the Message Display and the copier inhibits the initiation of a new copy cycle A new copy cycle can be initiate...

Page 159: ...as possible once the message has appeared and the Add Toner Indicator has lit up Continuing to make copies without changing the Toner Bottle will result in increasingly lighter images Use ONLY MT Toner 201B for the EP2050 copier Using any other Toner could result in image trouble NOTES Use the Auxiliary Toner Replenishing Mode if the image is light immediately after replacing the Toner Bottle with...

Page 160: ...ng procedure to load paper into the Drawer Adding Paper 1st 2nd Drawer Add Paper Indicator 1136P11OAA Monitor Display 1136P110AA 1 Add Paper Indicator The indications on the left show that the 1st Drawer has run out of paper 1136P350AA 1136O159AA 1136O159AA Slide out the 1st Drawer Back Side Front Side 1139O1370A Unwrap the package of copy paper and fan the paper stack thoroughly 1 2 2 Detailed In...

Page 161: ...Press down the right hand side of the paper stack loaded in the Drawer Then check that the paper stack rests under the two catches at the front and rear of the Drawer 2 Detailed Instructions for Messages Indicator Lights Use the same procedure for the 2nd Drawer NOTE The paper should be loaded no higher than the Max Level Indicator on the Edge Guide 1139O0450A 1136O147AA Slide the Drawer back in 4...

Page 162: ...er 1 Back Side Front Side 1139O1370A Unwrap the package of copy paper and fan the paper stack thoroughly 2 1139O1340A Load the paper stack into the Drawer so that its front side faces down 3 2 Detailed Instructions for Messages Indicator Lights NOTE Slide the Drawer back in The paper should be loaded no higher than the Max Level Indicator 1139O0450A Use the same procedure for the 4th Drawer Chapte...

Page 163: ...2 Detailed Instructions for Messages Indicator Lights Chapter 5 When a Warning Message Appears 151 ...

Page 164: ... Light The 3rd Drawer has run out of paper when a drawer other than the 3rd is currently selected for use Indication of the Paper Descent Button 1139O4930A 1139O4940A 1139O1552A Press the Paper Descent Button This unlocks the 3rd Drawer allowing you to slide it out of the copier Use the same procedure when you want to add additional paper or change the paper size 1 Front Side Back Side 1139O1370A ...

Page 165: ...acing its front side down Press the trailing edge of the paper stack tightly up against the left edge of the Drawer 3 4 1139O1512A Slide the Drawer back in NOTE The paper should be loaded no higher than the Max Level Indicator 1139O0470A NOTE The paper should be loaded no higher than the Max Level Indicator 1139O0470A 5 2 Detailed Instructions for Messages Indicator Lights 1139O1542A Press the Pap...

Page 166: ...lacing the Staple Cartridge for ST 101 1139O0490A Holding the Lock Release Lever of the Staple Sorter slide the Staple Sorter away from the copier 1 1136O003AA Open the Staple Cover While lifting the Staple Cartridge Release Lever pull the Staple Cartridge out of its port 1139O0970A Pull the staple sheet about 3 cm out of the new Staple Cartridge and break off that portion 2 4 2 Detailed Instructi...

Page 167: ...TE 1139O1440A Insert the new Staple Cartridge until a click is heard 5 1139O0650A Close the staple Cover and slide the Staple Sorter back against the copier 6 2 Detailed Instructions for Messages Indicator Lights 1139O1320A Place a sheet of paper into the Top Bin of the Staple Sorter 7 1136O009AA Top Bin Chapter 5 When a Warning Message Appears 153 ...

Page 168: ...ar the Cartridge inside the Staple Unit NOTES Manual Staple 1139O2732A 1139O2732A Press the Manual Staple Key The Staple Sorter test staples the paper several times automatically 8 1139O0950A Remove the sheet of paper from the Top Bin and check that it has been stapled If it has not been stapled place another sheet of paper into the Top Bin and repeat steps 7 8 and 9 9 2 Detailed Instructions for ...

Page 169: ...2 Detailed Instructions for Messages Indicator Lights Chapter 5 When a Warning Message Appears 155 ...

Page 170: ... the copier 1 1136O011AA Open the Staple Cover While pressing down the Staple Cartridge Release Lever pull the Staple Cartridge out of its port 1136O012AA Pull the staple sheet about 3 cm out of the new Staple Cartridge and break off that portion 2 4 2 Detailed Instructions for Messages Indicator Lights 3 Chapter 5 When a Warning Message Appears 158 ...

Page 171: ...he new Staple Cartridge until a click is heard 5 1136O167AA 1136O167AA Close the Staple Cover and slide the Staple Sorter back against the copier 6 2 Detailed Instructions for Messages Indicator Lights 1136O015AA Non Sort Bin Place a sheet of paper into the 1st Bin of the Staple Sorter 7 1136O016AA Non Sort Bin 1st Bin Sorter Chapter 5 When a Warning Message Appears 159 ...

Page 172: ...NOTES Manual Staple 1139O2732A 1139O2732A Press the Manual Staple Key The Staple Sorter test staples the paper several times automatically 8 1136O017AA Remove the sheet of paper from the 1st Bin and check that staples have been driven into it If no staples are evident place another sheet of paper into the 1st Bin and repeat steps 7 8 and 9 9 2 Detailed Instructions for Messages Indicator Lights Ch...

Page 173: ...2 Detailed Instructions for Messages Indicator Lights Chapter 5 When a Warning Message Appears 161 ...

Page 174: ...turns to orange and you can no longer start a new copy cycle Correct the closure failure by following the procedure given below 1136P18OAA 1136P18OAA 1139O0560A 1139O0600A 1139O0580A Monitor Display Check Locations Check that the Front Door is closed Check that the Automatic Duplexing Document Feeder AF 3 AFR 7 is lowered Check that the Document Exit Tray of the Automatic Duplexing Document Feeder...

Page 175: ...k that the Right Door is closed Check that the Left Door is closed Check that the Middle Left Door is closed 1136P25OAA 1136P25OAA 1136P20OAA 1136P20OAA 1136P19OAA 1136P19OAA 1136P21OAA 1136P21OAA 1136O020AA 1136O019AA 1136O021AA 2 Detailed Instructions for Messages Indicator Lights 1136P23OAA 1136P23OAA 1136O049AA 1139O0630A 1136P24OAA 1136P24OAA 1139O0650A 1136O014AA Chapter 5 When a Warning Mes...

Page 176: ... Detailed Instructions for Messages Indicator Lights Monitor Display Check Locations Check that the Lower Left Door is closed 1136P448CA 1136P448CA 1136O022AA Chapter 5 When a Warning Message Appears 164 ...

Page 177: ...2 Detailed Instructions for Messages Indicator Lights Chapter 5 When a Warning Message Appears 165 ...

Page 178: ...n the Lower Right Door and then pull out the sheet of paper from the Transport Section 1 1139O0620A Close the Lower Right Door 2 2 Detailed Instructions for Messages Indicator Lights 1139O1552A Press the Paper Descent Button This releases the 3rd Drawer allowing you to slide it out of the copier Now slide the Drawer out 3 Chapter 5 When a Warning Message Appears 174 ...

Page 179: ... the Drawer 4 1139O1532A Fan the paper thoroughly and reload it 5 1139O0760A Swing down the Front Door and then swing it closed to reset the Misfeed Indicator and message on the control panel This completes the procedure to clear a misfed sheet of paper in the Paper Feed Cabinet 7 Chapter 5 When a Warning Message Appears 175 ...

Page 180: ...046AA Open the Middle Left Door and Lower Left Door Pull out the sheet of paper from the Transport Section 1 2 Detailed Instructions for Messages Indicator Lights 2 1136O048AA Open the Lower Right Door and pull out the sheet of paper from the Transport Section 3 1136O047AA Close the Middle Left Door and Lower Left Door Chapter 5 When a Warning Message Appears 176 ...

Page 181: ...plex Unit Close the Misfeed Removal Guide Plate and slide the Duplex Unit back into the copier 6 1139O0760A Swing down the Front Door and then swing it closed to reset the Misfeed Indicator and message on the control panel This completes the procedure to clear a misfed sheet of paper in the Duplex Unit 7 1136O049AA Close the Lower Right Door Chapter 5 When a Warning Message Appears 177 ...

Page 182: ...ey swing open the Document Turnover Exit Unit Door Carefully pull out the original from the Exit Unit and close F2 F3 F3 2 1139O0820A Raise the AFR 7 Opening the Document Turnover Feed Unit Guide Plate gently pull out the original from the Document Feed Unit F4 4 1139O0840A Remove the original from the Original Glass and lower the AFR 7 This completes the procedure to clear a misfed original in th...

Page 183: ...0850A Carefully pull out the original from the Exit Unit 2 1139O0860A Raise the AF 3 Opening the Document Feed Unit Guide Plate gently pull out the original from the Document Feed Unit 3 1139O0840A Remove the original from the Original Glass and lower the AF 3 This completes the procedure to clear a misfed original in the AF 3 5 4 2 Detailed Instructions for Messages Indicator Lights Chapter 5 Whe...

Page 184: ...9O0880A Take hold of the Lock Release Lever of S 104 ST 101 and slide the sorter away from the copier 1 1139O0870A Pull out the copy from the Transport Section 2 1139O0650A Slide the S 104 ST 101 back to the copier This completes the procedure to clear a misfed sheet of paper in the S 104 ST 101 3 2 Detailed Instructions for Messages Indicator Lights Chapter 5 When a Warning Message Appears 180 ...

Page 185: ...away from the copier 1136O174CA Swing down Misfeed Removal Guide Plate Turn the Misfeed Removal Knob counterclockwise one complete turn or more ST 206 only S 1136O175CA Pull out the copy from the Transport Section 3 4 1 2 1136O014AA Close and then slide the S 205 ST 206 back to the copier This completes the procedure to clear a misfed sheet of paper in the S 205 ST 206 S 5 2 Detailed Instructions ...

Page 186: ...m or her the malfunction code shown on the Message Display NOTE Example This is malfunction code C0610 2 Detailed Instructions for Messages Indicator Lights 1136P372CA Call your Technical Rep Code C0610 1136P372CA When a malfunction occurs in the copier the Call Technical Representative Indicator lights up and the warning message as shown above appears on the Message Display showing the correspond...

Page 187: ...he Copy has dark specks or spots 186 The Edge of the Copy is dirty 186 The Image on the Copy is not aligned properly 186 2 The Copier is not functioning as designed None of the Control Panel Indicators Light up 188 The Message Display shows nothing 188 Pressing the Start Key does not start the copy cycle 188 Control Panel keys do not resopnd 188 The Copier is not activated when the Power Switch is...

Page 188: ...en replaced The Add Toner Indicator is lit up Add Toner Indicator The paper is damp The Image is too dark The exposure level for the Auto Exposure Mode is set at one of the Dark levels The manual exposure level is set on the darker side The entire surface of the Original Glass is dirty The original is not held tightly against the Original Glass The Copy is blurry The paper is damp 1136P51OAA 1074O...

Page 189: ...er Replenishing Key as many times as required to obtain the desired image density p 130 Replace the Toner Bottle with a new one p 146 Replace the paper p 148 Change the setting of the User s Choice Auto Expo Level p 135 Cancel the Auto Exposure Mode and select the Manual Exposure Mode to adjust the exposure level and obtain a lighter image p 49 Press the Exposure Control Key Lighter as necessary t...

Page 190: ...Document Feed Belt is dirty You have selected a paper size larger than the original Zoom Ratio is set at full size 100 The original is not placed in the correct position Zoom Ratio is set at full size 100 The reduction ratio selected is not in accord with the copy paper size When doing manual reduction copying The Image on the Copy is not aligned properly The original is not placed in the correct ...

Page 191: ...8 211 Select the same copy paper size as the original p 60 Or use the Auto Size Mode to enlarge the copy to the appropriate size p 56 Select the paper drawer that is loaded in the same direction as the original p 60 Or reload the paper in the same direction as the original p 60 Select the zoom ratio according to the copy paper size pp 58 217 Or use the Auto Size Mode to reduce the copy to the appr...

Page 192: ...he access number The Toner Collecting Box Full Indicator is lit up Control Panel Keys do not respond The Interrupt Key LED is lit up The copier is not activated when the Power Switch is turned ON The power cord is left unplugged from the power outlet The room circuit breaker is open If these procedures do not correct the problem contact your Technical Representative 2 The Copier is not functioning...

Page 193: ...t Control Knob as necessary Referring to Entering the Access Number enter the access number p 36 Call your Technical Representative The copier is in the interrupt mode Press the Interrupt Key to cancel the interrupt mode p 69 Plug the power cord into the power outlet Close the room circuit breaker 2 The Copier is not functioning as designed Chapter 6 Troubleshooting 189 ...

Page 194: ...190 ...

Page 195: ...s 1 Copier 192 2 Paper Feed Cabinet 194 3 Duplexing Document Feeder 196 4 Automatic Document Feeder 197 5 20 Bin Staple Sorter 198 6 10 Bin Staple Sorter 199 7 20 Bin Sorter 200 8 10 Bin Sorter 201 9 Duplex Unit 202 10 Data Controller 203 11 Copier Outline Dimensions 204 Chapter 7 Specifications 191 ...

Page 196: ...r A3L B4L A4C A4L A5L 210 330 mm L 297 430 mm L 220 280 mm L 216 320 mm L 297 216 mm C 216 297 mm L 210 280 mm L Foolscap L Quarto L Multi Bypass Table Crosswise 297 mm to 100 mm Lengthwise 432 mm to 140 mm Lost image 1 sided copy in the Full size mode Leading edge 3 mm 1 5 mm Trailing edge 1 mm to 5 5 mm Front edge Rear edge 3 mm or less Paper Feeding System Automatic feeding from two drawers and...

Page 197: ...cation Ratios Fixed ratios Full size 1 1 0 005 Reduction ratios 0 500 0 707 0 816 Enlargement ratios 1 154 1 414 2 000 Zoom ratios From 0 500 to 2 000 Zoom ratios In 0 001 increments Multiple Copy Up to 99 copies Count Down system Exposure Control Auto and Manual Power Requirements AC 110V 115V 120V 127V 200V 220V 220V 240V 50 60 Hz Power Consumption 1 5 kW Max Dimensions Width Depth Height 620 mm...

Page 198: ...the copier Dimensions Width Depth Height 620 mm 695 mm 390 mm Weight 36 5 kg Name Paper Feed Cabinet PF 202 Type Paper feeding unit with two drawers Installation Desk type Kinds of Paper Plain paper Recycled paper Weighing 60 g m2 to 90 g m2 Copy Paper Size 3rd drawer A3L to A5L 4th drawer A3L to 210 280 L Registration Front edge Paper Feeding System Automatic feeding from drawer Capacity 500 shee...

Page 199: ...nds of Paper Plain paper Recycled paper Weighing 60 g m2 to 90 g m2 Copy Paper Size A3L to A5L Multiple Copies 2 Sided Copies 50 sheets Registration Front edge Power Source DC24V supply from copier Power Consumption Included in 1 5 kW consumed by the copier Dimensions Width Depth Height 620 mm 695 mm 390 mm Weight 42 0 kg Chapter 7 Specifications 195 ...

Page 200: ...C 50 sheets 80 g m2 A3L B4L 30 sheets 80 g m2 Document Loading Face up Copy Productivity 100 First copy in automatic document feeding 10 3 sec or less Power Source DC24V supplied from copier Power Consumption 48W or less Dimensions Width Depth Height 610 mm 505 mm 127 mm Excluding Document Exit Tray Weight 13 8 kg Standard Mode 1 sided original 2 sided original 2 in 1 Mixed Original Detection Mode...

Page 201: ...aper Original Weight 1 sided Original Mode 50 to 110 g m 2 1 sided Mixed Original Detection Mode 60 to 90 g m2 Lightweight Original Mode 40 to 110 g m2 Original Size 1 sided Original Mode 1 sided Mixed Original Detection Mode A3L B4L A4L A4C FLSL Capacity of Document Feed Tray A4L A4C 30 sheets 80 g m2 A3L B4L 15 sheets 80 g m2 Document Loading Face up Copy Productivity 100 First copy in automatic...

Page 202: ...le Punch Mode A4C A3L Capacity of Bins Non Sort Mode Hole Punch Mode Plain paper Recycled paper Non Sort bin 50 sheets 1st bin to 20th bin 50 sheets bin Total 1 050 sheets A4 or smaller weighing 80 g m2 Total 1 600 sheets Larger than A4 weighing 80 g m2 Special paper Transparencies 10 sheets Max paper size A4 Thick paper Translucent paper 10 sheets Sort Mode Group Mode Sort Staple Mode Plain paper...

Page 203: ...n Sort Mode Plain paper Recycled paper weighing 60 to 90 g m 2 1st bin 2nd bin to 10th bin Total 50 sheets 225 sheets 25 sheets bin 275 sheets of A3L 80 g m2 paper Special paper Transparencies 10 sheets in 1st bin Max paper size A4 Thick paper Translucent paper 10 sheets in 1st bin Sort Mode Group Mode Plain paper Recycled paper weighing 60 to 80 g m 2 1st bin to 10th bin 250 sheets 25 sheets bin ...

Page 204: ...ode A5L to A3L Capacity of Bins Non Sort Mode Plain paper Recycled paper Non Sort bin 50 sheets 1st bin to 20th bin 50 sheets bin Total 1 050 sheets A4 or smaller weighing 80 g m2 Total 1 600 sheets Larger than A4 weighing 80 g m2 Special paper Transparencies 10 sheets Max paper size A4 Thick paper Translucent paper 10 sheets Sort Mode Group Mode Plain paper Recycled paper 1st bin to 20th bin 50 s...

Page 205: ...apacity of Bins Non Sort Mode Plain paper Recycled paper weighing 60 to 80 g m 2 1st bin 2nd bin to 10th bin Total 50 sheets 225 sheets 25 sheets bin 275 sheets of A3L 80 g m2 paper Special paper Transparencies 10 sheets in 1st bin Max paper size A4 Thick paper Translucent paper 10 sheets in 1st bin Sort Mode Group Mode Plain paper Recycled paper weighing 60 to 80 g m 2 1st bin to 10th bin 250 she...

Page 206: ...side the copier Basic Function 2 sided copying Kinds of Paper Plain paper Recycled paper Weighing 60 g m2 to 90 g m2 Copy Paper Size A3L to A5L Capacity 50 sheets Registration Front edge Power Requirements DC24V 5 supplied from copier Dimensions Stored in the Paper Feed Cabinet Weight 14 2 kg Chapter 7 Specifications 202 ...

Page 207: ...o of copies made total 9 999 999 Max no of copies made by paper size 9 999 999 Max no of copies made by department 999 999 Max no of copies made by copy mode 999 999 Max no of copies made by department copy mode 99 999 Distinguishable Copy Modes Up to 16 types Power Source DC24V supplied from copier Power Consumption 5W or less Dimensions Width Depth Height 180 mm 564 mm 111 mm Weight Approx 550 g...

Page 208: ...sions EP2050 1 550 1 455 990 620 1136O148AA EP2050 with a Complete Lineup of Options 1 665 1 070 1136O154AA Scale mm 1 105 685 1 000 595 624 1136O149AA Scale mm 1 340 1 160 1 463 1 221 1136O155AA Chapter 7 Specifications 204 ...

Page 209: ...r and the various possible combinations of functions 1 Care of the Copier Daily Checks 206 Cleaning 208 2 Function Combination Matrix 212 3 Description of Copy Paper Size 216 4 Zoom Ratio Table Original Size to Copy Paper Size 217 5 Index 218 Chapter 8 Miscellaneous 205 ...

Page 210: ...n cables of other electrical equipment Are the cord and cables free of damage or cracks Turn the copier OFF immediately unplug the power cord and call your Technical Representative Has the cord or cable jacket frayed to expose the wires Communications Cable Cable connecting the copier with options Original Glass Item Action Is the Glass dirty Clean the Glass using the procedure given in Cleaning p...

Page 211: ...Belt scratched Call your Technical Representative Copy Paper Item Action Is the paper damp and wavy Replace the paper p 148 Sound of Copier Operation Item Action Is there any unusual noise heard while the copier is running Call your Technical Representative Copier Housing Temperature Item Action Is the housing temperature inordinately high Call your Technical Representative 1 Care of the Copier Ch...

Page 212: ...eaning 1 2 Original Pad 1139O1830A Raise the Original Cover Wipe clean the surface of the Original Pad with a soft cloth dampened with neutral home detergent 1 2 Original Glass 1139O1840A Raise the Original Cover Wipe the surface of the Original Glass clean with a soft dry cloth 1 Care of the Copier Chapter 8 Miscellaneous 208 ...

Page 213: ...l clean with a soft dry cloth 1 2 NEVER use a glass cleaner or any other detergent to avoid damage to the control panel keys NOTE Front Door 1136O072AA Swing down the Front Door Wipe the inside of the Front Door clean with a soft cloth 1 2 1 Care of the Copier Chapter 8 Miscellaneous 209 ...

Page 214: ...1136O074AA Gently slide the Cleaning Lever back into the original position 3 1136O075AA Gently slide out the Corona Unit Cleaning Lever Lower as far as it goes 4 1136O076AA Gently slide the Cleaning Lever back into the original position Repeat steps 2 to 5 two to three times 6 1 Care of the Copier 5 Chapter 8 Miscellaneous 210 ...

Page 215: ...l home detergent 1 2 1139O1920A Hold the Document Transport Belt on both edges and pull it to the left to expose a fresh surface 3 4 1 Care of the Copier 1139O1910A Wipe the fresh surface clean using the soft cloth dampened with neutral home detergent Repeat these steps until the entire surface of the Belt is wiped clean Chapter 8 Miscellaneous 211 ...

Page 216: ...O O O O O O O O O O AB 1 1 2in1 O O O O O O O O O O B 1 2 2in1 O O O O O O O O AB 1 2in1 1 O O O O O O O O O O O O O O O B 2 2in1 1 O O O O O O O O O O O O O O O B Book 2 O O O O O O O O O O O AI Fini shing Sort O O O O O O O O O O O O O O DEFG Sort Staple O N O O O O O O O O O O O O EGJ Group O O O O O O O O O O O O O O DEFG Hole Punch O O O O P O O O O O O O O O G Cover O O O O O O O O O O O O O...

Page 217: ...errupt O O O O M Job Program Multi Bypass O O O O O O O Orig Copy 1 2 O O O O O O O A 2 1 O O O O O O O O B 2 2 O O O O O O O AB 1 1 2in1 O O O O O O O O B 1 2 2in1 O O O O O O O AB 1 2in1 1 O O O O O O O O B 2 2in1 1 O O O O O O O O B Book 2 O O O O O O S AI Fini shing Sort O O O O O O O O O O O O DEFG Sort Staple O O O O O O O N O O O O EGJ Group O O O O O O O O O O O O DEFG Hole Punch O O O O O...

Page 218: ...g settings has been made for Org Copy If any of them is selected after the Cover Mode has been selected it cancels the Cover Mode 1 2 2in1 Book 2 1 2in1 1 2 2in1 1 Book 1 I You cannot select Book 1 if you have previously loaded an original onto the AF 3 AFR 7 If you load an original onto the AF 3 AFR 7 after you have selected Book 1 the copier cancels Book 1 and selects 1 1 J The Sort and Staple m...

Page 219: ...a Staple Sorter ST 206 and the paper size is A3 lengthwise or A4 crosswise Q A multi copy cycle using OHP Interleaving is possible only when the copier is equipped with a 20 Bin Sorter or 20 Bin Staple Sorter R Mixed Orig Detect is possible only when the copier uses a Duplexing Automatic Document Feeder S Mixed Orig Detect takes precedence if a Duplexing Automatic Document Feeder is to be used whi...

Page 220: ...14 279 mm 356 mm COMPUTER 10 1 8 14 257 mm 356 mm 10 14 10 14 254 mm 356 mm 9 1 4 14 9 1 4 14 236 mm 356 mm LEGAL 8 1 2 14 216 mm 356 mm FOOLSCAP GOVERNMENT LEGAL 8 1 2 13 216 mm 330 mm FOOLSCAP 8 13 203 mm 330 mm FOOLSCAP 8 2 3 13 220 mm 330 mm FOOLSCAP FOLIO 8 1 4 13 210 mm 330 mm 8 1 4 11 3 4 8 1 4 11 3 4 210 mm 301 mm LETTER 8 1 2 11 216 mm 279 mm GOVERNMENT LETTER 8 10 1 2 203 mm 267 mm QUART...

Page 221: ...inal Size Copy Paper Size Zoom Ratio 11 17 279 4 431 8 mm 11 14 0 823 Legal 0 772 Foolscap 0 764 Letter 0 647 Invoice 0 500 11 15 279 4 381 mm 11 14 0 933 Legal 0 722 Foolscap 0 772 Letter 0 733 Invoice 0 500 11 14 279 4 355 6 mm Legal 0 772 Foolscap 0 772 Letter 0 772 Invoice 0 500 Legal 8 1 2 14 215 9 355 6 mm Foolscap 0 928 Letter 0 785 Invoice 0 607 11 17 1 214 Foolscap 8 1 2 13 215 9 330 2 mm...

Page 222: ...hnical Representative Indicator 29 145 182 Center Erase Erase 4 100 Cleaning 208 Closure Failure Indicator 28 145 162 Control Panel 22 Copy Cycle Start 67 Copy Mode Priority User s Choice 132 133 Corona Unit Cleaning Lever 13 210 Correcting the Number Entry 66 Counter Removal User s Choice 132 136 Cover Mode Front 110 Cover Mode Front Back 110 Crosswise Type of Originals and Copy Paper xi Custom B...

Page 223: ...aper path x File Margin Mode 103 Finishing Mode 90 Finishing Mode Priority User s Choice 132 135 Fixed Zoom Ratios 50 Frame Erase Erase 3 100 Full Size Copy 52 Function Combination Matrix 212 G Group Mode 90 H Hole Punch 90 I Initial Mode 34 Insertion 114 Intelligent Sort User s Choice 132 136 Interrupt Mode 68 J Job Memory 124 Job Type I 80 Job Type II 81 Job Type Select Key I Original Copy 24 80...

Page 224: ... Original Detection User s Choice 132 133 Monitor Display 28 Multi Bypass Copying 70 N Non Sort Mode 86 Number of Copies 66 Number of Originals Original Count Mode Key 83 O OHP Interleaving 122 OK Key Display Function Enter Key 27 1 One sided 1 sided 80 1 One sided 1 sided 2 in 1 81 1 One sided 2 sided 80 1 One sided 2 sided 2 in 1 81 Original Copy Job Type Select Key I 24 80 Original Copy Job Typ...

Page 225: ...nter 129 Sort Mode 90 Sort and Staple mode 90 Special Paper User s Choice 132 137 Special Paper Mode 64 Staple Cartridge 154 158 Stopping Multi Copy Cycle 67 Supplementary Copies 96 System Copies 72 T Total Counter 129 2 two sided Size Counter 129 2 two sided Total Counter 129 2 two sided 1 sided 80 72 2 two sided 2 sided 80 72 U User s Choice 132 140 W Wait Indicator 29 31 Width Type of Originals...

Reviews: