LS-G6000 User Manual
Converter
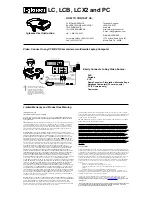
Product structure
Operation Guide
Charge the battery stick:
The product quipped with a special design for the removable battery stick; charge the battery stick fully along with the connector
converter by the special attached USB cable when you use it in the first time. There are 2 ways to charge basically:
1) By connecting to PC.
Make the attached USB cable plug into the computer USB port, then can be recharged.
2) By battery charger. Put the product with USB cable into an Electrical outlet with a USB port, then can be charged.
During charging, the Orange indicator will lit on
, when the battery’s power is full, the indicator will be off.
Note: when t
he battery’s power is low the product will shut down automatically right after closing the recorded file well. Please charge
the product immediately.
Power on and recording:
Click the On/Off button once, the orange light will turn on and the device will vibrate one long time, after few second the LED will
goes off and go straight to the recording automatically.
To obtain perfect video, please place the product under enough illumination. Keep the product toward the target, and at least
50cm from the target. . If the continuous the recording time for each stick is 60~70 minutes, while the charge time will be 2 hours.
Stop Recording and Power off:
When the video recording continue (indicator light do not blink), click the On/Off button once the blue LED will flash 4 times
shortly as well as the vibration to stop the recording and power off the device
Connecting to computer
:
Whenever the device is power on or off, remove out the battery stick and connect the main device to computer by the attached
USB cable. Push the main button once, the device will power on along with a vibration once and the lit on of an orange LED
indication. After few seconds a removable memory drive will be shown to read and edit the files
Note: when connect to PC, if no response in 30 seconds after connected, please disconnect the product, and reconnect again.
Function as a removable disk:
When connect the product to PC, you can
copy, move, or delete files.
Note: It is highly recommended to copy the recorded video files into the hard disk of computer, and then to playback. Because of
large amount of data flow, directly playback the video files stored in the built-in memory may cause the playback not smoothly.
Setting time
:
The product has the function of real-time stamp, the date and time will be shown on the image. The time format is
“YYYY-MM-DD hh:mm:ss”
. To set or correct the date and time when you use it in the first time in the following steps: Edit a text file (by the Notepad)
according to the format of
“YYYY-MM-DD hh:mm:ss”
such
as “2015-05-23 13:30:30”. Connect the product to computer, save the
edited .txt format file name exactly as
“time” to the root directory of the product memory. Disconnect the product from computer; turn
the product on, the time will be set up automatically.