

See www.routerboard.com for more information. Contact [email protected] for support questions.
rev. A (6-May-2011)
RouterBOARD 711UA-2HnD
Quick Setup Guide and Warranty Information
RB711UA-5HnD is a dual chain 2GHz 802.11b/g wireless device with one Ethernet port, one USB 2.0 port, and a power jack.
First use
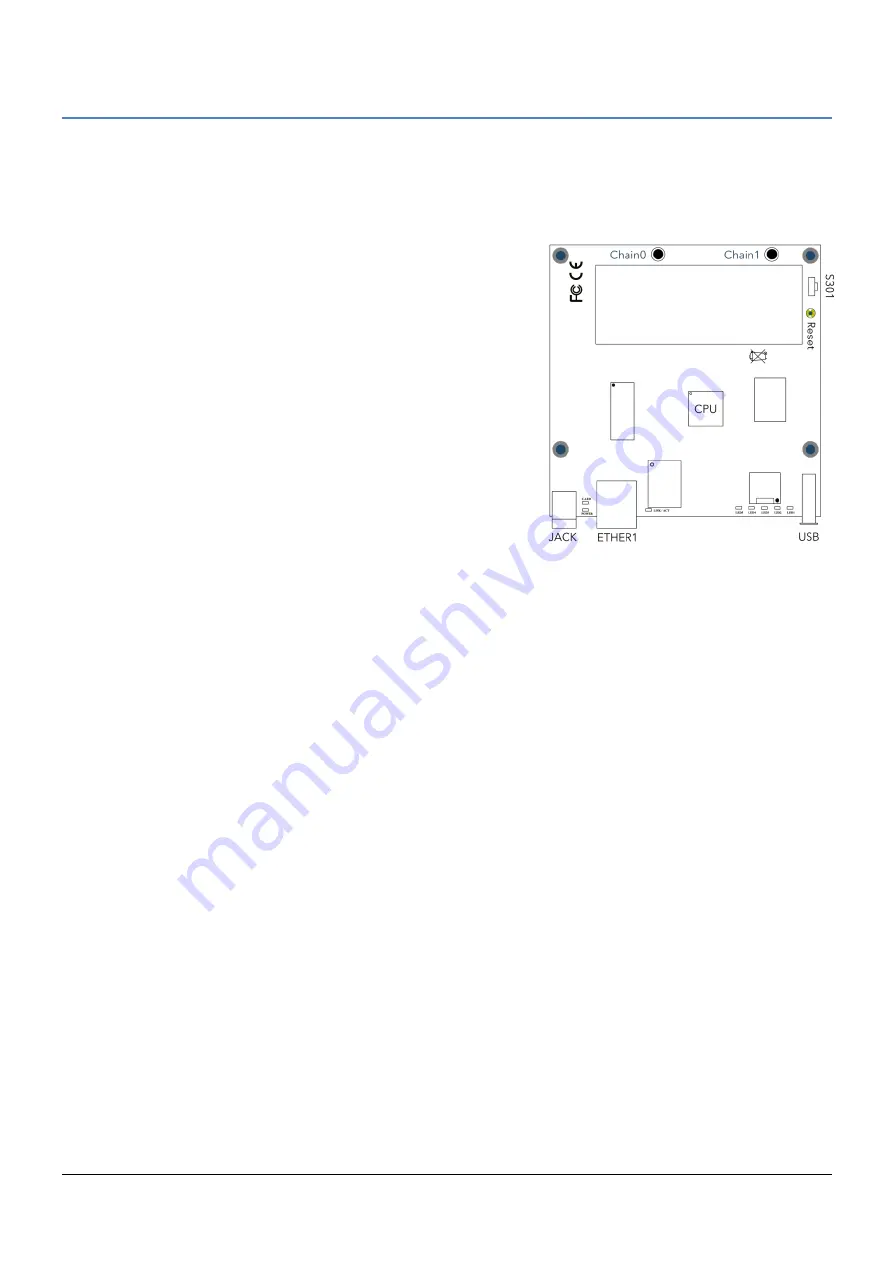
Connect antenna cables to the built in Wi-Fi connectors
Device accepts 8-30V with a passive PoE powered Ethernet cable
or with a power connector to the Power Jack
Powering
The board accepts power with the following modes:
With PoE to ETHER1 port. It accepts 8-30V DC input (at the board;
higher voltage needed to compensate for power loss on long ca-
bles; at least 18V suggested) from non-standard (passive) Power
over Ethernet injectors (no power over data lines). The board
does
not
work with IEEE802.3af compliant 48V power injectors.
Direct input to the power jack 8-30V
Booting process
This device doesn't come fitted with a Serial Port connector, so initial connection has to be done via the Ethernet cable, using
the MikroTik Winbox utility. Winbox should be used to connect to the default IP address of
192.168.88.1
with the username
admin
and no password.
In case IP connection is not available, Winbox can also be used to connect to the MAC address of the device. More infor-
mation here:
http://wiki.mikrotik.com/wiki/First_time_startup
In case you wish to boot the device from network, for example to use MikroTik Netinstall, hold the S301 button of the device
when starting it until it beeps and the LED light turns off and RB711 will look for Netinstall servers.
Extension Slots and Ports
One Ethernet port, supporting automatic cross/straight cable correction (Auto MDI/X), so you can use either straight
or cross-over cables for connecting to other network devices. The Ethernet port accepts 8-30V DC powering from a
passive PoE injector.
Built-in 802.11b/g Wi-Fi card with two MMCX/uFL (depends on model) connectors
Buttons and Jumpers
RouterOS reset jumper hole (RESET, marked with a black circle in the diagram above, below S301) – resets RouterOS
software to defaults. Must short circuit the metallic sides of the hole (with a screwdriver, for example) and boot the
device. Hold screwdriver in place until RouterOS configuration is cleared.
S301
– Holding this button during boot time will make RB711 look for Netinstall servers. Release the button after
the LED light goes out.
Operating System Support
Currently tested operating system is MikroTik RouterOS (starting from version v4.16).


