background image

User Guide

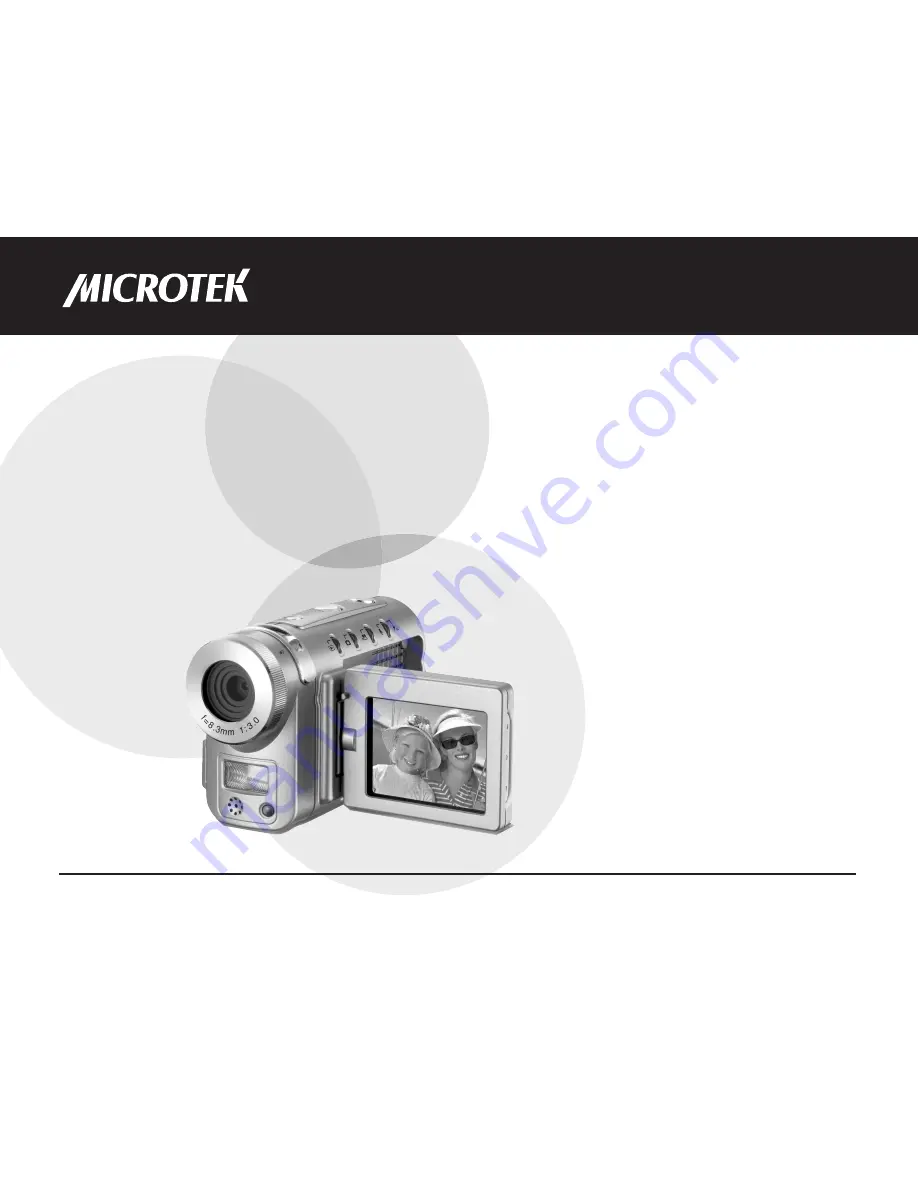
This guide shows you how to operate the Take-it MV500 digital video camera (DV camera) and provides 
information on basic functions, video/audio clip recording, still image shooting, playback, and troubleshooting.
Before using the Take-it MV500, be sure to read the safety precautions to prevent injuries or damage to users
or equipment.

Summary of Contents for Take-it MV500

Page 1: ...ital video camera DV camera and provides information on basic functions video audio clip recording still image shooting playback and troubleshooting Before using the Take it MV500 be sure to read the safety precautions to prevent injuries or damage to users or equipment ...

Page 2: ...materials could be a violation of the rights of the copyright holder June 2005 Disclaimer of Warranty Microtek does not guarantee the content of any written materials or software and is not liable for losses sustained by the purchaser arising from the use or inability to use these written materials software or equipment Warning If you take pictures of or use copyrighted material you may violate co...

Page 3: ...e by one or more of the following measures Reorient or relocate the receiving antenna Increase the separation between the equipment and receiver Connect the equipment into an outlet on a circuit different from that to which the receiver is connected Consult the dealer or an experienced radio TV technician for help Notes A shielded USB interface cable with ferrite core installed on the DV camera s ...

Page 4: ...4 ...

Page 5: ...ng the SD Card 23 Before Shooting Using Modes 24 Using the Menus 25 Using the Multifunction Button 26 Using the Shutter Button 26 Holding the DV Camera 26 Shooting Shooting Your First Video 27 Shooting Your First Still Images 28 Shooting with Digital Zoom 29 Using the Macro Function 29 Using the Flash 30 Using the Self Timer 31 Continuous Shooting 31 Recording a Voice Memo 32 Customizing Shoot Set...

Page 6: ...0 Time 50 Date Stamp 50 Video Out 50 Format 51 Reset 51 Copy to SD 51 Frequency 51 Power Saving 51 Language 51 USB Switch 51 File No Reset 51 Downloading to Your Computer Getting the DV Camera Ready 53 Connecting the DV Camera 53 Copying Files 54 Browsing Files 55 Value bundled Software 55 Appendixes Appendix A Viewing on a Television Set 56 Appendix B Web Cam 57 Appendix C Using the SD Card 58 Ap...

Page 7: ...d or allowing condensation to form may start a fire or give the user an electrical shock If liquid gets inside the DV camera turn the DV camera power off by removing the battery or unplugging the power cord with dry hands Allowing the DV camera to slowly adjust to temperature changes as in transferring the unit from outdoors to indoors will help to prevent condensation Let any condensation evapora...

Page 8: ... and have no effect on the recorded image If you aim the DV camera at the sun or shoot the flash close to someone s eyes you may injure your eyesight or that of someone else If you see smoke or smell a burning odor coming from your DV camera turn the DV camera off If you continue to operate the DV camera it could cause a fire or give you an electrical shock Do not clean the DV camera with flammabl...

Page 9: ...res at a resolution of 640 x 480 or 320 x 240 pixels offering superior image quality and super audio Equipped with a large 2 0 color LCD screen the DV camera allows you to focus clearly on the images you want and to review live images as shots are being taken Key features 1 1 8 5 1 megapixel CMOS sensor 12 megapixels interpolated resolution 2 0 LTPS LCD screen with 270 rotation 12X Digital Zoom 4X...

Page 10: ...POWER button 4 Macro focus lever 5 Lens 6 Flash 7 Self timer indicator 8 Microphone 9 Strap ring s 10 Battery door latch 11 Battery compartment 12 Battery door 13 Secure Digital SD Multimedia Card MMC compartment 14 SD MMC card compartment cover 15 Tripod mount DV Camera Components ...

Page 11: ...ED Audio mode indicator 3 Multifunction 4 way arrow button Up Zoom In Play Pause Down Zoom Out Stop Right Fast Forward Flash Left Rewind 4 OK Pan button 5 MENU button 6 Earphone TV out connector 7 DC in connector 8 USB connector 9 Connector cover 10 LCD screen ...

Page 12: ...mpression Best Fine Normal 15 Recording resolution 640x480 pixels 320x240 pixels 1 Video mode 2 Video format ASF MPEG 4 Motion JPEG AVI 3 Recording in progress 4 Elapsed recording time 5 Macro mode 6 Shutter button Press to stop video recording 7 Card indicator 8 Battery status indicator Full Half Low 9 EV Compensation 10 Anti shake 11 Color mode Normal Black White Classic 12 White Balance WB Auto...

Page 13: ...ro mode 8 Number of pictures remaining 9 Card indicator 10 Battery status indicator Full Half Low 11 Voice memo 12 Color mode Normal Black White Classic 13 Flash mode Auto Auto with Red eye Reduction Forced flash Forced flash with Red eye Reduction Flash off 14 Quality Compression Best Fine Normal 15 Image Size 12M 4000x3000 pixels Interpolated 8M 3264x2448 pixels 5M 2592x1944 pixels 3M 2048x1536 ...

Page 14: ... 5 4 6 5 4 1 Audio mode 2 Standby 3 Available recording time Suggested 4 Shutter button Press to begin audio recording 5 Card indicator 6 Battery status indicator Full Half Low 1 Audio mode 2 Recording in progress 3 Elapsed recording time 4 Shutter button Press to stop audio recording 5 Card indicator 6 Battery status indicator Full Half Low ...

Page 15: ...ess to advance or rewind the video playback with a speed setting 6 Press to stop the video playback and to return to standby 7 Press to pause the video playback 8 File type indicator 1 Playback mode 2 Elapsed playback time 3 Total playback time 4 Selected file Total number of files taken 5 Press the OK button to return to nine image display mode 6 Press the button to move forward backward and sele...

Page 16: ...ken 4 Pan mode 5 Press the OK button to enable the Pan feature 6 Press the button to move forward backward and select a different file Press the button to magnify the still image 7 File type indicator 7 6 5 4 3 1 Playback mode 2 Elapsed playback time 3 Total playback time 4 Selected file Total number of files taken 5 Press to stop the audio playback and to return to standby 6 Press to pause the au...

Page 17: ...hrough the strap ring of the DV camera as shown 2 Fasten the two ends of the strip as shown Ensure that the strap is adjusted correctly to fit your hand 3 Fasten the grip pad around the strap as shown 2 Insert the battery into the compartment Depending on the configuration of the DV camera that you purchased you can use either a rechargeable Lithium 3 7V ion battery or four AAA sized alkaline batt...

Page 18: ...rge soon External conditions or the type of battery used may affect the reliability of the battery status display NOTE When replacing an old battery ensure that the DV camera is turned off before the battery is removed Video audio clips or still images can be lost or damaged if the power is removed while the DV camera is still operating When using alkaline batteries never mix old and new batteries...

Page 19: ...and is not included with your purchase Charging the Lithium ion Battery If your DV camera is supplied with an AC adapter 5V 2A when connected using the AC adapter the DV camera can function as a charger allowing you to charge the Lithium ion battery or power the DV camera Charger LED 1 Plug the AC adapter into the power source 2 Ensure that the DV camera is turned off then connect the DC plug of t...

Page 20: ...Screen The LCD screen is used to frame the subject while you take your shots In addition you will be able to view the stored video audio clips and still images on the LCD screen as you record it When the DV camera is powered on the LCD screen is automatically activated displaying the DV settings relevant to your current DV mode To use the LCD screen Swing to open LCD screen from the side of the DV...

Page 21: ...date and time on your DV camera before you use the DV camera for the first time The DV camera can also add the time and date to your picture To set the date 1 Press the MENU button 2 Press to select the Setup menu option at the top When selected the settings are shown on the LCD screen and display the current state of the DV camera 3 Use the button to select Date then press the button A Date adjus...

Page 22: ...RAN AIS ESPA OL BEEP ON 2005 06 14 DATESTAMP ON NTSC 03 12 15 TIME SELECT T I M E HH MM SS 10 51 15 SELECT SET The time should also be set accurately on your DV camera To set the time 1 In the Setup menu screen use the button to select Time then press the button A Time adjustment screen appears on the screen allowing you to set the time 2 Use the button to toggle through the HH MM and SS formats T...

Page 23: ... the Setup menu screen 5 Press the MENU button to exit the menu NOTE The format function removes all files from the DV camera s internal memory or SD MMC card permanently Before you perform the format operation ensure that you have saved all desired images and video audio clips from the DV camera A MEMORY FULL message appears on the LCD screen if the internal memory or the SD MMC card is full To r...

Page 24: ...ips of unlimited length maximum length dependent on the size of available memory Photo Mode Press to enter Photo mode this allows you to capture still images in JPEG format with automatic exposure or provides you with a full selection of manual controls over all DV camera settings Audio Mode Press to enter Audio mode this allows you to record audio clips of unlimited length maximum length dependen...

Page 25: ...menu d Use the button to toggle through options The selected function option is highlighted with color e Use the OK button to confirm your selection 2 Press the MENU button to exit the menu PHOTO SELECT 5M 0 0 Functions Video Photo Playback Page Video Format o 33 Size o o 34 Quality o o 34 Drive Mode o 35 EV Compensation o o 35 White Balance o o 36 Sharpness o 36 Voice Memo o 37 Color Mode o o 37 ...

Page 26: ...unction Button The Multifunction button provides Up Down Left and Right arrow selections for navigating the menu screens In addition the button can perform different functions depending on the selected DV mode as shown by the table below Button Playback Photo Movie Zoom In Play Pause Pan Zoom In Zoom In Next Fast Forward Pan Flash Zoom Out Stop Pan Zoom Out Zoom Out Previous Rewind Pan The OK butt...

Page 27: ...ime shown on the LCD screen For best results hold the DV camera steady to pan when recording video clips 4 Press the Shutter button a second time to stop recording NOTE If the DV camera is not in Video mode press the MODE button to show the mode screen then select Video mode You can change the various settings that influence the quality and appearance of the video clips you record The following ta...

Page 28: ...still images in the JPEG format at resolutions of up to 12 megapixels interpolated 1 Press the POWER button to turn on the DV camera The DV camera starts up in Video mode when you turn the DV camera on You will need to switch to Photo mode to take still images 2 Press the MODE button The LCD screen shows the mode screen with the four mode options 3 Press the button to enter Photo mode When the DV ...

Page 29: ...al zoom function You can zoom in on distant images by pressing the button on the rear of the DV camera without changing the shooting distance the maximum zoom scale is 12X Use the button to zoom back out 1 In shooting mode compose your shot using the LCD screen 2 Press the button until the desired zoom level is reached A bar appears indicating the zoom scale of the DV camera 3 Release the button w...

Page 30: ...a picture regardless of ambient lighting conditions Forced flash with red eye reduction The flash fires every time you take a picture regardless of lighting conditions and will reduce the red eye effect Flash off The flash will not fire To take pictures using a desired flash mode 1 In Photo mode frame the subject using the LCD screen 2 Press the Flash button until the desired flash mode appears on...

Page 31: ...r a shot is taken Continuous Shooting Continuous shooting enables you to take three pictures in rapid succession with a single press of the Shutter button This is useful for shooting moving objects To use continuous shooting 1 In Photo mode press the MENU button 2 Use the 4 way arrow button to select M Drive Mode then select Continuous shot for 3 image continuous shooting 3 Press the OK button to ...

Page 32: ...hort audio clip after a picture is taken 23 5 Take a picture in the usual way After the picture is taken audio clip recording begins with the elapsed recording time shown on the LCD screen Recording stops and returns to Photo mode after you press the Shutter button again or when the maximum 10 second recording length is reached NOTE In Continuous shooting the Voice Memo function is inactive even t...

Page 33: ...Memo o 37 Color Mode o o 37 Anti Shake o 38 o Available Unavailable Customizing Shoot Settings Selecting Video Format The Video Format function allows you to specify the type of video clip being recorded The supported video formats are ASF MPEG 4 and AVI Option Description ASF MPEG 4 Records video clips in ASF format Motion JPEG AVI Records video clips in AVI format To access the Video Format sett...

Page 34: ...ST FINE NORMAL OK Selecting Image Size The Size function enables you to capture images with different image size settings Choosing a bigger image size will require more memory for storing recorded still images or video clips The DV camera can capture still images as large as 12 megapixels 4000x3000 pixels or as small as VGA 640x480 pixels Two size options are also available for video clips Option ...

Page 35: ...ears on the LCD screen You are now ready to shoot Adjusting EV Compensation EV Compensation is required when there is a large discrepancy in brightness between the subject and background and adjusting the EV setting can lessen this discrepancy For example when a subject is backlit such as in a snow or beach surrounding a positive EV setting can brighten the setting When a subject is in shadow such...

Page 36: ... Adjusting White Balance The White Balance function enables you to adjust the color balance in shots taken under different lighting conditions With white balance activated the DV camera also can eliminate color variations caused by lighting conditions In most cases if you choose Auto the DV camera automatically adjusts the White Balance to the environment Option Description Auto Adjusts white bala...

Page 37: ...ed Color Mode icon appears on the LCD screen You are now ready to shoot Normal Black White Classic Turning Voice Memo On Off The Voice Memo function allows you to add a maximum 10 second audio clip immediately to the captured image you just made The Voice Memo file will have the same basic file name as the captured image with a different file extension WAV This function is available only in Photo ...

Page 38: ...re This function is available only in Video mode To access the Image Stabilizer 1 In Video mode press the MENU button 2 Use the 4 way arrow button to select Anti Shake then select either On or Off 3 Press the OK button then the MENU button to exit the menu When the Electrical Image Stabilizer function is turned on the Image Stabilizer icon appears on the LCD screen You are now ready to shoot ANTI ...

Page 39: ... in the top left corner of the LCD screen indicating that you are in audio standby recording state Audio STBY STBY SNAP SNAP START 00 02 09 4 Press the Shutter button to record audio Audio recording begins with the elapsed recording time shown on the LCD screen For getting better voice quality locate the position of the DV camera s microphone and speak towards it when recording The distance betwee...

Page 40: ...ck mode 1 Press the POWER button to turn on the DV camera The DV camera starts up in Video mode when you turn the DV camera on You will need to switch to Playback mode to play back all the files stored in the memory 2 Press the MODE button The LCD screen shows the mode screen with the four mode options 3 Press the button to enter Playback mode When the DV camera changes to Playback mode there will...

Page 41: ...ying video or audio clips use the 4 way arrow button on the rear of the DV camera to play pause fast forward reverse and stop the playback Press to pause video audio playback Press to continue video audio playback Press to advance or reverse the playback with a speed setting Press to stop video audio playback and to return to the beginning To return to the main screen a composite display of nine i...

Page 42: ...use the Pan feature to scroll through the partially magnified image and bring it into view To pan a magnified image 1 Ensure that you are currently viewing a magnified image A Pan icon appears on the bottom of the LCD screen 2 Press the OK button to enable the Pan feature 2 Use the 4 way arrow button to scroll through parts of the magnified image into view 3 Press the OK button again to disable th...

Page 43: ...back file will remain on the LCD screen Rotating Images The Rotation function enables you to rotate captured images by 90 180 and 270 when you play it back later for viewing This function works only on captured still images To rotate an image 1 In Playback mode select a captured still image you want to rotate 2 Press the MENU button 3 Use the button to select Rotation 4 Press the button to display...

Page 44: ...the available options 5 Use the button to choose Select then press the OK button When Select is chosen the captured still image you selected is set as the startup image when the Busy message vanishes from the LCD screen The next time you turn on the DV camera the selected image is displayed at startup automatically Select the Default setting to restore the DV camera s startup image setting to fact...

Page 45: ...the screen 3 To listen to music through earphones connect the supplied earphones to the Earphone TV out connector of the DV camera A screen appears allowing you to switch between Earphone mode and TV out mode 4 Press the button then press the OK button to enter Earphone mode A list of MP3 files stored on the DV camera appears EXIT MENU TRACK001 TRACK002 TRACK003 TRACK004 5 Use the button to select...

Page 46: ... ERASE ERASE SLIDE SH ROTATION PRINT STARTUP IMAGE ERASE ONE ERASE SELECT ERASE ALL SELECT OK IMAGE 01 09 IMAGE 02 09 UNCHECK CURRENT DELETE CHECKED Deleting and Printing Deleting Files The Erase function lets you remove files from memory allowing you to free up space in which to store future recordings Deleting Current 1 In Playback mode select the file you want to remove from the memory then pre...

Page 47: ...RASE ALL SELECT OK ERASE SELECT OK ERASE ALL OK CANCEL Printing Images The DV camera features two printing modes as follows Direct print mode enables you to connect the DV camera directly to a Direct print compatible printer using the supplied USB cable With connection you can print images directly from your DV camera without having to use a computer or image editing software DPOF Digital Print Or...

Page 48: ...EXIT MENU 01 09 01 09 EXIT MENU 01 09 01 09 SNAP SELECT PRINT COPIES PAPER SETTING PAPER SIZE PAPER TYPE PAPERLAYOUT DEFAULT DEFAULT DEFAULT 01 MENU OK COPY TO SD 60HZ USB FILE N PWR SAVING ON ENGLISH USB SWITCH OK SELECT WEB CAM USB MODE DIRECTPRINT 4 Press the Shutter button A print settings screen appears allowing you to specify the printing attributes for the displayed image Copies Allows you ...

Page 49: ... Using DPOF 1 In Playback mode press the MENU button 2 Use the button to select Print 3 Press the button A Print options menu appears allowing you to print all images to print selected images or to cancel For Selected Images 1 In the Print options menu choose Select then press the OK button A nine image display appears 2 Use the button to select the image you wish to print The selected file is enc...

Page 50: ...brightness level of the LCD screen There are five levels of brightness to select from Beep When the Beep function is turned on the DV camera will produce a beeping sound to indicate that some function has been carried out The DV camera makes no beeping sound when this function is set to off Date Use this function to set the date for the DV camera Configure the date setting using the button Time Us...

Page 51: ... inactivity or the DV camera to power down when it is idle for totally two minutes This will conserve battery power If the LCD screen turns off automatically press any button to resume use If the DV camera turns off automatically press the POWER button to turn on Language Use this function to select the LCD screen display language The available options are English Japanese Simplified Chinese Tradi...

Page 52: ...Windows 98SE please follow the steps below to install the DV camera driver first 1 Turn on your PC and insert the supplied Microtek CD ROM in the CD ROM drive The Microtek Software Installer screen appears automatically 2 Click Camera Driver when it appears on the screen then follow the on screen instructions to install 3 Click EXIT on the Microtek Software Installer screen when the DV camera driv...

Page 53: ...d installed in your camera the system reads contents from the camera s internal memory The SD card may be placed into any card reader device The files stored on the card can then be read from the card reader and copied to the computer SD card is optional and is not included with your purchase COPY TO SD 60HZ USB FILE N PWR ON ENGLISH USB SWITCH OK SELECT WEB CAM USB MODE DIRECTPRINT Connecting the...

Page 54: ...ips that were made with the DV camera 2 Double click the DCIM icon then double click the 100_MTDV folder to display the files 3 Drag and drop the files into any folder on your computer File Structure File names vary depending upon the type of recording being described The 100_MTDV folder containing the files are named IMAGxxxx JPG for still images IMAGxxxx ASF for video clips and IMAGxxxx WAV for ...

Page 55: ...ocedures below For Windows users Install the bundled Ulead VideoStudio application contained in the Microtek CD ROM For Macintosh users Visit the http www videolan org vlc website to download the video player application Value bundled Software The software bundled with the Take it MV500 provides user friendly tools for image editing and management allowing you to open view print email upload to we...

Page 56: ...on the TV set and select the channel through the Video Input 5 Power on the DV camera then press the MODE button To play back press the button to enter Playback mode To use the TV screen to frame the subject during video shooting press the button to enter Video mode The image will appear on the TV monitor To view images on a TV set select the video output system first A Selecting a Video Output Sy...

Page 57: ...k EXIT on the Microtek Software Installer screen when the driver has been installed d Restart your computer 2 Set the DV camera to Web Cam mode a Press the MENU button to enter the Setup mode COPY TO SD 60HZ USB FILE N PWR SAVING ON ENGLISH USB SWITCH OK SELECT WEB CAM USB MODE DIRECTPRINT b Select USB Switch then select Web Cam c Press the button then the MENU button to exit the menu 3 Connect th...

Page 58: ...ove the contents of the SD card to be formatted Ensure that the data on the SD card is backed up or not needed before formatting the card NOTE Formatting an SD card may solve most operation problems of the DV camera It may also be necessary to format a card if it is used by a different DV camera SD Card Handling Precautions The following precautions are provided for you to safely get the best perf...

Page 59: ... use synthetic cleaning solutions or other solvents to clean the DV camera body or lens If you are unable to remove marks or dirt from the lens contact Microtek Customer Service Do not rub the LCD screen forcefully or apply excessive pressure to it to avoid scratching the surface Do not use water detergents paint thinner or benzene to clean any part of the DV camera as this may damage the DV camer...

Page 60: ...is rechargeable or replace the batteries with new ones A5 The incorrect type of battery is being used Replace with four new AAA sized alkaline batteries Replace with a new Lithium ion battery Nokia 8210 compatible A6 The battery SD card door is open Close the battery SD door securely A1 Your DV camera has a two minute time out setting for saving battery consumption You can disable the Power Saving...

Page 61: ... SD card to the unlocked position A4 The SD card is corrupted or not formatted correctly Reformat the SD card The SD card may be damaged contact your dealer A1 The Mode is set to the incorrect mode Set the Mode to Photo mode or Video Audio mode A2 The LCD screen is manually switched off Press any button to turn it on A The Date Stamp setting is disabled Enter the Setup mode and enable the Date Sta...

Page 62: ... warm place e g your pouch before use A3 The rechargeable battery has not been used in over a year To obtain optimal performance recharge the battery several times A4 The service life of the rechargeable battery may have been reached Stop using the rechargeable battery and replace it with a new one that follows the same specifications A The rechargeable battery has reached its service life Replace...

Page 63: ...White Balance WB setting is incorrect Adjust the White Balance setting A1 The subject is under strong light To improve choose a negative EV value A2 The light source shines directly into the lens of the DV camera Change the angle of the DV camera or move the DV camera away from the light source A3 The flash fires in every shot taken Do not set the flash mode to Forced flash or Forced flash with Re...

Page 64: ...he TV connection A4 The DV camera is disconnected from the TV set Make sure the video cable is properly connected to both the DV camera and the TV set A1 The USB Switch setting is set to the incorrect mode Enter the Setup mode and set the USB Switch to Direct Print A2 The DV camera is disconnected from the printer Make sure one end of the USB cable is connected to your printer and the other end to...

Page 65: ...ectX driver is not installed Install the DirectX driver appropriate for your system from the Microtek CD ROM version 8 1 or later is recommended DirectX is automatically installed each time when you install Ulead VideoStudio A1 The USB Switch setting is set to the incorrect mode Enter the Setup mode and set USB Switch to USB Mode A2 The DV camera is disconnected from the computer Make sure one end...

Page 66: ...nter the Setup mode and set USB Switch to USB Mode A2 The DV camera is disconnected to the computer Make sure one end of the USB cable is connected to your computer and the other end to your DV camera s USB connector Make sure the USB cable is properly connected to both the DV camera and the computer A1 The USB Switch setting is set to the incorrect mode Enter the Setup mode set USB Switch to Web ...

Page 67: ...e Hardware tab and then click the Device Manager button Expand the Image Device tree the DV camera should be in the list For Macintosh Users Make sure one end of the USB cable is connected to your computer and the other end to your DV camera s USB connector then turn on the DV camera Check to see if Camera Driver has been installed on your computer For Mac OS 9 x 1 Go to the Apple menu and select ...

Page 68: ...a will shut down soon Card error Incorrectly formatted SD card Reformat or replace the SD card The SD card contact area Use cotton swab dipped with industrial alcohol to clean is smudged or soiled the contacts The SD card is damaged Replace the SD card DV camera is faulty Contact Microtek Customer Service Memory full The memory space is full recorded Erase some data or use an SD card that has ampl...

Page 69: ... up to 270 degrees Print Select All Adds a DPOF print mark on the recording for professional print services to determine which prints are to be printed at a photofinisher Startup Image Cancel Default Select Specifies the startup image for the DV camera Setup Menu Options Description Brightness Adjusts the brightness level of the LCD screen Beep On Off Toggles DV camera s beep sounds on and off Dat...

Page 70: ...ash off Effective range 4 92 6 56 ft 1 5 2m Self timer 10 sec delay Movie Clip 640x480 pixels 30 fps 320x240 pixels 30 fps unlimited length maximum length dependent on SD MMC card Audio Clip Unlimited length maximum length dependent on SD MMC card Print Format DPOF Digital Print Order Format Direct Print Yes Quality Levels Best Fine Normal Storage Media External SD Secure Digital MMC Multimedia Ca...

Reviews: