background image

Microtek Scanner
Installation Guide

for the ScanMaker

®

 V6

UPL

1. Unpack scanner

Open your scanner package and check the
components as stated in your packing list. Install the
software first, then the hardware. Before proceeding
any further, check that you have the items listed on
the packing list. If any item is missing, contact
Microtek.

Use this installation guide if you have: 1) Windows 98 and an available USB port; or 2) if you have an Apple iMac or Power
Macintosh and an available USB port. This document provides information on how to install your Microtek Scanner on a PC or
Mac using the scanner’s Universal Serial Bus (USB) interface. For PC USB installation, see pages 1 to 5. For Mac USB
installation, see pages 6 to 8.

USB Installation on the PC

Version

for PC (Windows


98)

& Mac (Apple iMac / G3
with built-in USB ports)

UNIVERSAL SERIAL BUS

MQ0005099

Copyright © 1999 Microtek Lab, Inc.

http://www.microtekusa.com

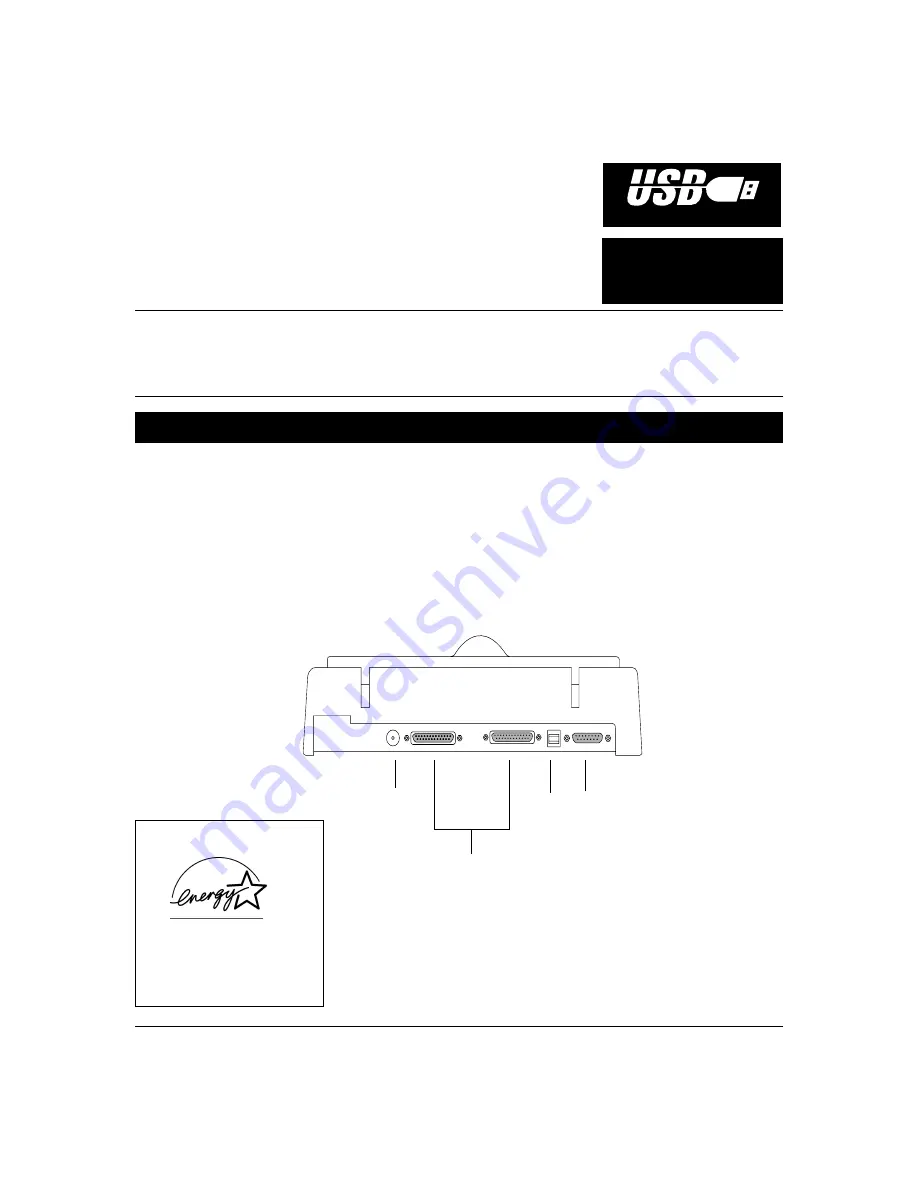
Your Microtek ScanMaker scanner comes with two
built-in interfaces: USB and Parallel. For USB
installation, use the scanner’s USB port. See the
graphic below to locate the different ports on the
back of the scanner, including the scanner accessory
port.

Energy Star Notice

As an ENERGY STAR Partner,
Microtek International, Inc. has
determined that this scanner
meets the ENERGY STAR
guidelines for energy efficiency.

Accessory

Port

Power

Connector

USB

Port

Parallel Ports

(Not used with

USB installation)

Summary of Contents for ScanMaker V6UPL

Page 1: ...niversal Serial Bus USB interface For PC USB installation see pages 1 to 5 For Mac USB installation see pages 6 to 8 USB Installation on the PC Version for PC Windows98 Mac Apple iMac G3 with built in...

Page 2: ...tware Installer Do not restart your computer until all the software has been installed Here is a list of software on your Microtek CD a Microtek ScanWizard 5 This is your scanner controller program fo...

Page 3: ...other cable is connected to the scanner except the power adapter at this point 3 Connect one end of the USB cable to your computer and connect the other end of the cable to the scanner s USB port 4 T...

Page 4: ...e image click the Scan to button The image is then scanned and saved to a file Aside from saving you may also deliver the saved image to an image editing software an e mail editor or a web browser 5 R...

Page 5: ...Test When started successfully the screen below appears 4 Place your document face down on the scanner glass and click on the Flatbed button in the Microtek ScanTest window A 5 A preview of your image...

Page 6: ...site at http www apple com to download and install any iMac updates you may need 3 Next install the software on your Microtek CD ROM To install each software open the software program s folder and the...

Page 7: ...adapter into the back of the scanner and plug the other end into a wall outlet or power source Make sure no other cable is connected to the scanner except the power adapter at this point This will tu...

Page 8: ...www support microtek com 3 When ScanWizard 5 launches it automatically performs a fast preview of the material on your scan bed and displays it in the preview area 4 In the preview window you can res...

Reviews: