Page 1
Quick Ceph
®
Systems
Doc ID# 1033ScanMaker8700_Setup - Revision 4/23/02
Microtek ScanMaker 8700 Setup
http://www.quickceph.com/docs/1033ScanMaker8700_Setup.pdf
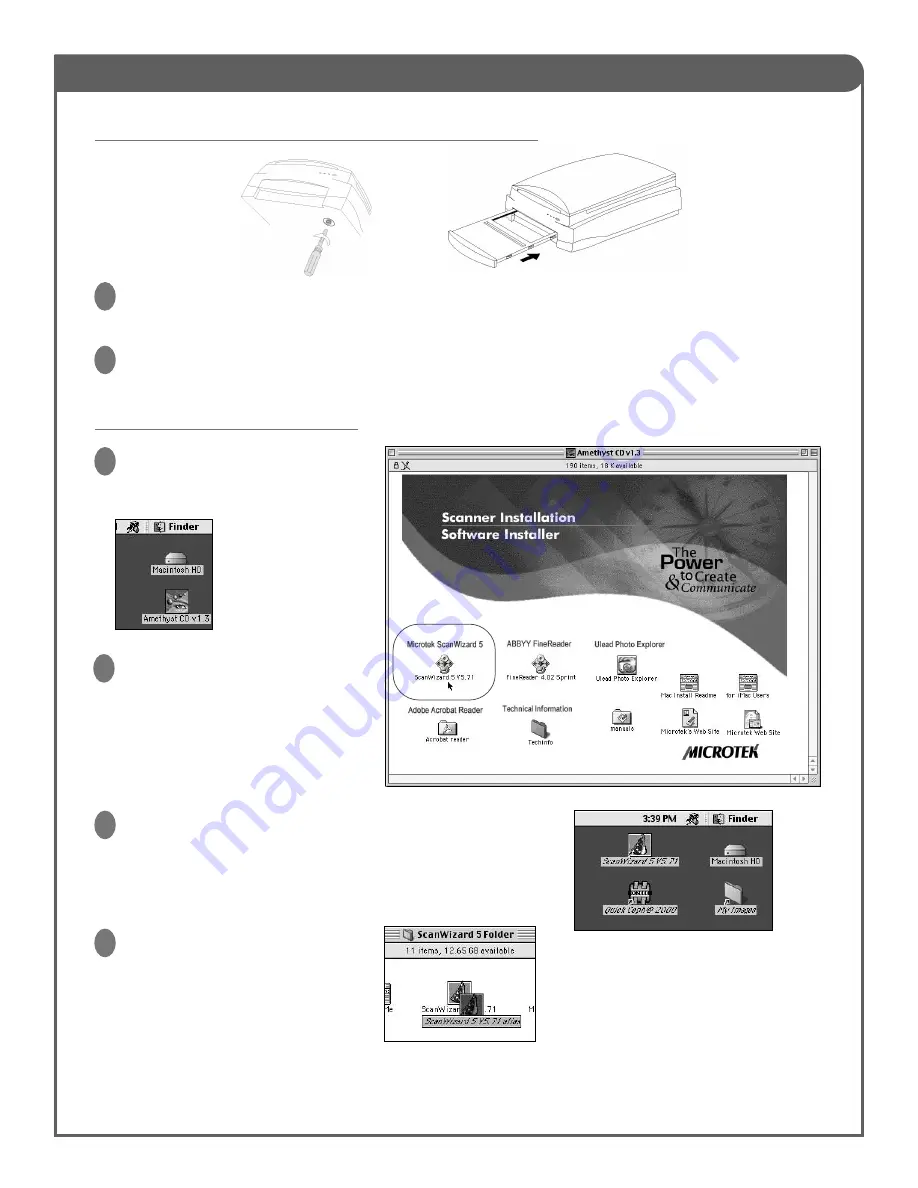
Installing Scanner Software
To allow x-rays to be scanned, remove the default sliding tray from the scanner and replace it with the Glass Film
Holder, as shown on the illustration above. Then, connect the scanner to either the FireWire port on the computer or
the USB hub. Both ports are supported, although using the FireWire port frees up a USB port on the hub.
Now that you have connected the scan-
ner to the computer, it is time to install
the scanner software. Insert the
“Amethyst CD v.1.3” CD-ROM found in
the scanner package.
An icon will appear on
your desktop. Double
click on this icon.
1
The folder shown to the right will open.
Double click on the icon labeled
“ScanWizard 5 V5.71”, which is highlight-
ed in the image. The program will start
installing onto your computer. You will
need to click on the Restart button after
the installation is finished.
2
Turn the scanner on its side to reveal the locking screw. To unlock the scanner, use a coin or screwdriver and turn the
locking screw counterclockwise. The screw will push out slightly when unlocked. The scanner should only be locked
for storage or transport.
1
2
3
When the computer reboots, there will be two new icons on your desktop,
“ScanWizard 5 V5.71” and “My Images”. Both of these icons are aliases
(shortcuts). The original items are found in “ScanWizard 5 Folder” with-
in the Macintosh HD. The ScanWizard 5 V.71 program activates the
scanner and the “My Images” folder stores the scanned images. You
should arrange the icons as shown on the image to the right.
Your desktop should resemble
the one shown above when the
software installation has concluded.
Preparing the Scanner and Connecting it to the Computer
4
If the “ScanWizard 5 V5.71” alias is not
automatically created, you can create
one manually. Open the “ScanWizard 5
Folder” within the Macintosh HD and
click once to highlight the icon
“ScanWizard 5 V5.71”. Then, go to the
File menu and select “Make Alias”. This
will create an alias of the ScanWizard
application, as shown to the right. Place
this alias on the desktop.