Memorex MVDP1077, User Manual
The Memorex MVDP1077 is an exceptional multimedia portable DVD player that provides ultimate entertainment on the go. Rest assured, you won't miss a beat with our comprehensive and easy-to-follow User Manual. Download it for free from manualshive.com to unlock the full potential of this remarkable device.
Share
Download


Reviews:
No comments
Related manuals for MVDP1077

DV-RA1000HD
Brand: Teac Pages: 2

DV-D6500
Brand: Tascam Pages: 68

COBY MP-CD550
Brand: Coby Pages: 6

SD2DUG24
Brand: CARLO GAVAZZI Pages: 32

Digital Touch screen MP3 player
Brand: Ematic Pages: 21

dmc1CD
Brand: M&S Systems Pages: 4

69671
Brand: Predator Pages: 24

THE V-CLIP PRO
Brand: Visual Land Pages: 10

DX-3700
Brand: Onkyo Pages: 22

AZ8068
Brand: Magnavox Pages: 2

PDV-708U
Brand: Durabrand Pages: 28

MP-FUB27
Brand: MPMan Pages: 19

SDVD 7026
Brand: Sylvania Pages: 12

LPD-902
Brand: Lloyd's Pages: 24
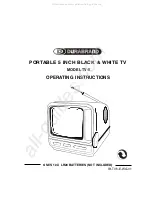
TV-5
Brand: Durabrand Pages: 9

CDI450/86
Brand: Magnavox Pages: 20

DVD5600
Brand: Majestic Pages: 44

MP5918
Brand: F&U Pages: 16


