

4
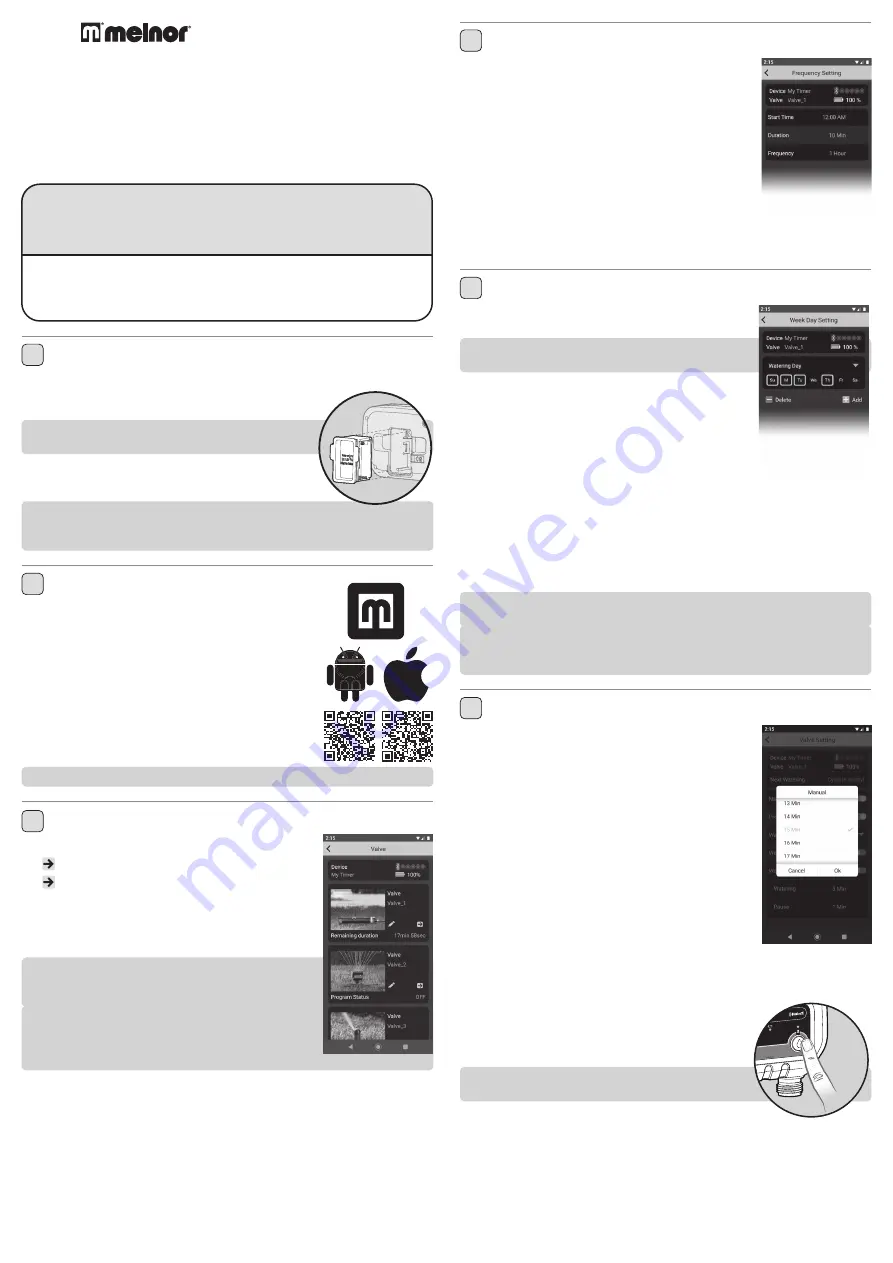
Schedule “By Frequency”
■
Tap
“Start Time”
to adjust the first watering start
time of the day and tap
“OK”
.
■
Tap
“Duration”
to adjust how long you want to water
and tap
“OK”
■
Tap
“Frequency”
to adjust how often you want to
water and tap
“OK”
■
The Valve is now ready to water. If using a 2 or 4 zone
Timer, complete scheduling as needed for each Valve
following the same steps.
■
You can return to the home screen by tapping
“<”
in
the upper left corner. The time until the next watering cycle will display on the
Valve setting screen.
5
Schedule “By Week Day”
■
Tap
“Watering Day”
to select which days you want
to water.
NOTE:
The selected days will be highlighted in yellow. All
days are selected by default.
■
Ensure
Cycle 1
is turned on. (Green)
■
Tap
“Start Time”
to adjust watering time for that
cycle. Tap
“OK”
.
■
Tap
“Watering”
to adjust how long you want to water.
Tap
“OK”
.
■
Watering Cycle 1
is now programmed.
■
To add additional watering cycles, tap
“Add”
. You may
set up to 12 watering cycles on each Valve.
■
Set
"Start Time"
and
"Watering"
as in the previous steps. Tap "
OK"
.
■
If using a 2 or 4 zone Timer complete scheduling as needed for each valve
following the same steps.
■
You can return to the home screen by tapping
“<”
in the upper left corner.
The time until the next watering cycle will display on the Valve setting screen.
NOTE:
You may deactivate a
“Cycle”
temporarily (Gray) and reactivate as
needed. Turn on (Green) to resume.
You may permanently delete a cycle by tapping the
“Delete”
button.
Trash icons will appear beside each cycle. Tap the trash can icon to
remove.
6
Manual Watering
There are two ways to turn on the water manually:
Directly
from the timer
or
through the app
.
Manual watering from the app:
■
Tap on the
Timer
you want to control.
■
Tap on the
Valve
that you want to open manually.
■
Set
“Manual”
to turn on (green) the valve. The water
will begin to run.
■
Tap the time to adjust how long you want to water. Tap
“OK”
to set. This will become your new default manual
watering time.
■
The app will show the remaining manual watering
duration.
■
You can cancel Manual Watering at any time by setting
“Manual”
to off (Gray)
Manual watering from the Timer:
■
Press the yellow button on the Timer above the Valve you want to use.
■
The Valve will open for the last manual watering time
set in the app. (Default factory setting is 20 minutes)
■
To stop the water at any time, press the yellow button
above the Valve again.
NOTE:
You can turn the water on using the app and off
from the Valve or vice versa.
93015, 93100, 93280
1, 2 & 4 Zone Bluetooth
®
Water Timers
An easy and convenient way to manage your lawn and garden watering.
This instruction guide is a universal manual for Melnor 1, 2 and 4 Zone
Bluetooth® Water Timers.
User Instructions
■
English
93XXX_INS_ENG_01
Instruction Update
We recommend you download the latest version of these instructions at:
www.melnor.com/btupdate
This is:
Revision
01
1
Battery Installation & Assembly
■
Remove the battery holder from the back of the Timer. Insert
4× AA Alkaline
batteries. Replace the battery holder, making sure that
it is firmly and securely placed in the Timer.
NOTE:
Once batteries are in place in the Timer, a green
light will flash twice.
■
Attach the Timer to an outside faucet and turn water
on slowly. The water must be left on while the Timer is
attached to the faucet for your Timer to operate.
NOTE:
Replace batteries when Timer battery indicator
flashes a red light or when the battery icon in the app turns red. Please
use only Alkaline batteries. Do not use rechargeable batteries.
2
Download Melnor BT App
■
Compatible with Bluetooth® 4.0 devices
(minimum required iOS 9 or Android V7.0).
■
Download and install the
Melnor BT
app from the
Google Play or Apple Store.
■
Visit the
Google Play Store
or
Apple App Store
and search for
Melnor BT
or scan the QR code to
download the app.
■
Make sure Bluetooth® is activated on your smart
phone or tablet.
■
After the app is installed, tap to launch the app.
NOTE:
Your phone must be within 30 feet of the timer to operate the device.
3
Automatic Watering
Open the
Melnor BT
app.
Tap or the Timer photo to go to the Valve screen.
Tap or image on the Valve you want to schedule.
Tap
“Program On/Off”
to on. (Green)
Tap
“Watering Mode”
to set the scheduling
“By
Frequency”
or
“By Week Day”
. Tap “
Setting”
to
confirm.
NOTE:
Scheduling
“By Frequency”
waters at regular
intervals.
i.e., Every 12 Hours, Every Day, Every 2 Days.
Scheduling
“By Week Day”
allows you to select
specific days to water.
i.e., Monday—Wednesday—Friday;
Sunday—Wednesday; Tuesday only.


