background image

Dok./Rev

.-Nr

.  3129

6 DE Aldi UK IRE Cover 3002

4

4

99_5

50 RC

Great care has gone into the manufacture of this product and it should 
therefore provide you with years of good service when used properly. 
In the event  of product failure within its intended use over the course 
of the fi rst 3 years after date of purchase, we will remedy the problem 
as quickly as possible once it has been brought to our attention. In the 
unlikely event of such an occurrence, or if you require any information 
about the product, please contact us via our helpline support services, 
details of which are to be found both in this manual and on the product 
itself.

PRODUCED IN TURKEY FOR:

MEDION AG
AM ZEHNTHOF 77
45307 ESSEN
GERMANY

AFTER SALES SUPPORT

www.medion.co.uk

MODEL:
MD 31296

UK: 84544

05/2018

3

YEAR

WARRANTY

GB

IRE

0333 32 13 106

1 800 99 25 08

National rate 

free phone

GB

IRE

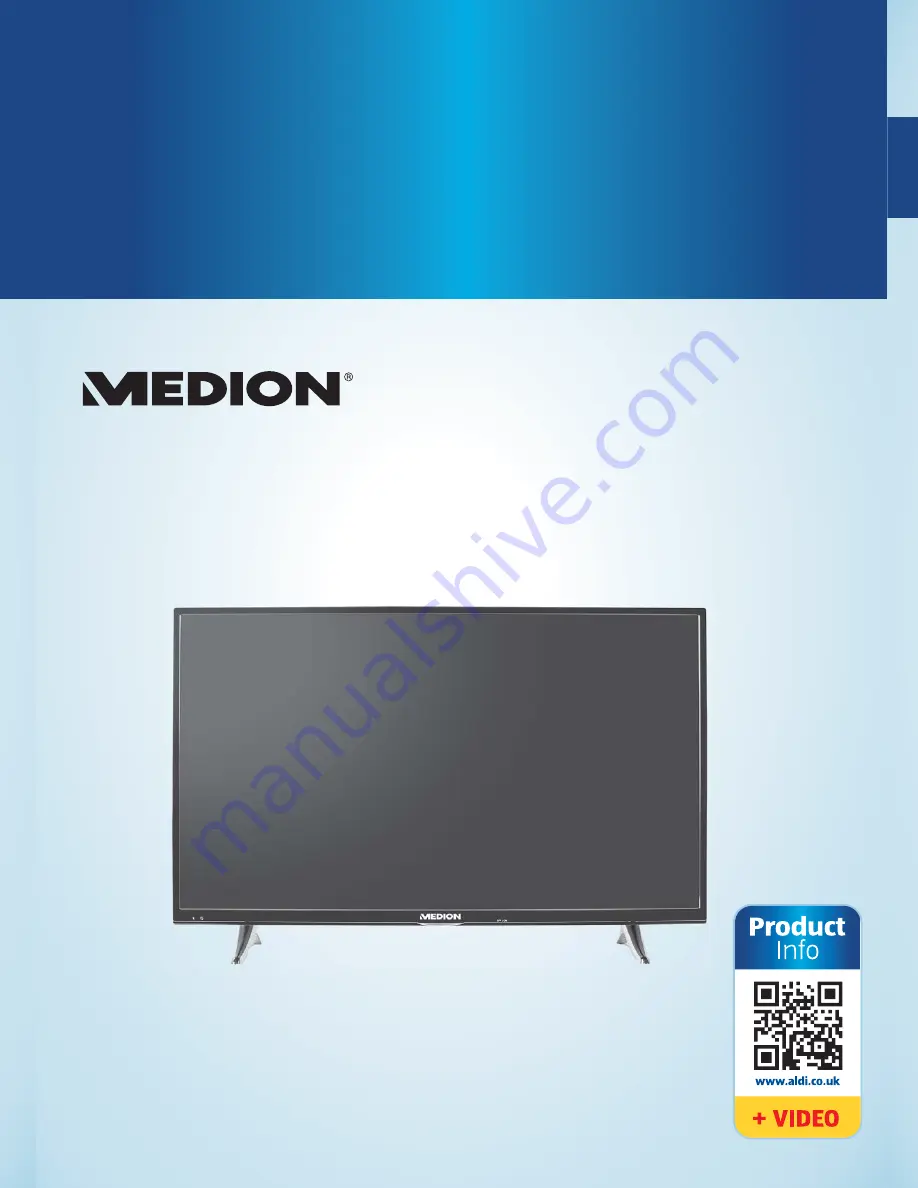
55“ (138.8 CM) SMART 4K ULTRA HD TV WITH HDR

X15507

User Manual

QR

Q

Q

Q

Q

QR

R

R

R

R

R

R

R

R

R

R

R

R

R

R

R

R

R

R

R

R

R

R

R

R

R

R

R

R

R

R

Q

Q

Q

Q

Q

Q

Q

Q

Q

Q

Q

Q

Q

Q

Q

Q

Q

Q

Q

Q

Q

Q

Q

Q

Q

Q

Q

Q

Q

Q

Q

Q

Q

Q

Q

Q

Q

Q

Q

Q

Q

Q

Q

Q

Q

Q

Q

Q

Q

Q

Q

Q

Whether you require 

product information

spare parts

 or 

accessories

, details on 

warranties

 or 

aftersales services

, or if you want to watch a 

product demonstration 

video

, our QR codes will take you there in no time at all.

What is a QR code?

A QR code (QR = Quick Response) is a type of matrix that can be read with a 
smartphone camera and that contains a link to a website or contact details, for 
example.

Advantage

:


You do not need to manually enter a website address or contact details.

How it works

To scan the QR code, all you need is a smartphone with QR code reader software and 
an internet connection.
This type of software can be downloaded for free from your smartphone’s app store.

Try it out now

Just scan the QR code with your smartphone and fi nd out more about the ALDI 
product you have purchased.

Your ALDI Service Portal

All details mentioned above can also be found in the ALDI Service 
Portal at www.aldi.co.uk.

Depending on your tariff plan you may be charged for the connection.

QR codes take you where you want to go quickly and easily

QR

Q

Q

Q

Q

QR

R

R

R

R

R

R

R

R

R

R

R

R

R

R

R

R

R

R

R

R

R

R

R

R

R

R

R

R

R

R

Q

Q

Q

Q

Q

Q

Q

Q

Q

Q

Q

Q

Q

Q

Q

Q

Q

Q

Q

Q

Q

Q

Q

Q

Q

Q

Q

Q

Q

Q

Q

Q

Q

Q

Q

Q

Q

Q

Q

Q

Q

Q

Q

Q

Q

Q

Q

Q

Q

Q

Q

Q

Contents

Overview .................................................................................................................. 4
Device parts .............................................................................................................. 6
About these operating instructions ........................................................................ 9
Safety instructions ...................................................................................................11
Declaration of conformity .......................................................................................16
Overview of the device ........................................................................................... 17
Using the device for the fi rst time ..........................................................................19
Operationun ............................................................................................................26
Teletext ....................................................................................................................29
Via the OSD menu ................................................................................................... 30
EPG – Programme guide .........................................................................................52
Media portal ............................................................................................................53
HbbTV system ......................................................................................................... 54
Internet ................................................................................................................... 54
MEDION® Life Remote App ..................................................................................... 54
Data protection MEDION® Smart TV ....................................................................... 55
Troubleshooting ..................................................................................................... 56
Cleaning .................................................................................................................. 59
Storage when not in use ........................................................................................ 59
Disposal ................................................................................................................... 60
Technical data.......................................................................................................... 61
Legal notice ............................................................................................................ 64
Index ....................................................................................................................... 65

IRE: 84545

31296 DE Aldi UK IRE Cover 30024499_550 RC.indd   1-5

31296 DE Aldi UK IRE Cover 30024499_550 RC.indd   1-5

27.02.2018   16:11:25

27.02.2018   16:11:25

Summary of Contents for X15507

Page 1: ...4K ULTRA HD TV WITH HDR X15507 User Manual QR Q Q Q Q QR R R R R R R R R R R R R R R R R R R R R R R R R R R R R R R Q Q Q Q Q Q Q Q Q Q Q Q Q Q Q Q Q Q Q Q Q Q Q Q Q Q Q Q Q Q Q Q Q Q Q Q Q Q Q Q Q Q Q Q Q Q Q Q Q Q Q Q ...

Page 2: ...he QR code all you need is a smartphone with QR code reader software and an internet connection This type of software can be downloaded for free from your smartphone s app store Try it out now Just scan the QR code with your smartphone and find out more about the ALDI product you have purchased Your ALDI Service Portal All details mentioned above can also be found in the ALDI Service Portal at www ...

Page 3: ...f conformity 16 Overview of the device 17 Using the device for the first time 19 Operationun 26 Teletext 29 Via the OSD menu 30 EPG Programme guide 52 Media portal 53 HbbTV system 54 Internet 54 MEDION Life Remote App 54 Data protection MEDION Smart TV 55 Troubleshooting 56 Cleaning 59 Storage when not in use 59 Disposal 60 Technical data 61 Legal notice 64 Index 65 ...

Page 4: ...4 A B C 3 2 1 14 SIDE AV MODE I O USB 5Vdc Max 500mA USB 5Vdc Max 500mA 4 9 10 11 12 13 5 5 6 7 8 SPDIF ARC Optic out ...

Page 5: ...P LANG SUBT EPG TXT Q MENU MENU BACK EXIT 2 1 3 ABC 4 DEF 5 GHI JKL 6MNO 7PQRS 8TUV 0 TV 9WXYZ 15 16 17 18 19 20 21 22 24 26 27 28 30 29 31 32 33 41 40 38 39 25 35 37 36 23 Play 34 De 1 2 3 4 5 6 7 8 9 10 11 12 13 14 ...

Page 6: ...PDIF Optic OUT 13 LAN 14 Fixing holes for a wall mount 15 16 NETFLIX 17 Number buttons 18 SWAP 19 MENU 20 21 P 22 OK 23 EXIT 24 SOURCE 25 TXT Activate teletext 26 Q MENU 27 MEDIA 28 Red button Green button Yellow button Blue button 29 SIZE 30 Media buttons 31 LANG 32 SUBT 33 multifunction button 34 Play 35 EPG EPG 36 i INFO 37 38 V 39 Direction buttons 40 BACK 41 TV ...

Page 7: ...for the first time 19 Unpacking 19 Mounting 19 Inserting batteries in the remote control 20 Connecting the antenna 20 Connecting the power supply 20 Switching the smart TV on and off 20 Using the multimedia connections 21 Channel search when switching on for the first time 23 Operationun 26 Channel selection 26 Sound settings 26 Screen settings 26 Displaying information 27 Opening the favourites lis...

Page 8: ...tion MEDION Smart TV 55 Troubleshooting 56 Do you need more help 58 Smart TV pixel faults 58 Cleaning 59 Storage when not in use 59 Disposal 60 Technical data 61 Product data sheet 63 Information on trademarks 63 Legal notice 64 Index 65 8 ...

Page 9: ...operty This symbol gives you useful additional information on assembly or operation Declaration of conformity see section Declaration of conformity Products that feature this symbol meet the requirements of the EC directives www tuv com The Tested Safety Mark GS Mark is used to certify that a product complies with the requirements of the German Product Safety Act ProdSG These requirements are desc...

Page 10: ...pictures with four times the level of detail as Full HD The prerequisite for this is an Ultra HD TV signal HDR High Dynamic Range HDR technology offers a higher dynamic range with respect to the brightness values of the displayed colours This means that each of the colour values can be displayed in 1024 steps instead of the previous maximum of 256 steps This quadrupling of the dynamic range makes ...

Page 11: ...g material is not a toy Packaging film can be swallowed or used improperly Therefore there is a risk of suffocation Keep packaging material such as plastic film or plastic bags away from children DANGER Risk of electric shock Risk of electric shock short circuit and fire Never open the housing of the smart TV and never insert any objects through the slots and openings into your smart TV WARNING Overh...

Page 12: ...not operating correctly The device has fallen or the housing is damaged Smoke is rising from the device Set up location In the first few hours of use new devices can give off a typical unavoidable but totally harmless smell which wears off with time We recommend that you ventilate the room at regular intervals to counteract the smell We have taken appropriate measures during the development of this...

Page 13: ...he smart TV from falling over Only use the stand and screws supplied with the TV Only use furniture that guarantees the safe use of the TV Ensure that the TV does not hang over the edges of the furniture Do not place the TV on higher or high furniture such as wall cabinets or shelves without ensuring that both the furniture and the TV are safely and securely held in place In order to guarantee the...

Page 14: ...ce completely from the mains network Disconnect the mains plug from the mains socket for this purpose DANGER Risk of electric shock There is a risk of death due to an electric shock when the housing is open Do not open the housing of the device It does not contain any parts requiring maintenance Only plug the smart TV into earthed 220 240 V 50 Hz sockets Contact your electricity provider if you ar...

Page 15: ...recharged Never empty the batteries by means of high power output Never short circuit the batteries Never expose the batteries to excessive heat such as sunlight fire or similar sources of heat Do not dismantle or deform the batteries You could injure your hands or fingers or battery fluid could come into contact with your eyes or skin If this happens rinse the affected areas with plenty of clean wat...

Page 16: ...levant regulations of RE Directive 2014 53 EU Ecodesign Directive 2009 125 EC RoHS Directive 2011 65 EU Full declarations of conformity are available at www medion com conformity AT BE BG CZ DK EE FR DE IS IE IT EL ES CY LV LI LT LU HU MT NL NO PL PT RO SI SK TR FI SE CH UK HR AT Austria BE Belgium CZ Czech Republic DK Denmark EE Estonia FR France DE Germany IS Iceland IE Ireland IT Italy EL Greec...

Page 17: ...dby mode or operating mode 9 HDMI 1 3 HDMI connection for devices with a HDMI output HDMI 1 can be used for CEC ARC 10 ANT For connecting an aerial analogue DVB T or DVB C 11 VGA VGA port for connecting a PC or a YUV adapter 12 SPDIF Optic OUT Digital audio output optical 13 LAN Network connection to connect to the Internet 14 Fixing holes for a wall mount Remote control 15 Switch smart TV on off ...

Page 18: ...ose services due to geo blocking 35 EPG EPG Digital TV call up the electronic programme guide 36 i INFO Digital TV show information e g current channel number 37 Mute 38 V Increase or decrease volume 39 Direction button Move up in menu Digital TV Select info bar for the current programme teletext select next page Direction button Move down in menu Digital TV Select info bar for the current program...

Page 19: ...onthly broadband data allowance Only selected channels provide 7 day catch up Using the device for the first time Before using for the first time be sure to read the section Safety instructions Unpacking Select a suitable place for setting up the device before unpacking Open the box very carefully to avoid damaging the device The device could be damaged if you use a knife with a long blade to open t...

Page 20: ...module available in specialist shops into the slot provided for this purpose on the left hand side of the device Common Interface 4 You can then insert the card from your provider into the CI module Connecting the power supply Connect the mains plug on the device to an easily accessible 220 240 V 50 Hz mains socket Switching the smart TV on and off Set the power switch 2 on the bottom of the devic...

Page 21: ...ers the best quality transmission and can also transmit Ultra HD resolutions from version 2 0 Use a standard HDMI cable for this purpose Connect the corresponding HDMI connections on the devices using a HDMI cable HDMI ARC If you want to use your TV as a signal receiver AND signal source for transmitting the sound signal to an audio receiver you should use a HDMI connection with Audio Return Chann...

Page 22: ...A connection on the TV to the YPbPr cinch connections red blue green on the video device Use a corresponding YPbPr adapter for this purpose Use the AV audio connections on the TV red white for transmitting the sound and connect them to the YPbPr audio connections on the video device red white Use a standard stereo cinch cable for this purpose If the TV has AV mini jack connections please use a sui...

Page 23: ...ose your country OK Back BACK UK On None Off Off Off Use 39 to select the desired country The country setting will influence the order in which the channels are stored Also there are a number of options preset for the individual countries If Siyou would also like to search for encrypted channels set the option to ON Now use the direction buttons to select the preferred reception type DIGITAL AERIAL...

Page 24: ...urther network configuration options CONFIGURATION Choose the setting AUTOMATIC IP or MANUAL IP If you select MANUAL IP three additional lines appear in which you can manually enter the data for the IP ADRESS SUBNET MASK and DEFAULT GATEWAY using the direction buttons and the number buttons 17 CONFIGURATION Select here between AUTOMATIC DNS or MANUAL DNS If you select MANUAL DNS two additional line...

Page 25: ...ue TV Radio Exit OK 51 0 0 0 29 After the end of the automatic channel storage an overview of the number of found channels appears for the corresponding reception types Press the OK 22 button to close the list and complete the search The device now switches to the channel of the previously selected preferred reception type At the same time the channel list is displayed If the list is not processed...

Page 26: ...audio language Screen settings Depending on the programme the pictures are transmitted in the formats 4 3 or 16 9 Use the SIZE 29 button to adjust the picture format AUTO The format displayed is automatically adjusted to match the input signal FULL only in HDMI mode and for HD TV programmes received via cable Pixel exact reproduction of the picture 1 1 16 9 For undistorted screen display in 16 9 f...

Page 27: ...he green button 28 ADVANCED Now use the and buttons to select the channel that you want to add to one or more favourites lists If you want to add several channels to the favourites simultaneously select these using the yellow button 28 Then press the OK button The CHANNEL EDIT OPTIONS menu opens Now use the and buttons to select the ADD REMOVE FAVOURITES option and press the OK button In the FAVOU...

Page 28: ...s 39 to go to the desired source Confirm your selection with the OK button 22 Wireless Display Via wireless display you have the option of playing content from a signal source device e g tablet PC smartphone etc via the television The signal source device must have at least Android version 4 2 installed Select WIRELESS DISPLAY as source The display Ready for Connection appears You must activate scr...

Page 29: ...yed in the top left corner of the screen The teletext counter searches as long as it takes to find the selected page number Scrolling through pages Using the channel selector buttons or the direction buttons and you can scroll back and forth through the teletext pages Colour buttons If coloured text entries are displayed at the lower edge of the screen then you can select the contents directly by p...

Page 30: ...lection Use the EXIT 23 or MENU buttons to close the menu Please note that depending on the presets the menu closes automatically if no button is pressed The OSD menu also displays the available options along the bottom You can select the following main menus PICTURE menu SOUND menu SETTINGS menu INSTALLATION menu CHANNEL LIST menu MEDIA BROWSER menu Due to technical changes the menus described he...

Page 31: ...e OPTION MENU EDIT FAVOURITES If you press the Q MENU button you can use the option EDIT FAVOURITES in the OPTION MENU to add the currently selected channel to a favourites list LIST 1 4 by switching the option of the desired list to ON SLEEP TIMER You can use the SLEEP TIMER to programme the device to switch off automatically You can set the time in 30 minute increments maximum 2 hours The sleep ...

Page 32: ...rast on a scale of 0 100 BRIGHTNESS Increase or decrease brightness on a scale of 0 100 SHARPNESS Increase or decrease sharpness on a scale of 0 100 COLOUR Increase or decrease colour saturation on a scale of 0 100 ENERGY SAVING Here you can activate the energy saving mode Select OFF MINIMUM MEDIUM MAXIMUM CUSTOM SCREEN OFF or AUTO to set the brightness of the TV or switch off the screen In DYNAMI...

Page 33: ...OINT If you have selected the setting CUSTOM under the option COLOUR TEMP you can set the colour temperature to any value between warm and cold PICTURE ZOOM Set the picture format here This function corresponds to the SIZE 29 button FILM MODE To play back films taken on a video camera without judder switch the film mode to the AUTO position SKIN TONE Set skin tone COLOUR SHIFT Set colour shift HDMI ...

Page 34: ...ect OFF MINIMUM MEDIUM MAXIMUM CUSTOM SCREEN OFF or AUTO to set the brightness of the TV or switch off the screen BACKLIGHT If you have selected CUSTOM under the setting ENERGY SAVING you can set your preferred brightness level for the energy saving mode scale 0 100 ADVANCED SETTINGS Advanced Picture Settings Dynamic Contrast ColourTemp White Point Picture Zoom Film Mode Normal 16 9 Auto Off Back ...

Page 35: ...can use 39 to adjust the horizontal position of the picture V POSITION You can use to adjust the vertical position of the picture DOT CLOCK With this setting the picture signal is synchronised to match with the monitor s pixel rate This corrects errors that can appear as vertical stripes in pixel dense images like tables or text with small fonts Set the frame rate using PHASE If the PC picture is ...

Page 36: ...avoid listening at high volume over long periods of time Before pressing play set the volume to the lowest setting Start playback and increase the volume to a comfortable level SOUND MODE Standard setting STEREO If the current programme supports DUAL mode e g dual language broadcasts you can also choose here between DUAL I and DUAL II original language and dubbed language AVL This function compens...

Page 37: ...the mains plug Insert first of all the CI module into the slot on the side of the smart TV Then insert the card Please note that you may only insert or remove the CI module when the device has been disconnected from the mains electricity network NOTICE Risk of damage The CI module or the television could be damaged if you attempt to use force to insert the CI module The CI module must be inserted c...

Page 38: ...gramme e g a film is broadcast in several languages you can select the spoken language here e g original language SECONDARY AUDIO LANGUAGE Select your second preferred language here PRIMARY SUBTITLE LANGUAGE If the programme includes subtitles for the hard of hearing you can set the preferred language here SECONDARY SUBTITLE LANGUAGE Select your second preferred subtitle language here TELETEXT The ...

Page 39: ...he entire menu system GUIDANCE If the child lock is activated the TV can only be operated via the remote control In this case the multifunction button MODE 8 is deactivated To switch the TV back on you will need the remote control When a button is pressed the message GUIDANCE ON appears on the screen while the menu remains hidden SET PIN Set a new PIN number Use the number buttons 17 to add a new ...

Page 40: ...the TIMER menu The timer then switches to the relevant programme However it is not possible to output the signal The displayed timer can now be selected and deleted using the red button 28 Press the green button 28 if you want to edit the timer The EDIT SELECTED TIMER menu will then open The timer function can be used to switch over to another channel at a particular time with the device switched ...

Page 41: ...st the selected time zone forwards or backwards GMT Only active if the previous point has been set to MANUAL Select the value with 39 The current time will be changed accordingly SOURCES In this menu you can activate deactivate or select sources Deactivate a source by selecting it and pressing Deactivated sources do not appear in the pick list that opens when you press the SOURCE 24 button HDMI co...

Page 42: ... options CONFIGURATION Choose the setting AUTOMATIC IP or MANUAL IP If you select MANUAL IP three additional lines appear in which you can manually enter the data for the IP ADRESS SUBNET MASK and DEFAULT GATEWAY using the direction buttons and the number buttons 17 CONFIGURATION Select here between DYNAMIC DNS or MANUAL DNS If you select MANUAL DNS two additional lines appear in which you can man...

Page 43: ...Stunden OK Aktiviert Letzter Zustand Aktiviert Aktiviert Deaktiviert TV Deaktiviert Weitere Einstellungen Menü Einblendungsdauer HBBTV Aktuelle Software Update Anwendungsversion AutomatischeTV Abschaltung nach Biss KeyVerschlüsselungssystem Audio Video Sharing Einschalt Modus Virtuelle Fernbedienung CEC CEC Automatisches Einschalten Lautsprechersteuerung Smart Remote Land Deutschland Navigieren Ve...

Page 44: ...tings under the following option SPEAKERS Enable the CEC function first and select HDMI1 as the source If you have already connected a CEC enabled device the name of the device is listed instead of HDMI1 The basic functions of the device can then be automatically controlled by using the remote control of the smart TV If the CEC feature is enabled and HDMI1 was selected as the source CEC enabled dev...

Page 45: ...es for related channels of the currently selected station The information sent in this respect depends on the selected channel and leads to different results The existing channel list is replaced when the network search is started ANALOGUE FINE TUNE Here you can fine tune analogue channels INSTALLATION SETTINGS Here you can make additional installation settings STANDBY SEARCH If this function is se...

Page 46: ...nnels You can use the lock function to password protect access to certain channels Press the OK button and then enter the required password on delivery 0000 A lock icon will open after the channel name Do the same to unlock the channel To lock a channel you have to know the password Default password on delivery 0000 it can be changed in the SETTINGS PARENTAL menu ADD REMOVE FAVOURITES You can crea...

Page 47: ...SD or all channels are displayed FAVOURITES Select whether one of the four possible favourites lists is to be displayed PROFILE OPTIONS Here you can make pay TV settings is not however currently supported by the pay TV providers BACK 40 BACK Press the BACK button to move back one step in the menu Number buttons 17 JUMP To jump to a desired channel you can enter the channel number directly using th...

Page 48: ...l be displayed on the device As soon as the USB medium is removed USB DEVICE 0 DISCONNECTED will be displayed and the device will automatically switch back to normal TV mode VIDEOS To play back video files 0 9 17 Jump OK 22 Play selection RED BUTTON 28 Sort by name LANG 31 Play preview SWAP 51 Device selection if several USB or network drives are available 39 Navigation 30 Playback GREEN BUTTON 28 ...

Page 49: ... The SWAP option will only be displayed if several USB connections and or networks are available ALL2 Play back all media types RECORDINGS In this option the recorded programmes on the connected USB stick USB hard drive can be displayed and played back SETTINGS Go to the settings for the media browser VIEW STYLE Select the playback style FLAT or FOLDER SLIDESHOW INTERVAL Select the display time fo...

Page 50: ...este have been selected under DISCARD HARD DISK INFORMATION To display details about the USB hard drive highlight this option and press the OK 22 button The information about the hard drive will tell you for example how much storage space is still available FORMAT DISK Select the FORMAT DISK menu option It is now necessary to enter the password entered during the initial installation or the master...

Page 51: ...he MEDIA BROWSER via the menu Select the SETTINGS option Under VIEW STYLE select the option FOLDER Press the BACK 40 button to return to the main menu of the media browser Select the desired media type and confirm with OK 22 All available networks are listed Select the desired media servers or the network you want to access All available files are displayed The available commands are shown on the lo...

Page 52: ...ton and the FILTER function with the TXT button Use the yellow button to get back to the TIMELINE SCHEDULE Yellow button 28 ZOOM Shrink time window Blue button 28 FILTER If you are looking for a specific programme you can use a filter to restrict the selection SUBT 32 HIGHLIGHT GENRE Set the category for the displayed programmes OK 22 OPTIONS While the selected channel is running only the option SEL...

Page 53: ...You can then register as a new user optional The start view of the media portal appears only on first use or after a reset of the media portal under SETTINGS Afterwards the home screen of the media portal appears where a preselection of certain apps is displayed The following options can be selected here Green button 28 ADD TO HOMESCREEN My Apps optional Press the green button to add the currently ...

Page 54: ...owser function is an app in the media portal and provides you access the Internet After opening predefined web pages and their logos are shown that you can select directly You can use the keyboard function to enter URL addresses directly or control web pages via the activated search function Use the arrow buttons 39 on the remote control to navigate through the options and confirm your selection wit...

Page 55: ...quire the provision of your personal data and the selection of a unique and secret password Please check the privacy policy of the provider beforehand MEDION shall not be liable if the HbbTV the portal or a service does not comply with the user s requirements nor does it guarantee that safe and error free use of such services can always occur without restrictions or continuously at the required ti...

Page 56: ...reception might be poor Check if the antenna is connected properly The picture is not clear The reception might be poor Check if the antenna is connected properly The picture is too bright or too dark Check the settings for contrast and brightness The picture is not sharp The reception might be poor Check if the antenna is connected properly Check the settings for sharpness and noise reduction in ...

Page 57: ...rdingly You will find more information on page 44 Change the input source Filter function of the channel list does not work permanently To set a permanent filter you need to call up the channel list with the OK 22 button and then the expanded channel list with the green button 28 Call up the expanded channel list via MENU CHANNEL LIST and then use the FILTER function If however you call up the chann...

Page 58: ...a resolution of 3 840 x 2 160 pixels which are each made up of four sub pixels red green blue white there are a total of approx 33 2 million control elements in use Occasionally pixels or individual sub pixels can fail or become incorrectly controlled because of this very high number of transistors and the associated extremely complex manufacturing processes used Pixel fault class Defect type 1 Co...

Page 59: ...e dust first or wipe the high gloss finish too vigorously you could scratch the high gloss finish Do not use solvents corrosive or gaseous cleaning agents Clean the screen with a soft lint free cloth Ensure that no water droplets remain on the smart TV Water can cause permanent discolouration In order to avoid damage to the device water must not penetrate into the interior of the device under any cir...

Page 60: ...erials in the device for the purpose of recycling and minimising the environmental impact Take old devices to a collection point for electrical scrap or a recycling centre Before doing so remove the batteries from the device and take them to a separate collection point for used batteries Contact your local waste disposal company or your local authority for more information on this subject Batterie...

Page 61: ...atible Physical resolution 3 840 x 2 160 TV system Pal Channel positions 199 ATV 800 DTV Channels VHF channels I III UHF BAND U HYPERBAND CABLE TV S1 S20 S21 S41 HD DVB T DVB T2 HD HD DVB C Connections Antenna connection analogue TV DVB T or DVB C 2 x USB connection 1 x LAN RJ 45 Video 3 x HDMI 2 0 In with HDCP 2 2 decryption 1 x VGA 15 pin D Sub YUV AV In 3 5 mm mini jack to cinch adapter Audio S...

Page 62: ...ns with stand W x H x D approx 1 247 x 787 x 275 mm Weight without stand approx 13 8 kg Weight with stand approx 14 2 kg Wall mounting Vesa standard hole spacing 400 x 200 mm4 Wi Fi Frequency range 2 4 GHz 5 GHz Wi Fi standard 802 11 a b g n Encryption WEP WPA WPA2 Frequency range MHz Channel Max transmission power dBm 2 400 2 483 5 1 13 19 9 5 150 5 250 36 48 22 4 5 250 5 350 52 64 22 5 5 470 5 7...

Page 63: ...olution px 3 840 x 2 160 www tuv com ID 1000000000 Information on trademarks DTS the logo and DTS together with the logo are registered trademarks of DTS Inc You can find more information about DTS patents at http patents dts com The HDMI logo and the name High Definition Multimedia Interface are registered trademarks of HDMI Licensing LLC Produced under licence from Dolby Laboratories Dolby and the...

Page 64: ...without the written permission of the manufacturer Copyright is owned by the initial product distributor MEDION AG Am Zehnthof 77 45307 Essen Germany The operating manual is available for download via the service portal at www medion com gb service start You can also scan the QR code above and download the operating manual onto your mobile device via the service portal 64 Legal notice ...

Page 65: ...dia connections 21 AV 21 HDMI 21 HDMI ARC 21 HDMI CEC 21 Headphones Out 22 LAN 22 SPDIF 22 USB 22 VGA PC 22 VGA YPbPr 22 N Netflix 43 Network Internet settings 24 42 O Operation 26 Options menu 31 OSD menu 30 Channel list 46 Image 32 Installation 45 Picture in VGA PC mode 34 Settings 37 Sound 36 Overview of the device 17 P Package contents 10 Password 39 Pixel faults 58 Power supply 14 20 61 Produc...

Page 66: ... Technical data 61 63 Teletext 29 Channel selection button 29 Colour buttons 29 Number buttons 29 Sub pages 29 U Ultra HD 10 USB 17 48 Using the device for the first time 19 W Wireless Display 28 66 Index ...

Page 67: ...le once it has been brought to our attention In the unlikely event of such an occurrence or if you require any information about the product please contact us via our helpline support services details of which are to be found both in this manual and on the product itself PRODUCED IN TURKEY FOR MEDION AG AM ZEHNTHOF 77 45307 ESSEN GERMANY AFTER SALES SUPPORT www medion co uk MODEL MD 31296 UK 84544...

Reviews: