background image

Note: 

The default WNVR username and 

password are, admin and, the password 
is blank with no characters, if the user has 
updated this detail please use the newly 
added username and password.

CMS remote playback

Select “playback” on the main interface, 
double click the device list or point “begin 
searching” its default is to show all recording 

fi

 les of that day.

The CMS also supports local playback and 
remote playback support base in “

fi

 le type”/

date to search, and the 

fi

 le will be show on 

the lower window of the application.

AU Technical Support 

1800-AERIAL

237425

   www.matchmaster.com.au

NZ Technical Support 

0800-AERIAL

237425

   www.matchmaster.co.nz
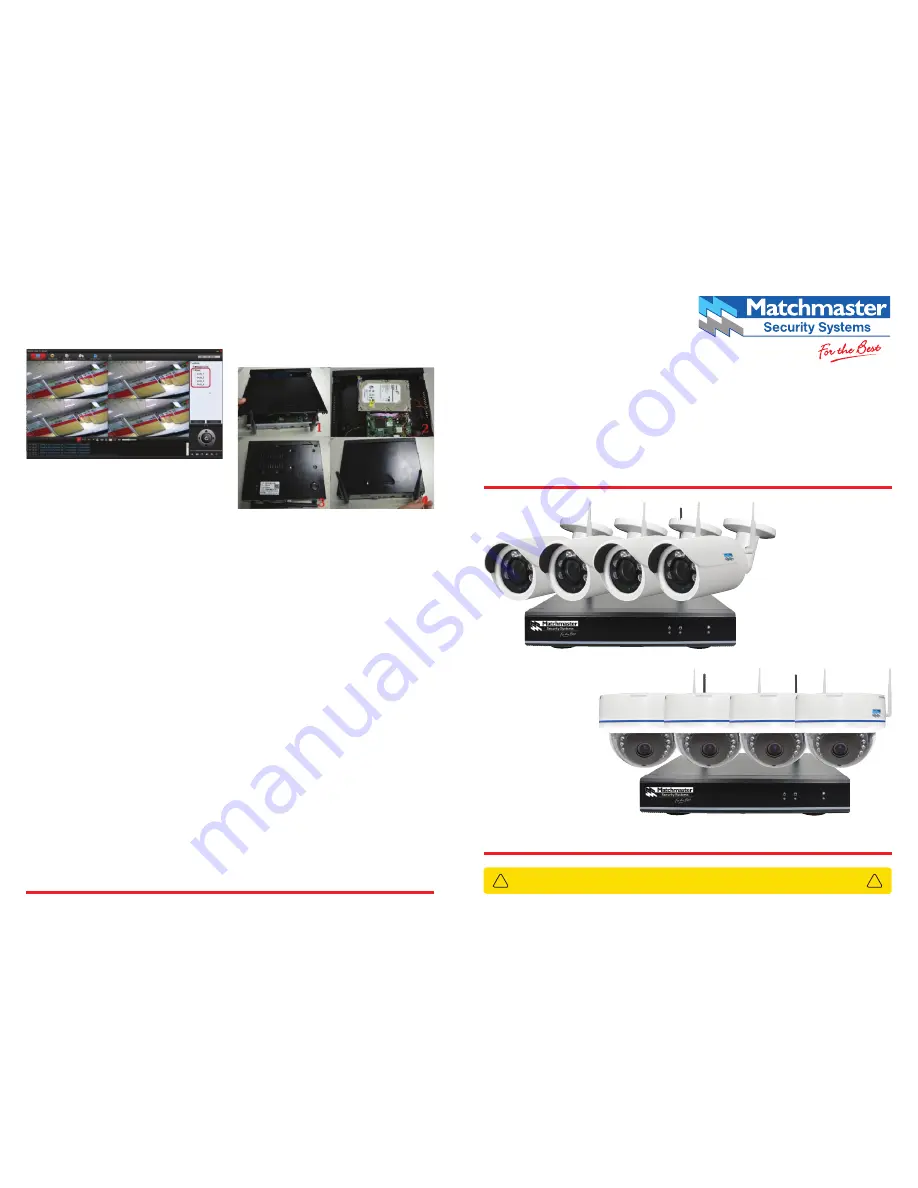
HDD upgrade

To upgrade the Wireless Network Video 
Recorder (WNVR) from its existing 2TB hard 
drive to the larger 4TB hard drive please 
follow the steps below and also reference 
the diagram below.

1.  Remove the screws as indicated in 

diagram above and remove the cover

2.  Turn the WNVR upside down, note 

the screws that support the drive and 
remove them so that the HDD is free 
from the WNVR.

3.  Remove the cables connected to the 

existing hard drive and connect to the 
new hard drive, making sure to be careful 
with the connectors

4.  Align the drive to the existing mounting 

holes and secure using the screws 
removed from the original drive

5.  Place the WNVR cover back and use 

the previously removed screws to 
reassemble the WNVR. The unit is now 
upgraded with the larger HDD.

Live remote monitoring through Smartphone and PCs

50MM-WN8CH2TB4B / 50MM-WN8CH2TB4D

HD Security Camera Kit

QUICK GUIDE

IMPORTANT: Remember to change your password from factory default.

!

!

Summary of Contents for 50MM-WN8CH2TB4B

Page 1: ...order WNVR from its existing 2TB hard drive to the larger 4TB hard drive please follow the steps below and also reference the diagram below 1 Remove the screws as indicated in diagram above and remove the cover 2 Turn the WNVR upside down note the screws that support the drive and remove them so that the HDD is free from the WNVR 3 Remove the cables connected to the existing hard drive and connect...

Page 2: ...the preferred positions with the premises Referring to diagram above please install the two WIFI antennas to the WNVR Installation of the WNVR K IE Remote Access When using a computer to access the WNVR the user has two choices IE Internet Explorer and CMS If within the LAN just enter the WNVR IP address e g 192 168 1 2 where this address is the same as the WNVR input the user name and password fo...

Page 3: ...n be used for the first time Method 1 click toolbar setup wizard the last step of setup wizard select hard disk to be formatted format 8 Video managr 9 Video backup 10 Fast network 11 WIFI add 12 Exit system 13 X4 view Method 2 Right click the screen main menu general setup HDD setup select hard disk to be formatted format On this page you can see all the information of the hard disk including mod...

Page 4: ...B hub into the WNVR allowing both the mouse and a USB flash drive 2 Use network access via the management port of the WNVR through the software CMS Refer K Example using a local flash drive for video backup I Network Settings Accessing the WNVR through the LAN network can be achieved with a PC and IE browser The WNVR must be setup to support this access GOTO Toolbar Main Menu Network Setting to IP...

Reviews: