MasterCraft 054-3179, Instruction Manual
The MasterCraft 054-3179 is an innovative power tool designed to enhance your DIY projects. With its comprehensive Instruction Manual, you'll master the tool's features effortlessly. Download the detailed manual for free from our website, manualshive.com, and unlock the full potential of your MasterCraft 054-3179.
Share
Download


Reviews:
No comments
Related manuals for 054-3179

CALIANO 6.1 cooK
Brand: Landmann Pages: 2

FRYTON 4.1 cooK
Brand: Landmann Pages: 60

DGP483CSN
Brand: Dyna-Glo Pages: 87

SC5812
Brand: Sunco living Pages: 30

PSBS 24 A1
Brand: Parkside Pages: 55

KHB 5 Battery
Brand: Kärcher Pages: 224

623514420502
Brand: RUSTA Pages: 32

Triton PTS 6.1
Brand: Landmann Pages: 60

Princesize Pro 10034703
Brand: Klarstein Pages: 56

24PD
Brand: Hitachi Pages: 58

DC228
Brand: DeWalt Pages: 204

77352-MB
Brand: Monument Grills Pages: 72
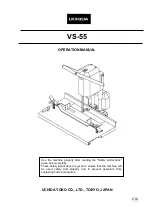
VS-55
Brand: UCHIDA Pages: 8

SPG90B
Brand: Camp Chef Pages: 8

WB 1010 SB III
Brand: WORKERS BEST Pages: 147

66006
Brand: Chicago Electric Pages: 18

BYRON
Brand: VerdeLife Pages: 4

96299
Brand: Chicago Electric Pages: 14


