M&S Systems MNCX, Owner'S Manual
The M&S Systems MNCX owner's manual is essential for operating this advanced product. Download the manual for free from our website to ensure you understand all features and functions. Get your copy at manualshive.com and make the most out of your MNCX system.
Share
Download


Reviews:
No comments
Related manuals for MNCX

GO
Brand: Xblitz Pages: 40

MILES
Brand: Gadhouse Pages: 9

ACUSTICA H series
Brand: RCF Pages: 10
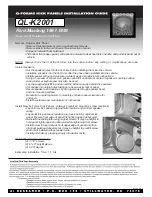
QL-K2001
Brand: Q-Logic Pages: 3

RM3300
Brand: Polk Audio Pages: 52

ES-AW300-ICDVC-6
Brand: Episode Pages: 2

VSA 1250 II
Brand: RCF Pages: 18

OBERON C Series
Brand: Dali Pages: 19

Megavox Pro MEGA-6000U1
Brand: Anchor Pages: 1

Balboa 10
Brand: JBL Pages: 4

Cinema CB259
Brand: EAW Pages: 2

Source Speakers
Brand: MartinLogan Pages: 1

Marquis HD
Brand: Legacy Pages: 17

XVP 25A6
Brand: Studiomaster Pages: 4

2820 LAPTOP SPEAKER
Brand: Manhattan Pages: 2

8-Ohm
Brand: M&S Systems Pages: 12

MINI A
Brand: Bryston Pages: 4

MB8
Brand: DLS Pages: 2


