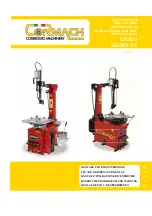
background image

SMONTAGOMME

TYRE CHANGING MACHINE - D

É

MONTE-PNEUS

REIFENWECHSLER - DESMONTA-NEUMATICOS

solutions creator

COD

. 500910  

REv

. 5

DIDO 26 MV

MANUALE D’ISTRUZIONE ORIGINALE

ORIGINAL INSTRUCTIONS MANUAL

MANUEL D’INSTRUCTIONS ORIGINAL

ORIGINALE ANLEITUNGSHINWEISE

MANUAL DE INSTRUCCIONES ORIGINAL

ES

DE

FR

UK

IT

Содержание DIDO 26 MV

Страница 1: ... REIFENWECHSLER DESMONTA NEUMATICOS solutions creator cod 500910 rev 5 DIDO 26 MV MANUALE D ISTRUZIONE ORIGINALE ORIGINAL INSTRUCTIONS MANUAL MANUEL D INSTRUCTIONS ORIGINAL ORIGINALE ANLEITUNGSHINWEISE MANUAL DE INSTRUCCIONES ORIGINAL ES DE FR UK IT ...

Страница 2: ......

Страница 3: ...CHANGER FOR INSTALLATION ON VANS DIDO 26 MV DEMONTE PNEUS UNIVERSEL 26 POUR L INSTALLATION SUR LES FURGON DIDO 26 MV UNIVERSAL REIFENMONTIERMASCHINE 26 FÜR INSTALLATION AUF TRASPORTEN DIDO 26 MV DESMONTADORA DE NEUMATICOS UNIVERSAL 26 PARA INSTA LACION EN FURGONETAS SMONTAGOMME TYRE CHANGING MACHINE DÉMONTE PNEUS REIFENWECHSLER DESMONTA NEUMATICOS ...

Страница 4: ...La macchina dovrà essere destinata solo all uso per il quale è stata espressamente concepita Ogni altro uso è da considerarsi improprio e quindi irragionevole Il costruttore non può essere considerato responsabile per eventuali danni causati da usi impropri erronei ed irragionevoli Per l utilizzo della macchina è previsto un solo operatore che ha l obbligo di mantenere le persone esposte lontano d...

Страница 5: ... lo tanto irrazonable No se ha de considerar responsable al constructor si la máquina sufrirá daños causados por un uso inadecuado y erróneo Para la utilización de la máquina está previsto un solo operador que tiene la obligación de man tener las personas expuestas lejos del área de peligro durante todas las fases de trabajo 3 metros alrededor de la máquina Este símbolo se utiliza en el presente m...

Страница 6: ...are il fac simile della targhetta con i dati riporta ti sulla macchina ATTENTION Please com plete the facsimile with the data written on the machi ne plate ATTENTION S il vous plaît remplir le fac similé avec les données écrites sur la plaque de la machine ACHTUNG Bitte füllen Sie das Faksimile mit den an der Maschineplatte ge schriebenen Daten ATENCIÓN Por favor com plete el facsímil con los da t...

Страница 7: ...CIONES IMBARCABILE puede obrar sobre ruedas y llantas con las siguientes dimen siones mínimas y máximas mín máx Actúa sobre ruedas de 14 26 Diámetro máx rueda 1380 mm Anchura máx rueda 750 mm DONNEES DE PLAQUE LES DONNEES DE LA MACHINE SONT INDIQUEES SUR UNE ETIQUETTE SPE CIALE INDELEBILE PLACEE SUR L ARRIERE DE LA MACHINE Les données techniques le marquage CE l année de fabrication et le numéro d...

Страница 8: ...ruppo contrasto 7 Manipolatore 8 Base di fissaggio 9 Centralina Idraulica 11 Gruppo Generatore 12 Scatola accensione Gruppo Generatore DESCRIPTION 1 Electrical System 2 Jaw 3 Mobile Arm 4 Tool roller 5 Roller arm 6 Stop assembly 7 Control unit 8 Mounting base 9 Hydraulic power unit 11 Generator Unit 12 Generator Unit Ignition Box 7 8 6 4 2 3 1 9 11 5 12 ...

Страница 9: ...e générateur BESCHREIBUNG 1 Elektrische Ausrüstung 2 Spannklaue 3 Beweglicher Arm 4 Werkzeugrolle 5 Rollenträgerarm 6 Gegengruppe 7 Manipulator 8 Befestigungs Unterstruktur 9 Hydraulikeinheit 11 Generatorgruppe 12 Box Einschaltung Generatorgruppe DESCRIPCIÓN 1 Sistema eléctrico 2 Mordaza 3 Brazo móvil 4 Rodillo herramienta 5 Brazo porta rodillo 6 Elemento de tope 7 Manipulador 8 Base de fijación 9...

Страница 10: ...coulissante sur le côté gauche vérifier pendant l installation si le gabarit du démonte pneu en position de travail n interfère pas avec la porte coulissante du fourgon lorsqu elle est ouverte Bei Transportern mit Schiebetür auf der linken Seite bei der Installation si cherstellen dass die Abmessungen der Rei fenmontiermaschine unter Arbeitsbedin gungen nicht die Schiebetür des Transporters behind...

Страница 11: ...e pallet fig 5 Machines in their packaging must be stored in a dry place with ventilation if possible Place the packs far enough apart to allow the in formation provided on the sides of the packaging to be read easily INSTALLATION CAUTION When choosing the installation site comply with the current regulations as regards safety at work The floor must be able to withstand a load equal to the sum of ...

Страница 12: ...de trabajo Humedad relativa entre 40 y 95 Temperatura entre 0 y 45 C Manutention Stockage Déplacer l appareil sans emballage exclusivement avec un chariot élévateur en enfilant les fourches dans les longerons se trouvant sur la base de l appareil fig 5 Les machines embaIIées doivent etre stockées dans un endroit sec et si possible aéré Placer les emballages à distance utile pour permettre une lect...

Страница 13: ...are la classificazione del bene secondo il grado di smaltimento ATTENZIONE Si rammenta l utilizzatore che è comunque tenuto a rispettare le leggi sulla ROTTAMAZIONE in vi gore nel paese di utilizzo LAY OFFS If the machine is to be out of use for a long period disconnect it from the power sources empty the tank containing the hydraulic fluid and protect those parts which might be damaged by dust Gr...

Страница 14: ...lte das Gerät nicht mehr benützt werden empfehlen wir Ihnen die elektrischen und hydraulischen Betätigungsteile zu entfernen Gefährliche Teile wie Oelbehälter elektrischer Motor Teile verschrotten und den entsprechenden Sammelstellen überge ben ACHTUNG Beachten Sie die Gesetze der Verschrottung in Ihrem Land MÁQUINA EN DEPÓSITO En caso de que la máquina deba ser mantenida en depósito por un largo ...

Страница 15: ...usati a cose o persone per il mancato rispetto di suddetta regola ATTENZIONE Ogni operazione di manutenzione deve essere ef fettuata dopo aver scollegato la spina della rete elettrica ATTENZIONE Non soffiare aria compressa per la pulizia ROUTINE MAINTENANCE To guarantee the machineís efficiency and correct operation it is essential to comply with the manu facturerís instructions with regard to cle...

Страница 16: ...it anderen Eigen schaften verwendet so kann dadurch die Lebensdauer bzw die Funktion der Maschine beeinträchtigt werden Alle Bewegungsteile reinigen Aufspannung Die Maschine und den Arbeitsbereich immer sauber halten um die Verschmutzung der Bewegungsteile zu vermeiden Alle mit Schmiernippeln vorgesehenen Teile regelmäßig mit Fett schmieren WICHTIG Die Einstellwerte der Sicherheitsventile und des ...

Страница 17: ...a in modo da poter bloccare il cer chio interamente e nella posizione più oppor tuna Serrare la morsa Il cerchio dovrà presentare la spalla più bassa sempre verso l esterno in modo da facilitare l uscita del pneumatico POSITIONING AND CLAMPING THE WHE EL Tilt back the roller holding arm taking care that it is correctly hooked Place the wheel vertically on the ground Secure the wheel onto the clamp...

Страница 18: ...z eines Gabelstaplers bzw eines Hallenkranes ACHTUNG Der Reifen darf nur für die erforderliche Zeit auf dem Spannklaue aufgespannt bleiben SCHMIERUNG DER REIFEN Bevor der Reifen montiert bzw abmontiert wird muß die Wul st zum Schutz vor Schäden und zur Erleichterung der Montage bzw der Demontage geschmiert werden Vor der Demontage sind besonders schwere Reifen so nahe als möglich an die Maschinenf...

Страница 19: ...morsa Continuare l operazione fino alla completa tal lonatura del pneumatico N B Per ottenere un montaggio corretto e sen za danni è opportuno lubrificare abbondante mente i talloni e la balconata del cerchio DEMOUNTING TUBELESS WHEELS Deflate the tyre After placing and locking the wheel on the clamp lift the wheel using the control until the roller on the bead breaker arm just touches the edge of...

Страница 20: ...inks vorfahren während sich die Spannklaue gleichzeitig kontinuierlich im Uhrzeigersinn dreht Vorgang fortsetzen indem mit der inneren Rolle dem Felgenprofil gefolgt wird bis der Reifen vollständig abgedrückt ist Abb 10 MONTAGE SCHLAUCHLOSER REIFEN Klemme am vorderen Felgenhorn befestigen und beide Rei fenwülste über die Klemme hinausragend auflegen Abb 11 Mit der äußeren Rolle gegen den Reifen dr...

Страница 21: ...upporter Riser Lower DESCRIPTION COMMANDES A Rotation du mandrin B Ouverture fermeture du mandrin C Levée abaissement de la machine D Translation du chariot porte mandrin E Levée abaissement du chariot porte man drin BESCHREIBUNG BEFEHLE A Drehung des Spannfutters B Öffnung Schließung des Spannfutters C Erhebung Senkung der Maschine D Übertragung des Fahrgestells des Spann futters E Erhebung Senku...

Страница 22: ...remità dell elettrovalvola come in figura svitare la valvola selettrice e avvitarla sull elettrovalvola corrispon dente al movimento desiderato fig 13 A B 1 2 3 EMERGENCY ACTIVATION The emergency manoeuvre ensures that in the event of a fault with the electrical system the machine can return to the completely closed position in order to be safely moved with a means of transportation to its destina...

Страница 23: ...es den Kontakt und ermöglicht durch wiederholte manuelle Betätigung des Hebels B die Schließung der entsprechen den Maschinenbewegung In der Reihenfolge Das Magnetventil 1 aktiviert die Schließung des Kippens der Maschine Das Magnetventil 2 steuert die Auf und Abfahrt in senkrechter Richtung des Spindelschlittens Das Magnetventil 3 steuert die waagerechte Verschiebung des Spindelschlittens Um die ...

Страница 24: ...ITE AVANT DE FAIRE TOUTES OPERATIONS DE SERVICE ET D ENTRETIEN SUR LA MACHINE INSEREZ LE PIVOT REF 500815 DANS UN DES DEUX TROUS LATERALES DE LA BASE REMARQUE RETIREZ LE PIVOT AVANT LA MISE EN FONCTION DE LA MACHINE WARNUNG UM SICHER ZU ARBEITEN BEVOR SIE ALLE SERVICE ODER WARTUNGSGÄNGE AN DEM GERÄT DURCHFÜHREN STECKEN SIE DEN STIFT ARTIKEL NR 500815 IN EINER DER ZWEI SEITLICHEN BOHRUNGEN IM BODEN...

Страница 25: ...misura e sono indicati separatamente sui visualizzatori a sinistra è indicato lo squilibrio del fianco interno della ruota rivolto verso la macchina e a destra quello del fianco esterno WHEEL BALANCER VERSION WB290 INSTRUCTIONS FOR USE CONTROL PANEL KEY 1 Data display 2 Unbalance point direction LED luminous diodes 3 Unbalance point LED 4 Rim distance setting key 5 Rim diameter setting key 6 Rim w...

Страница 26: ...erden a Wahl des Radtyps und des Auswuchtprogramms das die Positionierung der Gegengewichte auf der Felge bestimmt siehe Par Auswuchtprogrammwahl b Vorgabe der Raddaten Nennbreite und Nenndurchmesser s Par Vorgabe Raddaten c Vorgabe der Entfernung zwischen der Maschine und der Innenseite der Felge s Paragraph Vorgabe Raddaten Während der Messphase schalten sich alle Ablesungen außer einem zentrale...

Страница 27: ...lizzare ed ai piani di correzione prescelti Premen do il tasto MODE 10 fig 15 si accede in sequenza a tutti i diversi programmi di equilibratura disponibili che sono equilibratura dinamica standard con pesi a clip con mol letta 5 programmi Alu per l equilibratura dinamica con pesi adesivi 3 programmi di equilibratura statica con pesi a molletta o adesivi 2 programmi Alu speciali per l equilibratur...

Страница 28: ...uwuchtende Rad vorgegebenen Nennmas sen und den tatsächlichen Massen der Korrekturpläne Die Auswuchtmaschi ne verwendet verschiedene Auswuchtprogramme um diese Unterschiede zu berücksichtigen Der Bediener muss die gewünschte Betriebsart je nach Art des auszuwuchten den Rads der Gegengewichte die er zu verwenden beabsichtigt sowie der gewählten Korrekturpläne vorgeben Bei jedem Druck der Taste MODE...

Страница 29: ...e internal side of the rim with the cursor gauge fitted on the machine fig 20b The distance to be set can be read from the scale N B For wheels of small dimensions for example motorcycle wheels only the static imbalance has to be established In these cases the STATIC balancing program is used and the correct figures only have to be set for the rim diameter button 5 fig 19 The rim distance and widt...

Страница 30: ...in Kaliber gemessen werden Abb 18 Der Felgendurchmesser ist im Allgemeinen auf der Felge angegeben andern falls kann er vom Reifen abgelesen werden Der Felgenabstand wird auf der Innenseite der Felge gemessen hierzu verwendet man das an der Maschine angebrachte Kaliber Abb 17 Auf der Skala kann man die vorzugebende Entfernung ablesen Anmerkung für Räder mit kleinen Abmessungen z B bei Motorradräde...

Страница 31: ...stico il display di sinistra visualizza Snd ed il display di destra visualizza lo stato di attivazione o disattivazio ne del segnale acustico per impostare un nuovo valore utilizzare i tasti 5 fig 18 i valori possibili sono on segnale acustico attivo oFF segnale acustico disattivato CONFIGURING THE WHEEL BALANCER The configuration functions enable the user to set the machine according to his own n...

Страница 32: ...chtsauflösung in Gramm zur Vorgabe eines neuen Werts die Tasten 5 Abb 18 verwenden die möglichen Werte sind 1 Anzeige des Unwuchtswerts mit Feinauflösung die mit Schritten von 1g 0 01Once übereinstimmt 5 Anzeige des Unwuchtswerts mit Standardauflösung die mit Schritten von 5g 0 25 Once übereinstimmt drückt man die MENÜ Taste geht man zum folgenden Parameter über Maßeinheit Unwucht das linke Displa...

Страница 33: ...are si preme il tasto STOP il nuovo valore non viene memorizzato permanente mente spegnendo la macchina si ritorna all impostazione precedente ENGLISH Press the MENU key to pass to the next parameter configuration EUROPE AMERICA possible settings are configuration EUROPE the left display shows con and the right display shows Eur configuration setting TOLERANCE 4 5 g RESOLUTION 5 g configuration AM...

Страница 34: ...nd das rechte Display zeigt uSA an Konfiguration eingestellt mit TOLERANZ 7 g 0 25 uz AUFLOSUNG 5 g 0 18 uz Drückt man am Ende die MENÜ Taste wird die la vorgegebene Konfiguration permanent gespeichertund die Maschine kehrt zum normalen Auswuchtpro gramm zurück N B Für jeden Konfigurationsparameter erfolgt die Vorgabe des Werts un ter Verwendung der Tasten 5 Abb 18 und Bestätigung mit der MENÜ Tas...

Страница 35: ...ote vettura che con ruote autocarro prestare attenzione al peso da appli care in C3 e C4 Per la vettura 100g per l autocarro 300g valore da settare correttamente anche a display di destra in C3 con i tasti del diametro ITALIANO ENGLISH BASIC CALIBRATION OF THE MACHINE To select the truck car mode press and hold in the menu key until SET appears Continue pressing the menu key until arriving at the ...

Страница 36: ... dieser Position festhalten und die Angabe mit der Taste des Abstands bestätigen Den Piepton der Bestätigung abwarten Nach der Einstellung die Taste STOP drücken und auf dem linken Display erscheint C 2 Es geht weiter mit dem C2 der Maschinenkalibrierung indem man einen Messlauf mit Einstellrad durchführt Nach dem Erscheinen von C3 das Eichgewicht im Inneren der Felge an bringen und einen neuen Me...

Страница 37: ...ire il fusibile MALFUNCTIONS CAUSES AND POSSIBLE REMEDIES Malfunction Cause Possibile remedies The chuck does not rotate in any direction 1 The mains connection is not plug ged in 2 The plug is not correctly wired 3 The mains tension is not suitable for the machine 4 The mains switch is not on 5 Faulty fuse 1 Check the correct insertion of the plug and its connections 2 3 See 1 above 4 Switch on t...

Страница 38: ...Der magnetthermi sche Schalter ist nicht auf Betrieb gestellt 2 Der Druck des Hydrauliksystems ist ungenügend 3 Druckverlust im Hydraulikumlaufs 1 Überprüfen ob sich der Motor des Hauptkörpers des Geräts in der richtigen Richtung dreht 2 Den Druck des H y d r a u l i k n e t z e s entsprechend regulie ren 3 Den eventuellen Druckverlust beseiti gen Das Gerät Schlitten Arm oder Spindel führt keine h...

Страница 39: ...39 solutions creator ...

Страница 40: ...40 solutions creator ...

Страница 41: ...41 solutions creator ...

Страница 42: ...42 solutions creator ...

Страница 43: ...X IT WITH A CLIP AND TURN OFF THE RADIO CONTROL fig 20 A LORSQUEVOUS N UTILISEZ PAS LA MACHINE ÉTEIGNEZTOUJOURS LA RADIOCOMMANDE fig 20 A WENN SIE DAS GERÄT NICHT BENUTZEN SCHALTEN SIE DIE FUNKSTEUERUNG fig 20 A CUANDO NO SE UTILIZA EL EQUIPO SIEMPRE DEBE APAGAR EL RA DIO CONTROL fig 20 A 100726 500584 500563 100725 CABLE VERSION RADIO VERSION ...

Страница 44: ...44 solutions creator ...

Страница 45: ...45 solutions creator 100557 100874 100561 100566 3PH 100564 3PH 100789 3PH 100569 100570 100562 100568 100558 FUSIBILE 2A 100559 FUSIBILE 2A 100560 100873 ...

Страница 46: ...46 solutions creator KIT EQUILIBRATRICE WB290 WEEL BALANCER KIT WB290 EQUILIBREUSE KIT WB290 AUSWUCHTMASCHINE KIT WB290 EQUILIBRADORA KIT WB290 ...

Страница 47: ...47 solutions creator KIT VETTURA CAR KIT VEHICULES KIT PERSONENKRAFTWAGEN KIT TURISMOS KIT 500848 ...

Страница 48: ...48 solutions creator 500933 500847 500191 500232 500188 300348 100515 500210 100153 100493 100218 100152 ...

Страница 49: ...49 solutions creator OPTIONALS 300375 300376 300377 300539 300540 300537 300193 300186 300373 300374 300378 300190 300625 300538 300294 300117 300187 300188 300189 ...

Страница 50: ...50 solutions creator ...

Страница 51: ...51 solutions creator ...

Страница 52: ...52 solutions creator ...

Страница 53: ...53 solutions creator ...

Страница 54: ...54 solutions creator ...

Страница 55: ...55 solutions creator ...

Страница 56: ...56 solutions creator ...

Страница 57: ...57 solutions creator ...

Страница 58: ...LARACIÓN DE CONFORMIDAD CE La Maison Hiermit bescheinigt das Unternehmen La Compañia M B Engineering srl VIA DELLA COSTITUZIONE 49 42015 CORREGGIO REGGIO EMILIA ITALY declare par la presente comme constructeur et depositaire du dossier technique la conformité du produit Hiermit Erklaert als Hersteller und Verwahrer der Technischen akte die Uebereinstimmung des produktes por la presente declara com...

Страница 59: ...Via della Costituzione 49 42015 Correggio RE Italy Tel 39 0522 644511 Fax 39 0522 644510 www mb re it info mb re it ...

Отзывы: