background image

Important: 

Read this instruction manual carefully before putting the Power Cut into operation and strictly observe the 

safety regulations!

Keep this instruction manual!

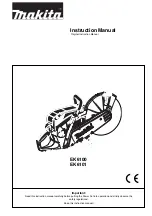
Instruction Manual

 Original Instruction Manual

EK7300
EK7301
EK8100

Summary of Contents for EK7300

Page 1: ...is instruction manual carefully before putting the Power Cut into operation and strictly observe the safety regulations Keep this instruction manual Instruction Manual Original Instruction Manual EK73...

Page 2: ...con dent that you will be satis ed with this modern piece of equipment Like our chain saws the MAKITA Power Cuts feature specially designed high performance engines with outstanding power to weight ra...

Page 3: ...e Instruction Manual Read instruction manual and follow the warning and safety precautions Particular care and caution Forbidden Wear helmet and eye respiratory and hearing protection Wear protective...

Page 4: ...of alcohol drugs medica tion or other substances which may impair vision dexterity or judgement A re extinguisher must be available in the immediate vicinity when working in easily in ammable vegetat...

Page 5: ...range of the cutting disc direction of sparks Fuel cannot be stored for an unlimited period of time Buy only as much as will be consumed in the near future When making up the gasoline oil mixture alwa...

Page 6: ...s instruc tion manual 13 Always place your left foot in the rear handle and grasp the other handle rmly with thumb and ngers Other starting methods are not allowed When starting the Power Cut it must...

Page 7: ...Power Cut unattended Use the Power Cut at high speed as far as possible see Tech nical Data Only use the Power Cut during good light and visibility periods Be aware of slippery or wet areas and of ice...

Page 8: ...stead always cut shallow around the whole piece Worn discs have a smaller diameter than new discs so that at the same engine speed they have a lower effective circumfer ential speed and therefore do n...

Page 9: ...or moving it from place to place on a site 26 Never carry or move the unit with the engine on or the disc moving Carry the unit only by the tubular middle handle with the cut ting disc pointing behind...

Page 10: ...ibility for accidents or damage occurring in association with the use of cutting discs or accessories other than original MAKITA First aid For the event of a possible accident please make sure that a...

Page 11: ...cement cm3 81 Bore mm 52 Stroke mm 38 Max power operating speed kW 1 min 4 2 9 150 Max torque Nm 5 0 Idling speed 1 min 2 500 Clutch engagement speed 1 min 3 800 Engine speed limitation 1 min 9 350 14...

Page 12: ...ecompression valve 15 Starter grip 16 Air intake 17 Combination switch Choke Start Stop I O 18 Safety locking button 19 Throttle lever 20 Tank cap fuel 21 Starter housing with starter 22 Cutting disc...

Page 13: ...te assembly and inspection Mounting the cutting disc Inspect the disc for damage See SAFETY INSTRUCTIONS Page 6 Unscrew screw 9 and remove the spring washer 8 Place the cutting disc 5 on the arbour 7...

Page 14: ...e Thistoolispoweredbyahigh performanceair cooledtwo stroke engine It runs on a mixture of gasoline and two stroke engine oil The engine is designed for unleaded regular gasoline with a min octane valu...

Page 15: ...cool secure locations AVOID SKIN AND EYE CONTACT Mineral oil products degrease your skin If your skin comes in contactwiththesesubstancesrepeatedlyandforanextended periodoftime itwilldryout Variousski...

Page 16: ...ION Observe the SAFETY INSTRUCTIONS on page 4 and 5 Start the Power Cut only after complete assembly and inspection Move at least 3m away from the place where you fuelled the Power Cut Make sure you h...

Page 17: ...of 3 5 pulls Important Do not pull the starter cable out more than about 50 cm 20 and guide it back slowly by hand instead of letting it snap back Press in the decompression valve 5 Move the combinat...

Page 18: ...r the two screws are sealed shut For correct adjustment of the idling speed the following steps must be carried out Start the engine and run it until it is warm about 3 5 minutes Adjust the carburetor...

Page 19: ...by a MAKITA service centre before being used again SERVICE Changing the V belt Loosen nuts 3 Loosen the tightening screw 1 counter clockwise until the end of the screw 2 is visible in the gap Loosen a...

Page 20: ...removed parts NOTE To install the cutting wheel see Mounting the cutting wheel Cleaning changing the air lter Turn the cover lock 11 counterclockwise to release it and carefully remove the lter cover...

Page 21: ...oughly NOTE The pre lter must be cleaned daily or several times daily if working under dusty conditions If cleaning is not possible on site have spare pre lters on hand Replace the pre lter at least e...

Page 22: ...the open ing Empty fuel tank Use a wire hook to pull the suction out of the tank opening for replacement Caution Do not allow fuel to come into contact with skin Replacing the spark plug CAUTION Do n...

Page 23: ...1 CAUTION Do not let the knots or the cable ends protrude from the outside of the cable pulley Pull knot 22 into the cable grip 23 Guide the cable into the recess 24 on the cable drum and use the cabl...

Page 24: ...gs are delivered already tensioned in the housing CAREFUL the spring can pop out If it does it can be put back in as shown in the diagram observe the direction of rotation Before installing the new re...

Page 25: ...8 to lever out the stop pin 9 as shown in the illustration until the protective hood 11 can be turned NOTE The turn stop 7 is deactivated when the stop pin 8 is removed This permits the hood 11 to be...

Page 26: ...hown IMPORTANT When you reposition the cutting attachment the direction of rotation of the cutting wheel changes If a rotation direction is marked on the cutting disc make sure the disc turns in the r...

Page 27: ...ing to the trolley and Power Cut are very fast and simple Mains pressure water system 6 The mains pressure water system is designed to be mounted on the Power Cut It can be used with or without the tr...

Page 28: ...quired spare part numbers and will be constantly informed about the latest improvements and spare part innovations Please bear in mind that if parts other than original MAKITA spare parts are used thi...

Page 29: ...uarantee must be performed by a MAKITA service centre Troubleshooting Malfunction System Observation Cause Cutting disc does not start turning Clutch Engine runs Damage to clutch Cutting disc runs in...

Page 30: ...30 Extract from the spare parts list Use only original MAKITA parts For repairs and replacement of other parts see your MAKITA service centre EK7300 EK7301 EK8100 32 31 29 30 22 28 19 24 25 26 27 4a...

Page 31: ...Power Cut Diamond cutting disc 22 966 1 Please consult your MAKITA dealer 394 228 121 1 Adapter ring dia 20 25 4 mm 24 957 114 200 1 Angle fuel tank ller neck cpl 25 394 369 600 1 Guide trolley DT2010...

Page 32: ...Speci cations subject to change without notice To nd your local distributor please visit www makita outdoor com MAKITA Corporation 3 11 8 Sumiyoshi Cho Anjo Aichi 446 8502 Japan This print product has...

Reviews: