MAJORITY KINGS KNG-ALL-BLK, Instruction Manual
Introducing the MAJORITY KINGS KNG-ALL-BLK: a cutting-edge audio device that delivers unparalleled sound quality. Enhance your listening experience with the comprehensive Instruction Manual, featuring step-by-step setup instructions, troubleshooting tips, and expert advice. You can effortlessly download this manual for free from our website, making it readily accessible for your convenience.
Share
Download


Reviews:
No comments
Related manuals for KINGS KNG-ALL-BLK
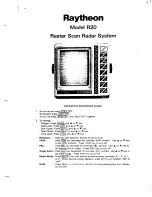
R20
Brand: Raytheon Pages: 22

IR-100
Brand: DAPAudio Pages: 28

R-3
Brand: Teac Pages: 17

VX-3R
Brand: Yaesu Pages: 2

FTM-400XDR
Brand: Yaesu Pages: 2

FT-60R
Brand: Yaesu Pages: 2

FT-450
Brand: Yaesu Pages: 69

Zlinx ZP24D-250RM-SR
Brand: B&B Electronics Pages: 2

12-896
Brand: Radio Shack Pages: 1

PCR2-EU868-ODA
Brand: Parametric Pages: 9

PR-D4W
Brand: Sangean Pages: 22

MX-CR01NW
Brand: Maxx Digital Pages: 30

XM GDL 69
Brand: Garmin Pages: 46

CA002AB1
Brand: SANG Pages: 20

CR41804
Brand: Craig Pages: 9

VHF 720
Brand: Garmin Pages: 2

VHF 115 AIS Series
Brand: Garmin Pages: 37

CR9953
Brand: Roberts Pages: 20


