background image

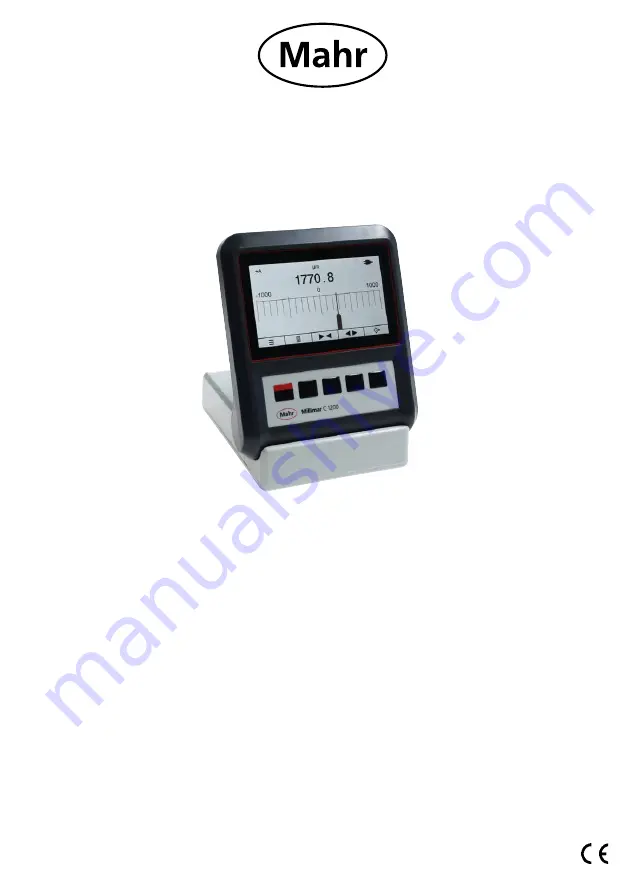
Compact length measuring instrument

3723034

1020

Millimar 

C 1200 M/T

Operating Instructions

Valid from firmware version 1.7

Mahr 

GmbH

Carl-Mahr-Straße 1 

37073 Göttingen  

Tel. +49 551 7073 0

[email protected], www.mahr.com

Summary of Contents for Millimar C 1200 M/T

Page 1: ...t length measuring instrument 3723034 1020 Millimar C 1200 M T Operating Instructions Valid from firmware version 1 7 Mahr GmbH Carl Mahr Straße 1 37073 Göttingen Tel 49 551 7073 0 info mahr com www mahr com ...

Page 2: ...nformation Important note Caution hazard Failure to follow instructions marked with this symbol can cause inaccurate results and lead to equipment damage Introduction Permitted uses The Millimar C 1200 M T is an electronic length measuring and evaluation instrument for use in production An inductive probe can be connected The operating maintenance and repair information detailed in these operating...

Page 3: ...ompany safety officer 4 Before connecting up this measuring instrument please check the local mains supply voltage to ensure that it is within the working range of the AC adaptor 100 V 240 V 50 Hz 60 Hz If they do not match this measuring instrument must not be connected under any circumstances 5 The instrument may only be connected to a grounded power socket which complies with the regulations of...

Page 4: ...l be accepted for damages caused by other usage or as a result of the incorrect application of this measuring instrument Should your specific measuring task not be solved with this measuring instrument please contact us so we can help solve your measuring task with a different instrument Please inform us about your measuring task Battery Not rechargeable Do not incinerate Dispose off as prescribed...

Page 5: ...ent conforms to the applicable EU directives A copy of the Declaration of Conformity can be requested from the following address Mahr GmbH Standort Esslingen Reutlinger Str 48 73728 Esslingen Germany or can be downloaded from www mahr com de Leistungen Fertigungsmesstechnik Produkte ...

Page 6: ...cting the measuring probe 15 2 5 Display of probe compatibility 15 2 6 Scaling the analog display 16 2 6 1 In static measuring mode standard 16 2 6 2 In dynamic measuring mode max min max min 16 2 7 Connecting the measuring probe 16 2 8 Selecting the probe type 17 2 9 Setting up the probe 18 2 10 Switching OFF 19 3 Measurement menu 3 1 Selecting the master 20 3 2 Selecting the nominal value 21 3 3...

Page 7: ...8 6 2 1 Enabling customer calibration 38 6 2 2 Executing a probe calibration 39 6 2 3 Conducting a factory standard calibration 41 6 2 4 Executing a customer calibration reset 44 6 3 Activating a factory calibration 46 6 4 Resetting to factory settings 47 6 5 Activating the menu lock 48 6 6 Requesting firmware version and serial number 49 7 Description of the interfaces 7 1 Suitable data connectio...

Page 8: ...8 Mahr GmbH Millimar C1200 M T 1 Delivery and connection 1 1 Unpacking ...

Page 9: ...9 Mahr GmbH Millimar C1200 M T 1 2 Scope of delivery ...

Page 10: ...llimar C1200 M T 1 3 Symbols Select menu Set zero point RESET Reduce the resolution Increase the resolution Start data transmission Scroll up Scroll down Scroll to the right Scroll to the left Confirm Cancel Exit menu ...

Page 11: ...ower supply mode Formula measuring combination Data is been transferred Factor is not equal to 1 Activated tolerance Dynamic measuring functions Start dynamic measurement Pause dynamic measurement Stop dynamic measurement Reset dynamic measurement A A DATA FACTOR TOL MAX MIN MAX MIN ...

Page 12: ... Mahr GmbH Millimar C1200 M T 1 4 Operating elements and interfaces 1 4 1 Display and operating keys Display Operating keys Mains connection 1 4 2 Interfaces Data output Probe input A Battery compartment ...

Page 13: ...cover and lift it off Correctly insert five type AA batteries or rechargeable batteries Observe polarity of the batteries Close the battery compartment cover in reverse order If connected to the mains power supply the measuring instrument will automatically switch to mains power supply The rechargeable batteries are not recharged during mains power operation Battery compartment cover Battery compa...

Page 14: ...itching ON Connect the mains power supply unit to the measuring instrument via the mains power supply socket and or insert the batteries rechargeable Press the ON OFF key The following appears on the display Start screen 2 3 Setting the measurement unit Select the required measurement unit with q or p Press ü to confirm 2 2 Selecting the display language Select the required language with q or p Pr...

Page 15: ...mpatibility 2 4 Selecting the measuring probe Select the required probe type with q or p For compatible probes see Chapter 8 2 page 54 Press ü to confirm The display shows the probe compatibility for approx 3 seconds This display appears after commissioning when the instrument is switched on and can be switched off under Setup Compatibility Info ...

Page 16: ... 2 6 1 In static measuring mode standard Select required resolution with u t or t u 2 6 2 In dynamic measuring mode max min max min Select required resolution with u t or t u Change the scaling direction by pressing and holding the t u key Select the functions max min max min standard see section 3 5 2 7 Connecting the measuring probe Connect the measuring probe to probe input A ...

Page 17: ...cting the probe type Press the ON OFF key Standard menu appears Select the Setup menu with u or t The display shows the probe compatibility for approx 3 seconds This display appears after commissioning when the instrument is switched on and can be switched off under Setup Compatibility Info Select the Probe type submenu with q or p Press ü to confirm or press Ó to cancel the selection Select the r...

Page 18: ...e Customer calibration Factory calibration Factory settings Keyboard menu interlock Info Ó ü q p ü 2 9 Setting up the probe Press the ON OFF key Standard menu appears The device guarantees the highest accuracy after approx 30 min operating time The measuring probe should be mechanically set to the electrical zero point before the first measurement is conducted Setting mode that indicates the raw v...

Page 19: ...the measuring instrument by pressing the ON OFF key in the Input menu Exit the Input menu to switch off the measuring instrument The Analog display will appear on the screen Press and hold the ON OFF key 2 seconds Mechanically set probe to 0 Press the u t and t u keys to adjust the scale Press ü to confirm Press the ON OFF key to exit the input menu ...

Page 20: ...tup System Master 0 0 0 0 0 0 0 ü Ó u q p 3 Measurement menu 3 1 Selecting the master Press the ON OFF key Standard menu appears Press q p to select the Master submenu Press ü to confirm Press q p to select the required sign Select the next position digit with the u key Press q p to enter the required value Press the Ó key for more than two seconds to reset the input to 0 Press ü to confirm or Ó t...

Page 21: ...Setup System Nominal value 0 0 0 0 0 0 0 ü Ó u q p 3 2 Selecting the nominal value Press the ON OFF key Standard menu appears Press q p to select the Nominal value submenu Press ü to confirm Press q p to select the required sign Select the next position digit with the u key Press q p to select the required value Press the Ó key for more than two seconds to reset the input to 0 Press ü to confirm o...

Page 22: ... System Tolerance 0 5 0 0 0 Measurement Display Setup System Master 0 0000 Nominal value 0 0000 Tolerance Off 0 5000 0 0 5000 Formula A Function Normal Factor 1 0000 Ó ü q p 3 3 Selecting the tolerance Press the ON OFF key Standard menu appears Press q p to select the Tolerance submenu Press ü to confirm Press q to select Tolerance On and press ü to confirm or Ó to exit the menu Enter Lower tolera...

Page 23: ...0 0 ü Ó u q p Lower tolerance Nominal Higher tolerance 0 5000 0 0 5000 Measurement Display Setup System Tolerance 0 5 0 0 0 Enter a value for the Higher tolerance Press q p to enter the required sign Press u to continue Press q p to enter the required value Press ü to confirm or Ó to cancel the selection Press the ON OFF key to exit the input menu ...

Page 24: ...Nominal value 0 0000 Tolerance Off 0 5000 0 0 5000 Formula A Function Normal Factor 1 0000 Ó ü q p 3 4 Selecting the formula Press the ON OFF key Standard menu appears Press q to select the Formula submenu Press ü to confirm Press q p to select A A Press ü to confirm or Ó to cancel the selection Press the ON OFF key to exit the input menu ...

Page 25: ...Nominal value 0 0000 Tolerance Off 0 5000 0 0 5000 Formula A Function Normal Factor 1 0000 Ó ü q p 3 5 Selecting the function Press the ON OFF key Standard menu appears Press q to select the Function submenu Press ü to confirm Press q p to select the required Function Press ü to confirm or Ó to cancel the selection Press the ON OFF key to exit the input menu ...

Page 26: ...nal value 0 0000 Tolerance Off 0 5000 0 0 5000 Formula A Function Normal Factor 1 0000 Ó ü q p 3 6 Selecting the factor Press the ON OFF key Standard menu appears Press q to select the Factor submenu Press ü to confirm Press q p to enter the required value Press ü to confirm the value or Ó to exit the menu Press the ON OFF key to exit the input menu ...

Page 27: ...ment Display Setup System Resolution 0 001 Display style Analog digital Color scheme Standard Display to center on Nominal value Brightness 80 Ó ü q p 4 Display menu 4 1 Selecting the resolution Press the ON OFF key Standard menu appears Press u to select the Display menu Press q to select the Resolution submenu Press ü to confirm Press q p to select the required Resolution Press ü to confirm or Ó...

Page 28: ...q p Measurement Display Setup System Resolution 0 001 Display style Analog digital Color scheme Standard Display to center on Nominal value Brightness 80 t u q 4 2 Selecting the display style Press the ON OFF key Standard menu appears Press u to select the Display menu Press q to select the Display style submenu Press ü to confirm Press q p to select the required Display style Press ü to confirm o...

Page 29: ...surement Display Setup System Resolution 0 001 Display style Analog digital Color scheme Standard Display to center on Nominal value Brightness 80 t ü q p 4 3 Selecting the color scheme Press the ON OFF key Standard menu appears Press u to select the Display menu Press q to select the Color scheme submenu Press ü to confirm Press q p to select the required Color scheme Press ü to confirm or Ó to c...

Page 30: ...Display to center on Nominal value Brightness 80 t ü q p 4 4 Centering the display Press the ON OFF key Standard menu appears Press u to select the Display menu Press q to select the Center display to submenu Press ü to confirm Press q p to select the required Centering With asymmetric tolerances the tolerance field can be displayed outside the scaled analog display In this case it is advisable to...

Page 31: ...ment Display Setup System Resolution 0 001 Display style Analog digital Color scheme Standard Display to center on Nominal value Brightness 80 t ü q p 4 5 Setting the brightness Press the ON OFF key Standard menu appears Press u to select the Display menu Press q to select the Brightness submenu Press ü to confirm Press q p to select the required Brightness Press ü to confirm or Ó to cancel the se...

Page 32: ...dard probe ECO mode On Compatibility Info Ó ü q Measurement Display Setup System Language Deutsch English Español Português 5 Setup menu 5 1 Selecting the display language Press the ON OFF key Standard menu appears Press u to select the Setup menu Press q to select the Language submenu Press ü to confirm Press q p to select the required Language Press ü to confirm or Ó to cancel the selection Pres...

Page 33: ...obe type Standard probe ECO mode On Compatibility Info On Ó ü q p Ó ü q Measurement Display Setup System Unit mm µm inch 5 2 Selecting the unit of measurement Press the ON OFF key Standard menu appears Press u to select the Setup menu Press q to select the Unit submenu Press ü to confirm Press q p to select the required Unit Press ü to confirm or Ó to cancel the selection Press the ON OFF key to e...

Page 34: ...y Setup System Probe type Standard probe Long probe 5 3 Selecting the probe type Press the ON OFF key Standard menu appears Press u to select the Setup menu Press q to select the Probe type submenu Press ü to confirm Press q p to select the required Probe type Press ü to confirm or Ó to cancel the selection Press the ON OFF key to exit the input menu Only probe P2010 and its subtypes P2010 A or B ...

Page 35: ... Setup System ECO mode On Off 5 4 Selecting ECO mode Press the ON OFF key Standard menu appears Press u to select the Setup menu Press q to select the ECO mode submenu Press ü to confirm Press q p to select the required mode Press ü to confirm or Ó to cancel the selection Press the ON OFF key to exit the input menu When ECO mode is activated the time until the backlighting and screen are completel...

Page 36: ...easurement Display Setup System Probe type Standard probe Long probe 5 5 Compatibility information Note The display appears for approx 3 seconds after start up when the device is switched on This display can be activated or deactivated Press the ON OFF key Standard menu appears Press u to select the Setup menu Press q to select the Compatibility Info submenu Press ü to confirm Press q p to select ...

Page 37: ...lute mode Press the ON OFF key Standard menu appears Press u to select the System menu Press q to select the Absolute mode submenu Press ü to confirm Mechanically set probe to 0 Press the u t and t u keys to adjust the scale Press ü to confirm Press the ON OFF key to exit the input menu The device guarantees the highest accuracy after approx 30 min operating time The measuring probe should be mech...

Page 38: ... p ü 6 2 Customer calibration 6 2 1 Enabling customer calibration Press the ON OFF key Standard menu appears Press u to select the System menu Press q to select the Customer calibration submenu Press ü to confirm Press q to select the Enable submenu Press ü to confirm or Ó to cancel the selection The ü symbol indicates the currently active calibration Press the ON OFF key to exit the input menu If...

Page 39: ...ess q to select Probe calibration Press ü to confirm or Ó to cancel the selection Enter value for Calibration Min e g 1 000 mm Press u to select the required digit and press q p to enter the required value Press ü to confirm or Ó to cancel the selection The device guarantees the highest accuracy after approx 30 min operating time To conduct a reliable probe calibration the calibration zero point t...

Page 40: ...e mode Customer calibration Factory calibration Factory settings Keyboard menu interlock Info Ó ü q p ü Enter value for Calibration Max e g 1 000 mm Press u to select the required digit and press q p to enter the required value Press ü to confirm or Ó to cancel the selection Move the Probe to the Min position e g measuring plate The following appears on the display Set probe to Calibration Min and...

Page 41: ... Customer calibration Factory calibration Factory settings Keyboard menu interlock Info Ó ü q p ü 6 2 3 Conducting a factory standard calibration Press the ON OFF key Standard menu appears Press u to select the System menu Press q to select the Customer calibration submenu Press ü to confirm Press q to select Factory standard calibration Press ü to confirm or Ó to cancel the selection Enter value ...

Page 42: ...and accept Enter value for Calibration Max e g 1 000 mm Press u to select the required digit and press q p to enter the required value Press ü to confirm or Ó to cancel the selection Connect the jumpers to the Factory standard as illustrated The following appears on the display Set probe to Calibration Min and accept Press ü to confirm Connect the jumpers to the Factory standard as illustrated Con...

Page 43: ... select the required digit and press q p to enter the required value Press ü to confirm or Ó to cancel the selection Enter value for Calibration Max e g 300 µm Press u to select the required digit and press q p to enter the required value Press ü to confirm or Ó to cancel the selection Connect the jumpers to the Factory standard as illustrated The following appears on the display Set probe to Cali...

Page 44: ...he probe at Zero and accept Measurement Display Setup System Absolute mode Customer calibration Factory calibration Factory settings Keyboard menu interlock Info Ó ü q p ü Connect the jumpers to the Factory standard as illustrated The following appears on the display Set probe to 0 and accept Press ü to confirm Factory standard calibration according to the customer s specifications is complete and...

Page 45: ...terlock Info Ó ü q p ü Measurement Display Setup System Absolute mode Customer calibration Factory calibration Factory settings Keyboard menu interlock Info Ó ü q p ü 6 2 4 Executing a customer calibration reset Press the ON OFF key Standard menu appears Press u to select the System menu Press q to select the Customer calibration submenu Press ü to confirm Press q to select Customer calibration Re...

Page 46: ...nu interlock Info Ó ü q p ü 6 3 Activating a factory calibration Press the ON OFF key Standard menu appears Press u to select the System menu Press q to select the Factory calibration submenu Press ü to confirm Press q to select the Enable menu Press ü to confirm or Ó to cancel the selection The ü symbol indicates the currently active calibration Press the ON OFF key to exit the input menu To avoi...

Page 47: ...alibration Factory settings Keyboard menu interlock Info Ó ü q p ü 6 4 Resetting to factory settings Press the ON OFF key Standard menu appears Press u to select the System menu Press q to select the Factory settings submenu Press ü to confirm If Yes is selected all of the settings are reset to the factory settings Press ü to confirm or Ó to cancel the selection The measuring instrument switches o...

Page 48: ...ck Info t q ü Measurement Display Setup System Absolute mode Customer calibration Factory calibration Factory settings Keyboard menu interlock Info Ó ü q p ü 6 5 Activating the menu lock Press the ON OFF key Standard menu appears Press u to select the System menu Press q to select the Keypad menu lock submenu Press ü to confirm Press q to select Enable or Disable Press ü to confirm the selection a...

Page 49: ...nt Display Setup System Keyboard menu interlock 0 0 0 0 Press q p to enter the first number of the pin and or press u to move to the next digit Press q p to enter the second number of the pin and or press u to move to the next digit Press ü to confirm or Ó to cancel the selection When the pin is activated the user will be asked to enter the pin every time the menu is displayed The following will a...

Page 50: ...mode Customer calibration Factory calibration Factory settings Keyboard menu interlock Info Ó ü q p ü 6 6 Requesting firmware version and serial number Press the ON OFF key Standard menu appears Press u to select the System menu Press q to select the Info submenu Press ü to confirm The firmware version and serial number are displayed The display appears for approx 3 seconds after start up This dis...

Page 51: ...e interfaces 7 1 Suitable data connection cables Opto RS232C 2 m SUB D jack 9 pin Order no 4346020 Digimatic 2 m SUB D jack 9 pin Order no 4346021 2000 USB 2 m incl MarCom Standard Order no 4346023 2000 e wireless transmission module Order no 4102232 e Stick wireless receiver incl MarCom Standard Order no 4102230 7 2 Interfaces Opto RS232C Digimatic USB ...

Page 52: ...INAL In mm 999 990 to 999 990 max 4 decimal places In µm 999990 0 to 999990 0 max 1 decimal place In inch 39 369685 to 39 369685 max 6 decimal places Reply dependent on measuring unit and resolution Request nominal value NOMINAL XXX XX Reply dependent on measuring unit and resolution Deactivate tolerance mode TOL0 TOL0 Enable tolerance mode TOL1 TOL1 Enter higher and lower limit value TOL_ higher ...

Page 53: ...on Power supply Mains powered 100 230 Volt 7 5 V 1 7 A 4102060 or battery rechargeable battery Battery rechargeable battery type AA cells 1 2 to 1 5 Volt Operating time with battery rechargeable battery 8 h Dependent upon the capacity of the batteries rechargeable batteries used the brightness of the screen and the ECO Mode settings With dynamic measurements displayed the indicated operating time ...

Page 54: ...13010 1303 5313030 1304K 5313049 1318 5313180 P1300MA 4400180 P1300TA 4400190 P1300MB 4400181 P1300TB 4400191 P2001M 5323040 P2004M 5323010 P2004T 5323011 P2004MA 5323020 P2004TA 5323021 P2004MB 5323030 P2004TB 5323031 P2104MA 5324070 P2104TA 5324071 P2104MB 5324080 P2104TB 5324081 Long probe Long probe Carrier frequency 19 4 kHz Carrier frequency 13 kHz Sensitivity 19 2 mV V mm Sensitivity 29 5 m...

Page 55: ...Order no Contents P U Designation 1 4346361 E 1 Screw top 2 4885431 E 1 Battery compartment cover incl clamping screw 3 4885417 E 4 Plug in housing feet 4 4885430 E 4 Elastic buffer black self adhesive 9 Spare parts 9 1 Available spare parts ...

Page 56: ...56 Mahr GmbH Millimar C1200 M T ...

Reviews: