4. Run Excella Demo
•
Navigate to and run C:\Program Files (x86)\MagTek\Excella-STX-
ImageSafe\ Excella-STX_Demo.exe
•
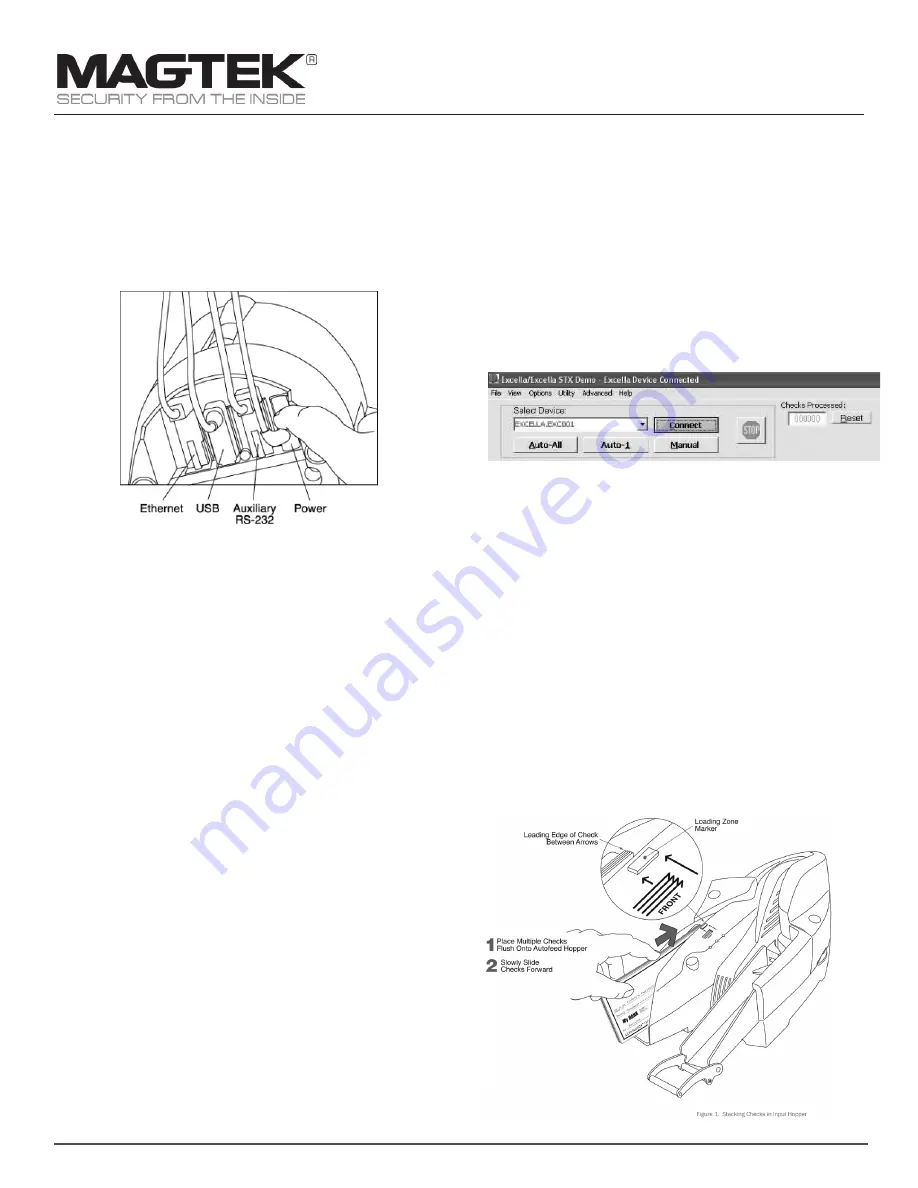
Click on the Excella Demo icon to run the demo; the main screen will be
displayed (see Figure 2).
•
In the Select Device pull-down menu, choose Excella.EXC001.
•
Click on the Connect button.
•
Based on the documents you want to read, click on one of the buttons:
•
Auto-All: to read and scan a batch of checks from the auto-feeder
•
Auto-1: to read and scan a single check from the auto-feeder
•
Manual: to read and scan a single check from the Manual Input Slot
5. Reading Checks
Preparing the Checks
When you have a deck of checks that needs to be processed, prepare the
checks as described below:
•
Grab the entire deck of checks and lightly tap the bottom of the deck
against a flat surface with the objective of aligning the bottom edge of
all the checks in the deck.
•
Also, grab the entire deck of checks and lightly tap with your hand the
right edge of the deck with the objective of aligning the leading edge of
all the checks in the deck.
Feeding the Checks Automatically
The Input Hopper can hold up to 70 checks. To feed a deck of checks,
proceed as follows:
•
Stack the checks in the Input Hopper as shown in Figure 1.
•
Slide the deck forward to the Loading Zone Marker so that all leading
edges are between the arrows as shown in Figure 1.
With a small footprint and striking modern design, Excella is an auto-feed
check reader which captures both the front and back image of checks in
a single pass at 45+ DPM. The automatic feeder has a capacity of up to
70 documents to easily support even the most active check processing
applications. Excella will communicate with the Host system using a USB 2.0
(USB 1.1 compatible) or Ethernet interface.
1. Installation Steps
•
Unpack Excella.
•
Install ink cartridge (the cartridge is shipped uninstalled).
•
Before connecting the Excella scanner, download and unzip the
installation package from here: https://www.magtek.com/support/
excella?tab=software
•
Once unzipped, run the Setup.exe installation program. Choose both
the drivers and demo during the installation.
•
Depending on your interface, continue with
USB CONNECTION
, step 2,
or
ETHERNET CONNECTION
, step 3, below.
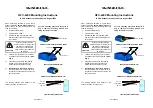
2. USB Connection
•
Connect the USB interface cable to Excella.
•
Connect the round connector from the power supply to Excella.
•
Connect the power cord to the socket on the power supply block.
•
Connect the three-prong power cord to the AC wall outlet.
•
Wait until the three LED’s are illuminated with a steady green.
•
Connect the USB interface cable to the PC.
NOTE: When the device is plugged in and detected by the PC, the USB
drivers will be automatically installed.
3. Ethernet Connection
•
Connect interface cable (Ethernet) and power cable to Excella.
•
Connect power cord to AC wall outlet. Connect interface cable to PC.
•
Wait until the three LED’s are illuminated with a steady green.
•
Connect the USB interface cable to the PC.
Excella is a web appliance and it offers several functions and features in
a built-in Web page accessible through a Web browser. For example, if
Excella’s default Ethernet device IP address is 192.168.10.100, type the
“http://192.168.10.100” in your web browser to access Excella’s web page.
On the main menu, the Configuration page offer options to setup the
Network and Ethernet configurations. Additionally, an option is provided to
save and restore device configurations.
Excella - USB or Ethernet
Small Document Scanner
Quick Installation Guide
Setup and Installation
MagTek
®
Inc., 1710 Apollo Court, Seal Beach CA 90740 | p 562-546-6400 | support 651-415-6800 | f 562-546-6301 | www.magtek.com