


Reviews:
No comments
Related manuals for 6P4841

Multimedia Projector MP8670
Brand: 3M Pages: 2

MP622 - XGA DLP Projector
Brand: BenQ Pages: 2

DBI-SALA 3400862
Brand: 3M Pages: 40

ARCLED1107AW
Brand: ProLights Pages: 36

LC-4300S
Brand: Eiki Pages: 1

PJD5232L
Brand: ViewSonic Pages: 2

CP-WX2542WN
Brand: Hitachi Pages: 113

CP-WU5500
Brand: Hitachi Pages: 124

CP-WU5500
Brand: Hitachi Pages: 124

RM-Y908
Brand: Sony Pages: 2

QUALIA KDS-R50XBR1
Brand: Sony Pages: 2

KV-34HS510 - 34" CRT TV
Brand: Sony Pages: 1

KPR-41EXR95
Brand: Sony Pages: 74

KP-HR43K90J
Brand: Sony Pages: 131

KP-XR432K90
Brand: Sony Pages: 172

kp-fw46
Brand: Sony Pages: 628

710-00792-1
Brand: Sanyo Pages: 8
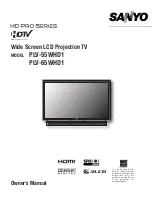
PLV-55WHD1
Brand: Sanyo Pages: 35


