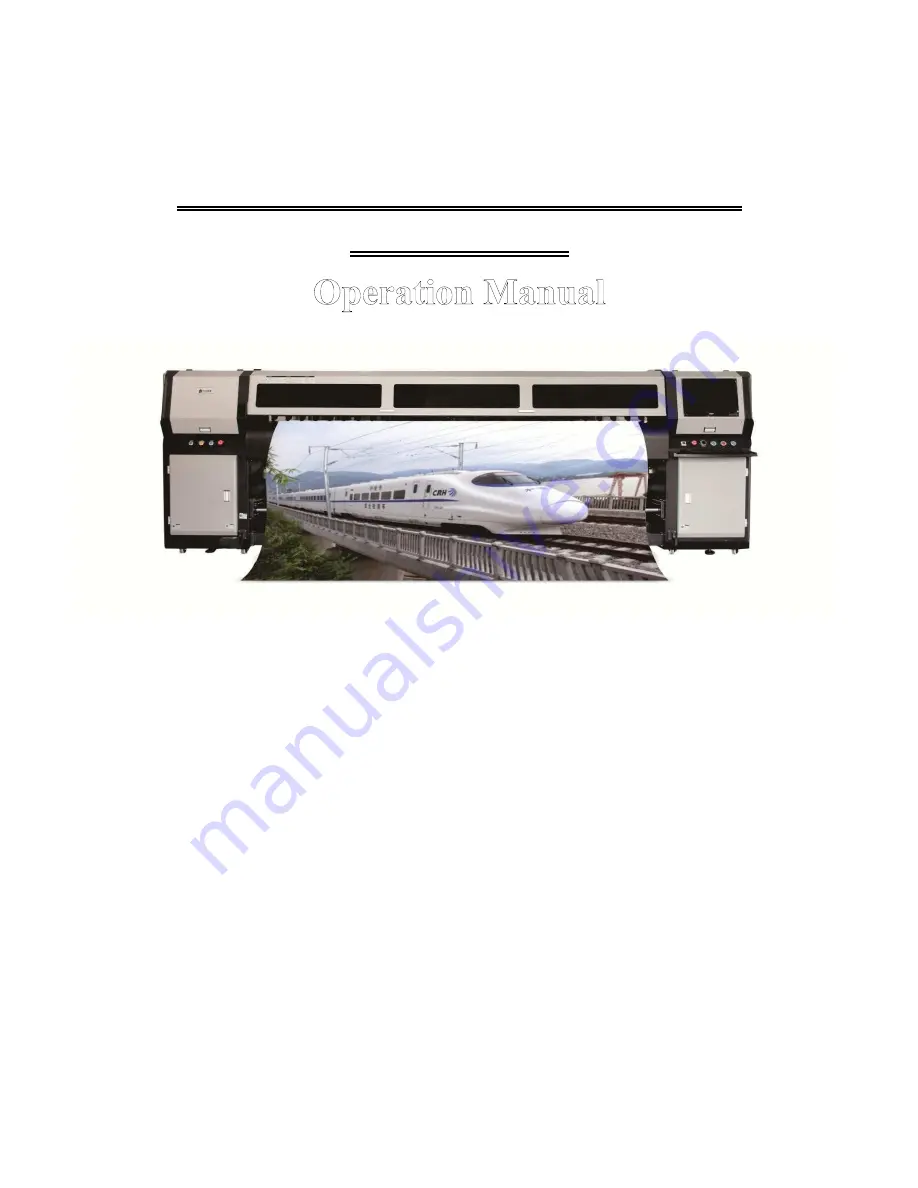
background image


LIYU PZR-KV-1 Series High Speed 


Inkjet Printer  


First edition     

September 15

th

, 2015   

 
Second edition  

March 3

rd

, 2016   

 
Copyright © 2015 All rights reserved for LIYU DMS GmbH 
 
LIYU DMS GmbH has the right to revise the technical specification and various contents in the 
manual without any notice and shall not be liable for any damages (including causal damages) 
due  to  reliance  on  the  contents  in  the  manual  (including  such  mistakes  as  misprints, 
miscalculation and list errors).  


Summary of Contents for PZR3204-KV-1

Page 1: ...rights reserved for LIYU DMS GmbH LIYU DMS GmbH has the right to revise the technical specification and various contents in the manual without any notice and shall not be liable for any damages including causal damages due to reliance on the contents in the manual including such mistakes as misprints miscalculation and list errors ...

Page 2: ...witch on and off and how to set various parameters of the printer Please carefully read the following contents before reading Chapter One Standard accessories Safety precautions Operation precautions Technical Specifications PZR KV 1series high speed inkjet printer uses KONICA KM512iLNB type print head with the following main categories List of machine models Model Description Features PZR3204 KV ...

Page 3: ...ous ink supply with vacuum negative pressure Media Type Flexible roll medium ordinary light box cloth post it note vehicle body transparent sticker and so on Take up and feeding system Automatic take up and feeding system double roller feeding system for standard configuration Media Absorption Table vacuum absorption segmented control and adjustable suction Table Pressure 50kg m2 Packing Size w d ...

Page 4: ...d LIYU PZR KV 1 Series Manual www liyu dms com 4 Note 1 The control software can add resolution for the equipment according to certain rules and the above maximum resolution is tested by our company to fully meet the customers needs ...

Page 5: ...er only relates to the print head type and head quantity in theory However other reasons may also lead to decline of actual printing efficiency such as low operation speed of computer small width of printing materials etc Print head KM512iLNB 30pl Head Quantity 4 8 Draft Mode 2PASS 135m2 h 240m2 h Production Mode 3PASS 100m2 h 170m2 h Quality Mode 4pass 80m2 h 130m2 h ...

Page 6: ...is applied to standard configuration while single roller feeding system can also be optional Configure to Order Heating Function of Print head Bottom Plate Heating function of print head bottom plate is not applied to standard configuration while it can also be optional Configure to Order Black Cloth detecting Function Black cloth detecting function is not applied to standard configuration while i...

Page 7: ... LIYU PZR KV 1 Series Manual www liyu dms com 7 Standard accessories Standard accessories include the essential accessories for the machine and additional fittings Please refer to the attachment Packing List for detailed information ...

Page 8: ...t head 3 Please carefully read the requirements for working space and working environment of the machine in this manual and strictly abide by the requirements Otherwise it will affect the working state of the machine machine service life or service life of parts or even endanger staff s physical health 4 During the operation and maintenance process of the machine please be sure to avoid the contac...

Page 9: ...bnormal image printing of the machine Never dismantle or transform the equipment by yourself otherwise such accidents as fire disaster electric shock and other accidents may be caused Keep the circuit control section of the equipment away from metal objects or liquid otherwise it will cause circuit board damage fire disaster or other accidents Never connect the power line of the equipment with wet...

Page 10: ... voltage and choose the famous brand products because inferior products may cause equipment fault or damage electrical component of the equipment including print head Inkjet printer 1 Don t place anything on the platform of the inkjet printer so as to avoid damages to print head 2 In case of any maintenance for the machine as regards electrical control please be sure to disconnect the power of ink...

Page 11: ...LIYU PZR KV 1 Series High Speed LIYU PZR KV 1 Series Manual www liyu dms com 11 2 See contents in Chapter 3 for maintenance method of ink and print head ...

Page 12: ... Environmental requirements 16 Computer configuration requirements 17 MACHINE UNPACKING AND FLOOR INSTALLATION 17 APPEARANCE NAME AND FUNCTIONS OF PARTS 21 Carriage view 24 Auxiliary ink tank view 26 Accessories figure 28 Moisturizing tray 28 Roll paper tray 28 Liquid Receiver Tank 29 Waste liquor bottle 30 CONSUMABLES 31 Printing media 31 Ink and cleaning fluid 31 Maintenance tools 32 CHAPTER 2 B...

Page 13: ...red heating unit 52 Button panel behind the left box 52 Switch of single and double roller feeding system 53 ADD INK AND FILL THE PRINT HEAD WITH INK 53 Install ink and cleaning fluid 54 Inject ink into the auxiliary ink tank 54 Inject ink into the print head 54 POSITIVE PRESSURE INK 56 NEGATIVE PRESSURE ADJUSTMENT 56 Vacuum Negative Pressure Adjustment 56 CHAPTER 3 MAINTENANCE AND SERVICE 59 DAIL...

Page 14: ...ormation for inkjet printer operation Please understand the necessary information before reading other chapters Contents of this chapter Working conditions Working space Environmental requirements Computer configuration requirements Machine unpacking and floor installation Appearance name and functions of parts Front view Back view Accessories figure Consumables ...

Page 15: ... as shown below with the aim of printer repair or spare parts replacement Installation and maintenance space is shown in the following figure Operation temperature and humidity The optimal working temperature and humidity of the equipment temperature 150C 280C humidity 40 80 Please try to keep the equipment working under the optimal working temperature and humidity otherwise the printing quality m...

Page 16: ...minimum configuration requirements for the software operation of the product are as follows CPU CPU of dual core above 2 0G Mother board High quality brand mother board with USB2 0 interface Display card Graphic display card with video memory above 256M Memory Memory above 2G Other CD ROM drive Hard disk Over 40 G room is left please use NTFS format as the hard disk format Operating system WINDOWS...

Page 17: ... in total take down the side plate and top cap of the packing box The location of screws in red mark is shown in the following figure 3 Remove the connecting bolts of the packing pressing plate in turn 4 places in total take down the packing pressing plate The location of packing pressing plate in red mark is shown in the following figure ...

Page 18: ...ty When the machine smoothly lands on the ground push the machine in place pay attention to safety operation while forking the machine the forklift is placed as shown in the following figure 5 Screw out the supporting feet at the corners of the rack 4 places and make its swivel casters 8 hang in the air Screw in other supporting feet and make swivel casters far away from the ground as shown in the...

Page 19: ...g the supporting feet of four corners of the rack and regulate the level to make the level precision within 0 1mm m Note During the adjustment process the swivel casters shall never touch the ground If double roller feeding system is used together with the level gauge adjust the left and right supports of double roller feeding system to make the level precision of double roller within 0 1mm m 7 Co...

Page 20: ...ing 3 Guide Cover Dust proof provide protection for carriage parts 4 Printing Platform The printing platform has such functions as platform heating and subsection vacuum suction underneath 5 Guide Beam The cross beam and guide of the machine are the important components for ensuring smooth running of the carriage 6 Front Panel Front panel has the function of heating mainly used for drying the imag...

Page 21: ...justing seat touch the ground reliably so as to stabilize the inkjet printer 11 Tension Shaft During automatic take up and feeding process always provide stable tension for the media meanwhile trigger the mechanical switch to control the work of take up motor through the front to back motion of tension shaft 12 Infra red Heating Unit Infra red heating unit contains infrared heating tube and fan ma...

Page 22: ... beam parts 4 Back Panel The back panel is equipped with heating unit and used for preheating of media so as to achieve better printing effects 5 Peeling Shaft It is used to peel the sticky entire volume of media not printed yet 6 Feeding Shaft It is used to support the entire volume of media not printed yet 7 Left Rear Button Panel It is used to control the temperature of infra red heating unit f...

Page 23: ...Carriage Cover Protect the print head 4 Three way Valve Three way valve is used to control cleaning fluid or ink into the print head and has three states namely close connected with ink path and connected with cleaning fluid 5 Two way Valve Core Every valve core corresponds to one ink outlet of print head The valve core has two states open and close mainly used for ink filling of the print head fo...

Page 24: ... please places the valve in this state State 3 Off state when the equipment is shut down place the valve in close state Print head height adjusting handle Note In the above figure the rotation direction marked in Picture 1 is the rotation direction of fastening the adjustment rod Please tighten the lock screw according to the direction at any time except when you adjust the print head height State...

Page 25: ...n you raise the print head height rotate the handle as per Picture 3 if you reduce the print head height rotate the handle as per Picture 4 and adjust the print head to the proper height c Fasten the adjustment rod as per the rotation direction in Picture 1 and complete the adjustment of print head height Two way valve core Every two way valve has two taps and two valve cores and is connected with...

Page 26: ...n height after ink inverse suction so as to prevent ink from flowing directly to the electromagnetic valve of control air channel 3 Ink Discharge Tube The outlet of waster ink in waste liquid tank safety bottle 4 Cleaning Fluid Tube When you press the cleaning button cleaning fluid will flow into the print head from the tube 5 Liquid Level Sensor Lead Wire It is connected to the carriage plate det...

Page 27: ...rint head Moisturizing tray Moisturizing tray is used for print head moisturizing When the print head is moisturized place one to two layers of non woven fabrics on the moisturizing tray and inject proper amount of cleaning fluid make sure that the non woven fabrics on the moisturizing tray are drenched then put the moisturizing tray on the print head plate and tighten the screw ensuring the sound...

Page 28: ...ransportation safety liquid receiver tank is fixed with screws Please remove the screws two screws marked with red circle before use as shown in the following figure Liquid receiver tank can be pushed back and forth after removing the above two screws and be placed right under the print head during working state so as to facilitate waste fluid recovery while pressing ink cleaning and flash spray I...

Page 29: ...f the machine and connect the corresponding pipelines then open the valve the specific position is shown in the following figure Make sure that the waste ink bottle is always installed on the machine except when you move the machine or pour out the waste ink Please close the valve before taking out the waste ink bottle Note Valve state see above left 1 valve is close 2 valve is open ...

Page 30: ...tch wrinkle curl and surface bulge If you use this kind of printing media paper feeding printing media on both sides of the roller will be affected which may even result in equipment failure or damage in severe case Ensure the clean and tidy printing surface of the media during printing free from any dust and clutter otherwise equipment failure or damage may occur Ink and cleaning fluid The print ...

Page 31: ...aline liquid please store them properly and try to avoid skin contact let alone swallow and keep it away from eyes Maintenance tools Please use the cleaning fluid recommended by the manufacturer to clean the print head moreover use the specialized wiping paper recommended by the manufacturer to wipe the print head otherwise it may lead to the permanent damage to the print head ...

Page 32: ...h basic movement as machine installation and operation Main contents in this chapter Machine installation Switch on and off Computer connection Installation and adjustment of print head Installation of printing media Functions of keys and buttons Add ink and fill the print head with ink Positive pressure ink Negative pressure adjustment ...

Page 33: ...according to machine placing requirements and regulate the adjusting seat of machine ensuring the sound contact of the adjusting seat of machine and the ground stable without shaking 4 Connect the computer the machine adopts USB port to connect with the computer meanwhile to ensure the reliability of communication USB port of the machine is not extended to the outside of the machine instead you ha...

Page 34: ...and specifications AC 11OV 60HZ power supply needs the transformer and our company can equip users with transformer according to requirements of orders Please properly connect the transformer equipped along with the machine as per the instructions of the transformer Illustration In the above picture 1 refers to the power interface of heating system with the power specification of AC220V 16A 2 refe...

Page 35: ...leaning position on the left after the machine completes self inspection Now it s power on 7 Then you can turn on high voltage please make sure that you have pressed high voltage button before printing every time Note Please make sure that you switch on the machine before turning on high voltage of print head Switch off 1 Make sure that the print head of the machine is not working 2 Turn off high ...

Page 36: ...he machine If drive is not installed in the computer users will be prompted to install the drive program 2 Select install from the list or designated location and click next then you are required to select drive storage path suppose the drive storage path is c LiYuPrint_UV LiYuPrintDriver LiYuDriver_USB 3 Click browse and select drive storage directory click confirm and then next ...

Page 37: ...peed LIYU PZR KV 1 Series Handbuch www liyu dms com 37 4 It starts to install drive program There may be a prompt window just click Continue Anyway and the installation will continue 5 The first phase of installation is completed ...

Page 38: ...ce it shows the successful installation Installation and adjustment of print head Some print heads of the machine have not been installed onto the machine therefore this chapter will start from the installation of single print head to the machine If print heads have been installed onto the machine please omit the illustration of print head installation Print head description The machine uses KM512...

Page 39: ... 6V and R 12 6V respectively mark the reference voltage of the left and right row of nozzle Print head installation 1 First install the bottom plate of print head onto the machine and place clean non woven fabrics under the bottom plate of print head so as to avoid soiling nozzle panel or blocking nozzle during print head installation process 2 Remove the packing of print head according to the ord...

Page 40: ...e following installation diagram 4 Fix the print head with fastening screw and adjusting screw as shown in the following figure Note Screw spring washer and flat washer marked as 1 in the above figure are used to fix the print head with the specification of M4x16 screw marked as 2 are used to adjust deflection and front and rear position of the print head ...

Page 41: ...ll the print heads as per the above method you will install the ink path of the print head There are two positions on the print head for connecting with ink tube namely ink inlet 2 and ink outlet 1 as shown in the following figure Before leaving the factory the machine has been equipped with ink tubes as needed as shown in the following figure Valve body This is the eight print machine The quantit...

Page 42: ...ad During print head installation and ink tube connection just connect one to one according to the tail number of the mark For the machine with four print heads the tail number of print head installation position mark is odd number The mark with even number is not used You can only remove the black plug right before connecting ink tube so as to prevent dust from falling into ink tube Electrical co...

Page 43: ...int heads the corresponding relation between print head connection wire and print head on the carriage plate is shown in the following figure Machine with 8 print heads When high speed machine is equipped with eight print heads the corresponding relation between print head connection wire and print head on the carriage plate is shown in the following figure ...

Page 44: ...s com 44 2 The electrical connection of print head is relatively simple Just connect the driver board of print head to print head connection wire with 50PIN connection cable attached Pay attention to the interface direction during connection As shown in the following figure ...

Page 45: ...teps of physical adjustment of print head are as follows 1 Print head arrangement inspection observe the adjustment requirements of the print head in view of the test pattern and adjust the print head number 0 to the best position Please refer to LiyuPrint help file or LiyuPrint operation manual for detailed description of calibration test pattern and calibration order of print head 2 Printing til...

Page 46: ...ghten the fastening screw of print head and print the test pattern for verifying effects again If it turns out to be undesirable return to the first step and continue to adjust until you get the satisfactory effects Installation of printing media Single roller take up and feeding system ...

Page 47: ...ble roller feeding system Note Both single roller and double roller feeding system can be configured as automatic take up device The above example only stands for two common configuration and our company can flexibly configure the take up and feeding system according to customers needs ...

Page 48: ...m Put positive pressure on ink route system to enable ink to flow out from the valve body or nozzle achieving the effect of venting for ink route of print head or cleaning print head This operation shall be completed with the operation of valve body 3 Purge button The button is used to start cleaning fluid pump which pumps the cleaning fluid to the carriage from the container so as to clean the pr...

Page 49: ... platform 4 Pinch Roller Up Down Button It is used to lift or lower the pinch roller When the pinch roller is up press the button and the pinch roller will fall automatically When the pinch roller is down press the button and the pinch roller will rise 5 High Voltage Switch of Print Head Switch on or switch off high voltage of print head 6 Power button The button is used to start inkjet printer Sw...

Page 50: ...on the machine platform from the right end of the platform Suction Switch SW2 Switch the suction fan on or off from 1 8 to 2 5m section on the machine platform from the right end of the platform Suction Switch SW3 Switch the suction fan on or off from 2 5 to 3 2m section on the machine platform from the right end of the platform Suction Switch SW1 Suction Switch SW2 Suction Switch SW3 ...

Page 51: ...ction of feeding motor is contrary to the original direction after pressing the button 4 Take up Forward Reverse When the button bounces up take up automatically in coordination with take up sensor Press the button and release the materials of cloth shaft If you want to suspend or stop automatic take up during take up process just push the tensioning shaft to the highest position 5 Pinch Roller Up...

Page 52: ...infra red heating unit from the right end of the infra red heating unit 4 Switch the infra red heating tube on or off from 0 to 1 8m section of infra red heating tube in infra red heating unit from the right end of the infra red heating unit button at the bottom 5 Switch the infra red heating tube on or off from 1 8 to 2 5m section of infra red heating tube in infra red heating unit from the right...

Page 53: ... time the second number before decimal point glitters adjust it by pressing and customers adjust the temperature according to actual conditions 2 Front Media Heater Turn on the rocker switch on the right side and adjust the temperature in the same way as 1 with the temperature of factory setting at 40 Customers adjust the temperature according to actual conditions 3 Bed Media Heater Turn on the ro...

Page 54: ...ry ink tank Please make sure that there is enough ink in the main ink bottle before injecting ink into the auxiliary ink tank and the steps are as follows Ensure that there is enough ink in the main ink bottle and conduct inspection of the machine before starting Start the inkjet printer You can either reset the machine or not reset the machine by pressing motor power button and cutting off motor ...

Page 55: ...ton and make the cleaning fluid flow out from two way valve clean the pipelines of this part About one or two seconds later tighten two way valve and make the cleaning fluid cascade out from nozzle for about five seconds clean other print heads according to the above method c Five minutes later clean all the print heads again as per the above method d Wait for five minutes and clean them once agai...

Page 56: ...he liquid receiver tank has been put in place under the bottom plate of print head Turn the three way valve of the print head demanding ink to working state with other valves off Press positive pressure button and hold for a while observe the ink out status of print head and release positive pressure button when you feel ink flowing smoothly Wait for two seconds and wipe the nozzle surface with cl...

Page 57: ...een P_1 and p_2 2 Operation to change the setting values of negative pressure gauge a Press MODE button to enter the setting state the minor screen will show Lo_1 for one time then the value of Lo_1will be displayed adjust its value through or button Press MODE button again to enter the setting state of Hi_1 the minor screen will show Hi_1 for one time and then shown its value adjust the value by ...

Page 58: ...he vacuum pressure gauge shows normal negative pressure The Pressure gauge shows Lo_1 and its current setting value Adjust its into the calculated one value following the above said method by using the up down arrow The Pressure gauge shows Hi_1 and its current setting value Adjust its value into the calculated one The Pressure gauge shows P_2 and its current setting value Adjust its value into th...

Page 59: ... 1 Series High Speed LIYU PZR KV 1 Series Manual www liyu dms com 59 Chapter 3 Maintenance and Service Contents of this chapter Daily maintenance instructions Print head maintenance instructions Ink use guidelines ...

Page 60: ...inting pictures printer please keep the print head under the state of flash spray in order to guarantee a smooth nozzle 8 The area around the orifice must be maintained clean No residual ink dust or fiber is allowed Orifice shall not be scratched 9 Since the ink and the cleaning fluid contain strong solvent they mustn t contact electrical components and wires Were ink or cleaning fluid spilled on ...

Page 61: ...ced every day and new cleaning liquid should be injected into it Cleaning liquid needs to be changed because components of moisturizing function within it are easy to volatilize If the downtime is over three days clean up the ink within the print head following its cleaning method inject a little cleaning liquid into it Leave some cleaning liquid in the print head when doing the cleaning Meanwhile...

Page 62: ...es When dealing with ink acrylic gloves and work clothes should be worn If ink spills onto the skin it should be washed immediately with soap suds Eating drinking and smoking are forbidden in the workspace 2 Storage of ink Ink should be stored in sealed containers and placed in a cool dry place with good ventilation no long period exposure to light including indoor sunlight illumination light etc ...

Page 63: ... settings such as setting the output mode and switching between NO and NC can be operated Under PRO Mode advanced functionalities like Hysteresis adjustment and copy function can be set During the normal operation of RUN Mode by pressing MODE button the mode switching button for 2 seconds it will switch to Menu Setting Mode while by pressing MODE button for 5 seconds it will switch to PRO Mode C O...

Page 64: ...gauge is shown as KPa which is the unit we need Unit could be selected through and buttons The interface is shown as the picture 8 By this time Menu setups have been circled a circle Press MODE button once again to return The main display shows actual air pressure values Or long press MODE button for 2 seconds during the setting to return to the home page 9 Long press for 5 seconds to enter into P...

Page 65: ...ove values are common used setting values Specific values may be sort of different 2 The instantaneous display of pressure gauge at its being energized is not in measuring status but as follows It means that the pressure gauge will enter the working state after being energized for 5 seconds ...

Reviews: