


© LINDY ELECTRONICS LIMITED & LINDY-ELEKTRONIK GMBH - FIRST EDITION (NOV 2001)
Ultra ATA/100
Controller PCI
User Manual
English
Benutzerhandbuch
Deutsch
Manuel Utilisateur
Français
Manuale d’uso
Italiano
LINDY Art.No. 70631
www.LINDY.com
English Manual
© LINDY ELECTRONICS LIMITED & LINDY-ELEKTRONIK GMBH - FIRST EDITION (NOV 2001)
Introduction
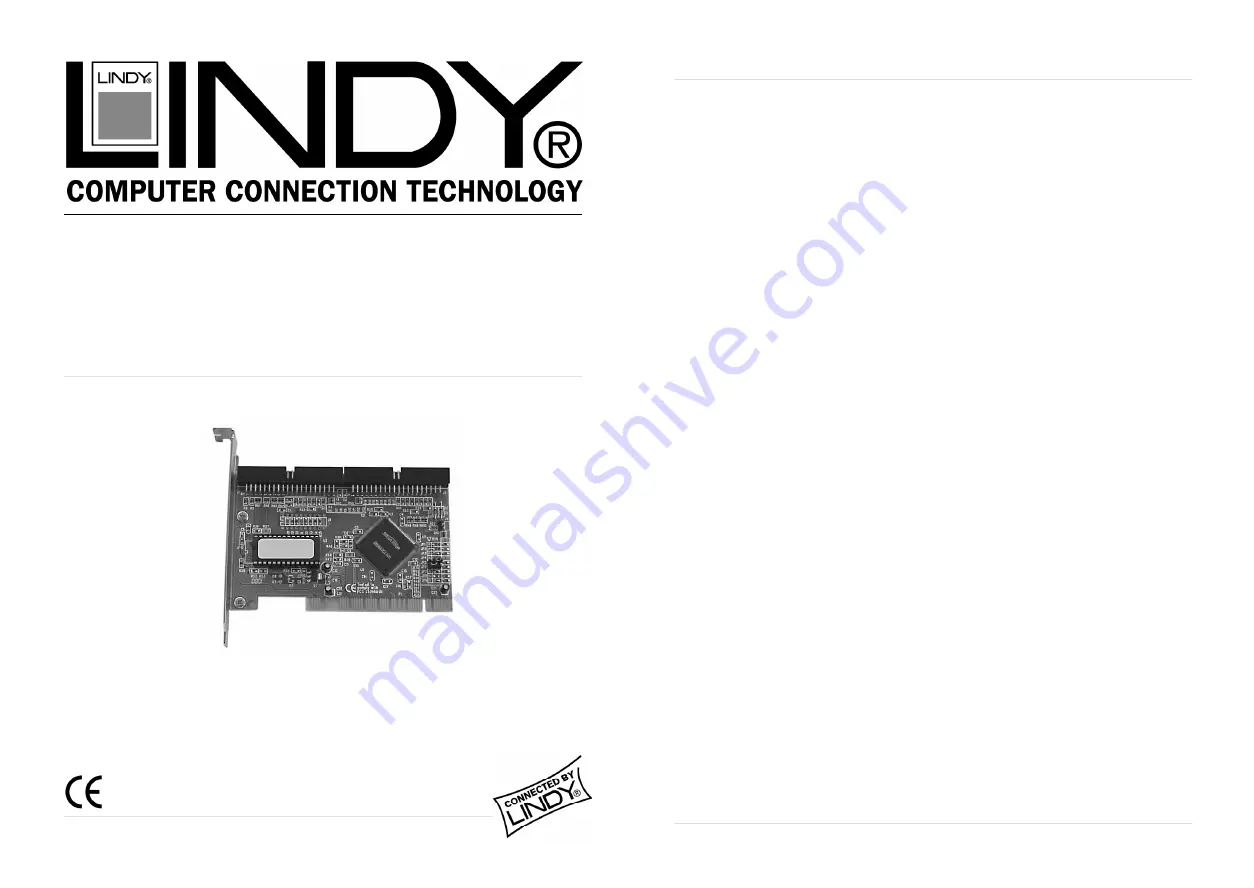
The LINDY ATA/100 IDE Controller card provides 2 high performance IDE-Channels. Up to 4 additional IDE,
ATAPI devices may be connected to your computer system. Compatible with new Ultra ATA/100 hard disks and
IDE ATAPI drives like CD-ROM etc.
Specification
•
Silicon Image ATA/100 IDE Controller Chip, PCI “Plug & Play”, PCI Version 2.1 Standard
•
Ultra ATA/100, Ultra DMA-5, ATAPI-5 and backwards compatible
•
32-bit 33 MHz PCI Interface, supports Bus Mastering
•
2 Independent Ultra ATA-Channels with 128 Bytes Buffer
•
Supports up to 4 IDE/ATA Devices and Hard Disks up to 125 GB
Contents
Handbook, Ultra ATA/100 IDE Controller Card, 80 Wire 40 Pin IDE Ribbon Cable, Drivers on Floppy/CD
System Requirements for Ultra ATA/100 Operation
1. Connected Devices must be Ultra ATA/100 Compatible
2. IDE-Cable must be an 80 Wire 40 Pin Connector, maximum length 46cm
Installing the Card
1. Remove all power cables and connected peripherals from your computer, you must observe safety
precautions when opening your computers case. Consult the manual provided with your computer for
further information.
2. Please observe Anti-Static handling of the card during installation to prevent any damage to the card.
3. Install the ATA/100 card into an available PCI slot and connect your new devices using the cable supplied.
4. Re-assemble your computer and re-connect all your peripherals and power cables.
BIOS Setup
If you wish to boot your system from this controller, you will have to change the settings in your system BIOS.
To enter the BIOS press the “Delete“ or function key when the system starts. To choose this controller select “SCSI
boot device“ (or similar), in the mainboard BIOS. Consult your motherboard user manual for details.
Driver-Installation
Windows 95/98
1. Start your computer and Windows will detect new hardware “PCI RAID Controller“ or similar.
2. Click the NEXT button in the “Update Device Driver Wizard” and select “Other Location/Specify Location”.
3. Select the floppy disk drive, WIN9X directory, click OK and then NEXT.
4. Confirm the driver "CMD PCI 0649 Ultra DMA IDE Controller“ respective "Silicon Image. IDE Controller” and
click the NEXT button.
5. Follow the instructions until the driver installation is completed.
6. After your system has rebooted enter “Control Panel” -> “System” -> “Device Manager” -> “Hard Disk
Controllers” to check if the driver is installed correctly.
Windows 2000
1. Start your computer and Windows 2000 will detect new hardware „PCI RAID Controller“. Click the NEXT
button.
2. Select “Search for suitable driver (recommended)” and click NEXT.
3. Insert and select the floppy disk and click NEXT.
4. Windows 2000 will search the entire floppy disk and find the appropriate drivers. Click NEXT to continue.
5. Click on FINISH and follow the instructions to complete the installation.
Windows NT 4.0 !!! IMPORTANT !!!
If you want to use the ATA/100 controller as your Master controller you have to install the ATA/100 driver into
Windows NT prior to changing the controller!!
1. Start Windows NT from your old controller.
2. Open “Control Panel” -> SCSI Adapters”
3. Insert the floppy diskette and select “Drivers” -> “Add” -> “Have Disk” -> “Browse” -> “A:WINNT” ->
“OEMSETUP” -> “Open” button and press OK
4. Select “„CMD PCI-0649 Ultra DMA IDE Controller“ respective”Silicon Image .... IDE Controller“ and click OK.
5. Click YES to restart your computer. Now driver installation is complete and you may change the controllers.
Windows XP
The appropriate drivers are included with the operating system and the device will be installed automatically.


