manualshive.com logo in svg
background image

LG
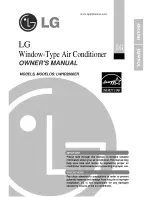
Window-Type Air Conditioner

OWNER'S MANUAL

LG

MODELS: LW1000_Series

LW1200_Series

IMPORTANT

Please read through this manual. It contains valuable
information about your air conditioner. This manual may help
save time and money by explaining proper air conditioner
maintenance and preventing improper use.

PRECAUTIONS

Pay close attention to precautions in order to prevent
potential hazards and damage from misuse or improper
installation. LG is not responsible for any damages caused by
misuse of the air conditioner.

FRANÇAIS

ESPAÑOL

ENGLISH

As an ENERGY STAR

®

  Partner,

LG Electronics Inc. has Determined
that this product meets the ENERGY STAR

®

guidelines for energy efficiency.

website http://www.lgservice.com
e-mail   http://www.lgeservice.com/techsup.html

Содержание LW1000ER

Страница 1: ...ce and preventing improper use PRECAUTIONS Pay close attention to precautions in order to prevent potential hazards and damage from misuse or improper installation LG is not responsible for any damages caused by misuse of the air conditioner FRANÇAIS ESPAÑOL ENGLISH As an ENERGY STAR Partner LG Electronics Inc has Determined that this product meets the ENERGY STAR guidelines for energy efficiency ...

Страница 2: ...ner properly Just a little preventive care on your part can save you a great deal of time and money over the life of your air conditioner You ll find many answers to common problems in the chart of troubleshooting tips If you review our chart of Troubleshooting Tips first you may not need to call for service at all Contact the authorized service technician for repair or maintenance of this unit Co...

Страница 3: ...pliances Do not operate with wet hands or in damp environment Always plug into a grounded outlet It will cause electric shock or fire due to heat generation It will cause electric shock No grounding may cause electric shock See Installation Manual Do not allow water to run into electric parts Always install air leakage breaker and a dedicated switching board Unplug the unit if strange sounds odors...

Страница 4: ...age It may cause failure of product or fire Do not place obstacles around the absorption inlet or output Ensure that an installation console of the outdoor appliance is not damaged due to the use for a long time Always insert the filters securely Clean it every two weeks It may cause failure of appliance or accident If leaving appliance damaged there is concern of damage due to the falling of prod...

Страница 5: ...gether with stoves or other heating devices Do not use this air conditioner for non specified special purposes e g preserving precision devices food pets plants and art objects Usage in such a manner could harm such property 3 2 1 Cleaning and maintenance Do not touch the metal parts of the unit when removing the filter Injuries can occur when handling sharp metal edges Do not use water to clean i...

Страница 6: ...AN SPEED F 1 2 3 4 5 Air Purifier Power Temp Sleep Mode Timer Auto Swing Fan Speed AIR PURIFIER 1 7 8 2 4 3 5 F1 LOW F2 MED F3 HIGH COOL DRY ENERGY SAVER FAN TIMER 6 Power Temp Fan Speed Timer Mode 1 2 3 4 5 6 Remote Control Operations Operating Instructions The remote control and control panel will look like one of the following pictures ...

Страница 7: ...ing mode to cool the room Select energy saver mode for energy saving operation Select fan mode for basic ventilating fan operation Select dry mode for dry operation FAN SPEED SELECTOR For increased power while cooling select a higher fan speed 3 steps High Low Med ON OFF TIMER The timer can be set to start and stop the unit in hourly increments up to 12 hours REMOTE CONTROL SENSOR AIR PURIFIER Pre...

Страница 8: ...cy Airflow can be adjusted by changing the direction of the air conditioner s louvers This can also increase the cooling efficiency of the air conditioner Adjusting Horizontal Air Flow Direction Adjusting the vertical louvers left and right will change horizontal airflow Adjusting Vertical Air Flow Direction Adjusting the horizontal vane up and down will change vertical airflow The vane can be adj...

Страница 9: ...fter installation Open the inlet grille by pulling off the exposed door on the top of the unit based on installation Pull the tab slightly to release the filter Pull the filter in the same direction as the opening Clean the filter with warm soapy water The water should be below 40 C 104 F Rinse off and gently shake off excess water from the filter Let it dry before replaceing it 5 4 3 2 1 Drainage...

Страница 10: ...es Dry the Air Purifying Filter in the shade for a day The moisture must be removed completely on this part Note the cuts of electric discharge lines Re install the Air Purifying Filter to the original position 5 4 3 2 1 The Air Purifying filter behind the air filter should be checked and cleaned once every 3 months or more often if necessary Don t touch this Air Purifying Filter within 10 seconds...

Страница 11: ...ON This appliance should be installed in accordance with national wiring regulations This guide acts as a guide to help to explain product features You can choose between two methods below according to your window stool shape and preference Fasten the stopper using 2 screw holes and lead out the power cord through slit A Fasten the stopper using left screw hole and rotate properly to lead the powe...

Страница 12: ...e condenser Restriction of outside air will greatly reduce the cooling efficiency of the air conditioner CAUTION All side louvers of the cabinet must remain exposed to the outside of the structure Install the unit a little slanted so the back is slightly lower than the front about 1 2 This will force condensed water to flow to the outside Install the unit with the bottom about 30 60 above the floo...

Страница 13: ...IDE 2 12 WINDOW LOCKING BRACKET 1 13 FOAM PE 1 PREPARATION OF CHASSIS Remove the screws which fasten the cabinet at both sides and at the back Slide the unit from the cabinet by gripping the base pan handle and pulling forward while bracing the cabinet Cut the window sash seal to the proper length Peel off the backing and attach the Foam PE to the underside of the window sash Remove the backing fr...

Страница 14: ...bottom front with the center line marked in the window stool Pull the bottom window sash down behind the Upper Guide until it meets NOTE Do not pull the window sash down tightly that the movement of Frame Curtain is restricted Loosely assemble the Sill Support using the parts in Fig 3 Select the position that will place the Sill Support near the outer most point on sill See Fig 4 NOTE Be careful w...

Страница 15: ...e cabinet to the window stool by driving the screws Type B Length 16mm 5 8 inch and below through the front angle into window stool Pull each Frame Curtain fully to each window sash track and repeat step 2 Attach each Frame Curtain the window sash using screws Type C See Fig 6 CAUTION Do not drill a hole in the bottom pan The unit is designed to operate with approximately 1 2 of water in bottom pa...

Страница 16: ... grille to the cabinet by inserting the tabs on the grille into the tabs on the front of the cabinet Push the grille in until it snaps into place See Fig 10 Pull down the inlet grille and secure it with a Type A screw through the front grille See Fig 11 Window installation of room air conditioner is now completed See ELECTRICAL DATA for attaching power cord to electrical outlet 15 14 13 12 Electri...

Страница 17: ...13 The large slot in the adapter must be aligned with the large slot in the receptacle to assure a proper polarity connection CAUTION Attaching the adapter ground terminal to the wall receptacle cover screw does not ground the appliance unless the cover screw is metal and not insulated and the wall receptacle is grounded through the house wiring The customer should have the circuit checked by a qu...

Страница 18: ...itioner was just turned on Cold air is escaping Cooling coils are iced up The cooling coils are iced over Make sure the plug is completely plugged into the outlet Check the fuse circuit breaker box and replace the fuse or reset the breaker In the event of a power failure set the power control to OFF When the power is restored wait 3 minutes to restart the air conditioner to prevent the compressor ...

Отзывы: